
Subscribe to Our Youtube Channel
Related Manuals for Gigaset SL910H


Summary of Contents for Gigaset SL910H
- Page 1 Congratulations By purchasing a Gigaset, you have chosen a brand that is fully committed to sustainability. This product’s packaging is eco-friendly! To learn more, visit www.gigaset.com.
-
Page 3: Table Of Contents
Contents Contents Overview of handset ............3 Display icons . - Page 4 Using the handset on the base ......... . . 31 Registering a handset to another Gigaset SL910/SL910A base ......31 De-registering the handset .
-
Page 5: Overview Of Handset
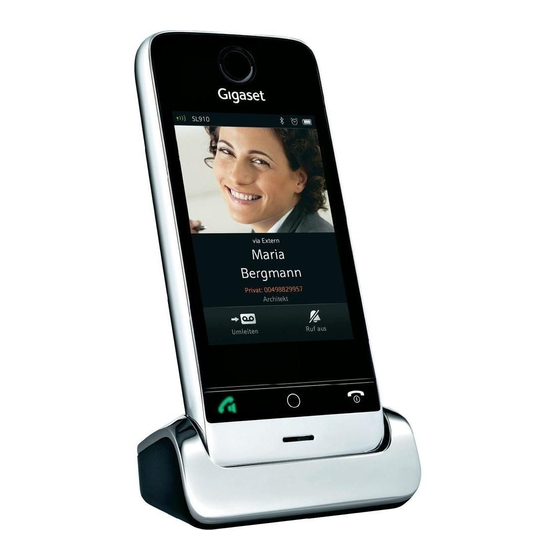
Menu key Press briefly: open main menus ( page 13) ¢ Press and hold: activate/deactivate key and display lock page 17) Underside of the handset: Mini USB connection socket Connect wire-bound headset or handset to your PC (Gigaset QuickSync) Charging contacts... -
Page 6: Display Icons
Display icons Display icons Icons in the status bar The following icons are displayed in the status bar depending on the settings and the operating status of your telephone: Icon Meaning Icon Meaning Signal strength (Eco Mode+ off ) Battery charge status: Ð... - Page 7 Display icons Option slider icons The functions on the option slider change depending on the operating situation. Icon Action Icon Action † Activate speaker mode Show keypad † (orange) (Speaker mode is activated) Determine free memory in the media pool Deactivate speaker mode Ž...
-
Page 8: Safety Precautions
Do not hold the rear of the handset to your ear when it is ringing or when speaker mode is activated. Otherwise you risk serious and permanent damage to your hearing. Your Gigaset is compatible with the majority of digital hearing aids on the market. However, perfect function with all hearing aids cannot be guaranteed. -
Page 9: First Steps
First steps First steps Checking the package contents One Gigaset SL910H handset, one battery cover (rear cover of the handset), one battery, one charger, one power adapter for the charger and one user guide. Setting up the charger The charger is designed for use in dry rooms in a temperature range of +5°C to +45°C. - Page 10 ¢ Use only rechargeable batteries ( page 40) recommended by Gigaset Communications GmbH, as doing otherwise could result in significant health risks and personal injury. For exam- ple, the outer casing of the battery could be destroyed or the battery could explode. The phone could also malfunction or be damaged as a result of using batteries that are not of the recom- mended type.
- Page 11 Registering the handset to the base Please note We recommend that you operate the handset on the Gigaset SL910 and Gigaset SL910A bases. On other bases you will not be able to use the full range of functions of your handset. In partic- ular, you will not be able to configure the base via the handset.
- Page 12 You can also change the display language of the handset. ¢ The sequence of the installation wizard is described in the user guide for the Gigaset SL910 or SL910A. Once the installation wizard has finished, the handset returns to idle status ( page 10).
-
Page 13: Operating The Handset
Operating the touchscreen The Gigaset SL910H handset is primarily operated using the display and only to a small extent using the three buttons on the handset. Icons, list entries, buttons and sliders shown on the display are sensitive areas. You can set up and activate functions, enter or dial phone numbers and navigate between the various display screens (pages) by touching these areas and dragging them across the display. - Page 14 Operating the handset Navigation area, changing the page You have to scroll right or left to move from one page to the next. Each idle display page therefore has a navigation area (example): Ä Å Ä < > Ä Å Ä The page position marker shows which idle display page is currently being displayed.
-
Page 15: Using The Menus
Operating the handset Using the menus All the functions for the base and the handset are provided in a menu (main menu). Open the menu: ¤ Briefly press the middle key when the handset is in idle status. The main menu is divided into two "pages" that are displayed separately. The Applications page (subsequently referred to as the Applications menu) comprises all the applications offered by your base or handset. -
Page 16: Scrolling Through Lists (Vertical Scrolling)
Operating the handset Opening the submenu Touch an icon on one of the main menu pages and it will be highlighted. The corresponding sub- menu or a new display page is opened up with settings options for the application. The submenus are displayed as lists. The lists contain the parameters that can be configured and the current setting, available options or buttons to activate/deactivate. -
Page 17: Options
Operating the handset Options Many display pages (especially lists like directories, call lists) have an option slider in the lower sec- tion. This displays all the actions that you can apply in the current context. ¤ Touch an option to perform the corresponding action. Example (moveable option slider): <... -
Page 18: Returning To Idle Status
Operating the handset ¤ You enter special characters (marked/diacritical characters, e.g., umlauts) by pressing and hold- ing the corresponding initial letter and selecting the required character from the list displayed. Diacritical characters in the default character set: a ä á à â ã æ... -
Page 19: Activating/Deactivating Key And Display Lock
Making calls Activating/deactivating key and display lock The key and display lock prevents the phone being operated unintentionally. When the handset is in idle status: ¤ Press and hold the menu key to activate or deactivate the lock. When you activate the key and display lock, the message Keys and display locked is displayed briefly. -
Page 20: Making Internal Calls
Making calls Making internal calls Internal calls to other handsets registered to the same base are free of charge. ¤ ¢ ¤ ¤ ‡ Open the dial page ( page 11). Touch [ Internal]. If necessary, select the handset from the list or touch All. -
Page 21: Menu Tree
Menu tree Menu tree ¤ ¢ Briefly press the key when the handset is in idle status to open the main menu. The main menu con- sists of the Applications ( page 19) and Settings pages. ¤ Drag your finger horizontally across the display to switch between the pages. Menu Settings â... - Page 22 Menu tree Keypad with R/P Keypad w. Letters ° Language + Display Language page 34 Location Further submenu dependent on base É Handsets + This Handset page 31 Base Connected to Base Base 1 page 31 Base 4 Best Base Further submenu dependent on base Ê...
-
Page 23: Using Lists
Touch all the entries to be deleted in sequence and then touch [ Delete]. Opening lists via the message page in the idle display u If applicable, the answering machine list (e.g., Gigaset SL910A) u Network mailbox u SMS inbox u Missed calls list ¢... -
Page 24: Deleting Lists
Using lists Deleting lists You can delete the entire contents of the individual lists: ¤ ¢ ¤ ¤ ’ Ê In the Settings menu ( page 13), touch [ System]. (If necessary, scroll). Touch next ¤ ¤ ± to Clean-up List. Touch next to the list to be emptied. -
Page 25: Using The Directory
Using the directory Using the directory ¢ You can create the directory (with up to 500 entries) individually for your handset. You can also send lists/entries to other handsets ( page 24). Please note ¢ To quickly access a number from the directory, you can place the number on the configurable page in the idle display ( page 32). -
Page 26: Selecting A Directory Entry, Navigating In The Directory
Using the directory Selecting a directory entry, navigating in the directory If your directory has too many entries to display all at once, an alphabetical index is shown on the right side. You have the following options: ¢ u Scroll vertically to the name you are searching for ( page 14). -
Page 27: Transferring The Directory As A Vcard With Bluetooth
Using the directory When transferring individual entries, after a successful transfer: ¤ Touch Yes if another entry should be sent. Otherwise touch No. Transferring the directory as a vCard with Bluetooth ¤ ¤ Sending directory: Open the directory. Touch [ Copy List]. -
Page 28: Using Bluetooth Devices
¢ You can exchange directory entries using the data devices and load ringtones and pictures to the handset using the Gigaset QuickSync software ( page 40). Please note u A headset must have the headset or speaker profile. The speaker profile is preferred. -
Page 29: Eco Dect: Reducing Energy Consumption And Radiation
Enter the new name. Confirm with ECO DECT: reducing energy consumption and radiation You are helping to protect the environment with your Gigaset handset. Reduced energy consumption Your telephone has a power-saving adapter plug and uses less power. Reducing radiation (dependent on base) The radiation can only be reduced if your base supports this function. -
Page 30: Using A Handset As A Room Monitor
Using a handset as a room monitor Using a handset as a room monitor If room monitor mode is activated, the saved destination number is called as soon as a defined noise level is exceeded in the vicinity of the handset. You can save an internal or external number in your handset as the destination number. -
Page 31: Setting An Appointment (Calendar)
Setting an appointment (calendar) Setting an appointment (calendar) ¢ You can remind yourself of up to 100 appointments. Birthdays in the directory ( page 25) are transferred into the calendar. Saving an appointment Prerequisite: the date and time have already been set. ¤... -
Page 32: Setting A Reminder Call
Setting the alarm clock Setting a reminder call ¤ ¢ ¤ ’ ì In the Settings menu ( page 13), touch [ Audio Settings]. Touch the next to Reminder ¤ Signal. Ô Ó ¤ Adjust the volume with or activate the crescendo call with the button next to Crescendo. ¤... -
Page 33: Using The Handset On The Base
Using the handset on the base Using the handset on the base Registering a handset to another Gigaset SL910/SL910A base You can register your handset on up to four bases. You must initiate registration of the handset on the base (1) and on the handset (2). Once registration is complete, the handset returns to idle status. -
Page 34: Configuring The Handset
Configuring the handset Configuring the handset Your handset comes with default settings, but you can change the settings to suit your individual requirements. Quick access to functions, QuickDial – customising your own idle display page ¢ ¢ On the configurable page of the idle display ( page 11, example page 10), you can customise applications, functions and phone numbers for quick access. - Page 35 Configuring the handset Selectable applications and functions Icon Description Display of the current date (if set). March 2011 If the date has not yet been set, the icon flashes. ¤ Set the date: Touch the icon. Thursday Display of the current time (if set). If the time has not yet been set, the icon flashes.
-
Page 36: Changing The Display Language
Configuring the handset Please note u The QuickDial number changes if you change the corresponding number in the directory. u If you delete the number assigned to the QuickDial shortcut from the directory, the QuickDial icon is deleted from the configurable page without prompting. Changing the display language ¤... -
Page 37: Changing The Earpiece, Speaker And Headset Volume
¤ Activate/deactivate the crescendo call with the Crescendo button next to Crescendo. Int. Calls ¤ Setting the ringtone ’ Gigaset Touch the next to Int. Calls or Ext. Calls. ¤ ¤ ‘ Select the ringtone. Back with Ext. Calls... -
Page 38: Activating/Deactivating Silent Alert
Configuring the handset Please note During this period, you will continue to receive calls from numbers to which you have assigned a personalised ringtone in the directory (VIP). Activating/deactivating the ringtone for anonymous calls The phone should not ring in the case of calls from withheld phone numbers, but instead just show them in the display: ¤... -
Page 39: Customer Service & Assistance
Customer Service & Assistance Customer Service & Assistance Do you have any questions? As a Gigaset customer, you can find help quickly in this User Manual and in the service section of our Gigaset online portal www.gigaset.com/service. Please register your phone online right after purchase. -
Page 40: Questions And Answers
24-hour support. Exclusion of liability The display on the Gigaset SL910H has a resolution of 480x320 pixels, which is achieved with the aid of 460,800 control elements. Each pixel consists of three sub-pixels (red, green, blue). It may be the case that a pixel is incorrectly controlled or has a colour deviation. This is normal and no reason for a warranty claim. -
Page 41: Environment
Environment Our environmental mission statement We, Gigaset Communications GmbH, bear social responsibility and are actively committed to a bet- ter world. Our ideas, technologies and actions serve people, society and the environment. The aim of our global activity is to secure sustainable life resources for humanity. We are committed to a responsibility for our products that comprises their entire life cycle. -
Page 42: Appendix
The device is supplied with the recommended battery. Handset operating times/charging times The operating time of your Gigaset depends on the capacity and age of the battery and the way it is used. (All times are maximum possible times). Standby time (hours) *... -
Page 43: Index
Index Index Changing ......character set ....device name (Bluetooth) . - Page 44 Index ........... Disposal configurable page .
- Page 45 Index ........as destination for room monitor inbox .
Need help?
Do you have a question about the SL910H and is the answer not in the manual?
Questions and answers