Table of Contents
Advertisement
Quick Links
Advertisement
Table of Contents

Related Manuals for Melitta Caffeo Varianza CSP


Summary of Contents for Melitta Caffeo Varianza CSP
- Page 1 Operating Instructions Bedienungsanleitung...
-
Page 2: Table Of Contents
Table of contents Table of contents For your safety ........................5 Symbols used ......................6 Proper use ........................6 Danger from electric current ................6 Risk of burns and scalds..................7 General safety......................7 Overview of the appliance ....................8 Appliance at a glance ..................... - Page 3 Table of contents Permanently changing beverage settings .............31 Changing default settings ..................31 Changing basic settings ....................32 Setting the language ....................32 Setting Auto OFF ....................32 Setting energy save mode ..................33 Deactivating the My Bean Select® function ..........33 Resetting the appliance to the factory settings..........34 Information on the appliance status ..............34 Setting the grinding fineness ................35 Care and maintenance ....................36...
-
Page 4: For Your Safety
Store the operating instructions carefully. If you pass on the appliance, include the operating instructions with it. Melitta accepts no liability for damage caused by failure to observe the operating instructions. If you require further information or have any questions on the appliance, contact Melitta or visit our website at: www.melitta.de... -
Page 5: Symbols Used
The appliance is intended for use in private households. Any other use is regarded as improper and may lead to personal injury and material damage. Melitta accepts no liability for damage that arises due to improper use of the appliance. -
Page 6: Risk Of Burns And Scalds
For your safety ū A defective appliance may only be repaired by an authorised workshop. Do not repair the appliance yourself. ū Do not undertake any changes to the appliance, its components or its accessories. ū Do not immerse the appliance in water. Risk of burns and scalds Escaping fluids and steam can be very hot. -
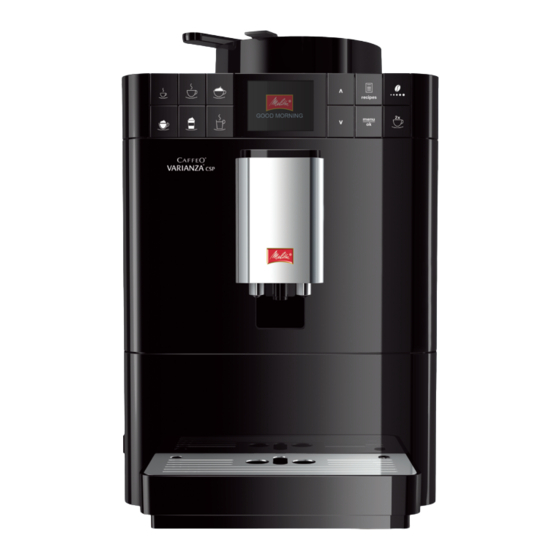
Page 7: Overview Of The Appliance
Overview of the appliance Overview of the appliance Appliance at a glance Fig. 1: Front left of the appliance 1 Water tank with lid 6 Height-adjustable outlet with 2 coffee nozzles, 1 milk nozzle, 1 hot water nozzle, cup illumination 2 Measuring spoon* for the 7 Coffee grounds container (inner) ®... - Page 8 Overview of the appliance Fig. 2: Front right of the appliance 11 Cover 14 Milk hose connection at the drip tray 12 Brewing unit (inner) 15 Cup plate 13 Milk hose connection at the 16 Float outlet...
-
Page 9: Control Panel At A Glance
Overview of the appliance Control panel at a glance 09:52 Please select beverage Fig. 3: Direct keys Item Designation Function 17 Espresso Preparing Espresso 18 Café Crème Preparing Café Crème 19 Cappuccino Preparing Cappuccino 20 Milk foam/Warm Preparing milk foam and warm milk milk 21 Latte Macchiato Preparing Latte Macchiato... -
Page 10: First Steps
First steps First steps This chapter describes how to prepare your appliance for use. Unpacking the appliance In addition to the appliance, there are further accessories in the packaging such as cleaning aids and agents. CAUTION Contact with cleaning agents may lead to eye and skin irritation. Keep the supplied cleaning agents out of the reach of children. -
Page 11: Installing The Appliance
First steps Installing the appliance Observe the following instructions: ū Do not install the appliance in damp rooms. ū Install the appliance on a stable, flat and dry surface. ū Do not install the appliance in the vicinity of sinks or the like. ū... - Page 12 First steps Fig. 5: ON/OFF button Requirement: The appliance has been installed and connected. 1. Place a vessel beneath the outlet. 2. Press the ON/OFF button. » The welcome display appears on the appliance. » The request to carry out the setup appears: Please set up the machine. 3.
-
Page 13: Basic Operation
Basic operation Basic operation This chapter describes basic operating steps for using the appliance on a daily basis. Switching the appliance on and off Before switching on after starting up the appliance for the first time, read section 3.5 Switching on the appliance for the first time on page 12. Information ū... -
Page 14: Using The Control Panel
Basic operation Using the control panel The essential programmes can be accessed using the control panel. Press the required button. Use the following actions to operate the buttons: Brief press Briefly press a button to select a programme. Long press Press a button for longer than 2 seconds to select a second programme that may be available. - Page 15 Basic operation Navigating in the menu or changing a numerical value Press the arrow buttons to navigate down or up in the menu. Press the arrow buttons to increase or decrease a numerical value. Press and hold an arrow button to quickly reach the required posi- tion or numerical value.
-
Page 16: Filling Coffee Beans Into The Bean Container
Basic operation Filling coffee beans into the bean container Roasted coffee beans lose their aroma. Only fill the bean container with as many coffee beans as you will consume over the next 3 to 4 days. ATTENTION The use of unsuitable types of coffee can lead to clogging of the grinder. Do not use freeze-dried or caramelised coffee beans. -
Page 17: Filling With Water
Basic operation Filling with water Only use fresh, cold water without carbon dioxide for optimum coffee enjoyment. Change the water daily. Information The quality of the water largely determines the flavour of the coffee. Therefore, use a water filter (see section 9.8 Setting the water hardness on page 41 and section 9.9 Using a water filter on page 42). -
Page 18: Adjusting The Outlet
Basic operation Adjusting the outlet The outlet (6) is height-adjustable. Set the greatest possible distance between the outlet and the vessel. Depending on the vessel, push the outlet up or down. Fig. 10: Adjusting the outlet... -
Page 19: Using Milk
Basic operation Using milk Use cooled milk for optimum coffee enjoyment. Depending on the version of the appliance, use the long milk hose supplied or the milk container supplied. Connecting the milk container A milk container is not available for all versions of the Caffeo® Varianza®. Fig. - Page 20 Basic operation Connecting the milk pack Fig. 12: Connected commercial milk pack 1. Connect the long milk hose (34) to the connection at the outlet (13). 2. Insert the free end of the milk hose into a commercial milk pack (35).
-
Page 21: Emptying The Drip Tray And Coffee Grounds Container
Basic operation Emptying the drip tray and coffee grounds container After dispensing several beverages, the drip tray (8) and the coffee grounds container (7) can become full. The projecting float (16) indicates the current filling level of the drip tray. After a specified number of beverage have been dispensed, the appliance also shows that the drip tray and coffee grounds container are full. -
Page 22: Using The My Bean Select® Function
Using the My Bean Select® function Using the My Bean Select® function With the My Bean Select® function, a single coffee beverage can be prepared from a different type of coffee. Separately fill a single portion of coffee beans to prepare the coffee. While the bean container is full with lightly roasted coffee beans, for exam- ple, the My Bean Select®... - Page 23 Using the My Bean Select® function MY BEAN SELECT Fill in single portion Mount spoon Fig. 15: Filling with coffee beans for the My Bean Select® function 1. Remove the measuring spoon (2) from the bean chute (36). » The My Bean Select message appears on the display with the requests Fill with single portion of beans, put back the spoon.
-
Page 24: Preparing Beverages
Preparing beverages Preparing beverages There are two options for preparing beverages: ū Standard dispensing as described below, ū Selection and preparation of a recipe (see section 6.6 Preparing further beverage specialities with recipes on page 27). Information ū A single coffee beverage can be prepared from an alternative type of coffee (see section 5 Using the My Bean Select®... -
Page 25: Preparing Latte Macchiato
Preparing beverages 3. Remove the vessel. » The display shows: Easy Cleaning? (OK for start). 4. You can execute the Easy Cleaning programme or prepare further bev- erages. a) Execute the Easy Cleaning programme. To do so, follow the instruc- tions on the display. -
Page 26: Preparing Hot Water
Preparing beverages 3. Remove the vessel. » The display shows: Easy Cleaning? (OK for start). 4. You can execute the Easy Cleaning programme or prepare further bev- erages. a) Execute the Easy Cleaning programme. To do so, follow the instruc- tions on the display. - Page 27 Preparing beverages Preparing Ristretto, Lungo or Americano The preparation of Ristretto, Lungo und Americano is similar. The selection of a Ristretto is described as an example. Requirement: The ready symbol appears on the display. 1. Place a vessel beneath the outlet. 2.
-
Page 28: Changing Beverage Settings Before And During Preparation
Preparing beverages Changing beverage settings before and during preparation Beverage settings can be changed before and during beverage preparation. Information The following settings only apply to the current beverage preparation. Changing beverage settings before preparation The total beverage amount and the coffee strength can be changed before selecting a beverage. -
Page 29: Stopping Beverage Preparation
Preparing beverages Stopping beverage preparation To stop beverage preparation prematurely, press any direct key. Preparing two beverages simultaneously The "Two cups" button is used to prepare two beverages simultaneously. Two-cup dispensing is only possible with pure coffee dispensing, such as Espresso, Café... -
Page 30: Permanently Changing Beverage Settings
Permanently changing beverage settings Permanently changing beverage settings The appliance offers further options for preparing coffee specialities. Default recipes can be used or the beverage settings can be permanently changed. Changing default settings Depending on the beverage, the following default settings can be changed: ū... -
Page 31: Changing Basic Settings
Changing basic settings Changing basic settings Operating steps that change the appliance's basic settings are described in the following chapter. Setting the language The display text language can be set. Requirement: The ready symbol appears on the display. 1. Press the "menu/ok" button for longer than 2 seconds. »... -
Page 32: Setting Energy Save Mode
Changing basic settings Setting energy save mode Energy save mode lowers the heating temperature. If the appliance is not operated for a long time, it automatically switches to energy save mode after a specified time. The Press any button prompt then appears on the display. -
Page 33: Resetting The Appliance To The Factory Settings
Changing basic settings 3. Use the arrow buttons to select the desired setting and confirm with "menu/ok". 4. Exit the menu with the Exit command. » The ready symbol appears on the display. Resetting the appliance to the factory settings The appliance can be reset to the factory settings. -
Page 34: Setting The Grinding Fineness
Changing basic settings Setting the grinding fineness The grinding fineness of the coffee powder influences the flavour of the coffee. The grinding fineness has been optimally set prior to delivery. We recommend adjusting the grinding fineness after around 1, 000 beverages have been dispensed (after around 1 year) at the earliest. -
Page 35: Care And Maintenance
Care and maintenance Care and maintenance Regular care and maintenance of the appliance ensure the consistent high quality of your beverages. General cleaning Clean the appliance regularly. Immediately remove external soiling caused by milk and coffee. ATTENTION The use of unsuitable cleaning agents can lead to scratched surfaces. Do not use any abrasive cloths, sponges or cleaning agents. -
Page 36: Removing And Cleaning The Brewing Unit
Care and maintenance Removing and cleaning the brewing unit To avoid damage to the appliance, we recommend cleaning the brewing unit once a week. Fig. 19: Removing the brewing unit Requirement: The appliance is switched off. 1. Open the cover (11). To do this, reach into the recess on the right of the appliance and push the cover off backwards. -
Page 37: Using The "Easy Cleaning" Programme
The cleaning programme takes approximately 3 minutes and should not be interrupted. ATTENTION The use of unsuitable milk system cleaning agents can damage the appliance. Only use the Melitta® PERFECT CLEAN Espresso Machines milk system ƒ cleaning agent. - Page 38 Care and maintenance Requirement: The ready symbol appears on the display. 1. Place the coffee grounds container (7) or a vessel with a capacity of at least 0.7 litres beneath the outlet. 2. Press the "menu/ok" button for longer than 2 seconds. »...
-
Page 39: Using The "Cleaning Coffee System" Programme
ATTENTION The use of unsuitable fully automatic coffee maker cleaning agent can damage the appliance. Only use the Melitta® PERFECT CLEAN Espresso Machines cleaning ƒ tablets. Requirement: The ready symbol appears on the display. 1. Press the "menu/ok" button for longer than 2 seconds. -
Page 40: Setting The Water Hardness
ƒ matic coffee maker descaling agent. ATTENTION The use of unsuitable descaling agent can damage the appliance. Only use the Melitta® ANTI CALC Espresso Machines liquid descaling ƒ agent. ATTENTION A water filter may be damaged if it is screwed in during the descaling programme. -
Page 41: Using A Water Filter
Care and maintenance Determine the water hardness with the enclosed test strip. Observe the instructions on the test strip packaging and in Table Water hardness range on page 47. Requirement: The ready symbol appears on the display. 1. Press the "menu/ok" button for longer than 2 seconds. »... -
Page 42: Inserting The Water Filter
Care and maintenance The water filter (42) is screwed in and unscrewed from the thread (43) on the base of the water tank (1) using the screwing aid (41). Inserting the water filter Information Place the water filter into a vessel filled with fresh tap water for a few minutes before inserting it. -
Page 43: Problems
Problems Removing the water filter The water filter should not be left standing dry for a long period of time. When it is not used for a long time, we recommend storing the water filter in a vessel filled with tap water in the refrigerator. Remove the water filter as follows: Requirement: The ready symbol appears on the display. -
Page 44: Transport, Storage And Disposal
Transport, storage and disposal Problem Cause Action The My Bean Select There are less than 8 ƒ Top up coffee beans (see sec- display goes out g of coffee beans in tion 5.1 one page 23). when the measuring the bean chute. spoon is put back on. -
Page 45: 11.2 Transporting The Appliance
Technical data 11.2 Transporting the appliance ATTENTION Freezing residual water can damage the appliance. Prevent the appliance from being exposed to temperatures below 0 °C. ƒ Information Transport the appliance in the original packaging. This avoids damage in transit. Before transporting the appliance, carry out the following activities: 1. - Page 46 Technical data Technical data Quantity of beverage 25 ml to 220 ml dispensed Weight (empty) 8.7 kg Ambient conditions Temperature 10 °C to 32 °C Relative humidity 30 % to 80 % (non-condensing) Water hardness range °d °e °f Soft 0 to 10 0 to 13 0 to 18...
- Page 47 Melitta Europa GmbH & Co. KG Division Household Products Ringstr. 99 D-32427 Minden Germany www.melitta.de Editorial department: ZINDEL AG www.zindel.de...
Need help?
Do you have a question about the Caffeo Varianza CSP and is the answer not in the manual?
Questions and answers