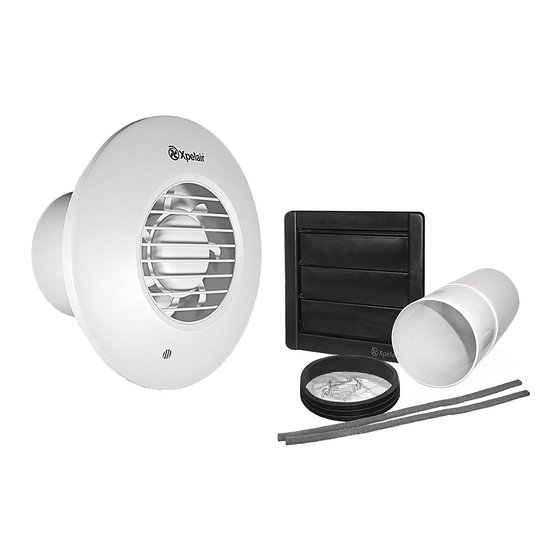
Xpelair Simply Silent DX100 Installation And Maintenance Instructions Manual
Hide thumbs
Also See for Simply Silent DX100:
Advertisement
Xpelair Simply Silent
Xpelair Simply Silent
Installation and Maintenance Instructions
Installation and Maintenance Instructions
Installation and Maintenance Instructions
DX100R (93005AW)
DX100S (93025AW)
DX100HPTR (93009AW)
DX100HPTS (93029AW)
Installatie - en Onderhoudsinstructies
DX100TR (93006AW)
DX100TS (93026AW)
DX100
DX100
DX100PR (93007AW)
DX100PS (93027AW)
DX100PIRR (93010AW)
DX100PIRS (93030AW)
DX100HTR (93008AW)
DX100HTS (93028AW)
™
™
Advertisement
Table of Contents

Related Manuals for Xpelair Simply Silent DX100


Summary of Contents for Xpelair Simply Silent DX100
- Page 1 Xpelair Simply Silent Xpelair Simply Silent ™ ™ DX100 DX100 Installation and Maintenance Instructions Installation and Maintenance Instructions Installation and Maintenance Instructions Installatie - en Onderhoudsinstructies DX100R (93005AW) DX100TR (93006AW) DX100PR (93007AW) DX100HTR (93008AW) DX100S (93025AW) DX100TS (93026AW) DX100PS (93027AW)
-
Page 2: Installation And Maintenance Instructions
Installation and Maintenance Instructions Standard Timer Pull Cord Humidistat, Timer DX100R (93005AW) DX100TR (93006AW) DX100PR (93007AW) DX100HTR (93008AW) DX100S (93025AW) DX100TS (93026AW) DX100PS (93027AW) DX100HTS (93028AW) Humidistat, Pull Cord, Timer Integral Body Movement Sensor DX100HPTR (93009AW) DX100PIRR (93010AW) DX100HPTS (93029AW) DX100PIRS (93030AW) • Do read the entire instruction leaflet before commencing installation. • Do install each fan with a means for disconnection in all poles in the fixed wiring. • Do make sure the mains supply is switched off before attempting to make electrical connections or carry out any maintenance or cleaning. -
Page 3: Installation
All Xpelair Simply Silent™ DX100 AC • If installing in a room containing a fuel burning fans have the following features: device which has a non-balanced flue, it is the • Two speed extraction installer’s responsibility to ensure that there... -
Page 4: Overall Dimensions (Mm)
Overall Dimensions (mm) Back plate fixing positions 90˚ 90˚ 6.0 (m) 6.0 (m) Horizontal detection area 60˚ 60˚ 6.0 (m) 6.0 (m) Vertical detection area Front Cover Removal DEPRESS COVER LATCH WITH TOOL & REMOVE COVER COMPLETE... -
Page 5: Wiring And Setting Up
IMPORTANT – PLEASE READ Adjusting the humidity setting Fan switches on Fan does not at lower level of switch on until condensation higher level of (anti-clockwise) condensation (clockwise) MORE SENTITIVE (RH = 50%) LESS SENTITIVE (RH = 95%) Factory settings: Timer 15 minutes, RH 75% Adjusting the run on timer setting Fan runs on for a Fan runs on for a shorter time when longer time when the external switch the external switch is turned off is turned off Minimum 30 seconds Maximum 30 minutes Wiring and setting up SEE DETAIL A DETAIL A... - Page 6 Wiring and setting up SEE DETAIL D DETAIL D SCALE 2.000 SEE DETAIL E OVER-RUN TIMER HUMIDISTAT CUSTOMER CONNECTION DETAIL E TERMINAL SCALE 2.000 LOW SPEED SET JUMPER TO REQUIRED POSITION HIGH LEVEL LINE FOR SPEED SETTING SPEED DX100HTR / DX100HTS SEE DETAIL F OVER-RUN SEE DETAIL G TIMER DETAIL F SCALE 2.000 HUMIDISTAT CUSTOMER LOW...
- Page 7 • A 100mm diameter prepared hole for the / DX100PR / DX100PS / DX100PIRR / external grille, ideally positioned to allow DX100PIRS Connection to the supply can be condensation to run away from the first bend made by a flexible 2-core cable complete with in the duct towards the external grille. 3 pin plug for insertion into an approved 10A • Appropriate ancillaries for termination. These GPO or directly wired through an approved 10A items are available from Xpelair: wall mounted surface switch with at least 3mm 1. 3m flexible ducting Ref: 89663AA. If the clearance between contacts. duct passes through a cold space use insulated duct ref: 89847AA. For Australia Only –DX100TR / DX100TS 2. Soffit Grille Ref: 89742AW / DX100HTR / DX100HTS / DX100HPTR / DX100HPTS These models are permanently...
- Page 8 10. Insert the fan tube into the wall duct/ceiling wall duct. as before. 17. Drill screw holes in marked positions and fit 11. Fasten the back-plate to the wall/ceiling the remaining wall plugs. using appropriate fasteners supplied. See 18. Holding open the top and bottom vanes, figure A. refit the back draft shutter and fasten 12. If using screws, do not over tighten. it to the wall using the screws. Do not overtighten screws. 19. Make sure that the vanes open and shut fully. Mount the back draft shutter 13. Peel the backing from the foam strip Wire the electrical connections. supplied and attach it around the outside lip 20. Make sure the mains supply is isolated. on the backdraft shutter. Switch off the mains electrical supply and 14. Go outside. Holding open the top and bottom remove fuses. vanes insert the lip into the wall duct. 21. Feed the cable to the terminal block. Wire 15.
-
Page 9: Fan Settings
Fan Settings drops the fan continues to operate for the adjustable time delay. • External operation - Use the external on/off SPEED SETTING switch. When the fan is switched off, the fan The fans are factory set to low speed, but have continues to operate for the adjustable time two speed settings for different applications. delay then goes into automatic mode. Select either high or low speed by connecting the jumper between the centre and high or low DX100HPTR / DX100HPTS Only. speed pin on the jumper (see Figure G). • Automatic mode - The fan automatically adjusts to slow changes in natural humidity DX100TR / DX100TS / DX100PIRR / levels without operating the fan. If the humidity DX100PIRS only. levels increase at a rate slower than 5% RH • To adjust the over-run period turn the control in 5 minutes, up to the pre-set humidity level, (T) clockwise to increase and anti-clockwise the fan will not be triggered by humidity. This to decrease – see Figure F. - Page 10 Cleaning Technical advice and service (recommended once a month) 1. Before cleaning, isolate the fan completely Customers outside UK - from the mains supply. see international below. 2. Remove the front cover by depressing the latch on the underside of the cover and United Kingdom pulling off the front cover from the bottom. Xpelair have a comprehensive range of services 3. To clean the front cover, either wipe it with including: a damp, lint free cloth or wash it with warm • Free technical advice help-desk from soapy water. Thoroughly dry the front cover Engineers on all aspects of ventilation. and refit. • Free design service, quotations and site 4. Do not immerse the fan in water or other surveys. liquids to clean any other parts of the fan. • Service and maintenance contracts to suit all 5. Do not use strong detergents, solvents or requirements. chemical cleaners 6. Allow fan to dry thoroughly before use.
- Page 11 Head Office, UK Sales Office and Spares Redring Xpelair Group Ltd, Newcombe House, Newcombe Way, Orton Southgate, Peterborough, PE2 6SE England Telephone: +44 (0) 844 372 7761 www.xpelair.co.uk www.xpelair.co.uk/international FM02118 ISO 9001: 2000 Part No: 26098AA (Revision A)
Need help?
Do you have a question about the Simply Silent DX100 and is the answer not in the manual?
Questions and answers