Table of Contents
Advertisement
Quick Links
Advertisement
Table of Contents
Troubleshooting

Related Manuals for Swisscom Aton CL103


Summary of Contents for Swisscom Aton CL103
- Page 1 Aton CL103 User guide...
-
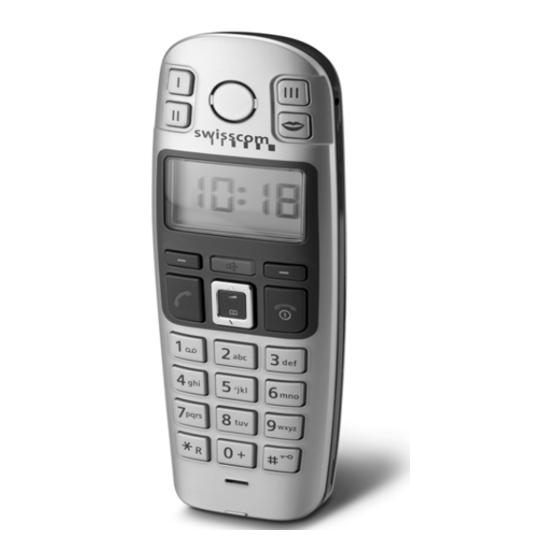
Page 3: The Handset At A Glance
The handset at a glance The handset at a glance 1 Direct dialling keys (I to III) 2 Display in idle status (example) 3 Battery charge level e V U (1/3 charged to fully charged) flashes: battery almost flat e V U flashes: battery charging 4 Display keys (page 12) 5 Control key (page 12) -
Page 4: Table Of Contents
Activating/deactivating the Aton CL103 ....5 SMS function ....21 Aton CL103 –... - Page 5 Contents Appendix ....29 Symbols and typographical conventions used ....29 Care .
-
Page 6: Safety Precautions
(page 29). Do not use the phone in environments with a potential explosion hazard, for example auto paint shops. If you give your Aton CL103 to someone else, make sure you also give them the ƒ user guide. -
Page 7: Special Features Of The Aton Cl103
Special features of the Aton CL103 Special features of the Use your handset as an alarm clock (page 27). Aton CL103 Have fun using your new telephone! Large keys First steps Text and symbols are shown clearly in large type on the display... -
Page 8: Connecting The Base Station
First steps Connecting the base station Setting up the handset for use ¤ First connect the mains adapter and Fitting the batteries and closing the then the phone jack as shown below cover and place the phone cord in the cord recess. - Page 9 Requirement: the handset must not already be registered on any base station. For questions and problems see page 29. Registering the handset on the Aton CL103 base station occurs automatically. ¤ Place the handset in the charging cra- dle of the base station with its display facing forward.
- Page 10 First steps Initial charging and discharging of Setting the date and time batteries ¢ ¢ ¢ Settings Date/Time §Menu§ §OK§ ¢ Battery charging is indicated in the top §OK§ right of the display by a flashing battery Enter the day, month and year icon e, V or U.
-
Page 11: Menu Tree
Menu tree Menu tree There are two ways to select a function: Using number combinations ("shortcut") ¤ To open the main menu, press with the handset in idle status. §Menu§ ¤ Enter the number combination that is in front of the function in the menu tree. ¤... - Page 12 Menu tree Settings 6-1 Date/Time 6-2 Direct Diall. Keys 6-3 Language 6-4 Jumbo Font 6-7 Handset 6-7-1 Screen Saver 6-7-2 Auto Answer 6-7-3 Register Handset 6-7-4 Reset Handset 6-8 Base 6-8-2 System PIN 6-8-3 Base Reset 6-8-4 Listening in Voice Mail 7-1 Set Key 1 7-1-1 Network Mailbox...
-
Page 13: Making Calls
Making calls Making calls Calling line identification When you receive a call, the caller's number is displayed on the screen if the Making an external call/ following conditions are met: ending a call Your network provider supports CLIP, CLI: External calls are calls using the public tel- –... -
Page 14: Activating/Deactivating The Keypad Lock
Operating the handset Activating/deactivating Display keys the keypad lock The current display functions are shown in the bottom display line in reverse video. Press and hold the hash key. The functions of the display keys change You will hear the confirmation tone. The depending on the particular operating icon Ø... -
Page 15: Menu Guidance
To open the main menu, press §Menu§ with the handset in idle status. Note: This key allows you to connect to the Swisscom Accessing a function Voice Portal, where you can activate additional ¤ Scroll to the function with the control... -
Page 16: Using The Directory, Direct Dialling Keys And Lists
Using the directory, direct dialling keys and lists Using the directory, direct Managing directory entries You have selected an entry (page 14). dialling keys and lists Editing entries ¢ ¢ A directory, last number redial list, SMS list Edit Entry §Menu§... -
Page 17: Direct Dialling Keys
Using the directory, direct dialling keys and lists Adding a displayed number to Using other functions the directory The following functions can be selected ¢ with §Menu§ You can copy any numbers to the directory Delete Entry that appear in a list, for example the calls Delete selected entry. -
Page 18: Opening The Message List With
Using the directory, direct dialling keys and lists Opening the message list with Selecting the list type for the calls list ¢ ¢ L N O 1 Q the display key §Menu§ Enter ¢ digits: = missed calls §OK§ ‘ The entries in the calls list are preserved if You can use the display key you change the list type. - Page 19 Using the directory, direct dialling keys and lists Deleting the calls list Caution! All old and new entries will be deleted. ¢ ¢ ¢ Calls List: §Menu§ §OK§ §Menu§ ¢ ¢ Delete List §OK§ ¤ aPress and hold (idle status).
-
Page 20: Sms (Text Messages)
When supplied, the number to access the Each incoming SMS is signalled by a Swisscom SMS centre (062 210 00 0) is single ring (ringtone as for external already configured. calls). If you accept such a call, the SMS Requirements: will be lost. -
Page 21: Writing/Sending An Sms
SMS (text messages) Writing/sending an SMS Reading or deleting SMS messages ¤ Open the draft message list. An SMS may contain up to 160 characters. Select SMS. Press the display key. Writing/sending an SMS §Menu§ ¢ ¢ ¢ You have the following options: Write Message §Menu§... -
Page 22: Receiving An Sms
SMS (text messages) Receiving an SMS Reading or deleting SMS messages ¤ Open the incoming message list. All received text messages are saved in the Select SMS. incoming message list. Since an SMS Press the display key. §Menu§ remains in the list even after it has been You have the following options: read, you should regularly delete SMS messages from the list. -
Page 23: Setting Up The Sms Centre
PABX (CLIP). The CLIP of the The access number (062 210 00 0) of the phone number for the SMS centre is Swisscom SMS Centre is preprogrammed in evaluated in your Aton CL103. the delivery version. Depending on your PABX, you may ¤... -
Page 24: Sms Troubleshooting
SMS (text messages) SMS troubleshooting Self-help with errors The following table lists error situations and possible causes and provides notes on Error codes when sending troubleshooting. If an SMS cannot be sent for a longer period of time, it is moved to the incoming You cannot send messages. -
Page 25: Using The Network Mailbox
Automatic registration of the handset on the Aton CL103 base station Aton CL103, Using the network mailbox for see page 7. setting speed dialling Manual registration of the handset on... -
Page 26: Locating A Handset ("Paging")
Using several handsets Locating a handset ("Paging") Transferring a call to another handset/ internal consultation You can locate your handset using the You are calling an external subscriber. base station. ¤ ¤ Initiate an internal call, see “Calling Press the registration/paging key ÷on other handsets”... -
Page 27: Listening In To An External Call
Handset settings Listening in to an external call Screensaver You want to listen in to an existing exter- When this function is activated, the time is nal call. shown in digital in idle mode, filling the entire display. Requirement: The function Listening in ¢... -
Page 28: Changing Ringtones
Handset settings Changing ringtones Activating/deactivation suppression of the first ringtone Volume: Five volume levels The phone identifies an incoming SMS (1-5; e.g. volume 2 = ˆ) and "off" from the first network signal. Ú ‰ ). (volume 0 = ¢ L N O 2 5 §Menu§... -
Page 29: Using The Handset As An Alarm Clock
Base station settings Restoring the handset default Setting the battery warning tone ¢ ¢ ¢ settings Audio Settings Battery §§Menu§ §OK§ ¢ ¢ During Call §OK§ ¢ (‰ = on) You can reset any individual settings and §OK§ changes that you have made. This will not The battery warning tone is activated or affect entries in the directory, calls list, or deactivated or sounds during a call. -
Page 30: Restoring The Base Station To Factory Settings
Operating the base station on the PABX Operating the base station Restoring the base station to factory settings on the PABX When the settings are restored all hand- The following settings are only needed sets are de-registered. Each individual set- when your PABX requires them. -
Page 31: Appendix
Appendix Appendix Contact with liquid If the handset has come into contact with liquid: Symbols and typographical ¤ Switch the handset off and remove conventions used the batteries immediately. ¤ Allow the liquid to drain from the hand- This section explains the meaning of cer- set. -
Page 32: Warranty/Maintenance/Repair/Authorisation
Appendix In case of an error, please contact your is flashing in the display. Base place of purchase. 1. The handset is outside the range of the base station. ¥ Repair/Maintenance Move the handset closer to the base. 2. The base station is not switched on. ¥... -
Page 33: Technical Data
Yuasa Technology AAA 800 dealer or network provider. VARTA Phone Power AAA 700mAh Swisscom hereby declare that this device The handset is supplied with two recom- meets the essential requirements and mended batteries. other relevant regulations laid down in Directive 1999/5/EC. -
Page 34: Writing And Editing A Text Message
Appendix General specifications Order of directory entries The directory entries are usually sorted in DECT standard is supported alphabetical order. Spaces and digits take GAP standard is supported first priority. The sort order is as follows: Range up to 250 m outdoors, 1. -
Page 35: Accessories
Phonebook for around 100 entries SMS (prerequisite: CLIP available) Headset connection including headset Voice portal key Aton CL103 charging station (including mains adapter) All accessories and batteries are available from your mobile phone retailer or from the Swisscom shop. Only use original accessories. This will avoid possible health risks and damage to property... -
Page 36: Wall Mounting For Base Station
Wall mounting for base station Wall mounting for base station... -
Page 37: Index
Index Index Changing system PIN ... . . Characters deleting ..... Charge status (battery) . - Page 38 Index Handset Last number redial ....activating/deactivating ..Liquid ......advisory tones .
- Page 39 Index PABX ......operating base station on PABX ..deleting ..... setting dialling mode .
- Page 40 This user guide is made with 100% recycled paper.
Need help?
Do you have a question about the Aton CL103 and is the answer not in the manual?
Questions and answers