
Related Manuals for AT&T TL7601


Summary of Contents for AT&T TL7601
- Page 1 User’s manual TL7601 DECT 6.0 remote dial pad for use with AT&T models TL7610/TL7611/ TL7650/TL7651...
- Page 2 AT&T product. You can also visit our website at www.telephones.att.com or call 1 (800) 222-3111. In Canada, dial 1 (866) 288-4268. Model #: TL7601 Type: Remote dial pad Serial #: (found in the battery compartment) Purchase date:...
-
Page 3: Parts Checklist
Check to make sure the remote dial pad package includes the following items: User’s manual TL7601 DECT 6.0 remote dial pad for use with AT&T models TL7610/TL7611/ TL7650/TL7651 User's manual Battery for dial pad Dial pad Battery compartment cover Charger for dial pad with... -
Page 4: Table Of Contents
TL7601 DECT 6.0 remote dial pad for use with AT&T models TL7610/TL7611/ TL7650/TL7651 Table of contents Getting started Quick reference guide ...1 Installation preparation ...2 Charger installation ...3 Battery installation & charging ...4 Remote dial pad registration and de-registration ...6 Register the remote dial pad to the headset base (with a single headset) ...6... - Page 5 Last number redial ... 12 Options while on calls ... 14 Call waiting ... 14 Last number redial ... 14 Screen icons & display screen messages ... 15 Troubleshooting Troubleshooting ... 17 Maintenance and safety Maintenance ... 25 Important safety information ... 26 Appendix FCC Part 68 and ACTA ...
-
Page 6: Getting Started
Quick reference guide Loop You can string a neck or wrist cord (not provided) through this loop. LANG/SEL Press to review and change language options (page 10). Press again to save the setting. While reviewing redial memory, press to select a phone number (page 12). -
Page 7: Installation Preparation
Installation preparation You must install and charge the battery before using the remote dial pad. Your product may be shipped with a protective sticker covering the remote dial pad display - remove it before use. For customer service or product information, visit our website at www.telephones.att.com 1 (866) 288-4268 In Canada, dial... -
Page 8: Charger Installation
Charger installation 1. Make sure the small end of the power adapter is plugged into the jack on the back of the charger, and then make sure that the cord is routed behind the tab as shown. IMPORTANT INFORMATION Use only the power adapter supplied with this product. To order a replacement power adapter, visit our website at www.telephones.att.com 1 (866) 288-4268... -
Page 9: Battery Installation & Charging
Battery installation & charging Install the battery as shown below. After installing the battery, place the remote dial pad in the charger. For optimal performance, charge the remote dial pad battery for at least use. Step Insert the battery plug securely into the jack located inside the remote dial pad battery... - Page 10 Battery installation & charging CHARGE light NOTE: 1. When the battery is charging, you will see the cycling fully charged, you will see 2. If the display on the remote dial pad is blank, try unplugging the power adapter, and firmly plugging it in again. IMPORTANT INFORMATION Use only the supplied rechargeable battery or replacement battery (AT&T model BT190545).
-
Page 11: Remote Dial Pad Registration And De-Registration
Remote dial pad registration and de-registration The TL7601 remote dial pad allows you to place phone calls with an AT&T DECT 6.0 cordless headset system. You must register it to the TL7610/TL7611/TL7650/TL7651 headset base before use. The remote dial pad should be charged for a minimum of five minutes before attempting registration to the headset base. -
Page 12: Register The Remote Dial Pad To The Headset
Remote dial pad registration and de-registration PLEASE WAIT... DIAL PAD REGISTERED DIAL PAD DIAL PAD DIAL PAD NOTES: 1. You cannot register a remote dial pad if a system headset is in use. 2. If the registration is not successful, the display shows NOT REGISTERED. Reset the remote dial pad by lifting it out of the charger and then placing it back in the charger. -
Page 13: De-Register The Remote Dial Pad
Getting started Remote dial pad registration and de-registration Flashes ON/OFF button CONNECTING... NOT REGISTERED NOTE: De-registering the remote dial pad from the headset base also de- registers all the headsets. To use the remote dial pad or the headset again, refer to the registration information on pages 6-7. -
Page 14: Belt Clip
Belt clip To attach the belt clip: Snap the belt clip into the retaining tabs on both sides of the dial pad as shown in the figure. To remove the belt clip: Gently lift either of the belt clip retaining tabs, shown in the figure, to remove the belt clip from the dial... -
Page 15: Remote Dial Pad Operation
Remote dial pad settings Language You can select the language used for all screen displays. To select a language: 1. Press LANG/ LANGUAGE 2. Use ENGLISH 3. Press DIAL PAD when in idle mode. to scroll to ENGLISH, FRANCAIS or ESPANOL. /SEL again to save your LANG preference and return to the idle mode. -
Page 16: Basic Operation
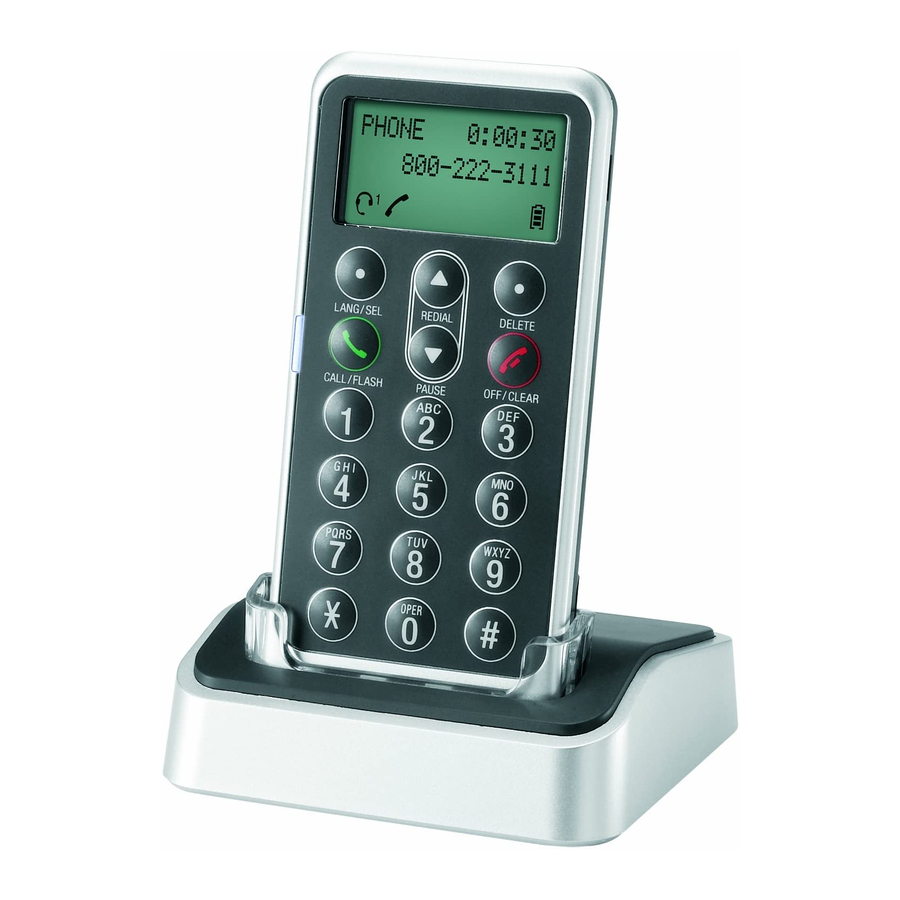
Remote dial pad operation Basic operation Make a call To make a call: Elapsed • Press ON time PHONE 0:00:30 1-234-5678 • Press ON To end a call: • Press ENDED 0:00:30 1-234-5678 • Press On-hook dialing (predialing) 1. Enter the telephone number. Press 2. -
Page 17: Answer A Call
Basic operation Answer a call Using the remote dial pad: INCOMING • Press CALL • To end a call: • Press Using the headset: • To end a call: • DIAL PAD LINE IN USE Last number redial To view the five most recently dialed numbers: •... - Page 18 Basic operation Last number redial (continued) To remove a number: • While the desired number is displayed, press DELETE to delete the displayed number from the redial memory. To edit a number: • While the desired number is displayed, press LANG/ •...
-
Page 19: Options While On Calls
PHONE 0:00:30 1-234-5678 MUTE/FLASH button NOTES: 1. Pressing FLASH to CALL/ access services from your local telephone service provider will not affect the elapsed time, which will continue to record the total talk time. 2. You cannot press to exit /CLEAR call waiting without ending the call. -
Page 20: Screen Icons & Display Screen Messages
Screen icons & display screen messages PHONE 0:00:30 1-234-5678 Screen icons The remote dial pad works with headset 1. The remote dial pad works with headset 2. The telephone line is in use. Battery charging (animated display). Display screen messages The remote dial pad with a low CHARGING battery has been placed in the... -
Page 21: Display Screen Messages
Screen icons & display screen messages Display screen messages ENTER TEL# THEN PRESS CALL INCOMING There is a call coming in. CALL LANGUAGE An extension phone or one LINE IN USE of the headsets is in use. The remote dial pad has not NOT REGISTERED yet been registered to the headset base. -
Page 22: Troubleshooting
Troubleshooting If you have difficulty with your remote dial pad, please try the suggestions below. For Customer Service, visit our website at www.telephones.att.com 1 (866) 288-4268 In Canada, dial My remote dial pad doesn’t work at all. , or call •... - Page 23 Troubleshooting I cannot dial out. • Reset the headset base. Unplug the electrical power of the headset base. Wait for approximately 15 seconds, then plug it back in. Follow the directions for remote dial pad registration. • You may need a new dial pad battery. Please refer to Battery installation &...
- Page 24 Troubleshooting My remote dial pad isn’t performing normally. CONNECTING... displays on my remote dial pad. • If the other phones in your home or office are having the same problem, the problem is in your wiring or local service. Contact your local telephone company (charges may apply).
- Page 25 Troubleshooting The battery does not hold a charge. • Follow the directions for dial pad registration on pages 6-7. Wait for several seconds until the screen message changes to DIAL PAD, confirming that registration was successful. • Disconnect and re-install the remote dial pad battery, then perform the dial pad registration procedure again.
- Page 26 Troubleshooting My remote dial pad does not react when I receive a call. the Battery installation & charging section (pages 4-5) of this user’s manual. • Your remote dial pad might be malfunctioning. Please refer to the Limited warranty section (pages 35-38) of this user’s manual for further instruction.
- Page 27 Troubleshooting The CHARGE light is off. My call waiting isn’t working. I cannot switch to the call waiting call. • Make sure the power adapter is plugged in correctly and securely to a working electrical power outlet not controlled by a wall switch.
- Page 28 TL7610/7611 headset base. Common cure for electronic equipment. • The TL7601 dial pad can only be registered to the TL7610/7611 headset base. • The 7601 dial pad can only be registered to the TL7610/7611 headset base. The dial pad can only be registered to the TL7610/7611 headset base if there is a headset registered to the base first.
- Page 29 Troubleshooting • Disconnect the power to the headset base. • Disconnect the remote dial pad battery. • Wait a few minutes. • Connect power to the headset base. • Re-install the battery, and place the remote dial pad into the dial pad charger. •...
-
Page 30: Maintenance And Safety
Maintenance Taking care of your remote dial pad • Your remote dial pad contains sophisticated electronic parts, so it must be treated with care. • Avoid rough treatment. • Put the remote dial pad down gently. Save the original packing materials to protect your remote dial pad if you ever need to return it. -
Page 31: Important Safety Information
Important safety information This symbol is to alert you to important operating or servicing instructions that may appear in this user’s manual. Always follow basic safety precautions when using this product to reduce the risk of injury, fire, or electric shock. Safety information •... - Page 32 Important safety information • Replace batteries only as described in your user’s manual. Do not burn or puncture batteries — they contain caustic chemicals. • This power adapter is intended to be correctly oriented in a vertical or floor mount position. The prongs are not designed to hold the plug in place if it is plugged into a ceiling or an under-the-table/cabinet outlet.
- Page 33 Important safety information or eliminate the interference. • Rechargeable batteries: This product contains nickel- cadmium, nickel-metal hydride or lithium-ion rechargeable batteries. Exercise care in handling batteries in order to not create a short circuit with conductive material such as rings, bracelets, and keys.
-
Page 34: Save These Instructions
Important safety information • To prevent fire or shock hazard, do not expose this product to water or any type of moisture. • Observe proper polarity orientation between the battery and the metallic contacts. • Do not disassemble your telephone. There are no user- serviceable parts inside. -
Page 35: Appendix
Appendix FCC Part 68 and ACTA This equipment complies with Part 68 of the FCC rules and with technical requirements adopted by the Administrative Council for Terminal Attachments (ACTA). The label on the back or bottom of this equipment contains, among other things, a product identifier in the format US:AAAEQ##TXXXX. - Page 36 Appendix FCC Part 68 and ACTA If this equipment is causing harm to the telephone network, the telephone company may temporarily discontinue your telephone service. The telephone company is required to notify you before interrupting service. If advance notice is not practical, you will be notified as soon as possible.
- Page 37 Appendix FCC Part 68 and ACTA Industry Canada Operation is subject to the following two conditions: (1) this device may not cause harmful interference, and (2) this device must accept any interference, including interference that may cause undesired operation. The term ‘’IC:‘’ before the certification/registration number only signifies that the Industry Canada technical specifications were met.
-
Page 38: Fcc Part 15
FCC Part 15 This equipment has been tested and found to comply with the requirements for a Class B digital device under Part 15 of the Federal Communications Commission (FCC) rules. These requirements are intended to provide reasonable protection against harmful interference in a residential installation. - Page 39 Appendix FCC Part 15 To ensure safety of users, the FCC has established criteria for the amount of radio frequency energy that can be safely absorbed by a user or bystander according to the intended usage of the product. This product has been tested and found to comply with the FCC criteria.
-
Page 40: Limited Warranty
Limited warranty The AT&T brand is used under license - any repair, replacement or warranty service, and all questions about this product should be directed to: In the United States of America, visit www.telephones.att.com 1 (866) 288-4268 In Canada, call What does this limited warranty cover? The manufacturer of this AT&T-branded product warrants to the holder of a valid proof of purchase (“CONSUMER”... - Page 41 Limited warranty How long is the limited warranty period? The limited warranty period for the PRODUCT extends for ONE (1) YEAR from the date of purchase. If the manufacturer repairs or replaces a materially defective PRODUCT under the terms of this limited warranty, this limited warranty also applies to repaired or replacement PRODUCT for a period of either (a) 90 days from the date the repaired or replacement PRODUCT is shipped to you or...
- Page 42 Limited warranty • PRODUCT returned without valid proof of purchase (see item 6 below); -or- • Charges for installation or setup, adjustment of customer controls, and installation or repair of systems outside the unit. How do you get warranty service? To obtain warranty service in the United States of America, visit www.telephones.att.com 1 (866) 288-4268...
-
Page 43: Other Limitations
Limited warranty Other limitations This warranty is the complete and exclusive agreement between you and the manufacturer of this AT&T branded PRODUCT. It supersedes all other written or oral communications related to this PRODUCT. The manufacturer provides no other warranties for this PRODUCT. The warranty exclusively describes all of the manufacturer’s responsibilities regarding the PRODUCT. -
Page 44: Dial Pad Operating Range
Technical specifications RF frequency band Channels Operating temperature Dial pad charger voltage (AC voltage, 60Hz) Dial pad voltage Dial pad charger voltage (AC adapter output) Replacement battery Dial pad operating range This dial pad operates within the maximum power allowed by the Federal Communications Commission (FCC). -
Page 45: Index
Index AC adapter, 3, 39 Answer calls, 12 Basic operation, 11-13 Battery charging, 5, 15 Battery installation, 4, 5 Belt clip, 9 Call waiting, 14, 22 CHARGE light, 1, 5, 22 Delete digits, 1, 11, 13 Delete redial memory, 13 De-registration, 8 Dial pad operating range, 39 Display screen messages, 15... - Page 46 www.telephones.att.com © 2008 Advanced American Telephones. All rights reserved. AT&T and the AT&T logo are trademarks of AT&T Intellectual Property II, L.P. d/b/a AT&T Intellectual Property licensed to Advanced American Telephones. Printed in China. Issue 2 AT&T 10/08.
Need help?
Do you have a question about the TL7601 and is the answer not in the manual?
Questions and answers