Advertisement
Display Messages
Screen Display:
PRIVATE NAME
PPP
PRIVATE CALLER
UNKNOWN NAME
UUU
UNKNOWN CALLER
EXTENSION USED
1
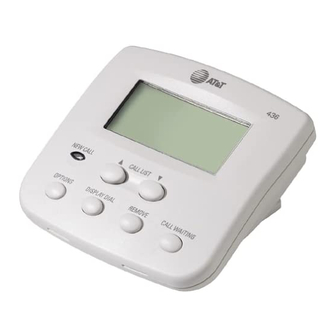
Call Display 436
Fold open this manual for
information about this product's
installation and operation. Please
also read Part 1 – Important
Product Information.
Para recibir este manual en español, por favor llame al 1 800 222-3111.
AT&T and the globe symbol are registered trademarks of AT&T Corp. licensed to Advanced American Telephones.
© 2000 Advanced American Telephones. All rights reserved.
Printed in ?. xxxxxxxxx Issue 1AT&T 9/00
When:
The other party is blocking name information.
The other party is blocking number information.
The other party is blocking both name and
number information.
Your phone company is unable to receive the
other party's name information.
Your phone company is unable to receive the
other party's number information.
Your phone company is unable to receive the
other party's name and number information.
An extension phone on this line is being used,
so call information cannot be received.
USER'S MANUAL
NEED 436 MODEL
Part 2
Revised 8/25/00
F.P.O.
Advertisement
Table of Contents

Related Manuals for AT&T Call Display 436


Summary of Contents for AT&T Call Display 436
-
Page 1: Display Messages
An extension phone on this line is being used, so call information cannot be received. USER’S MANUAL Part 2 Revised 8/25/00 Call Display 436 Fold open this manual for F.P.O. information about this product’s NEED 436 MODEL installation and operation. Please also read Part 1 –... - Page 2 Table/Desk Installation Connect the line cord. Plug one end of the line cord (supplied) into the unit’s TEL LINE jack. Plug the other end of this cord into the modular wall jack, making sure it snaps firmly into place. (If you are connecting an answering machine, make sure it is connected between the unit and the telephone.) Connect the power cord.
- Page 3 Table/Desk Installation Standard Electrical Outlet Caller ID Unit F.P.O. NEED 436 MODEL Modular Wall Jack Telephone Installation With Answering System Standard Electrical Outlet Caller ID Unit F.P.O. NEED 436 MODEL Answering System Modular Telephone Wall Jack NOTE: Use with a telephone is optional. However, if you do not connect a telephone, you will not be able to use the Display Dial feature (described later in this manual).
-
Page 4: Wall Installation
Wall Installation F.P.O. NEED 436 MODEL Remove the bracket by sliding it downward from the unit. Hold the flat edge of the bracket against the wall with the rubber feet towards the bottom of the unit. Mark the location of the two mounting screw holes with a pencil. - Page 5 Wall Installation (continued from page 3) Snap the unit onto the bracket and slide it down as far as it will go. Plug the power cord into the back of the unit. Plug one telephone line cord into the TEL SET jack and one line cord into the TEL LINE jack.
-
Page 6: Installation Settings
Installation Settings Language Selection You can select ENGLISH or ESPANOL (Spanish) as the language in which your Caller ID information is displayed. When you first plug in the power cord, the screen displays WHICH LANGAUGE?. Press + until the screen displays your language selection. Press N. - Page 7 Installation Settings Set Local Area Code If for You dial Enter in Step 2 All calls outside 11 digits No Local Area Codes your area code (1 + area code + phone number) Some calls outside 10 digits Area codes that do your area code (area code + phone number) not require a "1"...
-
Page 8: About Caller Identification (Caller Id)
About Caller Identification (Caller ID) This product has a Caller ID with Call Waiting feature that works with service from your local phone service provider. Caller ID with Call Waiting lets you see who’s calling before you answer the phone, even when you’re on another call. You may need to change your phone service to use this feature. -
Page 9: Operation
Operation Reviewing Call History The screen displays the call information for about 30 seconds after it has been received. To review earlier calls, press -. To advance through call history from an earlier call, press +. The screen displays END OF LIST to indicate you have reviewed all the calls in the call history. - Page 10 Operation Display Dial As you review calls in history, you can dial a displayed phone number. (This feature works only with touch tone service on a phone connected to the unit.) Lift the handset of the phone (the screen displays the first number in the call history), then press and release D to call that number, or press + or - to scroll to another number in the call history.
-
Page 11: All Calls
Choosing Display Options You can customize how the features of this product work. Press N, then use + or - to scroll through display choices. Press N again when the desired choice is displayed — this sets your selection and automatically moves you to the next option. -
Page 12: In Case Of Difficulty
In Case Of Difficulty If you have difficulty operating this product, try the suggestions below. For Customer Service, visit our website at www.telephones.att.com or call 1 800 222-3111. Please retain your receipt as your proof of purchase. If the NEW CALL light remains on: Unplug the power cord for 10 seconds, then plug it back in.
Need help?
Do you have a question about the Call Display 436 and is the answer not in the manual?
Questions and answers