Table of Contents
Advertisement
Quick Links
Advertisement
Table of Contents

Related Manuals for Varytec Laser Moonstar MK II


Summary of Contents for Varytec Laser Moonstar MK II
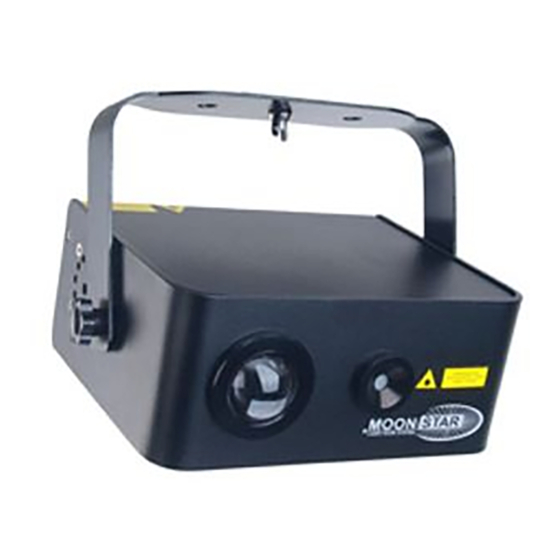
- Page 1 User manual Laser Moonstar MK II...
-
Page 2: Table Of Contents
Table of contents Safety instructions ..........................3 1.1. FOR SAFE AND EFFICIENT OPERATION ................3 Warning! ............................4 2.1. Laser Safety Warnings ......................4 2.2. NON-INTERLOCKED HOUSING WARNING ................. 5 2.3. LASER SAFETY AND OPERATING INSTRUCTIONS ............5 STOP AND READ ALL LASER SAFETY DATA ..................5 2.4. -
Page 3: Safety Instructions
1. Safety instructions • This device is suitable for indoor use only. • All modifications to the device will void the warranty. • Repairs are to carry out by skilled personnel only. • Use only fuses of the same type and original parts as spare parts. •... -
Page 4: Warning
Important: Damages caused by the disregard of this user manual are not subject to warranty. The dealer will not accept liability for any resulting defects or problems. Make sure the electrical connection is carried out by qualified personnel. All electrical and mechanical connections have to be carried out according to the European safety standards. -
Page 5: Non-Interlocked Housing Warning
Avoid direct eye contact with laser light. Never intentionally expose your eyes Caution or others to direct laser radiation. This laser product can potentially cause instant eye injury or blindness if laser Caution light directly strikes the eyes. It is illegal and dangerous to shine this laser into audience areas, where the Caution audience or other personnel could get direct laser beams or bright reflections into their eyes. -
Page 6: Laser Exposure Warning
exposure. In the laser safety regulation, it is not legal to aim Class 3B lasers in areas which people can get exposed. This is true even if it is aimed below people’s faces, such as on a dance floor. Do not operate laser without first reading and understanding all safety and technical data in this manual. Always set up and install all laser effects so that all lasers light is at least 3 meters (9.8 feet) above the floor on which people can stand. -
Page 7: Laser Safety Label Reproductions
3. LASER SAFETY LABEL REPRODUCTIONS 3.1. LASER EMISSION DATA Laser Classification Class 3B Red Laser Medium LD GaAlAs 650nm, typical Green Laser Medium DPSS Nd:YVO4, 532nm Beam Diameter <5mm at aperture Pulse Data All pulses < 4Hz (>0.25sec) Divergence (each beam) <2 mrad Divergence (total light) <160 degrees... -
Page 8: General Safety Instructions
4. GENERAL SAFETY INSTRUCTIONS Every person involved with installation and maintenance of this device has to Be qualified. Follow the instructions of this manual. CAUTION! Be careful with your operations. With a high voltage you can suffer a dangerous electric shock when touching the wires! This device has left out premises in absolutely perfect condition. -
Page 9: Before Operation
Please use the original packaging if the device is to be transported. Please consider that unauthorized modifications on the device are forbidden due to safety reasons! CAUTION! Operate the device only after having familiarized with its functions. Do not permit operation by persons not qualified for operating the device. -
Page 10: Dmx-512 Connection Between Fixtures
Cable EU Cable US International Brown Black Live Light Blue White Neutral Yellow/Green Green Earth 5.4. DMX-512 connection between fixtures The fixture is equipped with 2-pin XLR sockets for DMX input and output. The sockets are wired in parallel. Only use a shielded twisted-pair cable designed for 3-pin XLR-plugs and connectors in order to connect the controller with the fixture or one fixture with another 5.4.1. -
Page 11: Proper Laser Set Up & Usage
If you are using the standard DMX-controllers, you can connect the DMX-output of the controller directly with the DMX-input of the first fixture in the DMX-chain. If you wish to connect DMX-controllers with other XLR-outputs, you need to use adapter cables. Connect the DMX-output of the first fixture in the DMX-chain with the DMX-input of the next fixture. -
Page 12: Rigging The Fixture
6.1. Rigging the Fixture CAUTION! Please consider the respective national norms during the installation! The installation must only be carried out by an authorized employee or dealers! The installation of the fixture has to be built and constructed in a way that it can hold 10 times the weight for 1 hour without any harming deformation. -
Page 13: Product Overview
7. PRODUCT OVERVIEW This device has left out premise in absolutely perfect condition. In order to maintain this condition and to ensure safe operation, it is necessary for the user to follow the safety instructions and warning notes written in this manual. The manufacturer will not accept liability for any resulting damages caused by the non- observance of this manual or any unauthorized modification to the device. -
Page 14: Rear Panel
7.2. Rear Panel NAME FUNCTION Power switch Switch on and off the power Fixture power ground point Control panel To control the fixture with digital LED display, check more information on CONTROL & FUNCTION DMX Input 3 pins male XLR connector DMX Output 3 pins female XLR connector To detect the music/sound signal... -
Page 15: Operating Mode
8.1. Operating Mode Once after every power on laser, the VERSION and MANUFACTURE Attention! INFORMATION will be shown in LCD monitor of rear panel. When laser is powered on, LCD monitor on rear panel shows the current operating standalone mode or DMX address of DMX mode. -
Page 16: Stand Alone Preprogram Laser Show
8.3. Stand Alone Preprogram Laser Show Press FUNC to enter MODE OPTION. Till to LED panel shows either one of AUF, AUS, SOU,RDN Press FUNC to select your favorite Stand Alone mode as above. Press ENTER to confirm the setting. The laser is working in stand alone. -
Page 17: Manual Running Mode (Man)
8.5. Manual Running Mode (MAN) Press FUNC, until LED or RGB or RDE is shown in LED display panel. LED mode is preprogramed effect of LED. RGB mode is manual setting of LED effect. Once RGB mode is confirmed by press ENTER, the setting goes into 4 specification setting. -
Page 18: Dmx Chart
9. DMX Chart 18 / 22... - Page 19 19 / 22...
- Page 20 20 / 22...
-
Page 21: Specifications
Specifications Mains Input: AC100~240V, 50/60Hz Total Power: X/Y Axis Beam Angle: 160° Music Control: Audio / Sound Activated Laser Power: 100mW 650nm Red CW 40mW 532nm Green CW Laser Classification: Class 3B Laser Safety Standard:: EN60825-1 2007 Condition Temperature: 10~40℃ DMX Connections: 3 pins XLR Male/Female DMX Channels... - Page 22 Every information is subject to change without prior notice. The availability of particular products may vary by region. Please check with the dealer Importer: B & K Braun GmbH Industriestraße 1 D-76307 Karlsbad www.bkbraun.com info@bkbraun.com 22 / 22...
Need help?
Do you have a question about the Laser Moonstar MK II and is the answer not in the manual?
Questions and answers