Table of Contents

Related Manuals for CDA hc3615


Summary of Contents for CDA hc3615
-
Page 1: Ceramic Hob
Ceramic Hob Installation, Use and Maintenance Customer Care Department • The Group Ltd. • Harby Road • Langar • Nottinghamshire • NG13 9HY T : 01949 862 012 F : 01949 862 003 E : customer.care@cda.eu W : www.cda.eu www.cda.eu... - Page 2 Appliance information: Please enter the details on the appliance rating plate below for reference, to assist CDA Customer Care in the event of a fault with your appliance and to register your appliance for guarantee purposes. Appliance Model...
-
Page 3: User Information
IMPORTANT INFORMATION FOR CORRECT DISPOSAL OF THE PRODUCT IN ACCORDANCE WITH EC DIRECTIVE 2002/96/EC. At the end of its working life, the product must be taken to a special local authority waste collection centre or to a dealer providing appliance recycling services. Disposing of a household appliance separately avoids possible negative consequences for the environment and health. - Page 4 • Do not switch on the zones without cookware in place. • Do not lean over the hob when it is in use. • Follow the cleaning instructions carefully. • Ensure the base of the saucepan is clean and dry before placing it on the hob to prevent damage to the surface of the hob.
-
Page 5: Using Your Hob
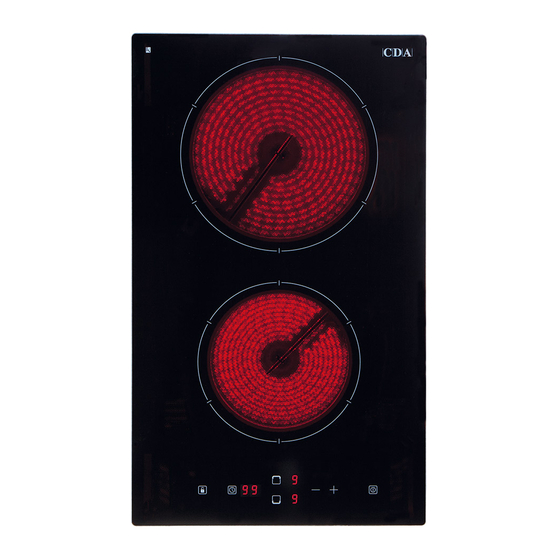
Using Your Hob Zones: 1. Front 1.2 kW 2. Back 1.8 kW Fig. 1... - Page 6 Control Panel 1. Heating zone selection controls 2. Key lock control 3. Power adjusting controls 4. ON/OFF control Fig. 2 Using the Touch Controls The controls respond to touch, so you don’t need to apply any pressure. Use the ball of your finger, not its tip. You will hear a beep each time a touch Fig.
- Page 7 To Switch Heating Zones On When the mains power supply is switched on, the buzzer beeps once and all the indicators light up for 1 second, then go out. This indicates that the ceramic hob has entered standby mode. Touch the ON/OFF control, all the indicators show “-“.
- Page 8 To Switch Heating Zones Off Touch the heating zone selection control that corresponds to the zone you wish to switch off (for example back Turn the cooking zone off by using the controls to scroll down to “0“. Alternatively, the zone may be switched off by touching the controls together.
- Page 9 Locking the Controls You can lock the controls to prevent unintended use (for example children accidentally turning the cooking zones on). When the controls are locked, all the controls except the ON/OFF control are disabled. To Lock the Controls: Touch the key lock control.
-
Page 10: Efficient Use Of Your Hob
Efficient Use of Your Hob Before using your hob for the first time, switch the zones on for a FEW SECONDS to burn off any grease left over from the manufacturing process. The ceramic glass retains heat, so to make best use of the residual heat, switch off the zone five minutes prior to the end of cooking. - Page 11 It is very important that the pans used on the hob are made of a suitable material and have the correct type of base. The base should be flat and smooth, as any rough part on the pan base could scratch the ceramic hob top.
-
Page 12: Care And Maintenance
Care and Maintenance Always disconnect the appliance from the power supply before undertaking any cleaning or maintenance. You should use a non-abrasive cleaner to clean the hob top. Any abrasive cleaner (including Cif) will scratch the surface and could erase the control panel markings. -
Page 13: Troubleshooting
Troubleshooting Below is a list of some of the possible malfunctions. If the problem cannot be resolved as described, contact Customer Services. Problem Possible Causes Remedy The hob cannot be turned No power. Ensure the hob is connected to the power supply and that it is switched on. -
Page 14: Fitting The Hob
Fitting the Hob Unpacking the hob: Take care not to lose or mishandle any parts. Fitting position of the hob: This appliance must be installed a minimum of 50mm from any back wall and a minimum of 180mm away from any adjacent vertical surfaces, e.g. - Page 15 • This appliance is designed to be installed into cabinet units capable of withstanding temperatures of 65°C or greater above ambient temperature. • Never place perishable foods, soft items such as tea towels, cleaning products or flammable items in the cupboard or drawer below the appliance.
-
Page 16: How To Install The Hob
How to Install the Hob Overall dimensions of the hob: Width: 300mm Depth: 510mm Worktop cut-out dimensions: Width: 268mm Depth: 500mm 1. Make the required hole in the worktop. Before doing this, you must check the instructions supplied with any cooker hood to ensure that you 600mm minimum will have the required clearance. -
Page 17: Mains Electricity Connection
Mains Electricity Connection Warning! this appliance must be earthed. This appliance must be connected by a competent FUSE SPUR OUTLET person, using fixed wiring via a double pole switched fused spur outlet, protected by a 13A fuse. We recommend that the appliance is connected by a qualified electrician, who is a member of the N.I.C.E.I.C. - Page 18 Any service call arising from incorrect installation may result in a charge. CDA and its representatives cannot be held responsible for any matters resulting from incorrect connection, or related to either the absence of an earth connection or a faulty earth connection.
- Page 19 E & O E. All instructions, dimensions and illustrations are provided for guidance only. CDA reserve the right to change specifications without prior notice.
- Page 20 T : 01949 862 012 F : 01949 862 003 E : customer.care@cda.eu labour Customer Care Department • The Group Ltd. • Harby Road • Langar • Nottinghamshire • NG13 9HY T : 01949 862 012 F : 01949 862 003 E : customer.care@cda.eu W : www.cda.eu www.cda.eu copyright © CDA 2014...
Need help?
Do you have a question about the hc3615 and is the answer not in the manual?
Questions and answers