Table of Contents
Advertisement
Quick Links
Advertisement
Table of Contents

Related Manuals for CDA HCC762


Summary of Contents for CDA HCC762
- Page 1 Manual for Installation, Use and Maintenance Passionate about style Customer Care Department • The Group Ltd. • Harby Road • Langar • Nottinghamshire • NG13 9HY T : 01949 862 012 F : 01949 862 003 E : service@cda.eu W : www.cda.eu...
- Page 2 Under no circumstances should any external covers be removed for servicing or maintenance except by suitably qualified personnel. Appliance information: Please enter the details on the appliance rating plate below for reference, to assist CDA Customer Care in the event of a fault with your appliance and to register your appliance for guarantee purposes. Appliance Model...
- Page 3 Please note: Before operating this hob, please read the instructions carefully After unpacking the appliance, make sure it is not damaged. In case of doubt, do not use the appliance and contact your supplier. Remove all packaging and do not leave the packing materials in easy reach of children as they may cause serious injury. The packaging materials are recyclable.
-
Page 4: Using Your Hob
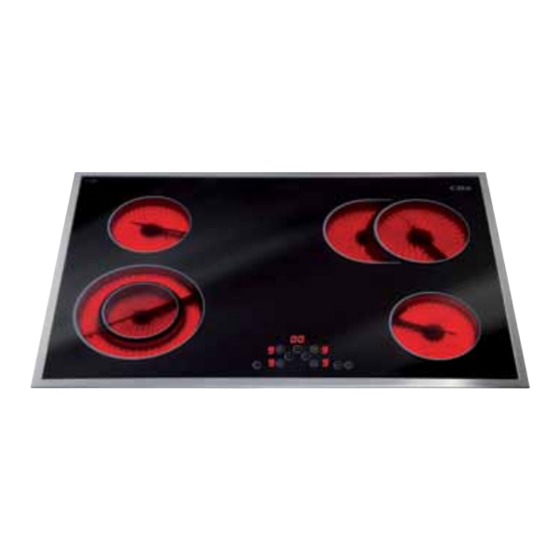
Using your hob Zones: Front left 0.7/2. 1 kW 120/210 mm dual Rear left 1.2 kW 140 mm Rear right 1. 1 /2 kW 145 x 270 mm dual Front right 1.2 kW 140 mm Touch control panel The Touch Control Dual zone key Minus key (for all zones) Timer key... - Page 5 How to use the hob The ceramic surface of the hob allows fast transmission of heat vertically from the heating elements under the glass to the pans on the hob top. The heat does not spread horizontally, so the hob top remains relatively cool only a few centimetres from the zone in use.
- Page 6 How to use the hob Power Level Type of cooking Switched off For melting (butter/chocolate) or keeping food warm Keeping food hot or to heat small quantites of liquid Heating large quantities of liguid (sauces etc.) Slow boiling e.g. spaghetti, soups, stews, potatoes Gentle frying Browning meats, frying fish.
- Page 7 How to use the hob The Timer/ Minute Minder The timer allows you to preset the length of time any of the zones will be on, between a minimum of one minute and a maximum of 99 minutes. The timer can be used on each zone separately and can also be used as a minute minder, to countdown the time without using any of the zones.
-
Page 8: Safety Features
Safety Features The childlock The hob is equipped with a childlock to lock all the controls except switched off or during cooking. To switch the childlock on and off Touch to switch the hob on. Touch for approximately two seconds. The childlock indicator is illuminated when the childlock is set and the hob is on. Residual Heat Indicators The hob is equipped with residual heat indicators to warn when any of the zones are still hot to the touch after cooking. -
Page 9: Efficient Use Of Your Hob
Efficient Use of your Hob The hob is equipped with zones of different sizes, designed to accommodate most shapes and sizes of pan. For best results, only use pans with flat bottoms and choose an appropriate zone depending on the size of the pan. The most efficient use of the hob is shown below, where the pan and zone are correctly chosen. -
Page 10: Care And Maintenance
Contact CDA Customer Care A : Customer Care Department, The CDA Group Ltd, Harby Road, Langar, Nottinghamshire, NG13 9HY T : 01949 862 012 F : 01949 862 003 E : service@cda.eu W : www.cda.eu Clean with Wipe over the zone to be cleaned with a sponge and hot... -
Page 11: Mains Electricity Connection
Mains Electricity Connection Warning! this appliance must be earthed We recommend that the appliance is connected by a qualified electrician, who is a member of the N.I.C.E.I.C. and who will comply with the I.E.E. and local regulations. This appliance is intended to be connected to fixed wiring and is not suitable for connection to a 13A plug or 13A supply. -
Page 12: Fitting The Hob
Fitting the Hob Unpacking the hob: Take care not to lose or mishandle any parts. Fitting position of the hob: This appliance must be installed a minimum of 50mm from any back wall and a minimum of 190mm away from any adjacent vertical surfaces, e.g. -
Page 13: How To Install The Hob
How to Install the Hob How to install the hob: Overall dimensions of the hob: Width: 770mm Depth: 510mm Worktop cut-out dimensions: Width: 740mm Depth: 480mm 1. Make the required hole in the worktop. Before doing this, you must check the instructions supplied with any cooker hood to ensure that you will have the required clearance. - Page 16 Passionate about style Customer Care Department • The Group Ltd. • Harby Road • Langar • Nottinghamshire • NG13 9HY T : 01949 862 012 F : 01949 862 003 E : service@cda.eu W : www.cda.eu...
Need help?
Do you have a question about the HCC762 and is the answer not in the manual?
Questions and answers