Advertisement
Advertisement
Table of Contents

Related Manuals for Caffitaly System Map Coffee Presto


Summary of Contents for Caffitaly System Map Coffee Presto
- Page 3 OWNER’S MANUAL PAG.2...
- Page 4 Dear Customer, We would like thank you for your preference. Your new espresso machine combines advanced technology and attractive, innovative design. You will experience all the benefits of a brand new concept in coffee making that lets you prepare your favourite coffee by simply inserting a coffee capsule and pressing a button.
-
Page 5: Important Safeguards
IMPORTANT SAFEGUARDS When using electrical appliances, basic safety precautions should always be followed, including the following: 1. Read all Instructions. 2. Do not touch hot surfaces. Use handles or knobs. 3. To protect against fire, electric shock and injury to persons do not immerse the appliance body and/or the cord and/or the plugs in water or other liquid. -
Page 6: Control Panel
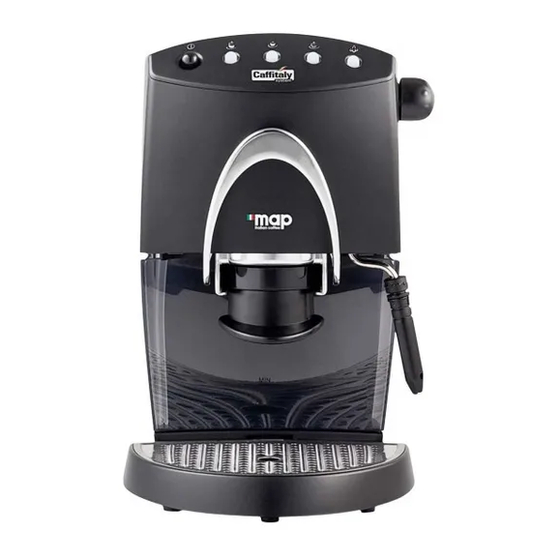
Components Shelf for cups Control panel Steam/hot water control knob Lever (metal) Water tank Capsule holder Steam wand Power cable Drip tray with grating Control panel Push-buttons and their respective functions (from left to right) ON/OFF button Caffè lungo selection button Medium coffee selection button Strong coffee selection button Steam fonction switch... -
Page 7: Technical Data
For more information, enquire with the relevant o ce. Intended use The co ee machine is designed to be used with "CAFFITALY SYSTEM" capsules only and for: • Co ee making • Frothing milk and making cappuccino... -
Page 8: Safety Instructions
Safety instructions Electrical hazards • To prevent electric shock, do not immerse the appliance, plug or power cable in water. • Do not use the coffee-machine out in the open. • Connect the machine to a power outlet with grounding system. The voltage must correspond to the voltage specified in the data plate under the machine. -
Page 9: Preliminary Operations
Caution. Follow the instructions given below in order to prevent damage to the machine: • Do not install or store the machine close to sources of heat. • Rest the machine on a level surface that is resistant to dampness and heat. The coffee machine is fitted with anti-slip feet. - Page 10 This coffee machine uses a single-cup capsule concept. The appliance operates with "CAFFITALY SYSTEM" capsules of fresh aromatic coffee. To provide a full, delicious aroma, one capsule makes one cup of coffee.
- Page 11 All capsules are pre-packaged and sealed. You can choose from different flavours of coffee capsules depending on your preference. Capsules can be easily identified by the Logo "CAFFITALY SYSTEM" which is a commercial product. When the lever is pulled down, the capsule holder and the capsule in it are pushed upwards.
-
Page 12: Power Lead
SAVE THESE INSTRUCTIONS HOUSEHOLD USE ONLY • This appliance has a polarized plug (one blade is wider than the other). • To reduce the risk of electric shock, this plug is intended to fit into a polarized outlet only one way. •... -
Page 13: Operating The Coffee Machine
Operating the coffee machine Before starting the machine •Each capsule contains the correct amount of coffee for one cup of light coffee, medium coffee or strong coffee. •The amount of water dispensed by the machine varies depending on the type of coffee your are making: light coffee: 100 ml, medium coffee: 60 ml, strong coffee: 40 ml •The above amounts are factory-calibrated but they can be changed to suit your personal taste. -
Page 14: Making Coffee
Inserting a capsule •Push up the lever. The capsule holder will be released and lowered slightly. (Fig. 7) •Draw the capsule holder out of the coffee machine. (Fig. 8) •Insert the capsule into the capsule holdere (Fig. 9) The capsule must be intact. Do not pierce or open the capsule! Fig. - Page 15 The key ingredients for preparing cappuccino, espresso macchiato and latte macchiato are frothed milk and freshly made coffee. Prepare a strong coffee as described on page 30. Note: IThe reason why should be prepared first is that the temperature required to make it is lower than the temperature required for frothing the milk, and the machine is quicker to heat up than to cool down.
- Page 16 Frothing milk •Fill a cup or small jug half way with cold milk. •Place the receptacle under the steam wand so as to place the nozzle of the steam wand in the milk to be heated. Turn the knob slowly anti-clockwise while gently rotating the receptacle.
- Page 17 Cooling the coffee machine The coffee making function requires a lower temperature than the steam dispensing and froth making functions. Steam button If you wish to make a coffee and you have just used the Espresso steam function, you should allow the appliance to cool down first.
- Page 18 User settings according to user taste Default settings control the amount of water that is dispensed for each type of coffee. These settings can be changed by the user to his /her liking in order to make a stronger or weaker coffee. For each type of coffee, the user can set one amount of water only.
- Page 19 Meaning of the indicator lamps on the control panel The lamps incorporated into the control panel buttons are used to inform the user about the function that is being performed. As illustrated below, their meaning changes depending on whether one or more buttons are blinking or are steadily illuminated.
-
Page 20: Cleaning The Machine
Cleaning the machine Danger •Before attempting to clean the appliance, remove the plug from the power outlet. •Do not immerse the machine, plug and/or power cable in water or other liquids. Caution •Allow the machine to cool before starting the cleaning procedure. Cleaning the casing and cup shelf. - Page 21 Cleaning the steam wand To ensure the best hygiene conditions, we recommend cleaning the parts that come into contact with milk immediately after use. Caution The steam wand is hot after dispensing steam. •Remove the cap from the steam wand by pulling the cap downwards (Fig.21) Fig.
- Page 22 To de-scale the machine, carry out the following procedure: 1.Mix the de-scaling agent with water according to manufacturer’s instructions and pour the mix into the machine’s water tank. 2. Place a suitable receptacle under the steam wand. 3.Press the ON/OFF button and wait until the heating process is completed, i.e. when the buttons with the coffee symbols illuminate steadily.
- Page 23 Trouble Solution The machine will not operate The lever was not properly pulled down. Pull down the when the coffee selection buttons lever. are pressed • There is no water in the tank. Fill it up No coffee comes out •The clear hose inside the tank is not fully immersed in the water.
-
Page 24: Warranty
Warranty The warranty on the machine applies to the provisions in force. The machine has been manufactured using the latest production methods and has undergone strict quality tests. During the warranty period, the manufacturer will replace any faulty parts free of charge and repair any defects in workmanship.
Need help?
Do you have a question about the Map Coffee Presto and is the answer not in the manual?
Questions and answers