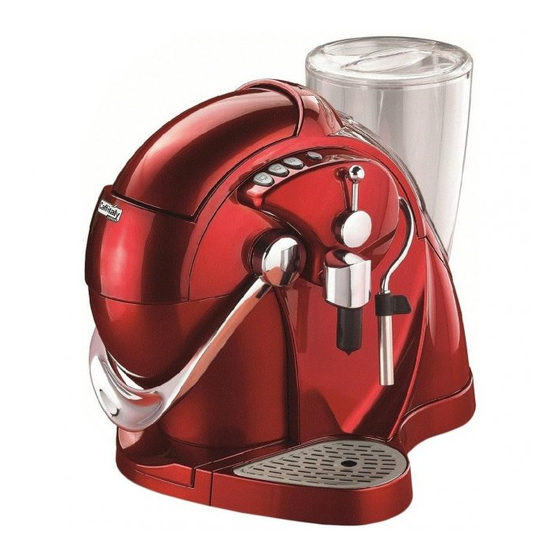
Caffitaly System S06HS Instruction Manual
Coffee brewer
Hide thumbs
Also See for S06HS:
- Instruction book (72 pages) ,
- Instruction manual (24 pages) ,
- Quick start manual (2 pages)
Table of Contents

Summary of Contents for Caffitaly System S06HS
-
Page 1: Instruction Manual
Model S06HS Imported by Maranatha Pty Limited Co ee maker Safety Unit 33 / 9 Hoyle Avenue, Castle Hill, N.S.W. 2154 Phone: 02 9846 0307 E-Mail: info@maranathaimport.com.au Web Site Contact: www.caffi talysystem.com.au Instruction manual... -
Page 2: Table Of Contents
English INDEX • Follow the instructions - Symbols ................. 2 • Your Caffi taly System contact ..................2 • Machine Elements ......................3 • Safety warnings ......................4 • Instructions for use and disposal .................. 5 • First use or after a long period no operation ..............5 •... -
Page 3: Machine Elements
English MACHINE ELEMENTS A: “Espresso Shot” (30ml) button; B: “Espresso Shot” (60ml) button; C: “Tea/Hot Water” button; D: “Multifunction” indicator light; E: Hot Water/Steam Control lever; F: Capsule compartment; G: Used capsule drawer; H: Power on/off Button; I: Lever for opening and closing capsule compartment; J: Water tank cover;... -
Page 4: Safety Warnings
English Safety warnings If you do not comply with the operating instructions and safety warnings in this Instruction Manual, the machine may become dangerous to operate. Please ensure you keep this Instruction Manual in a safe place. Carefully read the following instructions. This way you will avoid the risk of personal injury and damage to the appliance. -
Page 5: Instructions For Use And Disposal
English Instructions for use and disposal The appliance has been manufactured using high quality materials that can be reused or recycled. Dispose of the appliance in a suitable waste collection centre such as a public recycling yard. First use or after a long period no operation •... -
Page 6: Correct Use Of The Buttons
English Correct use of the buttons To dispense an Espresso shot (30ml or 60ml) use solely buttons A (30ml shot) or B (60ml shot) (both lit in WHITE). The same buttons, depending on the quantity, are to be used for dispensing capsules of Hot Chocolate (follow the specifi... -
Page 7: Programming The Quantity Of Coffee In A Cup
English Programming the quantity of coffee in a cup • Raise the lever to open the capsule compartment. • Insert the capsule, pressing it gently into place. • Close the lever fully. • Place a cup or mug under the dispensing spout. •... -
Page 8: Dispensing Hot Water
English Dispensing hot water WARNING! The tube for dispensing hot water reaches very high temperatures: Danger of scalding! The tube must only be handled using the special rubber grip. After each use, clean the tube with a damp cloth. • Place a metal container or cup under the hot water dispensing pipe. -
Page 9: Saving Energy
English Saving energy The machine will automatically reduce consumption after 1 hour of inactivity. Buttons A-B-C blink slowly and sequentially. To restore normal operating conditions, press any button or raise the lever. The appliance will start warming up. When buttons A-B-C turn on and remain steadily lit, the machine is ready for use. Daily maintenance •... -
Page 10: Descaling
English Descaling Descaling signal: When the D blinks YELLOW/ORANGE and the machine emits 3 beeps, it is advisable to perform the descaling cycle, as illustrated below. The machine features an advanced program that monitors how much water is used to dispense beverages. -
Page 11: Restore Original Settings (Reset)
Restore original settings (RESET) These instructions, allow you to reset the machine back to its factory settings – Helpful if you experience an issue with the machine, or you have changed the pour levels for example and cannot change them back to their original levels. The reset of the machine can be done with the following procedure: Start with machine OFF. -
Page 12: Technical Data
Technical data See the data plate on the base of the machine. The materials and objects in contact with Max. 15 bar food products comply with the requirements of European Regulation < 70dB A 1935/2004. About 5 kg 1.2 litres ambient temperature: 10°C - 40°C 220 mm 290 mm... - Page 13 .....................................................................................................................................................................................................................................................................................................................................................................................
- Page 14 .....................................................................................................................................................................................................................................................................................................................................................................................
- Page 15 .....................................................................................................................................................................................................................................................................................................................................................................................


Need help?
Do you have a question about the S06HS and is the answer not in the manual?
Questions and answers
Support request for Caffitaly S06HS model
Support for the Caffitaly S06HS model includes:
1. Instruction Manual – Covers safety warnings, machine components, usage instructions, cleaning, maintenance, troubleshooting, and technical data.
2. Customer Support Contact – Provided by Roasting Australia Holdings Pty Limited. You can contact them by phone at 02 9846 0307 or email at info@maranathaimport.com.au.
3. Warranty – The machine has a 12-month warranty from the date of purchase.
4. Replacement Parts – Available for purchase; users should check their specific machine model before ordering.
This answer is automatically generated