
Subscribe to Our Youtube Channel
Related Manuals for Caffitaly System S01HS


Summary of Contents for Caffitaly System S01HS
- Page 1 Manuale di istruzioni Instruction book Mode d'emploi Bedienungsanleitung Model S01HS / P01HS...
-
Page 2: Table Of Contents
Table of contents Introduction Intended use ..................27 Warning symbols ................... 27 Safety warnings ..................28 Instructions for use and disposal ............29 Your Ca taly System contact ............. 29 Description of machine components ..........30 Installation First use or after a long period of disuse .......... 31 Turning on the appliance .............. -
Page 3: Intended Use
Introduction Dear Customer, Thank you for having chosen our product and for your con dence in our company. You can savour your favourite hot beverages at any time of the day with our appliance by choosing one of the capsules that Ca taly o ers you. For example: An espresso, a cocoa- avoured beverage or a tea will be ready in just a few seconds. -
Page 4: Safety Warnings
Introduction Safety warnings Carefully read the following instructions! In this way you will avoid the risk of personal injury and damage to the appliance. After removing the packaging, check that the appliance is not damaged. If damage is found, or upon the rst sign of a defect (unusual noise or odours), do not use the appliance and contact the Authorised Service Centre. -
Page 5: Instructions For Use And Disposal
Introduction Descale the appliance regularly, following the instructions provided. If you do not, the appli- ance may be damaged and may become harmful to your health. Clean the appliance carefully and regularly. If it is not cleaned, the build-up that forms may be hazardous to your health. -
Page 6: Description Of Machine Components
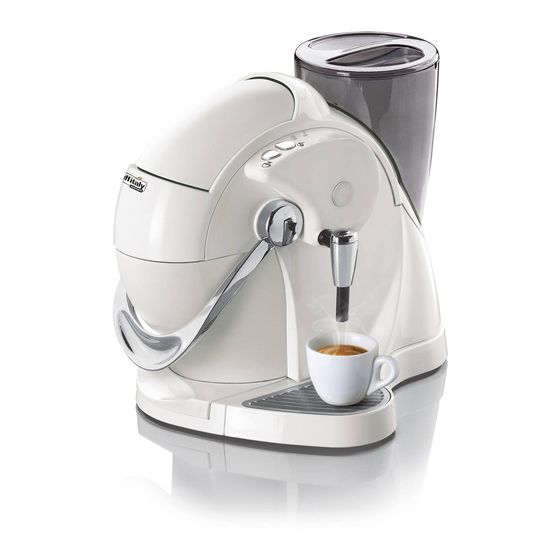
Introduction Description of machine components Water tank cover Water tank Capsule compartment Co ee / hot water / steam control lever Hot water / steam dispensing tube Used capsule drawer Power cord Adjustable co ee dis- penser Power on/o switch Lever for opening Drip tray capsule compartment... -
Page 7: First Use Or After A Long Period Of Disuse
First use or after a long period of disuse Plug in the appliance and turn it on. Fill the tank with fresh, still water. The multifunction indicator light blinks To ll the circuit, draw o approximately one in GREEN. After approximately 1 minute, it glass of water from the co ee dispensing spout becomes lit steadily and the appliance is ready (without using a capsule), setting the control... -
Page 8: Turning On The Appliance
Turning on the appliance Empty the water from the used capsule drawer. At the end of this step, set the lever back to its central position (0). Turning on the appliance The multifunction indicator light blinks Fill the tank with fresh, still water. Turning on in GREEN. -
Page 9: General Operating Indications
General operating indications Heating The multifunction indicator light blinks in GREEN. When the water runs out during operation Set the control lever back to the centre (0). When the multifunction indicator light is lit in RED, the water tank is empty. Fill the tank with fresh water. - Page 10 General operating indications If the lever is raised CAUTION! Raising the lever incorrectly while dispensing a product may cause brief splashes of hot water. Danger of scalding! If the lever is raised while a product is being The appliance will immediately stop dispensing. dispensed.
-
Page 11: Dispensing Co Ee
Dispensing co ee Caution! Before you start brewing, make sure the capsule container is not full. Raise the lever to open the capsule compart- Insert the capsule, pressing it gently into place. ment. Close the lever rmly. Place a cup or mug under the co ee dispensing spout. -
Page 12: Dispensing Lter Co Ee
Dispensing lter co ee Close the lever. Raise the lever to eject the used capsule into the drawer. Dispensing lter co ee Caution! Before you start brewing, make sure the capsule container is not full. Raise the lever to open the capsule compart- Insert the capsule, pressing it gently into place. - Page 13 Dispensing lter co ee Close the lever rmly. Press the lter co ee button; the lter co ee Place a mug under the co ee dispensing spout. indicator light is lit steadily in BLUE. When the desired quantity has been Turn the control lever to the co ee position.
-
Page 14: Dispensing Other Beverages
Dispensing other beverages Capsules for preparing beverages such as tea, chamomile tea, lter co ee, etc. are available. When using them, proceed as directed in Chapter 5, "Dispensing lter co ee". To prepare beverages using barley capsules, cocoa drinks, etc., proceed as directed in Chapter 4, "Dispensing co ee". -
Page 15: Dispensing Hot Water
Dispensing hot water CAUTION! During preparation there may be some brief splashes of hot water and the steam dispensing tube reaches very high temperatures. Danger of scalding! Handle the tube only by means of the special rubber grip. After each use, clean the tube with a damp cloth. Turn the control lever all the way to the right. -
Page 16: Preparing Cappuccino / Dispensing Steam
Preparing cappuccino / Dispensing steam CAUTION! During preparation there may be some brief splashes of hot water and the steam dispensing tube reaches very high temperatures. Danger of scalding! Handle the tube only by means of the special rubber grip. After each use, clean the tube with a damp cloth. - Page 17 Preparing cappuccino / Dispensing steam Move the container in a slight circular motion When preparation is complete, return the lever to ensure the milk is uniformly heated. to central position. Pour the heated and frothed milk into a co ee Press the steam button;...
-
Page 18: Daily Maintenance
Daily maintenance Take out the used capsule drawer; empty and Remove the drip tray and the grid. Empty the rinse it. drip tray. Wash the parts with fresh water. Remove the water tank. Empty and rinse out Remove the outside of the steam dispensing the tank. -
Page 19: Descaling
Descaling Descale the appliance regularly in accordance with the water hardness level. Water hardness French degrees German degrees Descale after ... cups 0 - 18°F 0 - 10°dH 1200 medium 18 - 36°F 10 - 20°dH high 36 - 54°F 20 - 30°dH CAREFULLY read the directions for use on the descaling agent packaging. - Page 20 Descaling Place a container (at least 250 ml) under the Make sure the lever is lowered. co ee dispensing spout. Turn the control lever to the co ee position. Press the Steam button and switch on the ma- chine; the multifunction indicator light blinks in GREEN and ORANGE alternately.
- Page 21 Descaling When the cycle is complete, the lter co ee Carefully rinse out the water tank and ll it indicator light blinks in BLUE. with fresh drinking water. Empty and rinse out the used capsule drawer Press the Steam button; the lter co ee indi- and drip tray.
- Page 22 Descaling Set the control lever back to the centre (0). Carefully rinse out the water tank and ll it with fresh drinking water. Empty and rinse out the used capsule drawer Turn o the machine. and drip tray. Use a soft cloth and a neutral detergent to clean the surfaces of the appliance.
-
Page 23: Changing The Gasket
Changing the gasket CAUTION! If the gasket shows signs of wear (small cuts or cracks, deforma- tions, ...) you can replace it easily using the spare gasket supplied in the pack. Perform the following operations only when the machine is cold; contact with the inside surfaces of the machine could cause burns. -
Page 24: Troubleshooting
Troubleshooting PROBLEM CAUSE SOLUTION - No co ee is dispensed / - The water tank is empty, the - Fill the tank with fresh water. No water is dispensed multifunction indicator light is - Press the steam button and wait until the lit in RED. -
Page 25: Technical Data
Technical data The materials and See the data plate on the bottom of the objects in contact with machine food products comply with the requirements Max. 15 bar of European Regulation 1935/2004. < 70dB A About 6 kg 2 litres 5°C - 15°C 220 mm 290 mm... - Page 26 www.ca taly.com...
Need help?
Do you have a question about the S01HS and is the answer not in the manual?
Questions and answers