Table of Contents
Advertisement
Available languages
Available languages
Advertisement
Table of Contents

Related Manuals for Oster FPSTSM5101


Summary of Contents for Oster FPSTSM5101
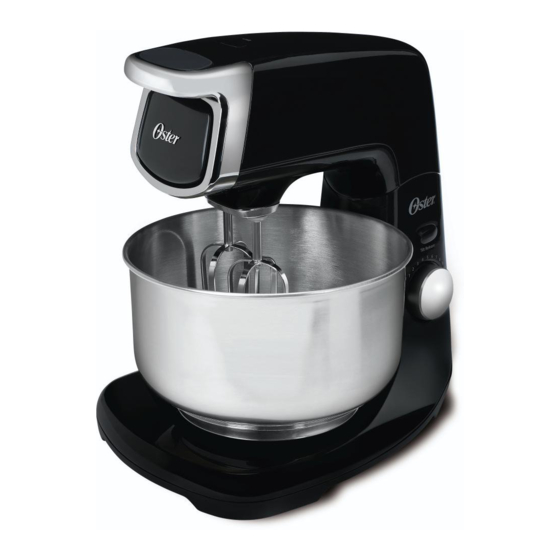
- Page 1 Questions? Visit www.oster.com Stand Mixer No vuelva este producto User Manual a lugar de compra. ¿Preguntas? Visita Batidora www.oster.com Manual de Instrucciones FPSTSM5101 MODELS/ FPSTSM5102 MODELOS Visit us at www.oster.com P.N. 135787 Rev. E...
-
Page 2: Important Safeguards
IMPORTANT SAFEGUARDS When using electrical appliances, basic safety precautions should always be followed, including the following: Read all instRuctions befoRe use 1. To protect against risk of electrical shock, do not put mixer in water or other liquid. This may cause personal injury or damage to the product. 2. -
Page 3: Special Instructions
SAVE ThESE INSTRUcTIONS Welcome Congratulations on your purchase of a Oster Stand Mixer! To learn ® more about Oster products, please visit us at www.oster.com. - Page 4 eatures oF tand ixer A. attachment eject button – The eject button, located on the top of the handle, releases the beaters or dough hooks for easy cleaning. B. Variable bowl speed – The bowl speed increases and decreases automatically as the beater speed is increased and decreased. C.
- Page 5 n select mOdels Only ttachMents E. turntable – The bowl of the stand mixer fits onto the turntable and must be positioned correctly for the mixer to function properly. See page 7 for “Positioning the Turntable” F. chrome steel dough Hooks – Heavy-duty dough hooks take the hard work out of kneading dough and other heavy mixtures.
-
Page 6: P Reparing The S Tand
eatures oF tand ixer cont reParing the tand ixer For Before preparing the mixer for use, be sure the speed control dial is in the OFF position and the electric cord is unplugged. Be sure to wash bowls and attachments before initial use. osition the urntable Figure 1... -
Page 7: I Nstalling The A Ttachments
nstalling the ttachMents Beaters, Dough Hooks, and Whisks (on select models) Select the pair of attachments best suited for your mixing job. (See Mixing Guide for recommendations). Take the attachment that has a green colored band around the top – illustrated as attachment (A). -
Page 8: Perating I Nstructions
reParation dding the ixing Place the mixing bowl onto the turntable. : Mixing bowls should NEVER be used in a conventional oven, microwave oven, on top of the range or on any other heated surface. Beaters must sit against the inside of the bowl. -
Page 9: M Ixing G Uide
ixing uide Please keep in mind that the various mixing tasks and related speeds listed in the following table may vary slightly from recipe to recipe. For most recipes, it is better to begin your mixing on a slower speed until the ingredients begin combining, then move to the appropriate speed range for the particular task. -
Page 10: C Aring F Or Y Our M Ixer
aring ixer leaning ixer To clean the mixer, turn off and unplug from outlet, wipe the mixer head, stand and turntable with a damp cloth, then dry. DO NOT IMMERSE THE STAND MIXER IN WATER. Avoid the use of abrasive cleaners, as they may damage the finish of the mixer. Wash the beaters and bowls in hot, soapy water after each use. -
Page 11: Helpful Hints
• Mixer is designed to be off-center when the large bowl (included) is used for best performance. • To remove the Turntable for cleaning or to change bowl size, reach under the base of the Stand Mixer and squeeze prongs in and lift Turntable up. replacement parts and accessories are available from Oster.com or by calling 1-800-334-0759 Turntable hole Turntable hole for Small Bowl... -
Page 12: Two-Year Limited Warranty
two Year limited Warranty Sunbeam Products, Inc. doing business as Jarden Consumer Solutions or if in Canada, Sunbeam Corporation (Canada) Limited doing business as Jarden Consumer Solutions (collectively “JCS”) warrants that for a period of two years from the date of purchase, this product will be free from defects in material and workmanship. -
Page 13: For More Information
20 B Hereford Street, Brampton, Ontario L6Y 0M1. If you have any other problem or claim in connection with this product, please write our Consumer Service Department. Please do not RetuRn tHis PRoduct to anY of tHese addResses oR to tHe Place of PuRcHase. Please also see WWW.osteR.coM foR MoRe infoRMation. English-13... -
Page 14: Precauciones Importantes
PREcAUcIONES IMPORTANTES Cuando use algún aparato eléctrico siempre deben seguirse precauciones básicas de seguridad incluyendo las siguientes: lea todas las instRucciones antes de usaR 1. Para protegerse contra peligros de electricidad no sumerja la batidora en agua u otros líquidos ya que podría ocasionar lesiones personales o daños al producto. -
Page 15: Instrucciones Especiales
También, no tire, no tuerza ni abuse de otra manera del cable eléctrico; en lugar, agarre el enchufe y tire para quitar del enchufe. GuaRde estas instRucciones Bienvenidos ¡Felicitaciones por su compra de una Batidora. Para aprender más sobre productos Oster , por favor visítenos en www.oster.com! ® Español-15... - Page 16 aracterísticas de atidora A. Botón de Expulsión – El botón de expulsión localizado en la parte superior del asa libera los batidores o ganchos para amasar para una fácil limpieza. B. Velocidad Variable del Tazón – La velocidad del tazón aumenta y disminuye automáticamente a medida que se incrementa o disminuye la velocidad de los batidores.
- Page 17 n algunOs mOdelOs sOlamente ccesorios Plataforma giratoria – El tazón de la batidora encaja en la plataforma giratoria y debe posicionarse en la forma correcta para que la batidora funcione correctamente. Ver en la página 25 “Cómo colocar la plataforma giratoria”.
- Page 18 aracterísticas de atidora cont óMo reParar la atidora Por riMera Antes de preparar la batidora por primera vez, asegúrese de que el disco de control de velocidades se encuentre en la posición OFF y que el electrodoméstico esté desenchufado. Asegúrese de lavar los recipientes y accesorios antes de usarlos por primera vez.
-
Page 19: C Ómo C Olocar Los A Ccesorios
inclinada. Con dicho botón pulsado, sostenga el asa (2) y baje el cabezal (1). Un clic indicará cuándo el cabezal queda fijado en posición. (Vea Figura 2) óMo olocar los ccesorios Batidores, Ganchos para Amasar y Batidores para airear (En algunos modelos solamente) Seleccione el par de accesorios adecuados para la mezcla. -
Page 20: Instrucciones Operativas
reParación óMo gregar el azón de ezclado Ubique el tazón de mezclado sobre la plataforma giratoria. NOTA: Los tazones de mezclado NUNCA se deben utilizar en hornos convencionales, hornos microondas, sobre la estufa o sobre cualquier otra superficie caliente. Los batidores deben estar en la parte interior del tazón. - Page 21 uía de ezclado Tenga en cuenta que las diversas tareas de mezclado y velocidades relacionadas listadas en la siguiente tabla pueden variar levemente de una receta a otra. Para la mayoría de las recetas, es mejor comenzar su proceso de mezclado a una velocidad más lenta hasta que los ingredientes comiencen a unirse;...
-
Page 22: C Ómo C Uidar S U B Atidora
óMo uidar atidora óMo iMPiar atidora Limpie el cabezal de la batidora, apagar, desenchufar la base y la plataforma giratoria con un paño húmedo; después, séquelos. NO SUMERJA LA BATIDORA EN AGUA. Evite el uso de limpiadores abrasivos porque pueden dañar el acabado de la batidora. Lave los batidores y tazones en agua caliente y jabonosa después de cada uso. -
Page 23: Consejos Prácticos
(incluido) para un mejor desempeño. • P ara retirar la plataforma giratoria para limpiar o cambiar el tamaño del tazón, por debajo de la base de la batidora apriete las clavijas y levante la plataforma. Los repuestos y accesorios están disponibles en Oster.com o llamando al 1-800-334-0759. Orificio en Orificio en... - Page 24 Garantía limitada de 2 años Sunbeam Products, Inc. operando bajo el nombre de Jarden Consumer Solutions, o en Canadá, Sunbeam Corporation (Canada) Limited operando bajo el nombre de Jarden Consumer Solutions, (en forma conjunta, “JCS”), garantiza que por un período de dos años a partir de la fecha de compra, este producto estará...
- Page 25 Departamento de Servicio al Consumidor. PoR faVoR no deVuelVa este PRoducto a ninGuna de estas diRecciones ni al luGaR de coMPRa. PoR faVoR, consulte WWW.osteR.coM PaRa MÁs infoRMaciÓn Español-25...
- Page 26 NOTES/NOTAS...
- Page 27 NOTES/NOTAS...
- Page 28 For product questions: Oster Consumer Service USA : 1.800.334.0759 Canada : 1.800.667.8623 www.oster.com © 2011 Sunbeam Products, Inc. doing business as Jarden Consumer Solutions. All rights reserved. Distributed by Sunbeam Products, Inc. doing business as Jarden Consumer Solutions, Boca Raton, Florida 33431.
Need help?
Do you have a question about the FPSTSM5101 and is the answer not in the manual?
Questions and answers