Table of Contents
Advertisement
Quick Links
Advertisement
Table of Contents

Related Manuals for Audionet MAP


Summary of Contents for Audionet MAP
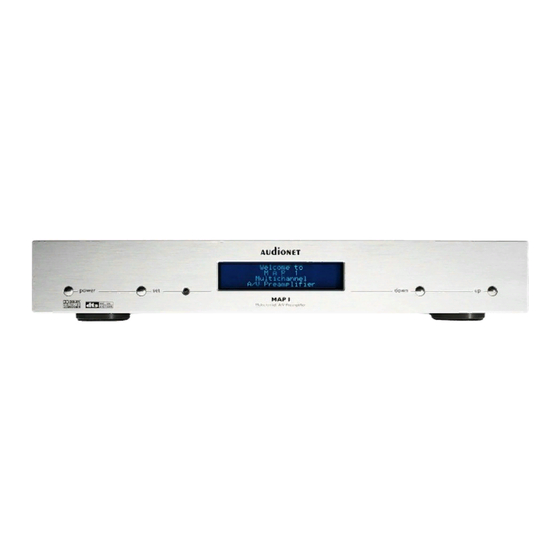
- Page 1 Audionet Multi Channel Audio/Video Pre - Amplifier User's Manual V1.1...
-
Page 2: Placement And Connection
'Phase'/'Hot pin' is marked at the back panel ('Phase') 23. The MAP is a stand by device. Please use the mains switch 23 at the back panel to switch on the MAP. After a short time the display reads 'Audionet' to show that the unit is in stand by mode. -
Page 3: Audionet Link
To disconnect both units from mains please switch off first the MAP, then the EPS. Before switching off the MAP make sure it is in stand by mode by pressing the POWER key at the front panel or remote control. - Page 4 External 8-Channel Analog Inputs: Plug in analog multi channel sources (external decoder, DVD-Player with internal decoder, SACD-Player etc.) into the 8-channel analog input 11 of the MAP. Alternatively, you can use this input for MultiRoom mode (see chapter 'MultiRoom feature').
- Page 5 Setup Setup at front panel: There are 4 keys at the front panel to control the MAP. Most of the setup can be done using those keys. For more comfort please use the provided remote control COM. The 'POWER' key is used to switch on/off the MAP. To change volume or any settings in the setup menus please press the UP and DOWN keys.
- Page 6 Overview setup menus: ® Select Input ® Listening Mode RUN mode ¯ ® Center Offset ® Left Surround Offset ® Right Surround Offset ® Left Aux Offset ® Right Aux Offset ® LFE Mix Offset ® Sub Offset Bal. Front ¯...
- Page 7 Description of all menu items RUN mode: This is the normal operation mode if no menu is selected. Use UP and DOWN keys to adjust the master volume. The display shows name and number of selected input channel in the first line. The second line shows the current volume (see section 'Display'). Select Input: Use UP and DOWN keys to select desired input channel.
- Page 8 Left/Right Aux Offset: Use UP and DOWN keys to trim level of the Aux channels(+10...-10dB). Note: These menus are only available, if 'Internal Decoder' is set to 'active' or 'External 8ch In' is selected. LFE Mix Offset: Use UP and DOWN keys to trim level of LFE channel (0...-10dB). Note: This menu is only available, if 'Internal Decoder' is set to 'active'.
- Page 9 DimensionControl and Panorama) that allow the sound to be tailored to your listening tastes. All three of these controls may be used alone or in any combination. After you experiment with them on a few programs, you will easily understand their effect and which setting you may prefer. 'Pro Logic': Original Dolby Pro Logic mode.
- Page 10 Use UP and DOWN keys to adjust the input channel offset. You can add gain or attenuate each input channel indenpentely within a range of +9...-9dB in order to compensate different output levels of sources connected to the MAP. Edit Channel Name: For each input channel you can choose a name up to 14 characters in length (exception: the name for the Monitor/Effects loop is up to 12 characters in length).
- Page 11 Center Speaker: Use UP and DOWN keys to select size of Center speaker. 'none': No Center speaker is available. Center channel information is redirected to Front speakers L/R. 'small': Bass below subwoofer crossover frequency (Sub X-Over Freq) is redirected to Front L/R or subwoofer channel depending on the settings for Front speakers.
- Page 12 Use buffered input if the output impedance of sources connected to the 8-ch. analog input is greater than 100 Ohms. Note: If you connect Audionet devices to the 8-ch. analog input, the input signals do not need to be buffered. In this case use option 'direct'.
-
Page 13: Remote Control
Press 'menu' key on remote control to get into the main menu. There you will find 2 keys named 'MAP' and 'MAP Setup'. If you want to change any setup options of the MAP, press key 'MAP Setup'. You get into the 'MAP Setup' sub-menu. All keys relevant while listening you will find in the sub-menu 'MAP'. - Page 14 (with 'SET' key) the menu does not offer the items for controlling Dolby Pro Logic II mode. These functions are available through a separate key ('PL II Mode') in menu 'MAP', screen 2. 'Video Setup' enters the 'Video Menu' (see 'Overview setup menus').
- Page 15 Press key 'DynRng' to enter Dynamic Range menu. Use keys 'Vol+' and 'Vol-' to select desired dynamic range. 'Max': full dynamic range, no compression at all 'Std': medium dynamic range, moderate compression 'Min': minimal dynamic range, full compression Note: This menu is only available, if 'Internal Decoder' is set to 'active'. Press key 'Listening Mode' to select desired Listening Mode.
- Page 16 'Video Out 1' (as cinch video and S-Video signal). Press key 'DigiFilt' to select the digital filter. Use keys 'Vol+' and 'Vol-' to choose between 4 different digital oversampling filters for Front channels L/R. 'Audionet': Special digital oversampling filter with short pre-ringing 'Lagrange': short Lagrange filter...
- Page 17 pressing 'mute/ENTER' key. While cursor is active get to the names of the other user setting with keys 'CH+' and 'CH-'. To leave edit mode press 'Load' again. To save the current setting as user setting press key 'Save' and choose one of the 16 memory spaces with 'VOL+' and 'VOL-' keys.
- Page 18 If internal decoder is inactive ('Internal Decoder' = 'disabled'), the volume is displayed in the second line as 'LEVEL – xx+y dB' with xx = current volume and y = offset adjust for current input channel. If internal decoder is active, the second line changes to 'MASTER – xx dB' with xx = current master volume of all channels.
-
Page 19: On Screen Display (Osd)
On Screen Display (OSD) Activate the On Screen Display by pressing the key 'OSD' on the remote control COM. The signal of the OSD is available at the video outputs 'Video Out 1' inm cinch video and S- Video format and replaces the current video image. Press 'OSD' again to switch the On Screen Display off. - Page 20 Alternatively, you can use the 8-channel analog input 'External 8ch Input' 11 to connect 4 separate 2-channel analog sources simultaneously to the MAP. The multi channel outputs are then to be connected (following the assignment listed beneath) to 4 separate stereo amplifiers driving speakers in 4 different rooms.
-
Page 21: Security Advice
Do not open the case. Unauthorised opening will cause loss of guarantee. ¨ Use a dry cloth for cleaning We would like to wish you many exciting listening experiences with your new Audionet product! If you still have any questions, don't hesitate to ask your competent Audionet dealer. -
Page 22: Technical Data
1 YUV/RGB video out (cinch) 1 VGA video out (SubD15HD) Outputs 1 "Audionet-Link" (optical) Inputs 1 7-pin jack for Audionet EPS (external power supply) 1 jack for additional ground connection Options line doubler video board MC/MM phono preamplifier external power Supply "Audionet EPS"... - Page 23 Features programmable infrared remote control with LCD-Touch-Screen selectable internal or external multi -channel decoder (Dolby Digital, DTS) 8-channal input configurable as 4 separate stereo inputs for multi-room usage On Screen Display Y/C-Separator with digital comb filter for CBVS-video-in to S-video-out conversion optional line doubler plug-in card for interlace-free video out selectable digital oversampling filters...
- Page 24 Digital inputs Samplefrequency 32 to 96 kHz (ready for 192kHz) "PCM-Direct"-Mode, 48kHz/96kHz THD+N >104 dB / >110 dB (A) @ 1kHz, -60dB >106 dB / >110 dB (a) @ 1kHz PCM-Mode (Dolby Config 1), 48kHz THD+N @ 1kHz, -60dBFS Front >100dB >108dB (A) Dolby Digital (Config 1)
- Page 25 “ DTS” and “ DTS Digital Surround” are registered trademarks of Digital Theater Systems, Inc. Copyright 1996, 2000 Digital Theater Systems, Inc. All rights reserved. Engineered and produced by: Idektron GmbH & Co. KG, Herner Str. 299, Gebä ude 6, 44809 Bochum www.audionet.de contact@audionet.de...
Need help?
Do you have a question about the MAP and is the answer not in the manual?
Questions and answers