Table of Contents
Advertisement
Available languages
Available languages
Register your product and get support at
www.philips.com/welcome
HD9015
HD9016
EN User manual
BG
LT Vartotojo vadovas
CS
PL
ET Kasutusjuhend
RO Manual de utilizare
HR
SK
HU Felhasználói kézikönyv
SL
KK
SR
LV
Specifications are subject to change without notice
© 2012 Koninklijke Philips Electronics N.V.
All rights reserved.
HD9015/HD9016_UM_01
314003533731
English
1 Important
Read this user manual carefully before you use the appliance, and save the user manual for
future reference.
Danger
Never immerse the body of the breadmaker in water or any other liquid, nor rinse it
under the tap.
Do not cover the steam and air vents while the breadmaker is operating.
Warning
years and above and persons with reduced physical,
sensory or metal capabilities or lack of experience
and knowledge if they have been given supervision
or instruction concerning use of the appliance in a
safe way and understand the hazards involved.
Children shall not play with the appliance. Cleaning
and user maintenance shall not be made by children
Keep the appliance and its cord out of reach of
hang over the edge of the table or worktop on
which the appliance stands.
If the mains cord is damaged, you must have it
replaced by Philips, a service centre authorised by
avoid a hazard.
The appliance is not intended to be operated by
means of an external timer or a separate remote
control system.
The accessible surfaces may become hot during use.
yeast for general bread, super rapid bread, and
easter cake programs respectively.
Check if the voltage indicated on the appliance corresponds to the local mains voltage
before you connect the appliance.
Only connect the appliance to an earthed wall socket. Always make sure that the plug
Do not use the appliance if the plug, the mains cord, the body of the appliance or the
bread pan is damaged.
Make sure that the heating element, the rotating shaft of the bread pan and the outside
of the bread pan are clean and dry before you put the plug in the wall socket.
Do not use the appliance for any other purpose than described in this manual.
Do not plug in the appliance or operate the control panel with wet hands.
Do not come near the steam and air vents with your face or hands when the appliance
is operating.
Do not open the lid during the baking process, as this may cause the dough or bread
to collapse.
During the baking process, the appliance itself and the lid become extremely hot. Be
careful not to burn yourself.
Do not remove the bread pan from the appliance during use.
Never use any utensils to mix the ingredients in the bread pan during a baking program.
Only put ingredients in the bread pan. Do not put or spill any ingredients and/or
additives in the inside of the appliance to avoid damage to the heating element.
When you remove jam from the bread pan, lift the bread pan with both hands in oven
mitts to pour out the hot jam.
Caution
This appliance is intended for household use only. If
the appliance is used improperly or for professional
according to the instructions in the user manual, the
guarantee becomes invalid and Philips refuses any
liability for damage caused.
Never use any accessories or parts from other manufacturers or that Philips does not
invalid.
a
b
c
d
Do not touch the bread pan with sharp utensils to avoid damage.
Do not expose the appliance to high temperatures, nor place it on a working or still
hot stove or cooker.
Always place the appliance on a stable, level and horizontal surface.
Always put the bread pan in the appliance before you put the plug in the wall socket
and switch on the appliance.
Always unplug the appliance after use.
Always let the appliance cool down before you clean or move it.
Do not place the bread pan in a conventional oven to bake bread.
The accessible surfaces may become hot when the appliance is operating. Always use
oven mitts when you lift the bread pan by its handle or when you handle the hot bread
pan, the kneading blade or the hot bread.
Beware of the hot steam that comes out of the steam vents during baking or out of
the breadmaker when you open the lid during or after the baking process.
Do not lift and move the appliance while it is operating.
Do not touch moving parts.
Do not expose the appliance to direct sunlight.
Do not insert metallic objects or alien substances into the steam vents.
Do not use the bread pan if it is damaged.
Always clean the appliance after use.
Do not clean the appliance in the dishwasher.
Do not use the appliance outdoors.
Leave a free space of at least 10cm above, behind and on both sides of the appliance
to prevent damage due to radiated heat.
To avoid damage to the appliance, do not place the bread pan or any other object on
top of the appliance.
Recycling
Your product is designed and manufactured with high quality materials and components,
which can be recycled and reused.
product is covered by the European Directive 2002/96/EC:
Never dispose of your product with other household waste. Please inform yourself about
the local rules on the separate collection of electrical and electronic products.
The correct disposal of your old product helps prevent potentially negative
consequences on the environment and human health.
handled properly and according to the instructions in this user manual, the appliance is safe
Power failure backup
This appliance has a backup function that remembers the status before a power failure,
provided the power supply resumes within 10 minutes. If the power failure occurs during
a cooking process, the countdown of the cooking time continues where it left off when
the power supply resumes. If the power failure lasts longer than 10 minutes and the failure
occurs during a cooking process, the breadmaker automatically resets to the preset setting
when the power supply resumes. Open the breadmaker, remove its contents and start all
over again. If you have set the timer and the preset cooking process has not yet started when
a power failure occurs, the breadmaker automatically resets to the preset setting when the
power supply resumes. Open the breadmaker, remove its contents and start all over again.
2 Introduction
that Philips offers, register your product at www.philips.com/welcome.
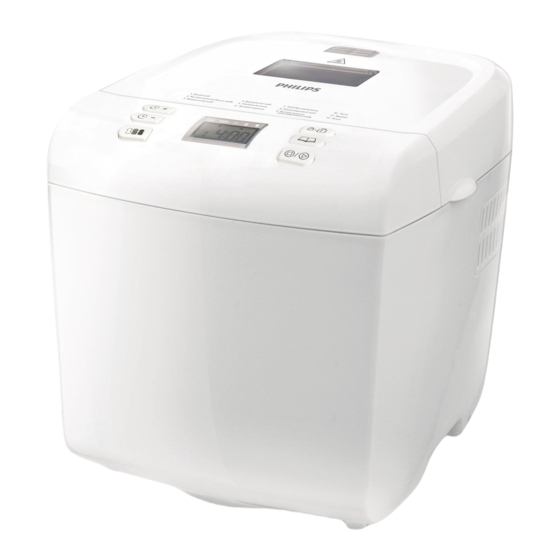
3 Your breadmaker
Main unit
Viewing window
Control panel
Cover lid
Mains plug
Control panel
Timer increase
Loaf weight
Timer decrease
Program menu
Crust color
Start/stop/cancel button
LCD status display
Accessories
Kneading blade
Measuring spoon
Bread pan
Measuring cup
Hook
Yoghurt container with lid (HD9016 only)
e
f
X1
g
X4
X5
(HD9015)
(HD9016)
X8
X8
X11
BEEP
(HD9016 only)
4
Use your breadmaker
1
Remove all packaging material from the appliance. Be careful not to throw away the
kneading blade.
2
Remove any labels from the body of the appliance.
3
To remove any dust that may have accumulated on the appliance, wipe the outside of
the appliance, the bread pan and the kneading blade with a damp cloth.
Note
Never use scouring pads, abrasive cleaning agents or aggressive liquids such as petrol or
acetone to clean the appliance.
4
Dry all parts thoroughly before you start to use the appliance.
Prepare your breadmaker and ingredients
1
Put your breadmaker on a stable, horizontal and level surface.
2
Turn the bread pan anticlockwise and lift it out.
3
4
Measure the ingredients for the recipe you want to prepare (see the recipes booklet).
Always measure ingredients accurately.
All ingredients should be at room temperature unless recipe suggests otherwise.
5
Put ingredients in the bread pan in the order they are listed in the recipe.
Do not let the yeast touch the salt.
Note
Do not add more quantities than mentioned in the recipe as it may damage the breadmaker.
Always use active dry yeast with this breadmaker.
The yeast should be dry and separate from other ingredients when it is added to
the bread pan.
Butter and other fats should be cut into small pieces before putting in the bread
pan to aid the mixing.
If necessary, use a spatula to scrape down the sides of the bread pan to get the
mixture sticking to the wall back to the mix.
During the mixing stage, there will be beep sounds to alert you to add additional
ingredients such as nuts if you wish.
6
Put the bread pan in the appliance. Turn the bread pan clockwise until it locks into
position.
Note
If the bread pan is not assembled properly, the kneading blade does not turn.
7
Put down the handle of the bread pan and close the lid of the appliance.
8
Put the mains plug in the wall socket.
» The appliance beeps and '1' and '3:55' appear on the display, which refers to the
'White' program.
Set your breadmaker
1
Press
(menu button) repeatedly to select the program.
The select program number and processing time are displayed.
For detailed program description, see section 'Bread recipe' supplied.
2
Press
(crust color button) repeatedly to select the crust color.
The selected crust color can be changed from light to dark.
3
Press
(loaf weight button) repeatedly to select the loaf weight.
Make sure the selected weight is appropriate for the amount of ingredients of the
selected recipe. See section 'Bread recipe' supplied.
4
Press
(Start/stop button) to start bread making process.
Caution
During the baking process, the breadmaker itself and the lid become extremely hot. Be careful
not to burn yourself.
» The display counts down the processing time until the bread is ready.
»
warm mode (for 60 minutes).
Preset time for delayed baking
You can use the timer if you want the bread to be ready at a later time. The maximum delay
time that can be set is 13 hours.
Note
Do not use the timer function with recipes that require fresh ingredients that may go bad, for
instance eggs, fresh milk, sour cream or cheese.
1
Put all ingredients in the bread pan.
2
Select the appropriate program, loaf size and crust color for your recipe.
» The total processing time is shown on the display.
3
Press
(timer increase and timer decrease)
to choose the desired preset time.
» The breadmaker enters preset mode.
X2
X3
X6
X7
X9
X10
For example, if the current time is 19:00 and you want your bread ready at 7:00
next morning (12 hours later), you can set the preset time to 12:00.
If you keep the button pressed, the time increases more quickly.
If the time on the display reaches 13 hours and you still keep the timer button
pressed, the display goes back to the baking time of the set program.
4
Press
(start/stop/cancel button).
» The timer counts down the set time in minutes.
» The bread is ready when the timer has counted down to 0:00 and the
breadmaker beeps.
Finish the baking process
Caution
The inside of the breadmaker, the bread pan, the kneading blade and the bread are very hot.
Always use oven mitts when you remove the bread pan at the end of the baking cycle or at
1
To power off the breadmaker, remove the mains plug from the wall socket.
2
Using pot holders or oven mitts, open the lid and turn the bread pan anticlockwise.
3
Grab the bread pan by its handle and lift it out.
4
Turn the pan upside down, hold the handle and shake the bread out.
Note
the bread pan.
Be careful, the bread pan and the bread are hot.
5
Use the hook supplied to remove the kneading blade from the shaft/bread.
Always make sure that the kneading blade does not stay inside the bread,
otherwise you may damage the kneading blade when you slice the bread.
6
Let the breadmaker cool down before you clean it.
Note
Ensure the yogurt container is thoroughly washed with warm water, and it is dried
before making yoghurt.
Full fat, skim, or 2% milk can be used.
Make sure the yoghurt is fresh and thus the culture starter is active.
1
The milk and yoghurt mixture proportion is 10:1 (For example: 400ml milk with 40ml
yoghurt).
2
Pour milk into the yoghurt container.
3
Add yoghurt into the yoghurt container, and mix well.
4
Close and tighten the lid.
5
Start the yoghurt program.
»
5 Cleaning and Maintenance
Note
Uplug the breadmaker before starting to clean it.
Never immerse the appliance in water or any other liquid, nor rinse it under the tap.
Never use scouring pads, abrasive cleaning agents or aggressive liquids such as petrol or
acetone to clean the appliance.
For maximum safety, keep the appliance clean and free of grease and food residues.
Interior
Inside of the cover and the main body:
Wipe with wrung out and damp cloth.
Make sure to remove all the food residues stuck to the breadmaker.
Heating element:
Wipe with wrung out and damp cloth.
Remove food residues with wrung out and damp cloth or toothpicks.
Exterior
Surface of the cover lid and outside of the main body:
Wipe with a cloth damped with soap water.
ONLY use soft and dry cloth to wipe the control panel.
Make sure to remove all the food residues around the control buttons.
Accessories
Bread pan:
liquid.
Do not immerse the bread pan in water and do not clean it in the dishwasher.
Kneading blade, measuring spoon and cup, and hook:
Soak in hot water and clean with sponge.
Yoghurt container with lid:
Thoroughly washed with warm water.
Make sure it is dried before use.
Tip
After baking, immediately remove the kneading blade from the bread pan to prevent it from
getting stuck.
6 Storage
Store your breadmaker in a safe and dry place.
7 Bread ingredients
contains high protein), it has good elastic and can keep the size of the bread from collapsing
ingredient of making bread.
usually has darker color and stronger taste than white and wheat bread. It should be used
texture.
steam bun and fried bread sticks.
Sugar
Sugar is very important ingredient to increase sweet taste and color of bread. And it is also
considered as nourishment in the yeast bread. White sugar is largely used. Brown sugar,
powder sugar or cotton sugar may be called by special requirement.
Yeast
After yeasting process, the yeast will produce carbon dioxide. The carbon dioxide will
yeast.
Yeast must be stored in the refrigerator, as the fungus in it will be killed at high temperature,
before using, check the production date and storage life of your yeast. Store it back to the
refrigerator as soon as possible after each use. Usually the failure of bread rising is caused by
the bad yeast.
Salt
rising. Never use too much salt in a recipe. But bread would be larger if without salt.
Egg
Eggs can improve bread texture, make the bread more nourish and large in size, the egg
should be stirred evenly.
Grease, butter and vegetable oil
Grease can make bread soften and delay storage life. Butter should be melted or chopped to
small particles before using.
Water and other liquid
Water is essential ingredient for making bread. Generally speaking, water temperature
between 20°C and 25°C is the best. The water may be replaced with fresh milk or water
orange juice, lemon juice and so on.
8 Environment
Do not throw away the appliance with normal household waste at the end of its life, but
the environment.
9 Guarantee and service
If you need service or information, or if you have a problem, visit the Philips website at www.
your country, go to your local Philips dealer.
Lietuviškai
1 Svarbu
jo gali prireikti ateityje.
Pavojus
pavojais.
kurio laikomas prietaisas, krašto.
kitaip kyla pavojus.
Naudojimo metu prieinami paviršiai gali
pyrago programas.
Prietaiso nenaudokite, jei maitinimo laidas, kištukas, prietaisas ar duonos keptuvas yra
sausi.
Nenaudokite prietaiso kitais tikslais, išskyrus nurodytus šiame vadove.
Nejunkite prietaiso ir nesinaudokite valdymo pultu šlapiomis rankomis.
Prietaisui veikiant neišimkite iš jo duonos keptuvo.
keptuve maišyti.
naudosite ne pagal vartotojo vadovo instrukcijas,
Advertisement
Table of Contents

Related Manuals for Philips HD9015


Summary of Contents for Philips HD9015
- Page 1 Do not throw away the appliance with normal household waste at the end of its life, but the environment. 9 Guarantee and service If you need service or information, or if you have a problem, visit the Philips website at www. BEEP your country, go to your local Philips dealer.
- Page 2 Rodomas pasirinktos programos numeris ir apdorojimo laikas. Paspausdami Paspausdami Paspauskite procesas. Aplinkosauga Uwaga Atsargiai un centru de service autorizat de Philips sau de nowa. » » accident. Wlej mleko do pojemnika na jogurt. welcome. unui cronometru exterior sau al unui sistem separat...
- Page 3 Înainte de prima utilizare detergent lichid. Výstraha Recipient de iaurt cu capac: » » Sugestie 9 Záruka a servis lipirea acesteia.. 6 Depozitarea Poznámka predajcu výrobkov Philips. 7 Ingrediente pentru pâine » 1 Pomembno uporabo. » uscate. Nevarnost 12:00. nikdy nezakrývajte. rezultat.
- Page 4 Oprez Glavna enota Notranjost pokrova in glavnega ohišja: » 9 Garancija i servis Pregledno okence Ukoliko su vam potrebne informacije ili ako imate neki problem, posetite Philips Web lokaciju Grelni element: Pokrov nepropisno, za profesionalne ili poluprofesionalne Zunanjost Napomena Površina pokrova in zunanja površina glavnega ohišja: Meni s programi Odstranite vso preostalo hrano okoli upravljalnih gumbov.
- Page 5 Výstraha Recyklace Poznámka » chleba mohli poškodit. Poznámka 2 Úvod » » » 3 Pekárna Poznámka Hlavní jednotka vodou. Ovládací panel » » Stavový displej LCD 12:00. » » HD9016) 6 Skladování Poznámka Chlebová mouka jsou bez dozoru. uvedeno jinak. Poznámka welcome.
- Page 6 Spremnik za jogurt s poklopcem: Temeljito operite toplom vodom i sredstvom za pranje. Kuka Spremnik za jogurt s poklopcem (samo Ärge kunagi kasutage teiste tootjate poolt tehtud tarvikuid või osi, mida Philips ei ole Pange leivavormi kõik koostisained. Hrvatski HD9016) Prije korištenja provjerite je li suh.
- Page 7 Megjegyzés Rozsliszt Kukoricaliszt és zabliszt elkerülése érdekében azt egy Philips szakszervizben, vagy hivatalos szakszervizben ki kell cserélni. Háztartási liszt ragadt keveréket, visszajuttatva azt a keverésbe. Cukor felforrósodhatnak. A készülékbe ne helyezzen 560 g lisztnél, valamint Megjegyzés...
- Page 8 Pilngraudu kviešu milti receptes tiek apvienoti pilngraudu kviešu milti vai maizes milti. Rudzu milti Cukurs Raugs sauso raugu. » Olas programmai. » svaru. Nospiediet pogu » 9 Garantija un apkalpošana » lietojot virtuves cimdus. aiztures laiks ir 13 stundas. » Nospiediet »...
Need help?
Do you have a question about the HD9015 and is the answer not in the manual?
Questions and answers