Table of Contents
Advertisement
Quick Links
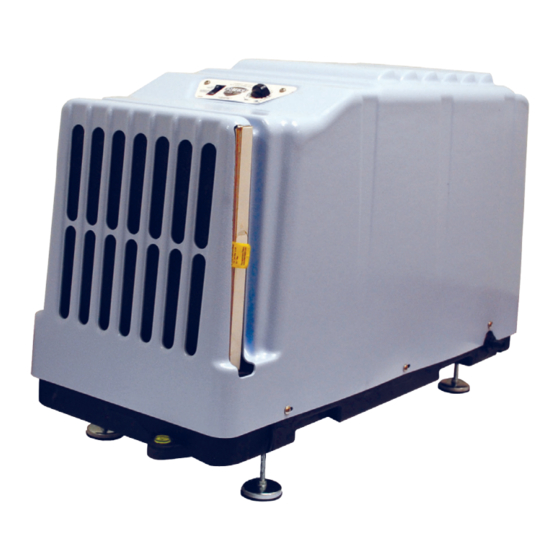
Quest DRY 180
Quest DRY 90
Installation, Operation and Maintenance Instructions
Installation, Operation and Maintenance Instructions
– Read and Save These Instructions –
– Read and Save These Instructions –
This manual is provided to acquaint you with
the dehumidifier so that installation, operation
and maintenance can proceed successfully.
Ultimate satisfaction depends on the quality
of installation and a thorough understanding
of this equipment. The dehumidifier is built
around tested engineering principles and has
passed a thorough inspection for quality of
workmanship and function.
Quest DRY 180:
• Uses only 6.7 amps of electricity (115
Volt)
• 90 pints water removal per day at 80°F
and 60%RH
• Plug-N-Play
• Defrost controls
• Superior air filtration (MERV-11 Standard)
• Auto-Restart after power outages
• Environmentally friendly R410A refigerant
quest
quest
Specifications subject to change without notice.
Water Removal Rates (Pints/Day)
90 pints
180 pints
4201 Lien Rd.
Madison, WI 53704
www.QuestHydro.com
1
80˚F, 60% (AHAM)
86˚F, 80%
Phone 608-237-8400
Toll-Free 1-877-420-1330
Info@QuestHydro.com
TS-832
05/13
Advertisement
Table of Contents

Related Manuals for Therma-Stor Quest DRY 180


Summary of Contents for Therma-Stor Quest DRY 180
-
Page 1: Introduction
Quest DRY 90 Quest DRY 180 Installation, Operation and Maintenance Instructions Installation, Operation and Maintenance Instructions – Read and Save These Instructions – – Read and Save These Instructions – This manual is provided to acquaint you with the dehumidifier so that installation, operation and maintenance can proceed successfully. -
Page 2: Table Of Contents
Quest DRY 180 Installation, Operation and Maintenance Instructions Table of Contents Introduction ..............1 Features & Benefits ............1 Safety Precautions ............3 1. Intended Application ..........4 2. Registrations .............. 4 3. Specifications ............4 4. Unit Assembly ............4 4.1 Installing Feet ............. -
Page 3: Safety Precautions
Quest DRY 180 Installation, Operation and Maintenance Instructions Safety Precautions Read the installation, operation and maintenance instructions carefully before installing and operating this device. Proper adherence to these instructions is essential to obtain maximum benefit from your Quest Dry 90 indoor air quality system. -
Page 4: Intended Application
1. Intended Application for Quest DRY 180 The Quest Dry 180 is designed to be installed overhead, can be placed on a shelf, or set on the floor for immediate plub and play performance. When extra space is required an optional duct kit is available, which allows the Quest Dry 180 to be placed outside of the structure or room. -
Page 5: Attaching Drain Hose
2. Locating near a floor or other suitable drain (8’ drain hose included). 3. Do not install the Quest Dry 180 with the intake or exhaust of the unit within 1’ of a wall or other obstruction. Do not place the unit where curtains or debris can be drawn onto the intake and restrict airflow. -
Page 6: Electrical Requirements
5.3 Condensate (Water) Removal The Quest Dry 180 drains via a gravity system - it is not able to push condensate (water) uphill. The drain hose must run flat or downhill toward the drain location. Be sure the hose is not kinked or otherwise restricted so that water can pass through it. -
Page 7: Defrost Cycle
Quality humidity meters are available from your dealer are recommended to accurately monitor humidity levels. Once the dial has been set to the desired level of humidity control, the Quest Dry 180 will maintain the same percentage of relative humidity regardless of room temperature. -
Page 8: Cleaning And Replacement
8. Service WARNING! Servicing the Quest Dry 180 with its high pressure refrigerant system and high voltage circuitry presents a health hazard which could result in death, serious bodily injury, and/or property damage. Only qualified service people should service this unit. 7.4 Installing Filters... -
Page 9: Technical Description
8.1 Technical Description The Quest Dry 180 uses a refrigeration system similar to an air conditioner’s to remove heat and moisture from incoming air and add heat to the air that is discharged. Hot, high pressure refrigerant gas is routed from the compressor to the condenser coil. -
Page 10: Troubleshooting
Quest DRY 180 Installation, Operation and Maintenance Instructions 8.2 Troubleshooting No dehumidification. Neither blower, nor compressor run with fan switch AUTO. 1. Unit unplugged or no power to outlet, circuit breaker tripped. 2. Humidity control set to “Humid” setting. 3. Loose connection in internal wiring. -
Page 11: Replacement Parts
Defrost Thermostat 4021648 Defrost Control Mounting Clip 4025560 Fan Switch 4029510 Filter Drier 4021469 Humidity Controller 4033032-05 Run Capacitor For more information on the Quest Dry 180, call 1--877-420-1330 or visit our website at www.QuestHYDRO.com quest quest 1-877-420-1330 www.QuestHydro.com Info@QuestHydro.com... -
Page 12: Condensate Pump Kit
(this process is optional and not necessary on every install). You may also use other low voltage (24 volt) cut off devices that do not involve an electrician. Please contact Therma-Stor if you have any additional questions. - Page 13 Quest DRY 180 Installation, Operation and Maintenance Instructions Quest Dry 180 Condensate Pump Installation Step 3. Step 5. Align mounting bracket of condensate Attach the 20' drain hose to the pump with the dehumidifier screw hole. Reinstall condensate pump and route it to a floor drain.
-
Page 14: Duct Kit Assembly
Quest DRY 180 Installation, Operation and Maintenance Instructions Quest Dry 180 Duct Kit Assembly Duct Kit Part No. 4026055 Parts Included: A. Pan Head Screws, 10-16 x 1/2" (8) B. 8" Duct Collars (2) C. Top Duct Assembly (1) D. Front Duct Assembly (1) - Page 15 Quest DRY 180 Installation, Operation and Maintenance Instructions Quest Dry 180 Duct Kit Assembly Continued FRONT DUCT ASSEMBLY Step 1. Check sealing foam on the front duct assembly. Ensure that none has come loose. Step 2. Place front duct assembly on the intake side of the dehumidifier.
-
Page 16: Warranty
(but all warranty periods will be extended by the period of time, if any, that the Quest Dry 180 Dehumidifier is out of service while awaiting covered warranty service).
Need help?
Do you have a question about the Quest DRY 180 and is the answer not in the manual?
Questions and answers