Table of Contents
Advertisement
Quick Links
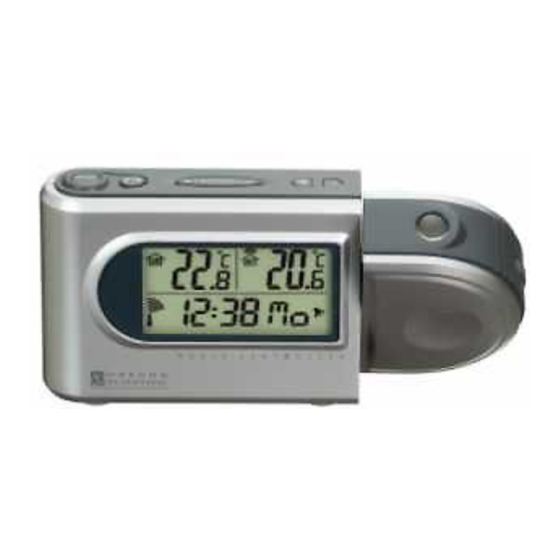
DIGITAL IN-OUT THERMOMETER
WITH RADIO CONTROLLED
PROJECTION CLOCK
MODEL: RMR686P
USER'S MANUAL
INTRODUCTION
The basic package comes with the following:
-Main Unit (RMR686P)
-Remote thermo sensor unit (THRN122N).
The main unit shows the indoor temperature, calendar clock and
temperatures collected and transmitted by the remote unit.
capable of keeping track of the maximum and minimum tempera-
ture measured. No wire installation is required and it operates at
433MHz.
As for the calendar clock, it is radio-controlled. It automatically
synchronizes its current time and date when it is brought within an
approximate 1500km radius of the radio signal generated from
Frankfurt, Germany (DCF77).
For easy time reading in dim or no light, it features a projection
function that allows the user to display the time and outdoor
temperature on the ceiling , wall or other flat surface. The time
projected is in a deep red that is easily seen but will minimize eye
dilation .The clock face also features a large LCD display with
backlight for easy viewing in dim or no light.
You can also set the calendar clock manually when it is off range.
Other features include five-language display and two-minute
crescendo daily alarm.
MAIN FEATURES: MAIN UNIT
C
A
B
It is
also
L
M
1
D
E
F
G
N
K
J
P
Q
O
I
H
Advertisement
Table of Contents

Summary of Contents for Oregon Scientific RMR686P
- Page 1 MODEL: RMR686P USER’S MANUAL INTRODUCTION The basic package comes with the following: -Main Unit (RMR686P) -Remote thermo sensor unit (THRN122N). The main unit shows the indoor temperature, calendar clock and temperatures collected and transmitted by the remote unit. It is...
- Page 2 A. TWO-LINE DISPLAY 90°(left or right) projected image rotation Displays reading of outdoor temperature, indoor temperature N. PROJECTION LENS & calendar clock B. RADIO RECEPTION SIGNAL O. ADJUSTABLE PROJECTOR Indicates the condition of radio reception 180° Tilt - swivel projection housing C.
-
Page 3: Before You Begin
BATTERY DOOR WALL-MOUNT RECESSED HOLE Supports the remote until in wall-mounting BEFORE YOU BEGIN For best operation, 1. Insert batteries for remote units before doing so for the main unit. 2. Place the main unit as close as possible next to the remote unit, reset the main unit after installing batteries. -
Page 4: Getting Started
indicator will show up on the indoor or outdoor temperature display. HOW TO USE THE TABLE STAND OR WALL MOUNTING You can place the remote unit on a flat surface or mount the unit on If no signals are received, blanks “ ”... -
Page 5: Transmission Collision
main unit. There are three possible forms: 2. The batteries of both the remote unit and main unit effective. Replace as necessary. Note: When the temperature falls below freezing point, the The unit is in searching mode. batteries of outdoor units will freeze, lowering their voltage supply and the effective range. -
Page 6: Clock Mode
ABOUT RADIO RECEPTION For better reception, place the clock away from metal objects and electrical appliances to minimize interference. RMR686P is designed to automatically synchronize its calendar If you wish to disable the auto-reception feature, press the [ clock once it is brought within range of the Frankfurt DCF77 radio button for two seconds. - Page 7 setting, press and hold [ ] or [ ] will increase or decrease the 4. Press [ ]. The minute digits will blink. value rapidly. 5. Enter the minutes using [ ] or [ Note that the date is displayed in DAY-MONTH format. For display 6.
- Page 8 will activate for approximately 5-seconds. The Continuous Projection will only be activate when the power adapter is properly connected to the unit and an electrical wall The projection feature has many user-selectable adjustments. outlet. Once the adapter has been plugged into the unit and an electrical wall outlet, slide Button L to the ON position to activate Projector Features the continuous projection feature.
-
Page 9: Specifications
Weight SPECIFICATIONS Main unit : 154g (without battery) Remote sensing unit : 46g (without battery) Temperature Measurement Main unit Dimension Main unit : 71(L) x 153(W) x 24(T) mm Indoor Temperature measurement Proposed operating range : -5.0°C to +50.0°C Remote sensing unit : 89(L) x 44(W) x 21(T) mm (23.0°F to 122.0°F) CAUTION... - Page 10 La confezione include: del segnale dell’unità principale. Vi sono tre forme K. ROTELLA MESSA A FUOCO possibili: • Unità principale (RMR686P). Regola la messa a fuoco dei valori proiettati • Termosensore remoto (THRN122N) L. SELETTORE ATTIVAZIONE / DISATTIVAZIONE L'unità é in modalità di ricerca.
- Page 11 Termometro Digitale Temperatura Interna ed Esterna attivare o disattivare l’allarme premendo il pulsante dall’utente. con Proiezione Orario-Sveglia (RMR686P) è conforme ] ripetutamente. Premere il pulsante [ MODO ] per 5. Usare solo pile nuove, come indicato nelle presenti ai requisiti essenziali ed alle altre disposizioni pertinenti tornare alla visualizzazione dell’orario.


Need help?
Do you have a question about the RMR686P and is the answer not in the manual?
Questions and answers