Table of Contents
Advertisement
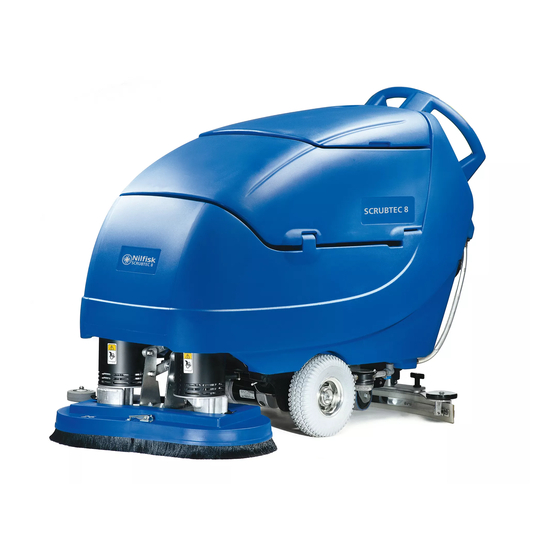
SCRUBTEC
SCRUBTEC
SCRUBTEC
SCRUBTEC
SCRUBTEC
SCRUBTEC 866
SCRUBTEC 866
SCRUBTEC 866
SCRUBTEC 866
SCRUBTEC 866
SCRUBTEC 871
SCRUBTEC 871
SCRUBTEC 871
SCRUBTEC 871
SCRUBTEC 871
SCRUBTEC 871C
SCRUBTEC 871C
SCRUBTEC 871C
SCRUBTEC 871C
SCRUBTEC 871C
SCRUBTEC 886
SCRUBTEC 886
SCRUBTEC 886
SCRUBTEC 886
SCRUBTEC 886
Operator's Manual
and Parts List
English (2-27)
EN
Parts List (29-58)
Form No. 71492A
10/08
8
8
8
8
8
READ THIS MANUAL
Printed in the U.S.A.
Advertisement
Table of Contents

Related Manuals for Nilfisk-ALTO SCRUBTEC BOOST 8


Summary of Contents for Nilfisk-ALTO SCRUBTEC BOOST 8
- Page 1 SCRUBTEC SCRUBTEC SCRUBTEC SCRUBTEC SCRUBTEC SCRUBTEC 866 SCRUBTEC 866 SCRUBTEC 866 SCRUBTEC 866 SCRUBTEC 866 SCRUBTEC 871 SCRUBTEC 871 SCRUBTEC 871 SCRUBTEC 871 SCRUBTEC 871 SCRUBTEC 871C SCRUBTEC 871C SCRUBTEC 871C SCRUBTEC 871C SCRUBTEC 871C SCRUBTEC 886 SCRUBTEC 886 SCRUBTEC 886 SCRUBTEC 886 SCRUBTEC 886 Operator’s Manual...
-
Page 2: Table Of Contents
ENGLISH READ THIS BOOK CAUTION: Read the Operator's Manual before using the appliance. This book has important information for the use and safe operation of this machine. Failure to read this book prior to operating or attempting any service or maintenance procedure to your Nilfisk ALTO machine could result in injury to you or to other personnel;... -
Page 3: Operator Safety Instructions
ENGLISH OPERATOR SAFETY INSTRUCTIONS DANGER: Failure to read and observe all DANGER statements could result in severe bodily injury or death. Read and observe all DANGER statements found in your Owner's Manual and on your machine. WARNING: Failure to read and observe all WARNING statements could result in injury to you or to other personnel;... -
Page 4: Introduction
71 cm wide. The Scrubtec 866 uses two brushes or pads to scrub a path 66 cm wide. The Scrubtec BOOST 8 uses one pad or brush to scrub a path 71 cm wide. The Scrubtec 871C uses two brushes to scrub a path 71 cm wide. -
Page 5: Machine Specifications
Sound test @ operator’s ear 65 dBA 65 dBA 67 dBA Model Scrubtec 871 C Scrubtec BOOST 8 Pad / Brush Size (2) 5.75” x 28” (14.6 x 69cm) (2) 14” x 28” (35.6 x 71cm) Brush Motor (s) (2) .81 hp (.6 kw) (2) 3/4 hp (.56 kw) -
Page 6: Procedures For Transporting
ENGLISH PROCEDURES FOR TRANSPORTING How To Put The Machine In A Van Or Truck WARNING: The machine is heavy. Make sure you use two able persons to assist the machine in climbing the ramp. 1. Make sure the loading ramp is at least eight (8) feet long, and strong enough to support the machine. 2. -
Page 7: Symbols Used On Focus Ii Midsize
ENGLISH SYMBOLS USED ON SCRUBTEC Hazard Alert Symbol On/Off Key Switch WARNING! Carefully read all instructions before Traverse Speed Control performing any procedure. WARNING! Do not use the machine on slopes exceeding the specifications. “One Touch” Control WARNING! Do not wash the machine with direct or pressurized water jets. -
Page 8: Machine Control Panel
ENGLISH MACHINE CONTROL PANEL Key Switch (See Figure 1, Item "A") The key switch turns "ON" the power to the control panel. "O" is "OFF" and "I" is "ON". Traverse Speed Switch (See Figure #1, Item "B") The speed control varies from low to high speed. To increase the speed, turn the knob to the right. To decrease the speed, turn the knob to the left. - Page 9 ENGLISH MACHINE CONTROL PANEL Figure 1 Nilfisk ALTO Operator's Manual (EN) - SCRUBTEC 866, 871, 866, Boost 8 and 871C - 9 -...
-
Page 10: Machine Controls And Features
ENGLISH MACHINE CONTROLS AND FEATURES Squeegee Lift Handle (Manual Squeegee Lift) (See figure 2) The squeegee lift handle is located below the control handles in the center. It is used to raise or lower the squeegee. Float Shut Off (See Figure 3). The shut-off switch for the vac motor is located in the recovery tank. - Page 11 ENGLISH HOW TO PREPARE THE MACHINE FOR OPERATION How to program battery charger (WET or AGM batter- ies): According to the type of batteries (WET or AGM), set the machine and electronic board of the battery charger as follows: Charger Setting Turn the key switch “ON”...
- Page 12 ENGLISH HOW TO PREPARE THE MACHINE FOR OPERATION Battery Maintenance The electrical power to operate the machine comes from the storage batteries. Storage batteries need preventative maintenance. WARNING: Working with batteries can be danger- ous. Always wear eye protection and protective clothing when working near Correct Level batteries.
- Page 13 ENGLISH HOW TO PREPARE THE MACHINE FOR OPERATION How To Charge The Batteries WARNING: Charging the batteries in an area without adequate ventilation could result in an explosion. To prevent an explosion, charge the batteries only in an area with good ventilation. WARNING: Lead acid batteries generate gases which could explode.
- Page 14 ENGLISH HOW TO PREPARE THE MACHINE FOR OPERATION How To Install The Brush Or Pad (BOOST Machine) To install the brush or pad on the machine, follow this procedure: 1. Turn the key switch "ON". 2. Put the brush head assembly in the "Up" position. 3.
- Page 15 ENGLISH HOW TO PREPARE THE MACHINE FOR OPERATION How To Install The Brushes Or Pad Drivers On The Disc Machine To install the brushes or pad drivers on the machine, follow this procedure: 1. Turn the key switch "ON". 2. Put the brush head assembly in the "UP" position. 3.
- Page 16 ENGLISH HOW TO PREPARE THE MACHINE FOR OPERATION How To Change Or Reverse Bristle Direction On Cylindrical Machine To install or reverse bristle direction on the machine, follow this procedure: 1. Turn the key switch "ON". 2. Put the brush head assembly in the "UP" position. 3.
-
Page 17: How To Operate The Machine
ENGLISH HOW TO OPERATE THE MACHINE How To Operate the Squeegee The squeegee wipes the floor while the vacuum motor removes the dirty solution from the floor. Use your hand to lower or raise the squeegee handle. To operate the squeegee, follow this procedure: 1. - Page 18 ENGLISH HOW TO OPERATE THE MACHINE How To Operate The Chemical Mixing System (Optional) The chemical mixing system is designed to automati- cally mix the cleaning chemical directly from the manufacturer’s chemical container into the clear water coming from the solution tank. The chemical control knob on the control panel is used to select the desired ratio according to the recommendation of the chemical manufacturer and the application requirements.
- Page 19 ENGLISH HOW TO OPERATE THE MACHINE WARNING: Water solutions or cleaning materials used with this type of machine can leave wet areas on the floor surface. These areas can cause a dangerous condition for the operator or other persons. Always put CAUTION signs near the area you are cleaning.
- Page 20 ENGLISH HOW TO OPERATE THE MACHINE How To Clean A Floor WARNING: Water solutions or cleaning materials used with this type of machine can leave wet areas on the floor surfaces. These areas can cause a dangerous condition for the operator or other persons. Always put CAUTION signs near the area you are cleaning.
-
Page 21: Maintenance
ENGLISH MAINTENANCE WARNING: Maintenance and repairs must be done by authorized personnel only. WARNING: Always empty the solution tank and recovery tank before doing any maintenance. WARNING: Keep all fasteners tight. These Maintenance Procedures Must Be Done Every Day Keep the machine clean, it will need fewer repairs and Figure 21 have longer life. - Page 22 ENGLISH MAINTENANCE Do These Procedures When You End Your Work 1. Drain the solution tank (if necessary) (Figure 22) and the recovery tank (Figure 23). To drain the tanks , follow this procedure: a. Turn the key switch “OFF”. b. Remove the drain hose from the back of the machine.
- Page 23 ENGLISH MAINTENANCE These Maintenance Procedures Must Be Done Every Week: WARNING: Maintenance and repairs must be done by authorized personnel only. Always empty the solution tank and the recovery tank before doing any maintenance. Keep all fasteners tight. WARNING: Always wear eye protection and protec- tive clothing when working near batter- ies.
- Page 24 ENGLISH MAINTENANCE Maintenance For The Squeegee To remove the squeegee, follow this procedure: 1. Remove the squeegee assembly by loosening the two knobs that attach the squeegee to the machine. Pull the squeegee assembly off. See figure 25. 2. Inspect the squeegee blades. 3.
-
Page 25: How To Correct Problems In The Machine
ENGLISH HOW TO CORRECT PROBLEMS IN THE MACHINE PROBLEM CAUSE ACTION The squeegee is up Lower the squeegee. The machine does not remove all the water from the floor. The vacuum tank is full. Drain the tank. The screen filter is dirty. Clean the screen filter. -
Page 26: Accessories
Battery Maintenance System (CBMS) 53391A 32.5” Squeegee Asm. 10398A 35” Squeegee Asm. 10399A 41” Squeegee Asm. 10748A Scrubtec Boost 8 Description Part No. Description Part No. Pads & Brushes 35" Squeegee Blades (front & rear) White Pad (14x28) 5 pack... - Page 27 ENGLISH ACCESSORIES Scrubtec 871 Description Part No. Description Part No. Pad Driver & Brushes 35" Squeegee Blades (front & rear) Pad Driver (14") 38036A Urethane Squeegee Blade Kit 11332A Poly Brush (14") 11427B Linatex Squeegee Blade Kit 11338A Soft Nylon Brush (14") 10874A Gum Squeegee Blade Kit 11335A...
Need help?
Do you have a question about the SCRUBTEC BOOST 8 and is the answer not in the manual?
Questions and answers