Table of Contents
Advertisement
Quick Links
Advertisement
Table of Contents

Related Manuals for Korg i40M


Summary of Contents for Korg i40M
- Page 1 User’s Guide AI2 Synthesis System...
-
Page 2: Important Safety Instructions
IMPORTANT SAFETY INSTRUCTIONS WARNING — When using electrical products, basic precautions should be followed, including the following: 1. Read all the instructions before using the 8. The power-supply cord of the product should be product. unplugged from the outlet when left unused for a long period of time. -
Page 3: Lcd Display
Data Handling Data in memory may sometimes be lost due to incorrect user action. Be sure to save important data to floppy disk. Korg will not be responsible for damages caused by data loss. LCD Display Some pages of the manuals show LCD screens along with an explanation of functions and operations. - Page 4 Service and User’s Assistance For service, please contact your nearest Authorized KORG Service Center. For more information on KORG products, and to find software and accessories for your piano, please contact your local Authorized KORG distributor. Web servers •...
- Page 5 How to… How to... Demo Loading from disk P. 129 Creating new arrangements P. 56 Listening P. 20 Programs (single sounds) MIDI Selecting P. 30 Connecting a master keyb. P. 47 Assigning to the keyboard P. 29 Connecting a sequencer P.
-
Page 6: Table Of Contents
Tutorial ..... 20 Connecting the i40M to a MIDI guitar ....52 Connecting the i40M to an external sequencer . - Page 7 Page 14: Effect 1 settings ......103 Compatibility with Korg i30 data ......133 Page 15: Effect 2 settings .
- Page 8 Summary Page 15: Chord recognition mode....147 Page 22: Rename program ......174 Page 16: Auto chord scanning/Damper polarity.
- Page 9 GETTING STARTED...
-
Page 10: Introduction
Getting Started - For those who want to start playing pleasure. straight away without too much theory. Follow the The i40M is not only an instrument with great sound, instructions step by step and start playing now! great design and easy to use, it is also a flexible instru-... -
Page 11: Connecting The Power Cable
Getting Started • Introduction Adjusting the general volume Connecting the i40M to a hi-fi system Connect the OUTPUT jacks of the i40M to the AUX or Use the MASTER VOLUME knob TAPE inputs of the amplifier using two audio cables... -
Page 12: The Headphones
OUT jack. Connect the MIDI OUT jack of the MIDI key- The headphones board to the MIDI IN 1 jack of the i40M using a standard MIDI cable. Connect the headphones to the PHONES jack located on the rear panel. - Page 13 Connect the MIDI OUT jack of the MIDI accor- accordion with two channels on the right hand and dion to the MIDI IN 1 jack of the i40M using a do not want to play the bass of the i40M.
-
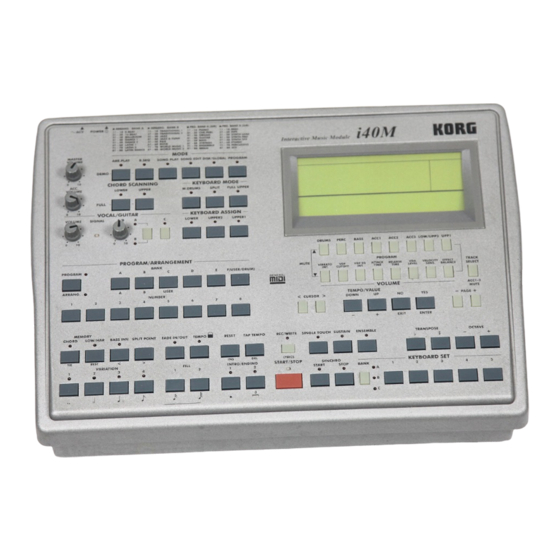
Page 14: Front And Rear Panels
(HD) floppy disks can be This control does not adjust the level of the VOCAL/ inserted in this drive. You can use Korg i-series for- GUITAR section (input signal through INPUT-IN). matted floppy disks and standard Ms-Dos® format- ted floppy disks. - Page 15 Note: This section is particularly dedicated to the con- Press both ARR.PLAY and B.SEQ to access the Demo nection of the i40M to a MIDI keyboard. It only works if mode where you can listen to 16 demo pieces. the MIDI controller transmits over the special Global channel (see page 45).
- Page 16 Getting Started• Front and Rear Panels • FULL UPPER button Note: When you turn the instrument on, the VOCAL/ One or two tracks (Upper 1 and/or Upper 2) play on GUITAR section is deactivated. Select one of the Key- the entire keyboard. board Sets to activate it.
- Page 17 Getting Started • Front and Rear Panels 17 ENTER/YES button go from channels 1-8 to channels 9-16 (and vice versa) press the TRACK SELECT button. By pressing this button you can give a positive reply to questions that may appear in the display and to Song Edit mode: these buttons select the tracks and start some operations in the Disk/Global mode change the volume.
- Page 18 Note: The split point is particularly useful when the contains the lyrics. The Lyrics 2 mode is only available i40M is connected to a MIDI keyboard. It only works if with some SMF. the MIDI controller transmits through the special Global channel (see page 45).
- Page 19 Getting Started • Front and Rear Panels played, after which the performance will end auto- select the set-up of the realtime tracks (Upper 1, matically. Upper 2 and Lower), the effects and the settings of the VOCAL/GUITAR section. Backing Sequence-Step Recording mode: these but- tons are used to specify the length of the note being In Song Play mode the Keyboard Set only select the input (the value of the notes is shown under the but-...
-
Page 20: Display
The first line of the display indicates the operative tempo recorded in the song. mode: ARR.PLAY, BACKING SEQ., SONG PLAY, EXT means that the i40M is synchronized with the SONG EDIT, DISK/GLOBAL, PROGRAM. metronome of an external device connected to its 2 Tempo/Value MIDI IN. -
Page 21: Rear Panel
2 OUTPUT connectors 4 GAIN knob Audio outlets. You can connect an amplifier here. You can connect the i40M to a mixer, two amplified Adjusts the gain of the INPUT-IN inlet. Turn it speakers or the AUX/TAPE inlet of an hi-fi system. - Page 22 9 POWER switch source)” on page 137). On/off switch. • MIDI OUT connector 10 Power supply connector Transmits the MIDI data generated by the i40M to Plug the power cable supplied with the instrument other devices. here. • MIDI THRU connector...
-
Page 23: Operative Modes
The way in which patterns are affected by chords is of board Set you wish to use. course more complex than what indicated above. Korg There are 192 arrangements in total, organized as 64 instruments are renowned for their refinement in arrangements in each of the three banks A, B, and detecting the chords. -
Page 24: Backing Sequence Mode
Getting Started • Operative modes SINGLE Arrangement TOUCH Style Keyboard assign Vocal/Guitar Keyboard mode Acc. tracks (prog, vol, Chord scanning pan, fx send, octave) Keyboard scale Outputs Master fx Wrap around Drum map Upper 1 (prog, vol, pan, fx send, octave) Snare/kick designation Upper 2 (prog, vol, pan, fx send, octave) Ensemble... -
Page 25: Program Mode
Getting Started • Operative modes Program mode The individual sounds played on the i40M are called In the Program mode you can edit previously recorded programs. The instrument has a total of 384 programs, programs in order to create new programs and save organized into six banks (A, B, C, D, E, F-USER) with them in the USER locations. -
Page 26: Disk/Global Mode
• Program pedals and external controllers point is not saved or loaded. • Program Lower Memory Note: The i40M can read disks from other Korg i-Series • Select a Scale (temperament) instruments, of which it can re-use the data (see •... -
Page 27: Subpages
Getting Started • Operative modes Subpages Programming a parameter value Some of the display pages allow you to select second- ary pages, referred to as “subpages”. The subpages are In order to modify the value of a parameter that indicated by two round brackets ( ) which contain the appears on the display, first of all you need to select option. -
Page 28: Tutorial
Getting Started • Tutorial 4. Tutorial This chapter is a practical guide to the use of the i40M • START/STOP stops the accompaniments; that illustrates some real examples. All you need to do • RESET interrupts all the notes you are playing;... -
Page 29: The Backing Sequence Demo
Getting Started• Tutorial To exit the Demo mode Move the cursor on (BSQ), and press ENTER/ YES view the files contained in the disk. Press EXIT/NO or one of the buttons of the MODE section. By pressing EXIT/NO you go back to the Arrange- ment Play mode. -
Page 30: Listening To The Songs
Standard MIDI Files (SMF). The ARRANG led, then press the BANK [USER] button i40M is able to playback SMF format 0 without having and a NUMBER button from [1] to [8]. to load them in memory, and SMF format 1 after a short loading. - Page 31 Getting Started• Tutorial If the played song is in Tune1000 or compatible The REC/WRITE/LYRICS led will light up. (Edirol, GMX, KAR, HitBit, XF) format, press To stop the song, press START/STOP. REC/WRITE/LYRICS to switch to the Lyrics 2 mode. Press REC/WRITE/LYRICS to change the viewing Listening to all the song on a disk mode from the lyrics (Lyrics modes) to the stan- dard executive information (Play mode).
- Page 32 Getting Started • Tutorial Choose the second song to be added in the list abbreviations appear on the display in time with with the TEMPO/VALUE buttons. the music. The songs in SMF format 1 must be loaded in mem- Press ENTER/YES to confirm the second song on ory first, then after a few seconds wait they are the list.
-
Page 33: The Arrangements
How to program the MIDI before selecting it. The i40M need to receive the chords from a controller Press a BANK button, use a NUMBER button to (MIDI keyboard, digital piano, MIDI accordion, MIDI select the tens –... -
Page 34: Starting The Accompaniment
You can make the accompaniment start or stop with- mode (see page 147). out pressing START/STOP. With the accompaniment stopped, light up the When the i40M is connected with a MIDI key- SYNCHRO-START led. board through the special Global channel, • if the CHORD SCANNING is LOWER, the... -
Page 35: Fill
The fill is an interlude that breaks the rhythm conti- At the end of the measure the pattern will change. nuity. Each style of the i40M has two different fill- The led of the new variation will stay lit. ins. -
Page 36: Varying The Tempo
Getting Started • Tutorial Varying the tempo Set (beat) the tempo on the TAP TEMPO button. The tempo shown on the display will change With the accompaniment stopped, use the according to the tempo beaten. TEMPO/VALUE buttons to vary the tempo. Start the accompaniment. -
Page 37: The Real Time Tracks (Upper 1, Upper 2, Lower)
Upper 1 track. Press the button to select the Upper 1 track. If the i40M is connected to a MIDI keyboard through the special Global channel (see pages 45 and 47), you Light up the UPPER 2 led (KEYBOARD ASSIGN can assign the real time tracks to the keyboard areas section) to activate the Upper 2 track. -
Page 38: Blocking The Programs Of The Real Time Tracks
Upper 1 track. You can assign one of the i40M programs to each real Program Preview. In the Arrangement Play mode time track. you can use the Program Preview function to view... -
Page 39: Transposition
Getting Started• Tutorial Transposition Press the BANK button in the KEYBOARD SET section a few times, to turn on the C bank led. You can change the pitch of the real time tracks with Each time you press the BANK button, one of the the semitone transposition. -
Page 40: The Backing Sequences
Getting Started • Tutorial The backing sequences What are the backing If the i40M is connected to a keyboard or to another controller, program it to transmit over sequences? the special Global channel. The backing sequences are musical pieces created by... -
Page 41: Saving The Backing Sequences On Disk
(max 10) in a new file. Insert an empty disk into the disk drive. Assign a new filename. The i40M uses 3.5” 2DD/HD (double density or high density) disks. The disk must be formatted in 1. Select the character you wish to change with the MS-DOS®... -
Page 42: Deleting The Backing Sequences
105). Tempo mode Quantize Metronome The i40M is compatible with most of the songs found on the market. You can convert songs created with the Starting measure Ending measure computer sequencer into songs that can be read by the i40M, and vice versa. -
Page 43: Saving The Song As Standard Midi File (Smf)
Getting Started• Tutorial Whilst on Page 2, press REC/WRITE/LYRICS to Move the cursor to the Q parameter and select enter the recording mode. a quantize value. The quantize corrects the rhythmical mistakes Select the track you wish to record with the but- made during the recording. -
Page 44: Editing Standard Midi Files (Smf)
Getting Started • Tutorial Press PAGE [+] to get to “Page 2: Playback”. Be careful: If you are saving a file that was previ- ously loaded from the disk, you need to change the name of the file to avoid overwriting the existing file on disk. - Page 45 BS MSB and BS LSB) and Pro- Move the cursor to “Tr01”. gram Change (usually abbreviated in PC). In the i40M the message sequence BS MSB=000, BS Press TEMPO/VALUE [UP/+] to select “Tr05”. LSB=000 and PC=075 corresponds to program B24 (bank B, program 24) which is the pan flute.
- Page 46 Getting Started • Tutorial Adding parts to a song with the same number as the track. For example, track 1 usually corresponds to channel 1, track 2 to In this example, we shall add a counterpoint melody channel 2 and son on. to the song, recording it onto track 7 (Tr07).
-
Page 47: The Vocal/Guitar Section
VOCAL/GUITAR section. TAR section with the VOLUME slider. The processed signal is sent to the OUTPUT audio jacks of the i40M, together with the sounds generated Use the A/B button to select the operating mode by the internal sound generator. -
Page 48: Changing The Settings Of The Vocal/Guitar Section
Getting Started • Tutorial Start singing and adjust the effect level (param- According to the connected device, assign the eter B) with the A/B knob. Guitar (for the guitar) or the Vocal (for the microphone) option to the “VOC/GTR MODE” Press the C button to mute the entire VOCAL/ parameter. - Page 49 Getting Started• Tutorial you wish to control with the A/B knob in B Press CURSOR [>] to select the parameter mode. assigned to the C button. Select the parameter you wish to control with the C button. MODE ARR.PLAY CHORD MODE ARR.PLAY TEMPO...
-
Page 50: The Programs
Program the MIDI controller to transmit over the special Global channel of the i40M. The i40M has a vast selection of Korg sounds, the same For information on the Global channel, see page 45. sounds that you hear on records and in concerts of For information on programming the Global chan- many famous artists. - Page 51 Getting Started• Tutorial Adjust the effect level using the PROGRAM Using the TEMPO/VALUE buttons select the loca- [EFFECT BALANCE] buttons. tion in the F(USER) bank where you wish to save the program. If you wish to save the program you have edited, press REC/WRITE/LYRICS to go to “Page Press ENTER/YES to save the program.
-
Page 52: Midi
MIDI IN). the program bank. In the i40M the possible values are: The MIDI IN 1 and MIDI IN 2 connectors of the i40M Banks A-B = 00 are identical. As a rule, if only one instrument is con-... -
Page 53: The Special Channels
Therefore, if the SPLIT button led is lit up, the need to play at least three notes in order for the notes that arrive to the i40M over this channel will be chord to be detected). divided by the split point into the Upper (above the These two channels are especially useful for accordion split point) and Lower (below the split point) parts. -
Page 54: The Arrangement Channel
105). ers in musical instruments, or computer software. SMF The i40M can also show on the display the lyrics of the are not necessarily GM compatible. SMF in Solton, M-Live (Midisoft), Tune1000 and com-... -
Page 55: Connecting The I40M To A Midi Keyboard
Connecting the i40M to a MIDI keyboard Connect the MIDI OUT connector of the key- The easiest way to control the i40M is by connecting a master keyboard. You only need to connect the MIDI board to the MIDI IN 1 connector of the i40M. -
Page 56: Connecting The I40M To A Digital Piano
The notes played on the keyboard are sent to Piano 2”, you can use the buttons of the Keyboard the i40M that uses the notes below the split point for Assign sections to add the Upper 1, Upper 2 and the chord detection and retransmits the notes above Lower section of the i40M to the piano. -
Page 57: Connecting The I40M To A Midi Accordion
Suggestion: If you only wish to play the i40M parts, right hand. and not the piano sound, set the piano volume to zero. - Page 58 2, bass over channel 3, special part dedicated However, in the i40M you can select the fixed dynam- to the arrangement change over channel 16 or 10. ics value used to receive the notes sent by the accor- dion.
- Page 59 SINGLE TOUCH led off. right hand and do not want to play the i40M bass. With this setup you can play Upper 1 and Upper 2 with your right hard, Lower with the chords, but not Suggestion: if you wish to change the programs of the the i40M bass.
-
Page 60: Connecting The I40M To A Midi Guitar
In order to use this function you only need a standard footswitch, such as Korg PS-1 or Korg Global. PS-2. The use of the Korg EC5 pedal keyboard is par- Press a button in the MODE section to go to the ticularly recommended. -
Page 61: Connecting The I40M To An External Sequencer
MIDI connections For instance, if the master keyboard transmits over In order to connect the i40M to a computer you need to channel 1 and you must program the drum track have a computer with the MIDI interface. -
Page 62: Controlling Another Instrument With The I40M
See the follow- 0–127 Dr11–Dr28 ing paragraph. In the i40M the Bank Select is represented by the Con- trol Change message #00 with value 0 and by the Con- trol Change message #32 with value from 0 to 4 (see The programs table above). - Page 63 REFERENCE...
-
Page 64: Arrangement Play Mode
Reference • Arrangement Play mode 6. Arrangement Play mode Tempo and chord scanning Name of the chords The tempo and recognized chords are always shown at the top of the display. When the instrument detects a chord, its abbreviation Tempo Chord name appears on the display. -
Page 65: Performance Monitor
You can also select the arrangements by using a foot- select a two-digit number with the number buttons. switch such as Korg PS-1 or PS-2 or an external con- troller KORG EC5 (optionals). For more information see “Page 12: Assignable pedal/switch” or “Page 13:... -
Page 66: Style Select
STY (Style) You can also select styles by using an optional foot- switch or KORG EC5 external controller. For more [A11…A88, B11…B58, U11…U28] information refer to see “Page 12: Assignable pedal/ Select the style using the buttons in the PROGRAM/ switch”... -
Page 67: Track Settings (1)
Reference • Arrangement Play mode Page 3: Track settings (1) Pan (Channels A and B) In this page you can choose the program (sound), pan (stereo position), and effect send (send levels) for each [OFF, L15…L01, CENT, R01…R15, PROG] of the eight tracks in the arrangement. Track position in the stereo “panorama”. -
Page 68: Track Settings (2)
Reference • Arrangement Play mode Page 4: Track settings (2) For each track in the arrangement, you can set the instrument connected via MIDI. It will only appear if damper pedal and the parameters related to keyboard you select one of the DRUM, PERC, BASS, or ACC1– range (octave, wrap around) for each arrangement ACC3 tracks. -
Page 69: Ensemble/Variation Change
Reference • Arrangement Play mode Page 5: Ensemble/Variation change BRASS ENS Typical brass section harmonization. In this page you can choose the kind of Ensemble you want, and latch the FILL buttons to a variation. REED ENS Typical reed section harmonization. Ensemble Fill 1/Fill 2 [OFF, →1…→4, 1&2…3&4, UP, DOWN]... -
Page 70: Drum Mapping
Reference • Arrangement Play mode Page 6: Drum Mapping Drum mapping VAR1…VAR4 The Drum Mapping function allows you to edit the Drum part of the Style with only one operation. The [1…8] Drum Mapping will replace some instruments in the drum kit without changing the notes. -
Page 71: Keyboard Scale
Reference • Arrangement Play mode Page 8: Keyboard scale to G for “rast G/bayati A”, to A# for In this page you can choose the keyboard scale (or “rast B b/bayati C”. temperament) automatically assigned by the arrange- ment to the tracks when selected. PYTHAGOREAN Pythagorean scale, based on ancient Greek theory. -
Page 72: Effect Select
Reference • Arrangement Play mode Page 9: Effect select The instrument has two incorporated digital effect effects you wish to assign to an arrangement and turn processors for the sounds produced by the internal them on or off. For more details, see page 175. sound generator. -
Page 73: Vocal/Guitar Mode/ Assigned Parameters
Reference • Arrangement Play mode Page 14: Vocal/Guitar mode/ Assigned parameters Assigned parameter (A/B, Vocal mode) This page allows you to select the operating mode of the VOCAL/GUITAR section. It also allows you to [ALL VOCAL PARAMETERS] select the operation of the A/B knob and of the C but- ton in the VOCAL/GUITAR section. -
Page 74: Vocal Effects (1) (Vocal Mode)
Reference • Arrangement Play mode Page 15: Vocal effects (1) (Vocal mode) First page for effect selection in the Vocal mode of the The harmony notes must be received over a dedicated VOCAL/GUITAR section. MIDI channel, which is different for each operative mode. -
Page 75: Mixer (Vocal Mode)
Reference • Arrangement Play mode Page 17: Mixer (Vocal mode) Harmony In this page you can program the mixing of the VOCAL/GUITAR section (Vocal mode). [0…127] Harmony volume Level of harmonization notes. MODE ARR.PLAY CHORD TEMPO OCTAVE Lead MIXER Harmony=100 Lead=100 FxSend=060 PAGE... -
Page 76: Drive Programming
Reference • Arrangement Play mode Page 19: Drive programming Sens (Sensitivity) This page contains the programming of the DRV (Drive) effect selected in “Page 16: Vocal Effects (2) [0…30] (Vocal mode)”. Sensitivity. With low values, the compressor will only Note: These parameters can only be accessed if the DRV eliminate the sounds at a low level (background noise, parameter is not set on OFF in “Page 16: Vocal Effects (2) sibilant and explosive sounds). -
Page 77: Fx1 Programming (Vocal Mode)
Reference • Arrangement Play mode Page 20: FX1 programming (Vocal mode) Depth This page shows the parameters of the FX1 effect selected in “Page 16: Vocal Effects (2) (Vocal mode)”. [0…30] The parameters are different according to the selected effect. Chorus intensity. -
Page 78: Fx2 Programming (Vocal Mode)
Reference • Arrangement Play mode Page 21: FX2 programming (Vocal mode) This page shows the parameters of the FX2 effect selected in “Page 16: Vocal Effects (2) (Vocal mode)”. MODE ARR.PLAY CHORD The parameters are different according to the selected TEMPO OCTAVE effect. -
Page 79: Guitar Effects (1) (Guitar Mode)
Reference • Arrangement Play mode Page 15: Guitar effects (1) (Guitar mode) First page for effect selection in the Guitar mode of the VOCAL/GUITAR section. [OFF, CHORUS, FLANGR, PHASER, TRMOLO, PAN, PITCH, WAH] Drive effect Modulation effect type. This type of effects creates a MODE ARR.PLAY modulation that gives more life and space feeling to... -
Page 80: Guitar Effects (2) (Guitar Mode)
Reference • Arrangement Play mode Page 16: Guitar effects (2) (Guitar mode) Second page for effect selection in the Guitar mode of the VOCAL/GUITAR section. [OFF/ON] Noise Reduction Activates/deactivates the Noise Reduction. For infor- MODE ARR.PLAY mation about programming see page 78. CHORD TEMPO OCTAVE... -
Page 81: Tone Programming (Guitar Mode)
Reference • Arrangement Play mode Page 18: Tone programming (Guitar mode) This page contains the programming of the Tone effect selected in “Page 16: Guitar effects (2) (Guitar mode)” [-15…0…+15] (see page 66). Low frequency band. With positive values the band is Note: These parameters can only be accessed if the boosted (level increase), whereas with negative values TONE parameter is not set on OFF in “Page 16: Guitar... - Page 82 Reference • Arrangement Play mode Distorsion values it will also reduce the notes played in pianis- simo. The distorsion is obtained by simulating the saturation of the amplifier distorsion circuit. The sounds are MODE ARR.PLAY CHORD colder and more buzzing than in the overdrive. TEMPO OCTAVE COMPRESSOR Sens=05...
-
Page 83: Modulation Programming (Guitar Mode)
Reference • Arrangement Play mode Page 20: Modulation programming (Guitar mode) Depth This page shows the parameters of the MOD (Modula- tion) effect selected in “Page 15: Guitar effects (1) (Gui- [0…30] tar mode)”. The parameters are different according to the selected effect. - Page 84 Reference • Arrangement Play mode F.Back (Feedback) MODE ARR.PLAY CHORD [0…30] TEMPO OCTAVE The feedback is the effect quantity that is sent back to Speed=20 the phaser and modulated again. PAGE Speed [0…30] Speed Effect modulation speed. [0…30] Depth Effect modulation speed. [0…30] Pitch modulation Effect intensity.
-
Page 85: Ambience Programming (Guitar Mode)
Reference • Arrangement Play mode Attack MODE ARR.PLAY CHORD [0…10] TEMPO OCTAVE WAH Sens=13 Attack speed. Attack=07 Pol.=DOWN PAGE Pol. (Polarity) [UP/DOWN] Wah polarity. Sens (Sensitivity) [0…30] Sensitivity. Page 21: Ambience programming (Guitar mode) Time This page shows the parameters of the AMB (Ambi- ence) effect selected in “Page 15: Guitar effects (1) [0…30] (Guitar mode)”. -
Page 86: Nr And Cr Programming (Guitar Mode)
Reference • Arrangement Play mode Time MODE ARR.PLAY CHORD [0…30] TEMPO OCTAVE Reverb length. ROOM Level=18 Time=07 Tone=07 PAGE Tone [0…30] Reverb tone. This parameter will determine the high Level frequency attenuation. Higher values will give a higher attenuation. [0…30] Reverb level. -
Page 87: Rename Arrangement
Reference • Arrangement Play mode Page 23: Rename Arrangement The “Rename Arrangement” page allows you to mod- The following characters can be used. ify the arrangement name. The name can be made up ABCDEFGHIJKLMNOPQRSTUVWXYZ of a maximum of 10 characters. abcdefghijklmnopqrstuvwxyz 0123456789?!.,:;'`"+-=#&@$ ¥%(){}[]<>*/_|^˘¯... -
Page 88: Write Keyboard Set
Reference • Arrangement Play mode Page 25: Write Keyboard Set Press REC/WRITE/LYRICS and one of the but- This page allows you to save the current situation of the real time tracks, effects and VOCAL/GUITAR sec- tons in the KEYBOARD SET section. tion in a Keyboard Set. -
Page 89: Backing Sequence Mode
Reference • Backing Sequence mode 7. Backing Sequence mode • Saving the backing sequences before turning off Warning: When the instrument is turned off, the back- disk (see “2. Save” on page 131, and “Saving the Back- ing sequences in memory will be erased. Before turn- ing Sequences on disk”... -
Page 90: Recording
Reference • Backing Sequence mode Page 1: Recording If the i40M is connected to a keyboard or to The backing sequence can be recorded in different ways: another controller, program it to transmit over the special Global channel. • In real time, all the tracks in one go (see “Recording all the tracks in one go in real time”... - Page 91 (accompaniment, keyboard, controls, chords). In order to record the ATr track, the MIDI controller TEMPO-REC Tempo changes are recorded whilst must transmit over the Global channel of the i40M. you are recording. This option can...
- Page 92 Reference • Backing Sequence mode How to carry out Manual The ETr1-ETr8 tracks are the Extra Tracks 1-8, used to Punch. Playback the song. When add freely recorded parts (non-automatic). See you get to the beginning of the area “Recording a track at a time in real time” on page 85. where you wish to record, press To record the Extra Tracks, the MIDI controller must REC/WRITE/LYRICS.
-
Page 93: Recording A Track At A Time In Real Time
The backing sequence tracks may corresponds to vari- ous tracks of the i40M. Some of the backing sequence tracks do not correspond to real tracks of the i40M, but to special control tracks. Abbrev. - Page 94 Reference • Backing Sequence mode Recording the control track To hear the metronome during the recording, move the cursor to “M” (metronome) and select In order to record the control track, the MIDI controller the option REC using the TEMPO/VALUE buttons. must transmit over the Global channel.
- Page 95 Reference • Backing Sequence mode Press START/STOP to listen to the song you have When finished, press START/STOP to stop the just recorded. recording. The song will be played from the beginning to the The recording will stop and the REC/WRITE/LYR- end.
- Page 96 Reference • Backing Sequence mode Move the cursor to the “Ch” parameter and assign a MIDI channel to the Extra Track. The Extra Track usually are not connected to the MIDI. Program the MIDI controller to transmit over the channel of the Extra Track you wish to record. The Extra Tracks must receive the notes over their own channel, and not over the special Global chan- Press START/STOP to start the recording.
-
Page 97: Step Recording
Reference • Backing Sequence mode Page 2: Step recording Step recording (recording step by step) allows you to Location Measure insert an event at a time. It can be used for all the tracks (keyboards, chords, controls, extra tracks). Step recording erases the data of the measures you are recording on. - Page 98 Reference • Backing Sequence mode Tension Position Tension adds notes that have actually been played to This indicates the position where the next chord will the accompaniment, even if they haven't been written be entered. The number to the left of the colon (:) indi- in the style pattern.
- Page 99 Reference • Backing Sequence mode Note ** The KB MODE/ASSIGN parameter controls the KEYBOARD ASSIGN and KEYBOARD MODE sec- tions: This indicates the name of the most-recently entered note. This parameter will appear if you have selected track KBTr or ETr1–8. Option Keyboard Assign Keyboard Mode...
-
Page 100: Erase Backing Sequence
Reference • Backing Sequence mode Duration (ETr1-ETr8), press REC/WRITE/LYRICS and then START/STOP. This page will appear. [001…100%] Measure Position Note This specifies the duration of the note, relative to the length of the step. Duration of the step. Lower values Staccato (sharply detached) notes. -
Page 101: Edit 1
Reference • Backing Sequence mode Page 5: Edit 1 5-2. Insert measures In this page you can select one of the following three options: delete measure (DELETE), insert measure (INSERT), erase data from measure (ERASE). Move This operation inserts measures into the selected track. the cursor to the desired operation using the CURSOR The following measures will then be moved forward. -
Page 102: Erase Measures
Reference • Backing Sequence mode If you assign the value **/** to the time signature LL value erases measures from all the tracks (chord parameter, the new measures will have the same time track, control track, tempo track, keyboard track, signature as the measures that are in the same position etc.). -
Page 103: Edit 2
Reference • Backing Sequence mode Page 6: Edit 2 In this page you can select one of the following three operations: copy measures (COPY), combine tracks 1. Move the cursor to the “Track” parameter, using (BOUNCE), adjust timing errors (QUANTIZE). Move the CURSOR buttons and choose the track with the the cursor to the operation you wish to carry out using TEMPO/VALUE buttons. -
Page 104: Bounce Tracks
Reference • Backing Sequence mode 6-2. Bounce tracks Type of data Quantize value This operation combines two tracks (keyboard tracks or extra tracks) into one track. The resulting track will use the program, the MIDI channel and all the settings of the Bounce destination track. -
Page 105: Shift Note (Transposition)
Reference • Backing Sequence mode Page 7: Shift note (Transposition) This operation shifts the pitch of notes making them 1. Move the cursor to the “Track” parameter using the more acute (higher) or more grave (lower), in semitone CURSOR buttons and choose the track with the steps. - Page 106 Reference • Backing Sequence mode Time signature You can insert an event before the displayed event by pressing the INS button. However, it is not possible to This indicates the time scanning of the measure, i.e. (a) carry out this operation if the bar line (BAR event) of number of movements in which it is divided, and (b) the first measure is selected.
- Page 107 Reference • Backing Sequence mode Event editing of the CTRL track (controls) Type of event Value Measure number / Index number Position TRANSPOSE –11… –1, 00, +1… +11 DRUM MUTE PERC MUTE BASS MUTE PLAY, MUTE ACC1 MUTE ACC2 MUTE ACC3 MUTE Type of event UP1 PROG (Upper 1...
- Page 108 Reference • Backing Sequence mode Event editing of the CHRD track (chords) Chord This indicates the chord that will be input. Option Keyboard Assign Keyboard Mode FUL-UP1 UPPER1 FULL Tension UPPER1, FUL UP1-2 FULL UPPER2 Tension adds notes that have actually been played to SP UP1&L UPPER1, LOWER SPLIT...
-
Page 109: Extra Track Settings (1)
Reference • Backing Sequence mode Page 9: Extra Track settings (1) Ch (MIDI channel) In this page you can set the initial parameters of the eight extra tracks ETr1-ETr8. In the same way as the [--, 01G…16] keyboard track, you can individually adjust the trans- pose and detune settings. -
Page 110: Extra Track Settings (2)
Reference • Backing Sequence mode Page 10: Extra Track settings (2) In this page you can choose the program (sound), pan repeatedly until the abbreviation “Dr” appears, then (stereo location) and the effect level sent to the two select a two-digit number with the number buttons. built-in effect systems, for each of the 8 extra tracks. -
Page 111: Effect Select
Reference • Backing Sequence mode Page 11: Effect select The instrument has two incorporated digital effect effects you wish to assign to each processor. For more processors for the sounds produced by the internal details, see page 175. sound generation. In this page, you can choose which Page 12: Effect modulation In this page you can connect the effects to one or two controls, which allow you to dynamically modulate... -
Page 112: Next Backing Sequence
Reference • Backing Sequence mode Page 16: Next Backing Sequence The “Next Backing Sequence” page allows you to is OFF, at the end the current backing sequence will choose a backing sequence which will be automati- carry on playing. cally selected when the current backing sequence ends. -
Page 113: Rename Backing Sequence
Reference • Backing Sequence mode Page 17: Rename Backing Sequence The “Rename Backing Sequence” page allows you to The following characters can be used. change the name of the backing sequence. The name ABCDEFGHIJKLMNOPQRSTUVWXYZ can be made up of a maximum of 10 characters. abcdefghijklmnopqrstuvwxyz 0123456789?!.,:;'`"+-=#&@$ ¥%(){}[]<>*/_|^˘¯... -
Page 114: Song Play Mode
To program a song on an external sequencer, set the The Song Play mode does not allow you to edit the i40M in the Song Play mode. In this way the instru- song permanently. You can only make changes during... -
Page 115: Performance Monitor
• Playing back one song The i40M can display the lyrics of the SMF in M-live Select the song with the TEMPO/VALUE buttons. (MidiSoft), Solton, or Tune1000 or compatible (Edirol, You can select the song on disk with the buttons of GMX, KAR, HitBit, XF) format. - Page 116 “Measure not exists. Continue?” will appear. If you specifications, it might be impossible to read the file press ENTER/YES playback will continue with the with the i40M, or it might be read incorrectly, with a next song. If you press EXIT/NO playback will stop bad sound.
-
Page 117: Channel Settings
Reference • Song Play mode Page 2: Channel settings In this page you can set the channels during playback. ARRANG section. (See “Changing the sounds of the The SMF have their own parameters, which are auto- real time tracks” on page 30). Press PROGRAM/ matically assigned to the tracks. -
Page 118: Transpose Position
Reference • Song Play mode Page 3: Transpose position In this page you can specify the transpose position in With the SEQ/MIDI&INT option, both the notes the MIDI data flow. received via MIDI and the ones played by the sequencer will be transposed. Both the notes sent to the internal tone generator and the ones sent to the MIDI OUT will be transposed. -
Page 119: Effect Select
Reference • Song Play mode Page 4: Effect select The instrument has two built-in digital effect proces- to the song and switch them on/off. For more informa- sors for the sounds produced by the internal tone gen- tion, see page 175. erator. -
Page 120: Song Play Harmony
SONG PLAY HARMONY The harmonization notes are only Ch=MIDI IN Ch01 sent to the harmonization and not played by the selected track. This set- tings allows you to save notes of the i40M polyphony. SONG PLAY HARMONY Ch=Song Ch01 TG=ON... -
Page 121: Song Edit Mode
Reference • Song Edit mode 9. Song Edit mode • Saving a song before turning off Warning: When the instrument is turned off, the song dure contained on “Page 13: Save” in the Song Edit in Song Edit will be erased. Before turning off the mode. -
Page 122: Playback
Reference • Song Edit mode Page 2: Playback Tempo mode The parameters contained in this page control the playback of the SMF loaded in memory. [AUTO, MAN, TEMPO-REC] Tempo Octave Playback mode of the metronome tempo. AUTO The song tempo will play. The tempo will be as defined by the TEMPO/VALUE buttons. -
Page 123: Recording
Reference • Song Edit mode Page 2: Recording to previously existing data. To enter the recording mode, go to Page 2 in the Song Edit mode, then press REC/WRITE/LYRICS. To go AUTP (Auto punch) You can specify a start back to playback press REC/WRITE/LYRICS or measure and an end measure before EXIT/NO. - Page 124 Turning the metronome on or off. The notes will be recorded as they The metronome will only sound dur- were played. (On the i40M precision ing the precount of recording. is 96 “tic” per quarter). The metronome will sound both dur-...
-
Page 125: Track Parameters
Reference • Song Edit mode Page 3: Track parameters Ch (MIDI channel) In this page you can view and modify the parameters of each individual track. [01…16] Track Program MIDI channel of the track. If a song is converted into a Standard MIDI File with the function on “Page 13. -
Page 126: Event Edit
Reference • Song Edit mode Page 4: Event edit Event types The Event Edit page allows you to modify single events, for example notes and control change mes- sages (pedal, volume, pan...). BAR (Bar line) Measure number / Index number Track The typical edit procedure is: 1. - Page 127 Reference • Song Edit mode Position *2. The pitch bend value is divided into two parts with two digits each. Use the CURSOR buttons to switch [1:00…8:95] from one part to the other. This indicates the position within the measure. The *3.
-
Page 128: Shift Notes (Transposition)
Reference • Song Edit mode Page 5: Shift notes (Transposition) Track This function shifts (i.e. transposes) the pitch of notes making them more acute (higher) or more grave [Ch01…Ch16, ALL] (lower). You can shift all the notes or choose certain measures. -
Page 129: Edit
Reference • Song Edit mode Page 7: Edit In this page, you can select one of the three following Time signature functions: delete measures (DELETE), insert measures (INSERT), erase data from measure (ERASE). Move the cursor to the desired function using the CURSOR buttons, then press ENTER/YES to enter the subpage. -
Page 130: Erase Measures
Reference • Song Edit mode Time signature = **/** 2. Move the cursor the “First measure” field, and choose the first of the measures you wish to erase. Move the cursor to the “Last measure” field, and Tr01 1 (4/4) 2 (2/4) 3 (2/4) 4 (4/4) -
Page 131: Effect Select
Reference • Song Edit mode Page 8: Effect select The instrument has two built-in digital effect proces- to assign to the song and switch them on or off. For sors for the sounds produced by the internal tone gen- more information, see page 175. erator. -
Page 132: Save
Format of the Standard MIDI File (SMF). In order to drum kits. Some sounds may not play playback the song in the Song Play mode of the i40M, at all on instruments from other man- choose format 0, which will allow loading to take ufacturers. -
Page 133: Disk/Global Mode
Reference • Disk/Global mode 10. Disk/Global mode • “Parameter modified - Write?” message After having modified some parameters, if you press • Load > Load Global the button of another operative mode, the question • Load > Load All > All “Parameter modified - Write?”... -
Page 134: Introduction To Disks
Reference • Disk/Global mode Introduction to disks Inserting a disk The i40M can save most of the data contained in mem- ory on a 3,5” DS-DD disk (720KB capacity) or HD (1,44MB capacity), formatted in MS-DOS® format. A Insert the disk delicately into the disk drive, with the disk can contain up to 112 files, irrespective of the disk... -
Page 135: Cleaning The Heads
Vocal/Guitar settings, Keyboard Set. • Do not open the metallic shutter on the disk, and The disk also contains a backup copy of the i40M ROM do not touch the surface of the magnetic media data, that is non user-modifiable data. They are the inside it. -
Page 136: Disk Functions
Reference • Disk/Global mode Page 1: DISK functions 1-1. Load all In this page you can select one of the three disk func- tions: loading (LOAD), saving (SAVE) and utility (UTIL). Move the cursor to the desired function, then The Load All function loads all data of a file, or all data press ENTER/YES to access its subpages. -
Page 137: Load One
Reference • Disk/Global mode BSQ (BACKING SEQUENCE) 3. Choose the desired file with the TEMPO/VALUE buttons. The BSQ files contain up to 10 backing sequences. 4. Press ENTER/YES to load the file (or, press EXIT/ NO to cancel the procedure). If all the data 1. - Page 138 Reference • Disk/Global mode ARR (ARRANGEMENT) 1. Use the TEMPO/VALUE buttons to choose the program file from which you wish to load the pro- This option allows you to load an arrangement from gram. an arrangement file. If the arrangement uses an USER 2.
-
Page 139: Load Global
There are 16 USER style locations available (U11-U28). Keyboard Sets. Any Keyboard Sets already in memory will be deleted. If you are loading data from a Korg iS40 disk, an error message (“Missing HMB file”) will appear at the end of the loading procedure, because the Vocal/Guitar setup file is missing in the Korg iS40. -
Page 140: Utility
Reference • Disk/Global mode PRG (PROGRAM) sage will appear asking you if you wish to proceed and delete the old file, replacing it with the one you are saving. Press ENTER/YES to confirm (or EXIT/ The PRG option saves a file containing the 64 pro- grams of the F(USER) bank and the two Drum pro- NO to cancel the operation). -
Page 141: Compatibility With Korg I30 Data
FORMAT (Format disk) data New disks must be formatted before they can be used with the i40M. (It is possible to purchase ready format- In spite of the differences between the two instru- ted MS-DOS® disks that can be used immediately by ments, the i40M can load data from Korg i30 disks. - Page 142 6. As soon the display shows the directory containing Loading data from a Korg i30 disk the file you wish to load, press ENTER/YES to...
-
Page 143: Echo Back / Midi In Octave
Local Off message over the MIDI OUT connec- Local Off message through the MIDI OUT, while dis- tor when you turn the i40M on. Turn on the piano before connecting the internal sounds of the piano from the turning the i40M on. -
Page 144: Midi Settings
MIDI and other parameters with only one command (see table “MIDI Setup” on Protect page 203). When you select one of the setups, the i40M will be automatically configured for connection with a The Protect function protect the settings in the Disk/ specific type of MIDI controller. -
Page 145: Global Midi Parameters
Page 4: Global MIDI parameters This page contains the global MIDI settings, such as You can also use “Local Off” to connect the i40M to a the clock and the external generator connection to the MIDI keyboard and a sequencer, while still using the MIDI. - Page 146 Start, Stop, Continue, [Nor, 0…127] Song Select, Song Position Pointer messages. The status of this parameter determines how i40M will receive velocity data. This is very useful when using EXT-IN2 As for the EXT-IN1 option, the mes- keyboards that do not transmit velocity data, for sages however, will be received example MIDI accordions.
-
Page 147: Midi Channel Settings (1)
MIDI channels. always transmits on the same channel as the Glo- bal. Global • In the Program mode, the i40M transmits and receives on the Global channel. • When you purchase the instrument, the Global is MIDI CHANNEL GLB=01 programmed on the MIDI 1 channel. -
Page 148: Midi Channel Settings (3)
Used for receiving program change messages for the master keyboard to simulate an integrated keyboard selection of arrangements. To deactivate this parame- in the i40M, choose the same channel that is assigned ter choose the “--” option. to Global. To deactivate this parameter choose the “--” option. -
Page 149: Midi Filter
Reference • Disk/Global mode Page 8: MIDI filter will be transmitted as [MSB 0, LSB 0]. This page contains a series of MIDI filters, to be used The other banks will be transmitted to restrict transmission and reception of some kinds of normally. -
Page 150: Arrangement Harmony
Reference • Disk/Global mode Page 9: Arrangement Harmony This page allows you to choose the harmonization channel in the VOCAL/GUITAR section for the [-3…0…+3] Arrangement Play mode. Transposition octave of the harmonization notes. For MIDI channel example, if you are playing the chords with your left hand, below the split point, and you must harmonize a female voice, you can choose a positive value (two or three octaves) to bring the chords to the sing height. -
Page 151: Song Play Harmony
While this parameter is selected, you can select the function by pressing the corresponding button on the control panel. Option Function The i40M is compatible with a number of pedal mod- None els. We recommend using a Korg PS-1 or PS-2 pedal START/STOP Same as the START/STOP button switch, and a Korg XVP-10 or EXP-2 expression pedal. -
Page 152: Setting Quarter Tones
EFFECT 2 ON/OFF Effect 2 activation/deactivation ** The i40M can detune single notes by a quarter tone DRUM MUTE Mutes the Drum track (50 cents), particularly for use in Middle Eastern... -
Page 153: Ec5 External Controller
The setting will be canceled when the instrument is turned off. Page 13: EC5 external controller Pedal You can connect the Korg EC5 external controller to the EC5 jack. This versatile controller includes five [A…E] completely programmable pedals, which make live controlling of the i40M easier. -
Page 154: Lower Memory
Reference • Disk/Global mode Page 14: Lower memory Chord 2 channels. Notes played In this page you can program the functioning of the through the channel of the Lower MEMORY-LOW/HAR button. track will not be held. Lower Memory See also “Page 7: MIDI channel set- tings (3)”... -
Page 155: Chord Recognition Mode
Reference • Disk/Global mode Page 15: Chord recognition mode This is the mode in which the chords for the automatic Chord Scanning Chord recognition accompaniment will be recognized when the button selected in the CHORD SCANNLING section is Three or more notes along the entire FULL LOWER. -
Page 156: Auto Chord Scanning/Damper Polarity
If you Auto chord scanning own a Korg PS-2 pedal, you should program its right jack as KORG (–) and the left jack as REVERSE (+). [ON, OFF] KORG(–) For pedals with normally open polar- If this parameter is set on ON, the Chord Scanning ity. -
Page 157: Main Scale
Reference • Disk/Global mode Page 17: Main scale Page 18: Sub scale WERCKMEISTER Late baroque/classical scale. These pages allow you to select a Main Scale (or tem- perament), or Sub Scale for the instrument. It is possi- KIRNBERGER 18th century harpsichord scale. ble to switch from the Main Scale to the Sub Scale with SLENDRO Indonesian... -
Page 158: User Scale
The MIDI Data Dump is the sending of internal data of 2. Select the type of data you wish to send and press the i40M to another MIDI device. In this page, you can ENTER/YES. transmit and receive System Exclusive data. -
Page 159: Joystick Settings
Reference • Disk/Global mode Data type Transmission Data type Size (in KB) time (in seconds) [GLOBAL…KEYBOARD SET] Global <1 GLOBAL All Global parameters, except for Local Control and Clock Source. Arrangement ARRANGEMENT The 64 USER arrangements. Backing sequence 2,6-186 1-60 B.SEQUENCE The 10 backing sequences. -
Page 160: Write Global
Reference • Disk/Global mode Page 22: Write Global The Write Global function permits you to save all of 1. Go to this page. the Global settings in memory, and the split point. 2. Press ENTER/YES twice to save the Global settings You can reach this page by pushing the REC/WRITE/ in memory. -
Page 161: Program Mode
Program XPOSE (Transpose) [A11…E88, F11…F88, Dr11…Dr28] [–11…+11] The internal memory of the i40M contains seven banks of Programs, as follows. When you need to transpose (shift the pitch), use the TRANSPOSE buttons to set the Transpose setting of each program. The pitch can be transposed in semi-... -
Page 162: Performance Edit
[–10…+10/–3…+3] gram that will sound. This allows 1 octave of change in one-octave steps. The Performance Edit function of the i40M allows you to make adjustments to the most important program VDF Cutoff modifies the VDF Cutoff parameter parameters, without having to bother with detailed ( P. -
Page 163: Oscillator Basic/Oscillator 2 Relative
Note-off This specifies whether or not a note sounded by the message is received, and whether the program will program will stop when you release the i40M’s key- sound monophonically or polyphonically. board or when a Note-off message is received. -
Page 164: Oscillator Tone
Reference • Program mode Dly (OSC2 Delay) With a setting of 0, OSC1 and OSC2 will sound simul- taneously. [00…99] This parameter delays the onset of the OSC2 sound, so that OSC2 will begin to sound after OSC1. Page 3: Oscillator tone In this page you can select the waveform used by the If Oscillator Type is set to DRUM, this will show a oscillator, and make other oscillator-related settings. -
Page 165: Pitch Eg
Reference • Program mode P (Pitch EG intensity) CNT will place the sound produced by the oscillator in the center. [–99…+99] L settings will place the sound toward the right, and R This specifies the effect that the Pitch EG will have on settings toward the left. - Page 166 Reference • Program mode AT (Attack time) Set it in the same way as the Start Level parameter. [00…99] L (Level velocity sensitivity) Sets the time over which the pitch will change from the Start Level (S) to the Attack Level (A). [–99…+99] With a setting of 0 the movement will take place This specifies the depth to which the Pitch EG levels...
-
Page 167: Vdf
Reference • Program mode Page 5: VDF CO (VDF cutoff frequency) Here you can change filter settings to adjust the tone. [00…99] Color VDF1/VDF2 VDF EG VDF cutoff Intensity This specifies the frequency at which the VDF filter will begin to apply. Lower values will produce a darker and more muted tone. -
Page 168: Vdf Eg
Reference • Program mode Page 6: VDF EG Here you can specify the shape of the VDF EG (enve- With positive (+) settings the Attack Level will be lope generator) that will determine how the VDF cut- higher than the normal cutoff frequency, and with off frequency will change over time. -
Page 169: Vdf Keyboard Tracking
Reference • Program mode R (Release level) Set it in the same way as the Attack Level parameter. [–99…+99] Sets the level at which the VDF cutoff frequency will arrive after the Release Time (RT) has elapsed. Page 7: VDF keyboard tracking VDF keyboard tracking is a function that adjusts the Positive (+) settings will cause the tone to become cutoff frequency according to the keyboard location of... - Page 170 Reference • Program mode AL (ALL) will cause keyboard tracking to adjust the A setting of “+” will cause keyboard tracking to cutoff frequency of all notes, relative to the Pivot note. shorten the attack time. A setting of “–” will cause keyboard tracking to Changes in cutoff frequency produced by Keyboard Track Amount (Amt) and Pivot Key settings for each Mode lengthen the attack time.
-
Page 171: Vdf Velocity Sensitivity
Reference • Program mode Page 8: VDF velocity sensitivity On the i40M, the VDF EG can be affected by your key- board playing dynamics or by the velocity values of VDF EG velocity sensitivity (for positive (+) settings) MIDI Note messages received from an external MIDI... -
Page 172: Vda Eg
Reference • Program mode D (Decay time) R (Release time) [–, 0, +] [–, 0, +] Specifies the direction of the change that velocity will Specifies the direction of the change that velocity will cause for Decay Time. cause for Release Time. This setting functions in the same way as the Attack This setting functions in the same way as the Attack Time parameter. -
Page 173: Vda Keyboard Tracking
Reference • Program mode DT (Decay time) Set it in the same way as the Attack Time parameter. [00…99] S (Sustain level) Sets the time over which the VDA volume will change from the Attack Level (A) to the Break Point (B). [+00…+99] Set it in the same way as the Attack Time parameter. - Page 174 Reference • Program mode determined by the setting of the Mode parameter, OF (OFF) will cause keyboard tracking to be turned below. off, so that notes in any range of the keyboard will have the same volume. LO (LOW) will cause keyboard tracking to apply to Mode the range below the Pivot note.
-
Page 175: Vdf Velocity Sensitivity
Reference • Program mode Page 11: VDF velocity sensitivity T (Time amount) On the i40M, the VDA EG can be affected by your key- board playing dynamics or by the velocity values of [00…99] MIDI Note messages received from an external MIDI device. -
Page 176: Vibrato
Reference • Program mode This setting functions in the same way as the Attack Note-on Note-off Note-on Note-off Note-on Note-off Time parameter. VDA EG Time parameter settings Notes played softly Notes played strongly Page 12: Vibrato Waveform This page contains settings which control pitch modu- lation. -
Page 177: Vibrato Controller
Reference • Program mode D (Delay) S (Key sync) [00…99] [ON, OFF] This parameter delays the onset of automatic pitch This parameter specifies whether or not the Vibrato modulation. will be reset each time you play a note. Higher values will produce a greater delay. With a setting of ON, the modulation waveform will be reset each time you play a note. -
Page 178: Vdf Mg
Reference • Program mode JS+ Af → Freq (Frequency control by joystick + Af (Aftertouch) aftertouch) [00…99] [0…9] This specifies the maximum depth of the modulation that will occur when aftertouch is applied. This parameter allows the modulation to be speeded up by moving the joystick away from you or by apply- This is similar to the “Page 12: Vibrato”... -
Page 179: Vdf Mg Controller/Vda Level
Reference • Program mode S (Key sync) playing chords, so that modulation will apply to each note in unison even if you arpeggiate the chord. [ON, OFF] This parameter specifies whether or not the VDF MG Oscillator will be reset each time you play a note. With a setting of ON, the modulation waveform will [OFF, OSC1, OSC2, BOTH] be reset each time you play a note. -
Page 180: Controllers
Reference • Program mode Page 16: Controllers The settings here determine how the joystick and • Af (Aftertouch) aftertouch will affect the pitch, filter cutoff frequency, [–12…+12] and volume of the program. These parameters will directly control the pitch, cutoff frequency, and vol- This specifies the amount of pitch change that will ume. -
Page 181: Effect Select
Reference • Program mode Page 17: Effect select The instrument has two incorporated digital effect you wish to assign to the program and turn them on or processors. In this page, you can choose which effects off. For more details, see “Effects” chapter. Page 18: Effect modulation In this page you can connect the effects to controls, which allow you to dynamically modulate their inten-... -
Page 182: Rename Program
Reference • Program mode Page 22: Rename program Here you can modify the title of the program that is The following characters can be used. being edited. ABCDEFGHIJKLMNOPQRSTUVWXYZ A title of up to 10 characters can be assigned to the abcdefghijklmnopqrstuvwxyz program. -
Page 183: Effects
This chapter explains the effect types rus, etc.) and including effects such as exciter and that can be used in the various modes of the i40M. The enhancer. In addition, you can use a foot pedal to i40M provides 47 different types of effect, beginning switch effects on/off while you play. -
Page 184: Effect Modulation
Reference • Effects Type of effect Type of effect 1 [00: No effect…47: Delay/Rotary] You can assign a different effect to each processor. For more information on the types of effect, read forward in this chapter. ON/OFF[OFF, ON] Type of effect 2 Effect on/off This switches the effect on or off. -
Page 185: Effect Placement
Reference • Effects “Effect placement” pages Mode Page Arrangement Play “Page 11: Effect placement” Backing Sequence “Page 13: Effect placement” Song Play “Page 6: Effect placement” Song Edit “Page 10: Effect placement” Program “Page 19: Effect placement” In this page you can choose the effect setup of the The PARALLEL 1 setting will assign effect 1 to chan- arrangement, backing sequence, song or program, and nels A and B, and effect 2 to channels C and D. -
Page 186: Effect 1 Settings Pages
Dynamic modulation If an optional Korg XVP-10 or EXP-2 pedal controller of the effect that can be controlled will depend on the is connected to the ASSIGN PDL/SW jack, and you set effect;... -
Page 187: Shelving Equalizer
In the LCD, parameters which can be controlled using dynamic modulation while you play are indicated by a Shelving equalizer Many of the i40M’s built-in effects have a two-band (13, 14), Stereo Chorus (19, 20), Exciter (28), and Trem- shelving-type equalizer that can boost or cut the low olo (35, 36 effects) are exceptions. - Page 188 Reference • Effects Early reflection Depends on Set the volume of the early Pre delay 0…200 ms Set the delay from the direct level the effect reflection components of the sound until when the early reverberation. As this value is reflections begin.
- Page 189 Reference • Effects Feedback –99%…+99% Set the amount of feedback; i.e., High damp L 0%…99% Set the degree to which the high the amount of the delayed signal frequencies of the left channel that will be returned to the input will be attenuated.
- Page 190 Reference • Effects determined by the Delay B parameter, as shown in the Left following diagrams. Delay B When delay time A is less than delay time B Delay A Level Delay A Delay B Right Multitap Delay 1 Time Left Delay B Delay A...
- Page 191 Reference • Effects As with reverb, this effect is indispensable for music Equalizer high –12 dB…+12 Set the amount of boost or cut production using electronic musical instruments. It is that the shelving type equalizer will apply to the region above 1 especially widely used on synth pads such as strings kHz.
- Page 192 Reference • Effects Equalizer low –12 dB…+12 Set the amount of boost or cut Dry:Effect balance DRY, Set the balance between the that the shelving type equalizer B1…B99, FX direct sound (DRY) and the will apply to the region below 1 sound processed by the effect kHz.
- Page 193 Reference • Effects For each of these three flangers, a two-band shelving → Dry:Effect balance DRY, Set the balance between the equalizer is applied to the signals of the right and left B1…B99, FX direct sound (DRY) and the sound processed by the effect channels before the flanging effect is applied.
- Page 194 For example if when playing in an ensemble (whether 29: Enhancer processes the left and right channel sig- using the i40M by itself, or in a band with other instru- nals separately. ments) you have ever felt that the i40M sound you...
- Page 195 Reference • Effects → Dry:Effect balance DRY, Set the balance between the Dry:Effect DRY, Set the balance between the B1…B99, FX direct sound (DRY) and the balance B1…B99, FX direct sound (DRY) and the sound processed by the effect sound processed by the effect (FX).
- Page 196 Reference • Effects Dry:Effect balance DRY, Set the balance between the Dry:Effect balance DRY, Set the balance between the 99:1…1:99, direct sound (DRY) and the 99:1…1:99, direct sound (DRY) and the sound processed by the effect sound processed by the effect (FX).
- Page 197 Reference • Effects Modulation speed 0.03…30 Hz Set the speed of the LFO that Middle width 0…99 Set the width of the band modulates the input level. Higher affected by the mid-range filter. settings will produce faster Higher settings will cause the modulation.
- Page 198 Reference • Effects → Dry:Effect balance Delay time 0…450 ms Set the basic delay length for the DRY, Set the balance between the delay effect. B1…B99, FX direct sound (DRY) and the sound processed by the effect Feedback –99%…+99% Set the amount of feedback that (FX).
- Page 199 Reference • Effects You can use dynamic modulation to control the Feedback –99%…+99% Set the amount of feedback; i.e., DRY:FX parameters of both the delay and flanger the amount of the delayed sound that will be returned to the input effects while you play.
- Page 200 Reference • Effects → Dry:Effect balance DRY, Set the balance between the Resonance 0…99 Set the amount of resonance B1…B99, FX direct sound (DRY) and the that is applied by the wah filter. sound processed by the effect Higher settings will produce a (FX).
- Page 201 Reference • Effects Modulation depth 0…99 Set the depth at which the phase Dry:Effect balance DRY, Set the balance between the will be modulated. Higher set- B1…B99, FX direct sound (DRY) and the tings will cause the modulation sound processed by the effect effect to be more pronounced.
-
Page 202: Appendices
Reference • Appendices 13. Appendices Messages In the various page displays of Arrangement Play mode and Backing Sequence mode display settings and parameters, and also when you modify settings such as volume, mute, and transpose, the iS40/iS50 will sometimes display “popup” screens that appear only for a few seconds. In addition to these, you may occasionally see messages that provide warnings, ask for confirmation, or indi- cate that processing is taking place. - Page 203 Reference • Appendices Can’t replace dir. The filename that you specified is already being used by a directory on that disk. Thus, the operation that you are attempting cannot be exe- cuted. Specify a different filename, and try the operation again. Can’t replace system.
- Page 204 Missing HMB file The setup file of the VOCAL/GUITAR section is missing. The disk probably comes from a KORG iS40. In spite of the error message, all the other files will be loaded and no problems will occur when operating the instrument.
- Page 205 Reference • Appendices Not enough memory. The iS40/iS50 does not have enough memory for work area. Thus, the operation that you are attempting cannot be executed. In order to allo- cate memory space, you will need to perform one of the operations described below.
-
Page 206: Troubleshooting
P. 4 Does not respond to MIDI messages are enable to receive in the i40M. Make sure that the MIDI Filters of the i40M do not prevent the reception of mes- P. 141 sages. Some drum kit sounds are not played Check the panpot and effect send level settings. -
Page 207: Floppy Disk Related Problems
Reference • Appendices Floppy disk related problems Problem Action Are you using a 3.5 inch 2DD or 2HD floppy disk? You must use one of these types. Cannot format a floppy disk Is the disk inserted correctly? Is the write protect tab of the disk in the protect position? Is the disk inserted correctly? Cannot save data to a floppy disk Is the write protect tab of the disk in the protect position? -
Page 208: List Of Detected Chords
Reference • Appendices List of detected chords Each of the chords pictured below are shown in root position with a root note of C. In order for the iS40/iS50 to correctly recognize major 6th and minor 6th chords, they must be played in root position as pictured. This is because these chords consist of the same notes as the minor 7th and minor 7th flatted 5th of the relative minor key. - Page 209 Reference • Appendices Minor Minor 6th 3-note 2-note 4-note Minor 7th Minor-Major 7th 3-note 4-note 3-note 4-note Diminished Diminished Major 7th 3-note 4-note Minor 7th 5 4-note Augmented Augmented 7th Augmented Major 7th 3-note 4-note 4-note Major 7th 5 Major 7th Sus 4 Dominant 7th 5 4-note 4-note...
-
Page 210: Midi Implementation Chart
Reference • Appendices MIDI Implementation chart KORG i40M OS Version 1.0 - Feb. 20, 1999 Function Transmitted Recognized Remarks Default 1–16 1–16 Memorized Basic Channel Changed 1–16 1–16 Default Mode Messages Altered ****************** 0–127 0–127 Note Transmit from sequencer Number:... -
Page 211: Midi Setup
Reference • Appendices MIDI Setup The following chart lists the parameters that are automatically configured by each MIDI Setup. Parametro Default Master Piano 1 Piano 2 Accordion 1 Accordion 2 Accordion 3 Guitar Global Upper 1 Upper 2 Lower Drum Percussion Bass Acc.1... -
Page 212: Styles
Reference • Appendices Styles 8 Beat 16 Beat Ballroom Dance 1 8 beat 1 16 beat 1 Slow Pop Party Polka 8 Beat 2 16 Beat 2 Slow Rock 1 Disco Party 8 Beat 3 16 beat 3 Slow Rock 2 Motown 8 Beat 4 16 Beat 4... -
Page 213: Arrangements
Reference • Appendices User 1 User 1 User 2 User 2 Arrangements You can select the arrangements via MIDI, sending Bank Select MSB, Bank Select LSB (shown in table as BS) and Program Change (shown in table as PC) messages through the ARNG channel. The Bank Select MSB is always = 00. 8 Beat 16 Beat Ballroom... - Page 214 Reference • Appendices Traditional 1 Traditional 2 Jazz Jazz & Funk Waltz Wiener Waltz Big Band 40's Ballad Mediu- Mazurka Slow Waltz 1 Big Band mSwing Polka Slow Waltz 2 Fast Big Band Be Bop German Operetta Latin BigBand Acid Jazz Waltz Laendler Fox Trot...
-
Page 215: Programs
Reference • Appendices Programs You can select the programs via MIDI, sending Bank Select MSB, Bank Select LSB (shown in table as BS) and Pro- gram Change (shown in table as PC) messages, through the MIDI channel you wish to change the program to. The Bank Select MSB is always = 00. - Page 216 Reference • Appendices Bank B: Synth SFX Bank B: Ethnic Bank B: Percussion Bank B: Effects Ice Rain Sitar Tinkle Bell Gt.FretNoise Soundtrack Banjo Agogo Breath Noise Crystal Shamisen Steel Drums Seashore Atmosphere Koto Woodblock Bird Brightness Kalimba Taiko Telephone 1 Goblin Bagpipe Melo.
- Page 217 Reference • Appendices Bank D: Synth SFX Bank D: Ethnic Bank D: Percussion Bank D: Effects Caribean Tambra WindChimes Heart Beat Rave Bouzouki Cowbell Laughing BellPad Claves Wind AmbientPad Kanoon Castanets Gallop ElastikPad Ukulele Tsuzumi Telephone 2 Bell Choir Jaw Harp Oil Drum Train Big Panner...
- Page 218 Reference • Appendices Bank F: User 5 Bank F: User 6 Bank F: User 7 Bank F: User 8 Drum 1 Drum 2 000, 002- 007, 074- Dr11 GM Kit 1 040-047 Dr21 Brush Kit 115, 117-127 Dr12 GM Kit 2 048-055 Dr22 Orchestra Kit...
-
Page 219: Multisamples
Reference • Appendices Multisamples Multisample Multisample Multisample Multisample Multisample Multisample A.Piano 1 Mute Gtr 1 E.Guitar 3 Viola VS 58 MuteTriang A.Piano 1w FunkyGtr1 House Bass Cello VS 71 OpenTriang A.Piano1LP Mute Guitar1 House Bass Cello LP VS 72 Agogo A.Piano 2 FunkyGtr 1 Bass Slide... - Page 220 Reference • Appendices Multisample Multisample Multisample Multisample Multisample Multisample PercOrgan2 Santur Shakuhachi BruNoiseNT Syn Rim NT ScratDblNT PercOrg2LP Bouzouki ShakhachiV WhiteNoise Click Scratch a Organ 1 BouzoukiLP ShakhachLP WhiteNoiNT Crash Cym Scratches Organ 1 LP Kanoun Bottle Jetstar CrashCymLP Rev.Kick Organ 2 Mandolin Recorder...
- Page 221 Reference • Appendices Multisample Multisample Multisample Multisample Multisample Multisample F.Guitar1V SynthBass3 Brass 2 Sagatty Baya Car Stop F.Guitar 2 RezBass 1 Brass 2 LP Sagatty NT Tabla 1 Car Pass F.Guitar 2 RezBass 2 Brass Fall Idling Tabla 2 Car Crash ResoGuitar RezBass 3 StringEns.
-
Page 222: Drum Kits
Reference • Appendices Drum kits The following chart lists the percussive instruments assigned to each note of each Drum program. The Excl (Exclu- sive) parameter determines the mutual exclusion of two instruments with the same Exclusive number. For example, if the “Open Hi-Hat” and the “Closed Hi-Hat” have the same Exclusive number, the “Closed Hi-Hat” will immedi- ately stop when you play the “Open Hi-Hat”. - Page 223 Reference • Appendices Inst Excl Inst Excl Inst Excl Inst Excl Whistle S Whistle S Whistle S Whistle S Whistle L Whistle L Whistle L Whistle L Guiro S Guiro S Guiro S Guiro S Guiro L Guiro L Guiro L Guiro L Claves Claves...
- Page 224 Reference • Appendices Inst Excl Inst Excl Inst Excl Inst Excl Crash Cym Crash Cym Crash Cym Crash Cym Viblaslap Viblaslap Viblaslap Viblaslap Ride Cym 2 Ride Cym 2 Ride Cym 2 Ride Cym 2 Hi Bongo Hi Bongo Hi Bongo Hi Bongo Lo Bongo Lo Bongo...
- Page 225 Reference • Appendices Inst Excl Inst Excl Inst Excl Inst Excl Brush Tom Timpani Baya 1 Slap Conga Pedal HH 1 Timpani Maracas 1 SynMaracas Brush Tom Timpani Baya 2 Open Conga Open HH 1 Timpani Cabasa MuteTriang Brush Tom Timpani Tabla 3 OpenTriang...
- Page 226 Reference • Appendices Inst Excl Inst Excl Inst Excl Inst Excl Orch Hit SagatClose Orch Hit JingleBell Orch Hit MarcTree 1 Orch Hit MarcTree 2 Orch Hit Tri Roll Orch Hit Cast Roll Orch Hit Metronome1 Inst Excl Inst Excl Inst Excl Inst...
- Page 227 Reference • Appendices Inst Excl Inst Excl Inst Excl Inst Excl Tabla Tak Siren Tabla Flam Train Tabla Rim Jetstar Slap Bongo Helicopter Tabla 2 Laser Gun Rek Dom 2 Gun Shot 2 Rek Tak MachineGun Rek Dom 1 Laser Gun Rek Rim Explosion Rek Rim...
-
Page 228: Drum Samples
Reference • Appendices Drum samples Instr Instr Instr Instr Instr Instr Instr Instr Fat Kick PoweSnare 103 -- 154 -- 205 Sagat HfOp 256 Claves 307 Growl 1 358 BrushNoise Rock Kick 104 -- 155 Tsuzumi 206 SagatClose 257 Syn Claves 308 Monkey 2 359 WhiteNoise Ambi.Kick 105 ClsSynHH1 156 --... -
Page 229: Technical Specifications
Reference • Appendices Technical specifications Features Generation system Synthesis System Tone generator 32voices, 32 oscillators Sample memory 14MB PCM ROM Effects Two stereo digital multi-effect systems, 47 effects, edit function Input sensitivity: Microphone, Guitar, Line (Mono). Controls: Volume, A/B programmable knob, C programmable button (mute). LED indicator: Signal (presence and clip). -
Page 230: Index
Index Index Symbols 56, 83, 147 chords compressor (Vocal) “All songs” damper amplitude envelope tracking, see VDA tracking in Arrangement Play mode amplitude envelope, see VDA EG 20–21 demo arrangement disk fade in/out data type fill load intro/ending save MIDI channels write protection name 18–19... -
Page 231: Erasing From Memory
Index 42–43 editing name JukeBox, see song, play all with jukebox recovering lost changes saving to memory selecting in Arrangement Play mode keyboard selecting in Backing Sequence mode how to block sounds selecting in Song Edit mode Keyboard Set selecting in Song Play mode loading from disk Program Change saving on disk... - Page 232 Index selecting VDA tracking transpose in Song Play mode VDF cutoff 154, 160 semitones VDF EG VDF MG VDF tracking velocity input (fixed) user velocity sensitivity arrangement 154, 167 of the VDA programs 154, 163 of the VDF styles 154, 168 vibrato user scale Vocal/Guitar...
- Page 234 Address KORG ITALY Spa Via Cagiata, 85 I-60027 Osimo (An) Italy Web server www.korg.it www.korg.net www.korg.com www.korg.co.jp PART CODE: MAN0001050 ENG...
Need help?
Do you have a question about the i40M and is the answer not in the manual?
Questions and answers