
Related Manuals for Sym DD 50


Summary of Contents for Sym DD 50
-
Page 1: Service Manual
FORWARD CONTENTS HOW TO USE THIS MANUAL MECHANISM ILLUSTRATIONS DD 50 SERVICE MANUAL... - Page 2 “Service Procedures”, “Operation Key Points”, and “Inspection Adjustment” so that provides technician with service guidelines. If the style and construction of the scooter, DD 50 series, are different from that of the photos, pictures shown in this manual, the actual vehicle shall prevail.
-
Page 3: General Information
How to Use This Manual This service manual describes basic information of different system parts and system inspection & service for Sanyang DD 50 scooters. In addition, please refer to the manual contents in detailed for the model you serviced in inspection and adjustment. -
Page 4: Table Of Contents
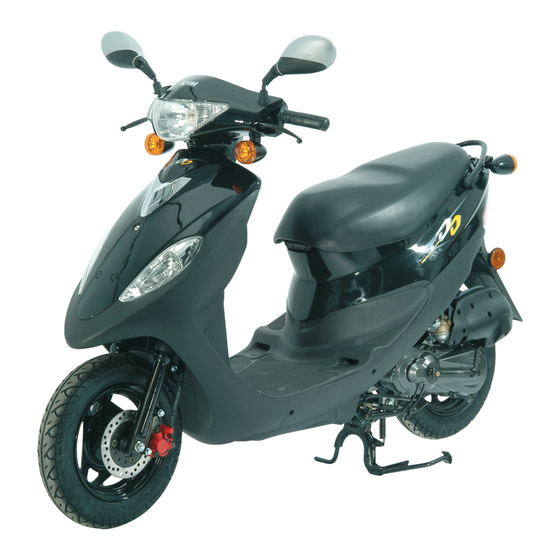
Home page CONTENTS Page Content Index 1-1 ~ 1-16 GENERAL INFORMATION 2-1 ~ 2-14 SERVICE MAINTENANCE INFORMATION 3-1 ~ 3-6 LUBRICATION SYSTEM 4-1 ~ 4-6 ENGINE REMOVAL 5-1 ~ 5-8 CYLINDER HEAD/CYLINDER/PISTON 6-1 ~ 6-4 ALTERNATOR 7-1 ~ 7-14 “V” TYPE BELT DRIVING SYSTEM/KICK-STARTER 8-1 ~ 8-6 FINAL DRIVING MECHANISM 9-1 ~ 9-6... - Page 5 Home page Contents MODEL ILLUSTRATION FT05V Light / Starter switch Front turn signal Helmet hook High & Low beam / Turn signal / Horn switch Battery / Fuses / C.D.I. / Fuel tank cap Eng. Oil tank cap Head light Tail light / Rear turn signal Storage box...
- Page 6 Home page Contents MODEL ILLUSTRATION FT05T FT05U FT05W...
- Page 8 Home page Contents 1. GENERAL INFORMATION Symbols and Marks ·························· 1-1 Torque values···································1-6 General Safety ·································· 1-2 Cables and Harness Routing ··········1-8 Service Precautions ························· 1-3 Troubleshooting·······························1-11 Specifications ··································· 1-5 Lubrication Points····························1-15 Symbols and Marks Symbols and marks are used in this manual to indicate what and where the special service are needed, in case supplemental information is procedures needed for these symbols and marks, explanations will be added to the text instead of using the symbols or marks.
-
Page 9: General Safety
This chapter Contents 1. GENERAL INFORMATION General Safety Carbon monoxide Battery If you must run your engine, ensure the place is Caution well ventilated. Never run your engine in a closed Battery emits explosive gases; flame is area. Run your engine in an open area, if you strictly prohibited. -
Page 10: Service Precautions
This chapter Contents 1. GENERAL INFORMATION Service Precautions Always use with Sanyang genuine parts and Rubber parts may become deteriorated when recommended oils. Using non-designed parts old, and prone to be damaged by solvent and oil. for Sanyang motorcycle may damage the Check these parts before installation to make motorcycle. - Page 11 This chapter Contents 1. GENERAL INFORMATION The ends of rubber hoses (for fuel, vacuum, or The length of bolts and screws for assemblies, coolant) should be pushed as far as they can go cover plates or boxes is different from one to their connections so that there is enough another, be sure they are correctly installed.
-
Page 12: Lubrication System
This chapter Contents 1. GENERAL INFORMATION Specifications Make SANYANG MODEL FT05 Series Overall Length 1660 mm Front TELESCOPIC Suspension System Overall Width 630 mm Rear UNlT SWING Overall Height 1020 mm Front 3.00 - 10 42J(T/L) Tire Specifications Wheel Base 1155 mm Rear 3.00 - 10 42J(T/L) -
Page 13: Torque Values
This chapter Contents 1. GENERAL INFORMATION Torque values Standard Torque Values for Reference Type Torque value Type Torque value 5 mm Bolt, nut 0.45 - 0.6 kg-m 5 mm Bolt 0.35 - 0.5 kg-m 6 mm Bolt, nut 0.8 - 1.2 kg-m 6 mm Bolt, SH nut 0.7 - 1.1 kg-m 8 mm Bolt, nut... - Page 14 This chapter Contents 1. GENERAL INFORMATION Frame Thread Dia. Torque Value Item Q’ty Remarks (mm) (Kgf-m) Bolt for engine suspension Bolt for engine suspension bracket Upper bolt for rear shock absorber Lower bolt for rear shock absorber Mounting screws for exhaust pipe connection Nut for exhaust Brake hose bolts...
- Page 15 This chapter Contents 1. GENERAL INFORMATION Cables and Harness Routing Note the following when routing cables and wire harnesses: • A loose wire, cable or harness may cause safety hazard. After clamping, check each wire to make sure it is secured. •...
- Page 16 This chapter Contents 1. GENERAL INFORMATION Speedometer Winker switch Headlight switch Winker relay High/low beam switch Starter switch Rear brake lamp switch Front brake lamp switch Horn switch Throttle cable Headlight Speedometer cable Front brake cable Rear brake cable Winker light Throttle cable Main switch Regulator...
- Page 17 This chapter Contents 1. GENERAL INFORMATION Battery/fuse/starting relay/CDI set Throttle cable Fuel unit Carburetor Rear brake cable Fuel pump Fuel filter Throttle cable Engine oil operation cable Engine oil filling pipe Fuel pump Spark plug cap Fuel unit Oil pump Engine oil return pipe 1-10...
-
Page 18: Troubleshooting
This chapter Contents 1. GENERAL INFORMATION Troubleshooting A. Engine hard to start or can not be started Check and adjustment Fault condition Probable causes Loosen carburetor drain bolt to check if there is gasoline 1. No fuel in fuel tank inside the carburetor 2. - Page 19 This chapter Contents 1. GENERAL INFORMATION Engine run sluggish (Speed does not pick up, lack of power) Check and adjustment Fault condition Probable causes Try gradual acceleration and check engine speed 1. Air cleaner clogged Engine speed can be Engine speed can not be 2.
- Page 20 This chapter Contents 1. GENERAL INFORMATION Engine runs sluggish (especially in low speed and idling) Check and adjustment Fault condition Probable causes Check ignition timing (using ignition lamp) Normal Abnormal 1. Incorrect ignition timing (malfunction of CDI or AC generator) Adjust the air screw of carburetor Good...
- Page 21 This chapter Contents 1. GENERAL INFORMATION . CLUTCH, DRIVING AND DRIVING PULLEY FAULT CONDITION PROBABLE CAUSES 1. Driving belt worn out or deformation 2. Driving disk damaged 3. Driving pulley spring broken Engine can be started but 4. Clutch ling broken motorcycle can not be driving 5.
-
Page 22: Lubrication Points
This chapter Contents 1. GENERAL INFORMATION Lubrication Points Throttle cable/ Front & rear brake lever pivot Seat lock Engine suspension bushing Steering shaft bearing Rear wheel bearing Speedometer gear/ front Main stand shaft Side stand shaft wheel bearing 1-15... - Page 23 This chapter Contents 1. GENERAL INFORMATION Note: 1-16...
- Page 24 Home page Contents 2. SERVICE MAINTENANCE INFORMATION General Information··························2-1 Suspension····································· 2-10 Periodical Maintenance Schedule ···2-2 Transmission Oil ···························· 2-11 Air Cleaner ········································2-3 Spark Plug ······································ 2-11 Fuel Lines··········································2-3 Control Cable Lubrication ············· 2-12 Fuel Filter ··········································2-4 Driver Belt ······································· 2-12 Engine Oil Line ·································2-4 Ignition Timing ·······························...
-
Page 25: Periodical Maintenance Schedule
25. Carbon cleaning for cylinder ☆ head, cylinder, piston head, and exhaust system. Have your scooter checked, adjusted periodically by your SYM Authorized Dealer to maintain the scooter at the optimum condition Code: I ~ Inspection, cleaning, and adjustment R ~ Replacement... -
Page 26: Service Maintenance Information
• Limit to use SAE 20 JASO FC class engine Soap Clean oil, otherwise, SYM is no responsible for the warranty. • Recommended engine oil: MAX-2 serial oils. Squeeze out remaining oil Squeeze oil out... -
Page 27: Fuel Filter
This chapter Contents 2. SERVICE MAINTENANCE INFORMATION Fuel Filter Remove the luggage box. Remove the fuel line from the fuel filter. Replace the fuel filter with new one. Install the fuel filter. The arrow indicates the fuel flowing direction. Check the fuel line for leaking. Fuel filter Engine Oil Line Remove the body cover. -
Page 28: Oil Pump Control Cable
This chapter Contents 2. SERVICE MAINTENANCE INFORMATION Oil Pump Control Cable Mounting nut Caution To adjust the oil pump control cable after adjusted the throttle grip play. Remove the body cover. Wide open the throttle valve, and check if the calibration point aligns on the oil pump lever with the mark of pump body. -
Page 29: Tire
This chapter Contents 2. SERVICE MAINTENANCE INFORMATION Tire Caution Tire pressure should be checked when cold. Check tire for cracks, damage, nail, or other object stuck in tread. Recommended tire and tire pressure Front: Rear: Tire size 3.00-10 42J 3.00-10 42J Tire pressure 1.75 (cold) kg/cm... -
Page 30: Rear Brake Free Play: (Drum Brake Type)
This chapter Contents 2. SERVICE MAINTENANCE INFORMATION Rear Brake Free Play: (Drum Brake 10∼20mm (3/8∼3/4 in) Type) Measure the free play of the rear brake lever at the end of the lever. Free play: 10-20 mm (3/8-3/4 in) Adjust the free play by turning the front brake adjustment nut if necessary. - Page 31 This chapter Contents 2. SERVICE MAINTENANCE INFORMATION Brake System Hose: (Front Disc Lower limit Brake Type) Make sure that the brake hose is corrosion or damage, and also check the system for leaking. Brake Fluid: Check brake fluid level in the brake fluid reservoir. If the level is lower than the LOWER limit, add brake fluid DOT-3 to UPPER limit.
- Page 32 This chapter Contents 2. SERVICE MAINTENANCE INFORMATION Remove the pin bolt cap. Loosen the bolt. Remove the front wheel shaft bolt. Take out the front wheel. Pin bolt cap Remove brake caliper mounting bolt and then remove the brake caliper. Caution Mounting bolt Do not operate the brake lever after the clipper...
-
Page 33: Steering System
This chapter Contents 2. SERVICE MAINTENANCE INFORMATION Steering System Caution The control cables can not interfere with the rotation of steering handle. Lift the front wheel out of ground, and check if the steering handle turning is smoothly. If handle turning is uneven and bending, stuck, or the handle can be operated in vertical direction, then adjust the handle top bearing by adjusting the steering nut. -
Page 34: Transmission Oil
This chapter Contents 2. SERVICE MAINTENANCE INFORMATION Transmission Oil Leak Oil level check bolt Draining bolt Check if the transmission is leak. Check Caution Park the scooter on flat ground with its main stand. Remove the oil level check bolt, and check if the oil level is placed on the hole of check bolt. -
Page 35: Control Cable Lubrication
This chapter Contents 2. SERVICE MAINTENANCE INFORMATION Control Cable Lubrication Remove the throttle control and the brake cables periodically, and lubricate the moving parts of the Tooth face Belt width cables thoroughly. Driver Belt Remove left crankcase cover. Check if the belt is crack or worn out. Replace the belt if necessary. -
Page 36: Carburetor Idle Speed Adjustment
This chapter Contents 2. SERVICE MAINTENANCE INFORMATION Carburetor Idle Speed Adjustment Pilot screw Caution Inspection & adjustment for idle speed have to be performed after all parts in engine had been adjusted in specification. Idle speed check and adjustment have to be done after engine is being warn up. -
Page 37: Headlight Adjustment
This chapter Contents 2. SERVICE MAINTENANCE INFORMATION Headlight Adjustment Loosen headlight mounting bolt. Move the headlight for adjustment its light beam. Tighten the headlight mounting bolt after adjusted. Caution Improper headlight beam adjustment will make in coming driver dazzled or insufficient lighting for safety distance. - Page 38 Home page Contents 3. LUBRICATION SYSTEM Lubrication System Diagram ············3-1 Oil Pump Removal ···························· 3-3 Precautions In Operation ··················3-2 Oil Pump Installation ························ 3-3 Lubricant ············································3-2 Oil Pump/Oil Tube Air Bleeding ······· 3-4 Trouble Shooting ·······························3-2 Oil Tank ·············································· 3-5 Lubrication System Diagram Oil tank Oil lever switch...
-
Page 39: Precautions In Operation
This chapter Contents 3. LUBRICATION SYSTEM Precautions In Operation Be careful not let dirt enter into engine or oil hoses when removing or installing the oil pump. If air is found in the oil tube (from oil tank to oil pump) or oil tube is removed, the oil pump should be conducted air-bleeding operation. -
Page 40: Oil Pump Removal
This chapter Contents 3. LUBRICATION SYSTEM Oil tube Oil output tube Oil Pump Removal Caution Before removing the oil pump, clean the oil pump and crankcase. Remove the luggage box and seat. Loosen the mounting nut of the oil pump control cable, and remove the control cable. -
Page 41: Oil Pump/Oil Tube Air Bleeding
This chapter Contents 3. LUBRICATION SYSTEM Oil tube Oil Pump/Oil Tube Air Bleeding Caution The oil tube system has to be conducted air bleeding operation because air will clog or restraint oil flowing so that cause serious Oil output tube engine damage. -
Page 42: Oil Tank
This chapter Contents 3. LUBRICATION SYSTEM Oil tank cap Oil Tank Removal/Installation Remove the battery and oil tank cap. Remove the luggage box and seat. Battery Remove the oil input tube from oil pump, and then drain oil to a clean container. Oil tube Remove the oil level switch wire of the oil Blot... - Page 43 This chapter Contents 3. LUBRICATION SYSTEM Notes:...
-
Page 44: Engine Removal
Home page Contents 4. ENGINE REMOVAL Maintenance Information ····················4-2 Engine installation ······························ 4-5 Engine removal····································4-3 4.0kgf-m 3.3kgf-m 1.2kgf-m 6.0kgf-m... - Page 45 This chapter Contents 4. ENGINE REMOVAL Maintenance Information There are parts that require removal of engine for maintenance. Crankcase Crankshaft Related bolts tightening torque for removal of engine: Engine hanger bolt 5.0kgf-m Engine bracket bolt 6.0kgf-m Rear shock absorber upper mounting bolts 4.0kgf-m Rear shock absorber lower mounting bolts 2.7kgf-m...
- Page 46 This chapter Contents 4. ENGINE REMOVAL Engine removal Spark plug cap Remove body cover. Remove the spark plug cap from the spark plug section. Remove the fuel output and the vacuum tubes Oil control cable Oil tube from fuel pump. Remove the oil control cable from oil pump.
- Page 47 This chapter Contents 4. ENGINE REMOVAL Remove rear brake cable from engine rear-lower side. Brake cable Remove air cleaner mounting bolts. (2 bolts) Mounting bolt Support the engine and then remove shock Shock absorber lower absorber lower mounting bolt. mo nting bolt Remove two exhaust pipe connection nuts.
-
Page 48: Engine Installation
This chapter Contents 4. ENGINE REMOVAL Remove engine mounting nut and bolt. Engine mounting bolt Engine installation Install in the reverse order of removal procedures. Tighten the engine mounting and rear shock absorber upper/lower bolts. Torque value: Engine hanger bolt: 5.0kgf-m Rear shock absorber upper mounting bolts:... - Page 49 This chapter Contents 4. ENGINE REMOVAL Note:...
-
Page 50: Cylinder Head/Cylinder/Piston
Home page Contents 5. CYLINDER HEAD/CYLINDER/PISTON Maintenance Information ···················5-2 Cylinder Head ·····································5-3 Troubleshooting ·································5-2 Cylinder/Piston···································5-5... - Page 51 This chapter Contents 5. CYLINDER HEAD/CYLINDER/PISTON Maintenance Information Precautions in Operation The inspection and maintenance of the cylinder head, cylinder and piston can be carried as engine mounted on the body. It should clean the engine to prevent dirt from entering into cylinder and crankcase before removal. Remove all washes from the interfaces of cylinder head, cylinder and crankcase.
-
Page 52: Cylinder Head
This chapter Contents 5. CYLINDER HEAD/CYLINDER/PISTON Cylinder Head Tightening bolt Cylinder Removal Removal body covers. Remove spark plug cap. Remove fan cover. Remove engine shield. Engine shield Remove two connection nuts of the exhaust pipe. Tightening bolt x 2 Remove exhaust muffle mounting bolt, and then remove the exhaust pipe. - Page 53 This chapter Contents 5. CYLINDER HEAD/CYLINDER/PISTON Cylinder Head Inspection Use a straight edge and a feeler gauge to measure the cylinder head for warp. Service limit: 0.10 mm Tightening bolts Cylinder Head Installation Replace the cylinder head gasket with new one, and place the cylinder head onto cylinder.
- Page 54 This chapter Contents 5. CYLINDER HEAD/CYLINDER/PISTON Cylinder/Piston Cylinder Removal Be careful to pull the cylinder up and prevent piston from damage. Caution Do not have pry out operation between cylinder and crankcase. Or let radiation fan be knocked seriously. Piston Removal Place a clean rag onto crankshaft to cover the piston.
- Page 55 This chapter Contents 5. CYLINDER HEAD/CYLINDER/PISTON Use a straight edge and a feeler gauge to measure the cylinder head for warp. Service limit: 0.10 mm In “X” and “Y” direction, measure the cylinder for worn out as the three levels shown in the figure. With the max.
- Page 56 This chapter Contents 5. CYLINDER HEAD/CYLINDER/PISTON Piston Ring Inspection Measure the end gap of each piston ring. Service limit: 0.40 mm Caution With the piston, push each piston ring into cylinder correctly. Connecting Rod Inspection Install bearing and piston pin onto connecting rod small end, and then check its clearance.
- Page 57 This chapter Contents 5. CYLINDER HEAD/CYLINDER/PISTON Place a cleaning cloth onto the crankcase opening Piston to prevent the piston pin snap ring from falling into the crankcase. 〝EX〞mark Apply with two-stroke engine oil onto needle bearing and piston pin, and then install the piston pin onto connecting rod.
-
Page 58: Alternator
Home page Contents 6. ALTERNATOR Maintenance Information ··········6-2 Alternator Installation ··············· 6-4 Alternator Removal ···················6-3 3.8kgf-m... - Page 59 This chapter Contents 6. ALTERNATOR Maintenance Information Precautions in Operation The maintenance service of A.C. alternator can be carried out directly on the scooter. Please refer to Chapter 15 for the relative alternator inspection. Torque value: Flywheel 3.8kgf-m Tool General tool Rotor puller Universal holder Coil resistance value for the A.C.
- Page 60 This chapter Contents 6. ALTERNATOR Alternator Removal Cooling fan cover Remove the body cover. Remove two bolts and then take out cooling fan cover. Bolt Remove four bolts, and then take out the cooling fan. Cooling fan Hold flywheel with universal holder. Universal holder Support the flywheel and the remove the 10 mm nut on the flywheel.
- Page 61 This chapter Contents 6. ALTERNATOR Disconnect alternator wire connector and pulse Wire harness connector generator connector. Remove the pulse generator and alternator four (4) bolts, and then take out the alternator assembly. Caution Care to be taken for not damaging the alternator coil.
- Page 62 Home page Contents 7. “V” TYPE BELT DRIVE SYSTEM/KICK-STARTER Maintenance Information················· 7-2 Drive Belt···········································7-5 Trouble Shooting······························ 7-2 Movable Driven Pulley······················7-6 Left Crankcase Cover ······················ 7-3 Clutch/Driven Pulley·························7-10 Reassembly of Kick Starter ············· 7-4 Installation of the Left Crankcase Cover ··························································· 7-4 3.8kgf-m 5.5kgf-m 3.8kgf-m...
-
Page 63: Maintenance Information
This chapter Contents 7. “V” TYPE BELT DRIVE SYSTEM/KICK-STARTER Maintenance Information Precautions in Operation The surfaces of drive belt and driven pulley must be free of grease. Specification Item Standard value(mm) Limit(mm) Driving belt width 18.0 16.5 ID of movable driving pulley 20.035~20.085 20.120 OD of movable driving pulley boss... -
Page 64: Left Crankcase Cover
This chapter Contents 7. “V” TYPE BELT DRIVE SYSTEM/KICK-STARTER Left Crankcase Cover Left crankcase cover Left crankcase cover removal Remove left body side cover. Remove air cleaner. Remove kick start arm. Remove left crankcase cover. Kick start arm Return spring Disassembly of Kick Starter Remove snap clip and thrust washer from left crankcase cover. -
Page 65: Reassembly Of Kick Starter
This chapter Contents 7. “V” TYPE BELT DRIVE SYSTEM/KICK-STARTER Reassembly of Kick Starter Kick starter spindle Install bush, return spring and starter spindle as diagram shown. Install thrust washer and snap clip onto starter spindle. Install Kick starter lever temporary. Slightly rotate the lever and then align driven gear with width-tooth on the starter spindle. -
Page 66: Drive Belt
This chapter Contents 7. “V” TYPE BELT DRIVE SYSTEM/KICK-STARTER Drive Belt Removal Remove left crankcase cover. Hold clutch outer with universal holder, and remove nut and clutch outer. Caution Using special tools for tightening or loosening the nut. Fixed rear wheel or rear brake will damage Universal holder reduction gear system. -
Page 67: Movable Drive Face
This chapter Contents 7. “V” TYPE BELT DRIVE SYSTEM/KICK-STARTER Install the driven pulley that has installed the belt Drive shaft Drive face Drive belt onto drive shaft. Clutch/driven pulley Install the clutch with universal holder, and then Clutch outer tighten nut to specified torque value. Torque value: 3.8kgf-m Universal holder Movable Drive Face... - Page 68 This chapter Contents 7. “V” TYPE BELT DRIVE SYSTEM/KICK-STARTER Drive face boss Movable drive face Removal Remove movable drive face set and drive belt from crankshaft. Crankshaft Remove ramp plate. Ramp plate Remove weight rollers from movable face. Movable drive face Weight roller Inspection The weight roller is to press movable driven face...
- Page 69 This chapter Contents 7. “V” TYPE BELT DRIVE SYSTEM/KICK-STARTER Check if movable drive face boss is worn or Movable drive face damage and replace it if necessary. Measure the outer diameter of drive face boss, and replace it if it exceed service limit. Service limit: 19.98 mm Measure the inner diameter of drive face, and replace it if it exceed service limit.
- Page 70 This chapter Contents 7. “V” TYPE BELT DRIVE SYSTEM/KICK-STARTER Install movable drive face assembly onto Drive face boss Movable drive face crankshaft. Crankshaft Drive Face Installation Drive belt Press down Press drive belt into pulley groove, and then pull the belt on to crank shaft. Install drive face, washer and nut.
-
Page 71: Clutch/Driven Pulley
This chapter Contents 7. “V” TYPE BELT DRIVE SYSTEM/KICK-STARTER Clutch/Driven Pulley Clutch nut wrench Disassembly Remove drive belt and clutch/driven pulley. Install clutch spring compressor onto the pulley assembly, and operate the compressor to let nut be installed more easily. Caution Do not press the compressor too much. - Page 72 This chapter Contents 7. “V” TYPE BELT DRIVE SYSTEM/KICK-STARTER Clutch weight Clutch weight Measure each clutch weight thickness. Replace it if exceeds service limit. Service limit: 2.0 mm Driven pulley spring Measure the length of driven pulley spring. Replace it if exceeds service limit. Service limit: 92.7 mm Free length Driven pulley...
- Page 73 This chapter Contents 7. “V” TYPE BELT DRIVE SYSTEM/KICK-STARTER Clutch Block Replacement Spring Drive plate Remove clip and washer, and then remove clutch weight and spring from drive plate. Caution Some of models are equipped with one mounting plate instead of 3 snap clips. Check if spring is damage or insufficient Snap clip elasticity.
- Page 74 This chapter Contents 7. “V” TYPE BELT DRIVE SYSTEM/KICK-STARTER Install snap clip and mounting plate onto lock pin. Snap clip Replacement of Driven Pulley Bearing Remove inner bearing. Outer bearing Caution Clip If the inner bearing equipped with oil seal on side in the driven pulley, then remove the oil seal firstly.
- Page 75 This chapter Contents 7. “V” TYPE BELT DRIVE SYSTEM/KICK-STARTER Installation of Clutch/Driven Pulley Oil seal Assembly Install new oil seal and O-ring onto sliding pulley. Apply with specified grease to lubricate the inside of sliding pulley. O-ring Specified grease Sliding pulley Install sliding pulley onto driven pulley.
-
Page 76: Final Driving Mechanism
Home page Contents 8. FINAL DRIVING MECHANISM Maintenance Information ················· 8-2 Inspection of Final Driving Mechanism ···························································· 8-4 Troubleshooting ······························· 8-2 Bearing Replacement ······················· 8-4 Disassembly of Final Driving Mechanism ···························································· 8-3 Re-Assembly of Final Driving Mechanism ········································ 8-4... - Page 77 Oil quantity:100 c.c. (90 c.c. as replacement) Special tools: Inner type bearing puller (SYM-6204020) Outer type bearing puller (SYM-6204010) Final shaft oil seal installer (SYM-9125500) Drive shaft oil seal installer (SYM-9120200) Bearing driver 6204 (SYM-9110400) Bearing driver 6201 (SYM-9610001) Bearing driver 6203/6004UZ (SYM-9620000) L.
- Page 78 This chapter Contents 8. FINAL DRIVING MECHANISM Disassembly of Final Driving Mechanism Oil filling hole Remove driven pulley Drain gear oil out from gearbox. Remove rear wheel. Remove gearbox cover mounting bolts from the clutch side and then remove the cover from the rear wheel side.
-
Page 79: Bearing Replacement
Special tool: Gear Box Cover Punch guide Final shaft bearing: Bearing driver 6203/6004UZ (SYM-9620000) Bearing driver 6201 (SYM-9610001) Final shaft oil seal installer (SYM-9125500) Adapter Left Crankcase Drive shaft bearing: Drive shaft Bearing driver 6203/6004UZ (SYM-9620000) Bearing driver 6201 (SYM-9610001) L. - Page 80 This chapter Contents 8. FINAL DRIVING MECHANISM Install countershaft, final driven gear and thrust Final driven gear & shaft washer. Counter gear & shaft Install new gasket and lock pin. Install gearbox cover. Install clutch/driven pulley assembly. Install driven pulley, drive belt, and left crankcase side cover.
- Page 81 This chapter Contents 8. FINAL DRIVING MECHANISM Notes:...
-
Page 82: Crankcase/Crankshaft
Home page Contents 9. CRANKCASE/CRANKSHAFT Maintenance Information ··················· 9-2 Crankshaft Removal·····························9-3 Troubleshooting ································· 9-2 Crankshaft Inspection··························9-4 Crankcase Disassembly ···················· 9-3 Crankcase Installation ·························9-5 1.0kgf-m Apply liquid gasket... -
Page 83: Maintenance Information
Special Tools Crankcase disassemble tool (SYM-1120100-G5) Outer bearing puller (SYM-6204010) R. Crank shaft puller (SYM-1130000-R) R. Crank shaft install bush (SYM-1130020) L. Crank shaft puller (SYM-1130000-L) L. Crank shaft install bush (SYM-1130010) 20*32*6 Oil seal driver (SYM-9120200) Bearing driver 6204 (SYM-9110400) -
Page 84: Crankcase Disassembly
This chapter Contents 9. CRANKCASE/CRANKSHAFT Crankcase Disassembly Remove the crankcase bolts. Bolts Install the crankcase puller onto the right crankcase with two (2) bolts, 6mm, as the Crankcase puller diagram shown. Disassemble the right crankcase. Right crankcase Crankshaft Removal Crankcase puller As the diagram show with 3 special bolts to install the crankcase puller onto the left crankcase. -
Page 85: Crankshaft Inspection
This chapter Contents 9. CRANKCASE/CRANKSHAFT Crankshaft Inspection Measure the clearance of connecting rod big end. Service limit: 0.60 mm Measure the radial clearance of connecting rod big end at X-Y directions as diagram show. Service limit: 0.04 mm Place the crankshaft on a V-block, measure run-out points A and B of the crankshaft with dial gauge. -
Page 86: Crankcase Installation
This chapter Contents 9. CRANKCASE/CRANKSHAFT Crankcase Installation Clean the crankshaft with solvent and blow it with Bearing driver 6204 compressed air. Then, check for damage or other foreign materials attached. Install new bearing into right crankcase. Caution All rotation and sliding surfaces have to be applied with clean engine oil. - Page 87 This chapter Contents 9. CRANKCASE/CRANKSHAFT Assemble the right crankcase with assembly R. Crank shaft puller tools. R. Crank shaft Install right crankcase onto the crankshaft. install bush Install right crankshaft puller and install bush onto crankshaft. Screw the right crankshaft puller onto crankshaft. Turn the puller in C.W.
-
Page 88: Fuel System
Home page Contents 10. FUEL SYSTEM Maintenance Information··················10-2 Flaot Level Inspection ······················10-7 Troubleshooting································10-2 Carburetor Installation ·····················10-7 Throttle Valve ····································10-3 Reed Valve·········································10-7 Carburetor Remove···························10-4 Fuel Pump ·········································10-8 Auto By-Starter··································10-4 Air Cleaner·········································10-9 Float/Float Valve/Jet ·························10-6 Throttle valve cable Air hose Oil tube Vacuum hose Carburetor Fuel pump... -
Page 89: Maintenance Information
When disassembling fuel system parts, pay attention to O-ring position, replace with new one as re-assembly It has to conduct air bleeding operation as removed the oil tube. Idle speed adjustment. Specification Item DD 50 Venturi diameter 14 mm Fuel level 8.6±1.0mm Air screw opener... -
Page 90: Throttle Valve
This chapter Contents 10. FUEL SYSTEM Carburetor Throttle Valve upper part Removal Remove the body cover. Remove the carburetor upper part, throttle valve spring and sealed cap. Remove the throttle valve cable from the throttle valve. Remove needle clamp and fuel needle. Oil hose Inspection Throttle valve spring... -
Page 91: Carburetor Remove
This chapter Contents 10. FUEL SYSTEM Carburetor Remove Remove the body cover. Disconnect the auto by-starter connector. Auto by-starter Loosen draining screw and then drain out fuel Carburetor Fuel hose upper part inside the carburetor. Loosen carburetor upper part and remove Bolt carburetor upper part. - Page 92 This chapter Contents 10. FUEL SYSTEM Remove carburetor, and allow it to cool off for 30 minutes. Connect fuel rich circuit with a hose and pump compressed air to the hose. Air should flow into fuel rich circuit. Replace the auto by-starter if the circuit clogged. Connect battery to starter’s connectors and wait for several minutes.
-
Page 93: Float/Float Valve/Jet
This chapter Contents 10. FUEL SYSTEM Float/Float Valve/Jet Removal Remove the float from carburetor body. Remove the float pin and then remove float and float valve. Check the valve seat for worn out or damage. Check float for bend and if fuel inside the float. Before removing both the throttle valve stopper Float cap and air screws, record their original turns for... -
Page 94: Float Level Inspection
This chapter Contents 10. FUEL SYSTEM Float Level Inspection Measure float fuel level to have the upper end of float just contact with the float. Float fuel level: 8.8 mm Carefully bend the float arm for adjustment. Check the float operation and the install it. Carburetor Carburetor Installation Fuel hose... -
Page 95: Fuel Pump
This chapter Contents 10. FUEL SYSTEM Inspection Reed valve Check the reed valve for damage and its reed Reed stopper strength. Check the reed valve seat for crack, damage and the clearance between the seat and the valve. Replace reed valve if necessary. Caution Do not bend the reed valve stopper. -
Page 96: Air Cleaner
This chapter Contents 10. FUEL SYSTEM Air Cleaner Removal/Installation Remove the EEC hose from the air cleaner outer case. Loosen connection hose clamp. Remove 2 bolts and then remove the air cleaner outer case. Install in the reverse order of removal procedures. - Page 97 This chapter Contents 10. FUEL SYSTEM Notes: 10-10...
-
Page 98: Front Disc Brake System
Home page Contents 11. BRAKE SYSTEM Front Disc Brake System ················ 11-1 Disc Brake -Air Bleed ·························11-7 Front Drum Brake System··············· 11-2 Disc Brake - Caliper····························11-7 Rear Drum Brake System················ 11-3 Brake Disc ···········································11-8 Maintenance Information ················ 11-4 Disc Brake - Master Cylinder ·············11-8 Troubleshooting ······························... -
Page 99: Front Drum Brake System
This chapter Contents 11. BRAKE SYSTEM Front Drum Brake System 0.55kgf-m 2.5kgf-m 6.0kgf-m 11-2... -
Page 100: Rear Drum Brake System
This chapter Contents 11. BRAKE SYSTEM Rear Drum Brake System 2.5kgf-m 11.0kgf-m 0.55kgf-m 11-3... -
Page 101: Maintenance Information
This chapter Contents 11. BRAKE SYSTEM Maintenance Information Precautions in Operation Caution Inhaling brake lining ashes may cause disorders of respiration system, therefore, never use air hose or dry brush to clean brake parts. Use vacuum cleaner or other authorized tool instead. The brake caliper can be removed without removing the hydraulic system. -
Page 102: Troubleshooting
This chapter Contents 11. BRAKE SYSTEM Troubleshooting Disc Brake Soft brake lever Hard operation of brake Tight brake 1. Air inside the hydraulic 1. Dirty brake lining/disc lever system 2. Poor wheel alignment 1. Blocked brake system 2. Hydraulic system leaking 3. -
Page 103: Hydraulic Disc Brake
This chapter Contents 11. BRAKE SYSTEM Hydraulic Disc Brake Close the drain valve of the hydraulic disc brake. Replace the brake fluid. Lower level Cap plate Before the brake fluid reservoir is removed, turn the handle so that the brake fluid reservoir Diaphragm becomes horizontal, then remove the brake fluid Upper level... -
Page 104: Disc Brake -Air Bleed
This chapter Contents 11. BRAKE SYSTEM Disc Brake -Air Bleed Drain valve Air bubble 1. Tightly hold the brake lever and open the drain valve around 1/4 turns, and then close the valve. Caution Do not release the brake lever before the drain valve is closed. -
Page 105: Brake Disc
This chapter Contents 11. BRAKE SYSTEM Brake Disc Brake disc Inspection Visually check the brake disc for wear or break. Measure the thickness of the disc at several places. Replace the disc if it has exceeded the service limit. Allowable limit: 2.0 mm Micrometer Remove the brake disc from wheel. - Page 106 This chapter Contents 11. BRAKE SYSTEM Master Cylinder Inspection Cylinder gauge Check the master cylinder for damage or scratch. Replace it if necessary. Measure the cylinder inner diameter at several points along both X and Y directions. Replace the cylinder if the measured values exceed allowable limit.
- Page 107 This chapter Contents 11. BRAKE SYSTEM Install the rubber pad into the groove correctly. Master cylinder Place the master cylinder onto handlebar, and install the bolts. Install the brake lever, and connect leads to brake light switch. Brake lamp switch Connect brake hoses with 2 new washers.
-
Page 108: Drum Brake
This chapter Contents 11. BRAKE SYSTEM Drum Brake To use vacuum cleaner or other alternatives to avoid danger caused from dusts. Caution Inhaling brake lining ashes may cause disorders of respiration system, therefore, never use compressed air or dry brush to clean brake parts. - Page 109 This chapter Contents 11. BRAKE SYSTEM Installation Bolt Apply with a thin coat of grease to the brake cam and the anchor pin. Install brake cam. Never allow brake linings to be contaminated by oil or grease. Wipe off the excessive grease from brake cam and the anchor pin.
- Page 110 Home page Contents 12. BODY COVER Body Overview································ 12-1 Front Under Spoiler ························12-9 Maintenance Information ··············· 12-3 Front Inner Box ·······························12-10 Side Covers ····································· 12-4 Floor Panel ······································12-11 Luggage Box ··································· 12-5 Front Fender····································12-11 Body Cover······································ 12-6 Steering Handle Cover····················12-12 Front Cover ·····································...
-
Page 111: Body Overview
This chapter Contents 12. BODY COVER Body Overview (FT05T / FT05V) Handle front cover (FT05V) Handle rear cover Luggage box Front inner Battery cover upper cover Handle front cover (FT05T) Right body cover Left body cover Right side cover Front cover stripe Front cover Left side cover... -
Page 112: Maintenance Information
This chapter Contents 12. BODY COVER Maintenance Information Body covers disassemble sequence: Handlebar Front Cover Front Cover Luggage Box/Seat Handlebar Rear Cover Left/Right Side Cover Front Spoiler Front Fender Front Inner Cover Body Cover Rear Fender Left/Right Side Cover Floor Panel Under Cover Be careful not to damage various covers in disassembly or re-assembly operation. -
Page 113: Side Covers
This chapter Contents 12. BODY COVER Side Covers Removal: Remove 2 screws (front/middle) from two side covers. Screws Slide the side cover backward so that their hooks are out of slots. Take out the side cover end part and then remove the cover. -
Page 114: Luggage Box
This chapter Contents 12. BODY COVER Luggage Box Removal: Lift up seat cushion. Remove luggage box mounting screws (1 screw). Remove luggage box bolts (4 bolts) Remove oil tank cap and oil guide rubber. Hold the luggage box in both front and rear sides by two hands, and then lift up Bolts the box to remove it. - Page 115 This chapter Contents 12. BODY COVER Body Cover Bolts Removal: Remove 3 bolts from rear carrier, and then remove rear carrier. Remove the luggage box. Remove 4 screws from the two side cover, and then remove the side cover. Screws Remove 4 screws from the both sides.
-
Page 116: 12. Body Cover
This chapter Contents 12. BODY COVER Remove 1 screw from the front side. Screw Remove the body cover. Installation: Install in reverse order of removal procedures. 12-7... -
Page 117: Front Cover
This chapter Contents 12. BODY COVER Front Cover Removal: Remove 2 screws from the inner cover and front cover. Screws Remove 1 screw from the front cover. Screws Push the front guard up and then remove Installation Install in reverse order of removal procedures. -
Page 118: Front Under Spoiler
This chapter Contents 12. BODY COVER Front under Spoiler Removal: Remove the front cover and right / left side cover. Remove 4 screws from the front inner box. Screw Remove 2 screws from the front upper part of the front spoiler and the front inner box. -
Page 119: Front Inner Box
This chapter Contents 12. BODY COVER Front Inner Box Bolts Removal: Remove the front cover. Remove the front under spoiler. Remove 2 bolts from the floor panel. Remove 5 screws of the fuel filling cap. Screws Remove hook and 1 screw. Main switch cover Hook &... -
Page 120: Floor Panel
This chapter Contents 12. BODY COVER Floor Panel Removal: Remove the luggage box, rear carrier, right / left side covers and body cover. Remove 4 plugs of the floor panel. 4 plugs and 4 Bolts Remove the floor panel. (4 bolts) Installation: Install in reverse order of removal procedures. - Page 121 This chapter Contents 12. BODY COVER Steering Handle Cover Screws Removal: Remove 1 screw under front light. Screw 3 Screws Remove 3 screws from the handle rear cover. Remove handle front cover. Remove 2 inner screws. Disconnect each switch connectors. Remove speedometer cable.
-
Page 122: Under Cover
This chapter Contents 12. BODY COVER Under Cover Removal: Remove the right and left side cover. Remove 2 bolts from the under cover. Remove under cover. 2 bolts 2 bolts Installation: Install in reverse order of removal procedures. 12-13... - Page 123 This chapter Contents 12. BODY COVER Note: 12-14...
-
Page 124: Steering/Front Wheel/Suspension
Home page Contents 13. STEERING/FRONT WHEEL/SUSPENSION Maintenance Information ················· 13-2 Front Wheel ······································· 13-4 Troubleshooting ······························· 13-2 Front Shock Absorber ······················ 13-8 Steering Handle ································ 13-3 Front Fork·········································· 13-9 1.5kgf-m 4.5kgf-m 0.25kgf-m 3.3kgf-m 2.7kgf-m 6.0kgf-m 13-1... -
Page 125: Maintenance Information
This chapter Contents 13. STEERING/FRONT WHEEL/SUSPENSION Maintenance Information Specification Item Standard value (mm) Limit (mm) ─ Shaft bending 0.2 (0.01 in) ─ Radial 2.0 (0.08 in) Rim wobbling ─ Axial 2.0 (0.08 in) Torque Value Steering handle nut 4.5kgf-m Front brake caliper bolt 3.3kgf-m Front wheel axle 6.0kgf-m... -
Page 126: Steering Handle
This chapter Contents 13. STEERING/FRONT WHEEL/SUSPENSION Steering Handle Master cylinder Removal Rear brake lever seat Remove handle cover, front cover and inner box. Remove throttle grip after mounting screw removed. Remove master cylinder (disc brake) after 2 bolts removed. Remove rear brake lever bracket after mounting bolt removed. -
Page 127: Front Wheel
This chapter Contents 13. STEERING/FRONT WHEEL/SUSPENSION Place master cylinder onto handle and align its Master cylinder connection surface with bolt hole on the handle (disc brake). Install the mounting seat. Tighten the upper part bolt, and then tighten lower bolt. Install all components in reverse order of removal procedures. - Page 128 This chapter Contents 13. STEERING/FRONT WHEEL/SUSPENSION Inspection Place the axle onto a V-block to measure its run-out with a dial gauge. The dial gauge indicated 1/2 run-out. Service limit: 0.20 mm Wheel axle Place the wheel on to a rotation seat, and turn Free play the wheel to check its bearing free play.
- Page 129 Dust seal DRUM TYPE Dust seal Dist. collar Bearing Bearing Special tools Inner bearing puller (SYM-6204020) Installation Fill out the block of bearing by grease. Drive the left bearing and install the dist. collar. Bolts Install the right bearing. Caution Carefully install the bearing in correct and evenly.
- Page 130 This chapter Contents 13. STEERING/FRONT WHEEL/SUSPENSION Lubricate the speedometer gear with grease and install the gear into the wheel hub. (Drum type) Lubricate the speedometer gear box with grease (Disk type) Align the flange part on the speedometer gear with the slot of wheel hub. Stopper Caution Contaminated brake lining will reduce brake...
-
Page 131: Front Shock Absorber
This chapter Contents 13. STEERING/FRONT WHEEL/SUSPENSION Front Shock Absorber Hose clamp Removal Bolt Front cover Front under spoiler Front fender Front wheel Disc Brake Cable clamp Bolt Remove the caliper mounting bolts and the Caliper bolts caliper. Take out the hose from hose clamp. Bolts Remove the hose clamp mounting bolt and the clamp. -
Page 132: Front Fork
This chapter Contents 13. STEERING/FRONT WHEEL/SUSPENSION Front Fork Steering stem Removal mounting nut Handle Front wheel Front shock absorber Remove the steering stem mounting nut. Remove top cone race and front fork. Caution Place the steel ball onto a parts container to Top cone race prevent from missing. - Page 133 This chapter Contents 13. STEERING/FRONT WHEEL/SUSPENSION Install the steering stem mounting nut and tighten Steering stem mounting nut the nut by means of holding the top cone race body. Torque value: 1.5kgf-m Install in reverse order of removal procedures. Top cone race 13-10...
-
Page 134: Rear Wheel/Suspension
Home page Contents 14. REAR WHEEL/SUSPENSION Maintenance Information ·················14-2 Rear Wheel ······································· 14-3 Troubleshooting ·······························14-2 Rear Shock Absorber ······················ 14-4 2.7kgf-m 4.0kgf-m 11.0kgf-m 3.3kgf-m 14-1... - Page 135 This chapter Contents 14. REAR WHEEL/SUSPENSION Maintenance Information Specification Item Standard value (mm) Limit (mm) Rear wheel rim run out 2.0 (0.08 in) Torque Value Rear shock absorber upper mounting bolt: 4.0kgf-m Rear shock absorber lower mounting bolt: 2.7kgf-m Rear wheel nut: 11.0kgf-m Rear wheel hub: 2.5kgf-m Exhaust muffler nut: 1.2kgf-m Exhaust muffler bolt: 3.3kgf-m...
- Page 136 This chapter Contents 14. REAR WHEEL/SUSPENSION Rear Wheel Connection nuts Remove Remove exhaust pipe nut. (2 connection nuts) Remove exhaust muffler bolt (2 bolts), then remove the muffler. Bolts Remove rear wheel shaft nut and then remove the rear wheel. Shaft nut Inspection As the diagram shown, measure wheel rim...
- Page 137 This chapter Contents 14. REAR WHEEL/SUSPENSION Shaft nut Installation Install the rear wheel and tighten the nut. Tighten torque: 11.0kgf-m Connection nuts Install exhaust pipe & muffler. Tighten torque (bolt): 3.3kgf-m Tighten torque (nut): 1.2kgf-m Bolts Rear Shock Absorber Upper mounting bolt Removal Remove body cover.
-
Page 138: Electrical Equipment
Home page Contents 15. ELECTRICAL EQUIPMENT Maintenance Information ················ 15-2 Starting System ······························ 15-12 Troubleshooting ······························ 15-3 Oil Level Switch ······························ 15-14 Battery ·············································· 15-4 Fuel Unit ·········································· 15-15 Charging System ····························· 15-5 Switch/Horn····································· 15-16 Ignition System ································ 15-9 Bulb Replacement ·························· 15-18 Reg. -
Page 139: Maintenance Information
This chapter Contents 15. ELECTRICAL EQUIPMENT Maintenance Information Precautions in Operation When remove the battery, the disconnection sequence of cable terminals shall be strictly observed. (First disconnect the negative cable terminal, next, the positive cable terminal.) The model of the spark plug and the tightening torque. The ignition timing. - Page 140 This chapter Contents 15. ELECTRICAL EQUIPMENT Troubleshooting No voltage Intermittent power supply Battery discharged The connector of the charging system The cable disconnected becomes loose The fuse is blown Poor connection of the battery cable Improper operation of the main switch Poor connection or short-circuit of the discharging system Low voltage...
-
Page 141: Battery
This chapter Contents 15. ELECTRICAL EQUIPMENT Battery Negative terminal Positive terminal Battery Removal/Installation Turn off main switch. Open seat. Remove screw and the open battery cover. Disconnect the negative cable terminal first, then the positive cable terminal. Remove the battery from the scooter. Install the battery in reverse order of removal. -
Page 142: Charging System
This chapter Contents 15. ELECTRICAL EQUIPMENT Charging System Green White Yellow Pink Green/ Black AC. Generator Current Leakage Inspection Ammeter Turn the main switch to OFF position, and Battery (-) terminal remove the negative cable terminal (-) from the battery. Ground circuit Connect an ammeter between the negative cable terminal and the battery negative terminal. - Page 143 This chapter Contents 15. ELECTRICAL EQUIPMENT Charging Voltage Inspection Caution Caution Before conducting the inspection, be sure To replace the old battery, use a new battery that the battery is fully charged. If with the same current and voltage. undercharged, the current changes dramatically.
- Page 144 This chapter Contents 15. ELECTRICAL EQUIPMENT Headlight Voltage Inspection Front cover Connect a tachometer. Do not disconnect the headlight harness connector after engine started. Turn the headlight ON and to high beam position. Measure the voltage between the blue wire (+) and green wire (-) while the headlight harness is still in connection.
- Page 145 This chapter Contents 15. ELECTRICAL EQUIPMENT Voltage regulator Voltage Regulator Inspection Check the each pins of connector on the voltage regulator. Voltage regulator connector Inspection Probable cause Check voltage between battery terminal (red) and ground Blown fuse or poor main switch (green).
-
Page 146: Ignition System
This chapter Contents 15. ELECTRICAL EQUIPMENT Ignition System Green Blue/Yellow Black/Red Black/Yellow Black/White 15-9... - Page 147 This chapter Contents 15. ELECTRICAL EQUIPMENT Ignition Coil Inspection Remove body cover. Ignition coil Measure the primary coil resistance. Resistance :0.19~0.23KΩ (A)→(B) Measure the secondary coil resistance. Resistance : 8.2~9.3KΩ (A)→(C) Remove the high voltage coil cap, and measure its negative (-) terminal for the secondary coil resistance.
- Page 148 This chapter Contents 15. ELECTRICAL EQUIPMENT Electrical System Circuit Inspection Pulse Generator / Exciting Coil Remove body cover. Disconnect alternator connector. Resistance Measurement: (20℃) AC generator Pulse generator coil (blue/yellow - ground): harness connector 50~200Ω Exciting (yellow - ground): 400~800Ω C.D.I.
-
Page 149: Starting System
This chapter Contents 15. ELECTRICAL EQUIPMENT Starting System Starter relay Starter Relay Inspection Remove luggage box. Connect both the green/yellow (-) and the Starter relay yellow/red (+) pins to battery posts directly. If the red and red/white pins are also in continuity, it means it is in normal. - Page 150 This chapter Contents 15. ELECTRICAL EQUIPMENT Starter Motor Removal / Disassembly Remove body cover. Remove bolt and oil pump control cable. Disconnect starter motor harness connector. Starter motor Remove 2 bolts for separation starter motor and gasket. Remove 2 bolts for disassembly the starter motor.
-
Page 151: Oil Level Switch
This chapter Contents 15. ELECTRICAL EQUIPMENT Oil Level Switch Troubleshooting Fuse Main switch If the oil level in oil tank is in specified level, but the oil level indicator still goes on. 1. Remove body cover. 2. Disconnect oil gauge wire, and turn the Indicator main switch to ON position. -
Page 152: Fuel Unit
This chapter Contents 15. ELECTRICAL EQUIPMENT Fuel Unit Fuel unit Removal / Installation Remove 4 bolts and floor panel. Disconnect fuel unit connector. Remove the fuel unit plastic cap. Turn the snap ring in CCW direction and then remove the fuel unit. Caution Do not bend the float arm. -
Page 153: Switch/Horn
This chapter Contents 15. ELECTRICAL EQUIPMENT Switch / Horn Remove handle covers and front cover. Remove main switch cover. Remove front inner box. Check continuity on each switch. The connected circles with a line are that they should be in continuity. Main Switch Wire Black /... -
Page 154: Headlight Switch
This chapter Contents 15. ELECTRICAL EQUIPMENT Headlight Switch Headlight switch Wire color Brown Yellow Pink Mark Starter Switch Wire color Yellow / Red Green Starter switch Mark FREE PUSH Headlight switch connector Starter switch connector Front / Rear Brake Light Switch If the switch is in continuity as braking, it is in normal. -
Page 155: Bulb Replacement
This chapter Contents 15. ELECTRICAL EQUIPMENT Bulb Replacement Headlight Remove handle front cover. Remove bulb seat and replace the bulb. Install the all removed parts. Headlight Front winker light Remove front cover. Remove front winker light lens. Replace front winker light bulb. Install the all removed parts. -
Page 156: Electrical Diagram
Home page Contents 16. ELECTRICAL DIAGRAM 16-1... - Page 157 Home page Contents 16. ELECTRICAL DIAGRAM Notes: 16-2...
Need help?
Do you have a question about the DD 50 and is the answer not in the manual?
Questions and answers