Table of Contents
Advertisement
Quick Links
Advertisement
Chapters
Table of Contents

Related Manuals for Sym ATTILA RS-21 EFi 150


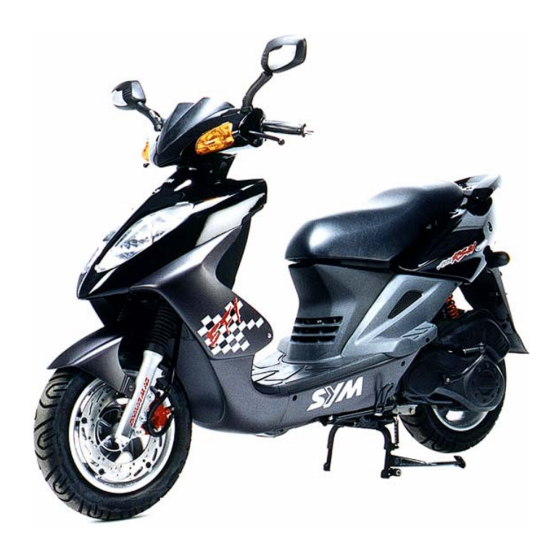
Summary of Contents for Sym ATTILA RS-21 EFi 150
- Page 1 CONTENTS FORWARD HOW TO USE THIS MANUAL MECHANISM ILLUSTRATIONS SERVICE MANUAL...
- Page 2 Forward This service manual contains the technical data of each component inspection and repair for the SANYANG ATTILA RS-21 EFi 150 motorcycle. The manual is shown with illustrations and focused on “Service Procedures”, “Operation Key Points”, and “Inspection Adjustment” so that provides technician with service guidelines.
- Page 3 How to Use This Manual This service manual describes basic information of different system parts and system inspection & service for SANYANG ATTILA RS-21 EFi 150 motorcycles. In addition, please refer to the manual contents in detailed for the model you serviced in inspection and adjustment.
- Page 4 Home page Contents Page Content Index 1-1 ~ 1-16 General Information / Trouble Diagnosis 2-1 ~ 2-16 Service Maintenance Information 3-1 ~ 3-8 Lubrication System 4-1 ~ 4-38 Fuel System 5-1 ~ 5-10 Engine Removal 6-1 ~ 6-16 Cylinder Head / Valve 7-1 ~ 7-8 Cylinder / Piston 8-1 ~ 8-14...
- Page 5 Home page Contents Model illustration Battery / fuse Engine temperature sensor Spark plug Winker relay Crankshaft position sensor Horn IG. Coil / Start relay / Fuel pump relay Fuel tank / Fuel pump Intake temperature & MAP sensor (T-MAP) Engine control unit Throttle position sensor (TPS) / (ECU) Air by-pass valve /...
-
Page 6: Table Of Contents
Home page Contents 1. General Information/Trouble Diagnosis Symbols And Marks....1-1 Torque Values (Frame) ... 1-11 General safety ......1-2 Standard Torque Values for Reference......... 1-11 Service Precautions....1-3 Troubles Diagnosis....1-12 Specifications......1-9 Parts To Be Greased....1-16 Torque Values (Engine) ..1-10 Symbols And Marks Symbols and marks are used in this manual to indicate what and where the special service are needed, in case supplemental information is procedures needed for these symbols and marks,... -
Page 7: General Safety
This chapter Contents 1. General Information/Trouble Diagnosis General safety Carbon monoxide Battery If you must run your engine, ensure the place is Caution well ventilated. Never run your engine in a • Battery emits explosive gases; flame is closed area. Run your engine in an open area, if you have to run your engine in a closed area, be strictly prohibited. -
Page 8: Service Precautions
This chapter Contents 1. General Information/Trouble Diagnosis Service Precautions ¡ E Always use with SANYANG genuine parts and ¡ E Never bend or twist a control cable to prevent recommended oils. Using non-designed parts stiff control and premature worn out. - Page 9 This chapter Contents 1. General Information/Trouble Diagnosis ¡ E The length of bolts and screws for assemblies, ¡ E Remove residues of the old gasket or sealant cover plates or boxes is different from one before reinstallation, grind with a grindstone if another, be sure they are correctly installed.
- Page 10 This chapter Contents 1. General Information/Trouble Diagnosis ¡ E Lubricate the rotation face with specified ¡ E Before battery removal operation, it has to lubricant on the lubrication points before remove the battery negative (-) cable firstly. assembling. Notre tools like open-end wrench do not contact with body to prevent from circuit short and create spark.
- Page 11 This chapter Contents 1. General Information/Trouble Diagnosis ¡ E Before terminal connection, check if the boot is ¡ E When separating a connector, it locker has to crack or the terminal is loose. be unlocked firstly. Then, conduct the service operation.
- Page 12 This chapter Contents 1. General Information/Trouble Diagnosis ¡ E Do not let the wire harness contact with ¡ E Protect wires or wire harnesses with electrical rotating, moving or vibrating components as tape or tube if they contact a sharp edge or routing the harness.
- Page 13 This chapter Contents 1. General Information/Trouble Diagnosis ¡ E Do not let the wire harness been twisted as ¡ E With sand paper to clean rust on connector installation. pins/terminals if found. And then conduct connection operation later. Clean rust •...
-
Page 14: Specifications
This chapter Contents 1. General Information/Trouble Diagnosis Specifications Maker SANYANG MODEL HE15W Overall Length 1933 mm Front TELESCOPE Suspension System Overall Width 700 mm Rear UNlT SWING Overall Height 1160 mm Front 100 / 90-12 (T/L) Tire Specifications Wheel Base... -
Page 15: Torque Values (Engine)
This chapter Contents 1. General Information/Trouble Diagnosis Torque Values (Engine) Thread Dia. Torque Item Q’ty Remarks (mm) Value(Kg-m) Cylinder head bolts 1.0~1.4 Cylinder head nuts 2.0~2.4 Cylinder/cylinder head two-ends 0.7~1.1 Tighten to crankcase bolts Cylinder head left bolts 1.0~1.4 Valve adjustment fixing nuts 0.7~1.1 Apply oil to thread Cylinder head left cover bolts... -
Page 16: Torque Values (Frame)
This chapter Contents 1. General Information/Trouble Diagnosis Torque Values (Frame) Thread Dia. Torque Item Q’ty Remarks (mm) Value(Kg-m) Mounting bolt for steering 4.0~5.0 handlebar 25.4 1.0~2.0 Mounting nut for steering rod 25.4 0.2~0.3 Cone seat for steering rod 5.0~7.0 Front wheel shaft nut 11.0~13.0 Rear wheel shaft nut 0.15~0.3... -
Page 17: Troubles Diagnosis
This chapter Contents 1. General Information/Trouble Diagnosis Troubles Diagnosis A. Engine hard to start or can not be started Check and adjustment Fault condition Probable causes 1. No fuel in fuel tank Loosen carburetor drain bolt to check if there is gasoline 2. - Page 18 This chapter Contents 1. General Information/Trouble Diagnosis B. Engine run sluggish (Speed does not pick up, lack of power) Check and adjustment Fault condition Probable causes Try gradual acceleration and check engine speed 1. Air cleaner clogged 2. Poor fuel supply Engine speed can be Engine speed can not 3.
- Page 19 This chapter Contents 1. General Information/Trouble Diagnosis C. Engine runs sluggish (especially in low speed and idling) Check and adjustment Fault condition Probable causes Check ignition timing (using ignition lamp) Normal Abnormal 1. Incorrect ignition timing (malfunction of ECU or AC alternator) Check If air sucked through throttle valve gasket 1.
- Page 20 This chapter Contents 1. General Information/Trouble Diagnosis E. Clutch, driving and driving pulley FAULT CONDITIONS PROBABLE CAUSES 1. Drive belt worn out or deformation 2. Ramp plate of movable drive face damaged Engine can be started but 3. Driving pulley spring broken motorcycle can not be moved.
-
Page 21: Parts To Be Greased
This chapter Contents 1. General Information/Trouble Diagnosis Parts To Be Greased Acceleration cable/ Front & rear brake lever pivot Seat lock Steering shaft bearing Main stand pivot Side stand pivot Speedometer gear/ Rear wheel bearing front wheel bearing 1-16... - Page 22 Home page Contents 2. Maintenance Information Precautions In Operation ..2-1 Spark Plug ........2-8 Periodical Maintenance Cylinder Compression Schedule ........2-2 Pressure........2-9 Lubrication System....2-3 Driving System ......2-9 Gear Oil ........2-4 Steering System ....... 2-10 Fuel System........ 2-4 Suspension System ....
-
Page 23: Maintenance Information
This chapter Contents 2. Maintenance Information Periodical Maintenance Schedule Maintenance Initial 1 Month 3 month 6 month 1 year item Code 300KM every1000KM every3000KM every6000KM every12000KM ¡ ¸ Air cleaner ¡ ¸ 2nd air jet cleaner ¡ ¸ Fuel filter ¡... -
Page 24: Lubrication System
This chapter Contents 2. Maintenance Information Lubrication System Engine Oil Capacity Caution The vehicle must be parked on a level • ground when checking oil capacity. Run the engine for 3-5 minutes then stop, • wait about 3-5 more minutes allowing engine oil to settle before checking the oil level. -
Page 25: Gear Oil
This chapter Contents 2. Maintenance Information Gear Oil Inspection Check gear oil if leaking. Park the motorcycle with main stand on flat level place. Turn off engine and remove the gear oil draining plug. Place a measurement cup under the draining hole. -
Page 26: Air Cleaner
This chapter Contents 2. Maintenance Information Air Cleaner 6 screws Air element Remove the air cleaner cover (6 screws). Remove the lock plate from the element of air cleaner. Check the element if dirt or damaged. If it dirt, clean it with solvent and then soap it into cleaning engine oil after cleaned. -
Page 27: Crankcase Ventilation
This chapter Contents 2. Maintenance Information Primary adjustment is conducted from button side of cable on the throttle body. Loosen fixing nut, and adjust by turning the adjustment nut for its free-play. Tighten the fixing nut, and check acceleration operation condition after adjusted. Adjustment nut Fixing nut Crankcase Ventilation... -
Page 28: Valve Clearance Inspection And Adjustment
This chapter Contents 2. Maintenance Information Valve Clearance Inspection And Adjustment Check & adjust valve clearance with feeler gauge. Valve clearance (IN/EX): 0.12 ± 0.02 mm Loosen fixing nut and turn the adjustment nut for adjustment. Caution It has to make sure that valve rock-arm is be adjusted to standard level when adjusting it, and re-check the valve clearance after tightened the fixing nut. -
Page 29: Ignition System
This chapter Contents 2. Maintenance Information Ignition System F mark Ignition Timing Caution C.D.I ignition system is set by manufacturer so it can not be adjusted. Ignition Ignition timing check procedure is for lamp checking whether CDI function is in normal or Remove right side cover. -
Page 30: Cylinder Compression Pressure
This chapter Contents 2. Maintenance Information Cylinder Compression Pressure Warn up engine and then turn off the engine. Remove the trunk and the central cover. Remove spark plug cap and spark plug. Install compression gauge. Full open the throttle valve, and rotate the engine by means of stepping the foot-starting lever. -
Page 31: Steering System
This chapter Contents 2. Maintenance Information Steering System Caution Check all wires and cables if they are interfered with the rotation of steering handle bar. Lift the front wheel out of ground. Turn handle from right to left alternative and check if turning is smoothly. -
Page 32: Disk Brake System (Front/Rear Disk Brake)
This chapter Contents 2. Maintenance Information Disk Brake System (Front/Rear Disk Brake metals hose Brake) Brake System Metal Hoses Make sure the brake metal hoses for corrosion or leaking oil, and also check brake system for leaking. Brake Fluid Check brake fluid level in the brake fluid reservoir. If the level is lower than the LOWER limit, add brake fluid to UPPER limit. - Page 33 This chapter Contents 2. Maintenance Information Brake Lining Wear The indent mark on brake lining is the wear limitation. Brake lining Replace the brake lining if the wear limit mark wear limit closed to the edge of brake disc. Caution It is not necessary to remove brake hose when replacing the brake lining.
-
Page 34: Wheel / Tire
This chapter Contents 2. Maintenance Information Wheel / Tire Check if both front & rear tires’ pressure is in correct. Caution Tire pressure check should be done as cold tire. Appointed tire pressure Tire size Front tire Rear tire Load for Tire pressure 1.75 2.25... -
Page 35: Battery
This chapter Contents 2. Maintenance Information Battery Battery Removal Remove right cover. (3 screws) Battery cables removal: 1. At first, remove the negative “-” cable. 2. Then, remove the positive “+” cable. 3. Remove the battery. If there is some rust on battery posts, clean it with steel brush. -
Page 36: Special Service Tools Catalogue
This chapter Contents 2. Maintenance Information Special Service Tools Catalogue (£ r 22mm) (£ r 30mm) Alternator fly wheel Puller/presser for Puller/presser for Name Name Name remover crankcase bushing crankcase bushing Parts no. SYM-3110A01 Parts no. SYM-1120310 Parts no. SYM-1120320 Presser for crankcase Valve spring Valve spring... - Page 37 This chapter Contents 2. Maintenance Information (6301) (6203/6004UZ) (6204) Bearing installer £ r Name Bearing installer Name Bearing installer Name 17mm Parts no. SYM-9610000 Parts no. SYM-9110400 Parts no. SYM-9620000 (20*32*6) (27*42*7) (25*40*8) Name Oil seal installer Name Oil seal installer Name Oil seal installer Parts no.
- Page 38 Contents Home page 3. Lubrication System Mechanism Illustration ....3-1 Oil Pump Disassembly ....3-4 Operational Precautions:... 3-2 Oil Pump Inspection ....3-5 Trouble Diagnosis ...... 3-2 Oil Pump Re-assembly ....3-5 Engine Oil ........3-3 Oil Pump Installation ....3-6 Cleaning Engine Oil Strainer..
-
Page 39: Operational Precautions
This chapter Contents 3. Lubrication System Operational Precautions: General Information This chapter contains maintenance operations for the engine oil pump, engine oil and gear oil. Specifications Oil viscosity Engine oil quantity Disassembly 1000 c.c. Replacement 800 c.c Oil viscosity SAE 10W-30 or equivalent (Recommended King-Mate serial oils) Gear Oil... -
Page 40: Engine Oil
This chapter Contents 3. Lubrication System Engine Oil Turn off engine, and park the motorcycle in flat surface with main stand. Check oil level with oil dipstick after 3-5 minutes. Do not screw the dipstick into engine as checking. If oil level is nearly low level, fill out recommended oil to upper level. -
Page 41: Oil Pump Removal
This chapter Contents 3. Lubrication System Oil Pump Removal Remove the alternator (refer to chapter 10). Remove the engine right cover. Remove the one-way clutch and starting gear (1 nut). Make sure that the pump axle can be rotated freely. Remove the oil pump cover (2 screws), and then the oil pump driving gear clamp and the gear. -
Page 42: Oil Pump Inspection
This chapter Contents 3. Lubrication System Oil Pump Inspection Check the clearance between oil pump body and outer rotor. Limit¡ G below 0.12mm Check clearance between inner and outer rotors. Limit: below 0.12mm Check clearance between rotor side face and pump body. -
Page 43: Oil Pump Installation
This chapter Contents 3. Lubrication System Install driving gear and clamp. Caution Install the oil pump cover and fixing pin properly. Oil Pump Installation Install the oil pump (3 screws). Caution The elliptical hole on the driving gear is not match with the screw hole. -
Page 44: Gear Oil
This chapter Contents 3. Lubrication System Gear Oil Oil Level Inspection Park the motorcycle on flat surface with main stand. Turn off engine and remove both engine oil filling bolt and oil draining plug. Filling bolt Remove gear oil filling hole bolt and place a measurement cup under the draining plug. - Page 45 This chapter Contents 3. Lubrication System NOTES:...
-
Page 46: Fuel Injection System
Contents Home page 4. FUEL INJECTION SYSTEM Mechanism Illustration ....4-1 Air By-pass Valve......4-15 EFI System Components....4-2 Fuel Injector.......4-15 Introduction Of Fuel Control Fuel Pump........4-15 System .........4-3 Fuel Tank ........4-16 Electronical Fuel Injection Air Cleaner .........4-19 Components & Operation Principle Introduction .........4-3 Trouble Diagnosis &... -
Page 47: Efi System Components
This chapter Contents 4. FUEL INJECTION SYSTEM EFI System Components Battery voltage Main switch ON Throttle position sensor Fuel pump Engine temperature Transistor ignition sensor coil Intake temperature /MAP sensor Fuel injector Crankshaft Idle air by-pass position sensor valve... -
Page 48: Introduction Of Fuel Control System
This chapter Contents 4. FUEL INJECTION SYSTEM Introduction Of Fuel Control System The engine of this model was based on a 150 c.c. four-stroke & 4-valve SOHC electronic controlled single cylinder, air-cooler, engine. It adopts a charcoal canister to absorb the fuel vapor generated through evaporation in the fuel system &... -
Page 49: Precautions In Operation
This chapter Contents 4. FUEL INJECTION SYSTEM Precautions In Operation General Information Warning Gasoline is a low ignition point and explosive materials, so always work in a well-ventilated place and strictly prohibit flame when working with gasoline. Cautions £ » Do not bend or twist throttle valve cable. -
Page 50: Trouble Diagnosis
This chapter Contents 4. FUEL INJECTION SYSTEM Trouble Diagnosis Turn on the ignition switch. EFI Electrical Circuit Inspection 1. Burnt Bulb? 2. Blown fuse? 3. Battery voltage too low? 4. Poor wire contact on ECU Does the warning lamp goes on for 2 seconds circuit? and then off? 5. - Page 51 This chapter Contents 4. FUEL INJECTION SYSTEM Engine cannot be started or difficult to start. Cannot be started or difficult to start Does the warning lamp goes Check electrical circuit according to on for 2 seconds and then procedure. off? 1.
- Page 52 This chapter Contents 4. FUEL INJECTION SYSTEM Diagnosis Of Idle Speed Misfire Idle speed misfire Does the throttle valve cable stuck so could not be set-up? 1. Connect the Data Scan Connect the Data Scan and check trouble content and enter into CO 2.
- Page 53 This chapter Contents 4. FUEL INJECTION SYSTEM Abnormal CO Correct Value Does the throttle valve cable Idle speed misfire. stuck so could not be set-up? Connect the Data Connect the Data Scan Scan and enter into and check trouble content the data analysis if there is an abnormal menu.
-
Page 54: Components Description Of Efi
This chapter Contents 4. FUEL INJECTION SYSTEM Components Description Of EFi ECU (Electronic Control Unit): ¡ E Powered by DC 8~16V, and has 22 terminals connector on the unit. ¡ E The hardware component consists of an 8-bite computer that be its control center. -
Page 55: Throttle Body
This chapter Contents 4. FUEL INJECTION SYSTEM Intake temperature and pressure sensor: ¡ E Powered by 5V DC from ECU. It has 4 terminals on the sensor. One terminal is for power, and 2 terminals are for signal output. And, the rest one is for ground. ¡... -
Page 56: Fuel Lines
This chapter Contents 4. FUEL INJECTION SYSTEM Fuel Lines Fuel filter Fuel tank Fuel injector Fuel pump & pressure regulator Vacuum hose Battery System Description: 1. All sensors’ signals sent to the ECU firstly after the electrical fuel pump inside the fuel tank key-on. Then, ECU controls the fuel pump relay so let the pump operate. -
Page 57: Ignition System
This chapter Contents 4. FUEL INJECTION SYSTEM Ignition System Throttle valve openness Intake temperature/pressure Engine temperature rpm/TDC Ignition coil TDC/ crank position sensor ACG/flywheel gear Diode ring (24-1 tooth) 1. Principle of operation: The engine is equipped with a computerized ignition control system that collects signals from TDC/crankshaft position sensor, throttle position sensor, temperature sensor, and intake temperature as well as pressure sensor. -
Page 58: Crank Position Sensor
This chapter Contents 4. FUEL INJECTION SYSTEM Crank Position Sensor The magnetic field type sensor is to induct a voltage signal to calculate engine speed with ACG gear ring (24-1 tooth). No teeth There is one tooth in every 15 degree on the gear ring. -
Page 59: Temperature Sensor
This chapter Contents 4. FUEL INJECTION SYSTEM Temperature Sensor Engine temperature sensor Intake temperature and pressure sensor Engine oil temperature sensor: According to the semiconductor’s variable character, the sensor detects the change of engine oil and metal wall and then transferred into a voltage signal sending to the ECU. -
Page 60: Air By-Pass Valve
This chapter Contents 4. FUEL INJECTION SYSTEM Air By-pass Valve Fuel injector air temperature engine oil temperature engine speed manifold pressure throttle openness Air by-pass valve Description: The ECU that received all sensors’ signals to control the throttle valve openness with PWM so that can adjust air-flow into the by-pass valve of the intake manifold. -
Page 61: Fuel Tank
This chapter Contents 4. FUEL INJECTION SYSTEM Fuel Tank Removal of fuel pump/pressure control valve/fuel sender Open the seat cushion. Remove the luggage assembly. (bolt x 4, screw x Remove the rear carrier. ( bolt x 4) Remove both the left and right body covers. (screw x 4) Remove the rear lamp. -
Page 62: Electrical Equipment
This chapter Contents 4. FUEL INJECTION SYSTEM Remove the rubber oil seal. Installation of the fuel pump and the fuel sender Install them in reverse procedure of removal. Caution The oil seal of fuel pump can not be omitted, The ¡ ¶ mark must be aligned deformed or damaged. - Page 63 This chapter Contents 4. FUEL INJECTION SYSTEM Remove the fuel tank mounting bracket. (bolt x 4) Bolt x 4 Remove the fuel tank. Loosen the fuel inlet clamper and then remove the fuel inlet and the connection hose. Remove all hoses from the pressure regulator. Installation Install the fuel tank in reverse procedure of removal.
-
Page 64: Air Cleaner
This chapter Contents 4. FUEL INJECTION SYSTEM Air Cleaner Remove the air cleaner cover. (screw x 6) Screw x 6 Remove the air cleaner assembly. Installation: Install the air cleaner in reverse procedure of removal. Application of fuel injection system diagnosisor Open the front luggage cover. -
Page 65: Trouble Diagnosis & Solutions Of Efi
This chapter Contents 4. FUEL INJECTION SYSTEM Trouble Diagnosis & Solutions Of EFi Judgment of Flash Code When the engine might have problem and also no tester to detect, the problem can be detected by reading the flash times of CHK lamp on the odometer. And then, the motorcycle is warned what kind of problem had occurred by means of the solution priority lamp of the tester operation message table, or the FLASH CODE. -
Page 66: Error Code Message And Solution Operation
This chapter Contents 4. FUEL INJECTION SYSTEM Error Code Message and Solution Operation Solution Flash Message Solution Operation Code Priority code 1. Stopping the motorcycle immediately, and solve it with priority 2. Check if the lubricant system for abnormal? Engine 3. - Page 67 This chapter Contents 4. FUEL INJECTION SYSTEM Solution Flash Message Solution Operation Code Priority code 1. Check if the openness of idle speed by-pass valve Application is within specification. (40~100%) range abnormal P0505 2. Make sure if the idle speed valve openness is in of the air normal.
-
Page 68: Efi Data Scan Operation Manual
This chapter Contents 4. FUEL INJECTION SYSTEM EFi Data scan Operation Manual A. DTC Codes Retrieved by Data Scan Description: When a problem comes out, with the Data Scan to diagnosis the problem and solve it. Method: 1. Stop the engine and do not turn on the ignition switch. 2. - Page 69 This chapter Contents 4. FUEL INJECTION SYSTEM C. Data Scan Function Menu 1. P1120: Throttle position sensor connection problem 2. P0560: Abnormal battery voltage 3. P0700: Starting speed exceeds CVT matching speed 1. Problem searching. 2. Just occurred problem searching, 3.
- Page 70 This chapter Contents 4. FUEL INJECTION SYSTEM D. Operation Steps & Menu Function Description 1. Connect the Data Scan’s connector onto the specified signal connector of the EFI system on the motorcycle. 2. Turn the ignition switch on and then the LCD monitor goes on and show “SANGYANG Motor Co.” as fig 1.
- Page 71 This chapter Contents 4. FUEL INJECTION SYSTEM When selecting the “1. retrieving DTC code” (LCD background changed into black), and press “ENTER”, then there have 3 sub-functions can be selected. Fig 6 With the ▲▼ cursor to select “1. active DTC codes” (LCD background changed into black), press “ENTER”...
- Page 72 This chapter Contents 4. FUEL INJECTION SYSTEM To verify if there has problem occurred in past. When the menu record shows the past problem record, it will show the problem symptom (as fig 10). Then, suggestion to erase the DTC codes. (please refer to DTC codes Erase on page 28).
- Page 73 This chapter Contents 4. FUEL INJECTION SYSTEM Remarks: a. Current DTC codes: It means that the problem onto EFI system is occurring. When the problem is solved, the recorded will disappear. b. Past DTC codes: It means that the problem onto the EFI system just occurred. The DTC codes are recorded.
- Page 74 This chapter Contents 4. FUEL INJECTION SYSTEM ¡ · As the fig 20 (2/8) shown, the menu provides with 3-set dynamic values of engine rpm, atmosphere pressure & sensor’s voltage, and throttle valve opening & sensor’s voltage. ¡ · As the fig 21 (3/8) shown, the menu provides with 3-set dynamic values of engine rpm, CO voltage meter, battery voltage, and sensor’s voltage.
-
Page 75: Reference
This chapter Contents 4. FUEL INJECTION SYSTEM ¡ · As the fig 23 (5/8) shown, the menu provides with 4-set dynamic values of engine rpm, initial position voltage of throttle valve idle speed, idle speed target value, and idle speed CO corrective value. - Page 76 This chapter Contents 4. FUEL INJECTION SYSTEM ¡ · As the fig 25 (7/8) shown, the menu provides with 2-set dynamic values of fuel pump condition and manual TPI initialization. Description: Fuel pump condition: It means the ON & OFF condition of current fuel pump. manual TPI initialization: It means the action status of the manual TPI initialization.
- Page 77 This chapter Contents 4. FUEL INJECTION SYSTEM 8. With the ▲▼ cursor to select “5 operation test” function, press “ENTER” key to enter into “5. re-set/Zero setting command” main function menu. (as fig 28) Fig 28 With the ▲▼ cursor to select “1. Reset TPI adaption” or “2. Re-set CO deposited time” function. (as fig 29, 30, 31, 32, 33, 34) (Note: Do not enter this menu if not necessary.) Description: 1.
- Page 78 This chapter Contents 4. FUEL INJECTION SYSTEM Press ENTER key to left this set up function menu. Fig 32 Fig 33 Fig 34 9. With the ▲▼ cursor to select “6. Waveform” analysis (as fig 35), press ENTER to enter into the waveform analysis menu.
- Page 79 This chapter Contents 4. FUEL INJECTION SYSTEM With the ▲▼ cursor to select “1. engine speed (as fig 37), press ENTER to enter into the “engine speed” menu to check current waveform. There are 3 instantly dynamic data values shown on the menu.
- Page 80 This chapter Contents 4. FUEL INJECTION SYSTEM With the ▲▼ cursor to select “3. throttle position sensor (TPS) (as fig 43), press ENTER to enter into the “3. TPS” menu to check current waveform. (as fig 42). Press EXIT key to left the “TPS” waveform menu.
-
Page 81: Efi Component Malfunction Check& Replacement Procedure (Pi Engine)
This chapter Contents 4. FUEL INJECTION SYSTEM EFi Component Malfunction Check& Replacement Procedure (PI Engine) PI (Port Injection) ¡ ÷ Intake manifold injection engine Parts No. Service Item Inspection Method Adjustment & replacement procedure Parts Name schedule 390-002 At least 1. - Page 82 This chapter Contents 4. FUEL INJECTION SYSTEM Parts No. Service Adjustment & replacement Item Inspection Method Parts Name schedule procedure 366-008 At least 1. Connect the Data Scan as Replacement procedure for T-MAP Intake 20000km inspection. The engine intake (intake temperature/pressure temperature life-expectancy temperature and pressure should...
- Page 83 This chapter Contents 4. FUEL INJECTION SYSTEM Parts No. Service Adjustment & replacement Item Inspection Method Parts Name schedule procedure 325-002 At least 1. Connect the Data Scan. ECU replacement procedure: 20000km 2. Record the ECU service time. 1. Connect the Data Scan onto the life-expectancy original ECU.
-
Page 84: Operational Precautions
Contents Home page 5. REMOVAL OF ENGINE Operational Precautions ... 5-1 Engine Suspension Frame ..5-8 Engine Removal ......5-2 Installation Of Engine ....5-9 Removal Of Engine Suspension Bushing ....5-7 Operational Precautions General Information Engine must be supported by a bracket or adjustable tool in height. The following parts can be serviced with the engine installed on the frame. -
Page 85: Engine Removal
This chapter Contents 5. REMOVAL OF ENGINE Engine Removal Remove the battery cap (Nut ×3). Remove the battery negative (-) cable. Remove the battery positive (+) cable. Open seat cushion. Remove the trunk assembly. (bolt x 4, screw x 1) Remove rear bracket and fuel tank cap. - Page 86 This chapter Contents 5. REMOVAL OF ENGINE Remove the spark plug. Remove the engine temperature sensor connector. Caution Open the latch located under the temperature sensor before disconnect it so that the connector can be pull out and not be damaged.
- Page 87 This chapter Contents 5. REMOVAL OF ENGINE Remove the throttle body and the fuel injector. Nut x2 (nut x 2) Loose the strap screw of the air duct on the Bolt x 2 engine left side, and then remove the air duct. Remove the air cleaner bolts.
- Page 88 This chapter Contents 5. REMOVAL OF ENGINE Remove the rear brake pipe seat. (bolt x 2) Bolt x 2 Remove the rear brake assembly. (bolt x 2) Bolt x 2 Bolt x 2 Remove the front-end nut of rear bracket. (bolt x Remove the rear wheel axle nut.
- Page 89 This chapter Contents 5. REMOVAL OF ENGINE Engine suspension removal Remove the rear shock absorber lower bolt. (bolt x 1) Bolt x 1 Remove the side hole cap of cooling fan. Side hole cap Remove the engine suspension nuts, and then remove the bolt from the side hole.
-
Page 90: Removal Of Engine Suspension Bushing
This chapter Contents 5. REMOVAL OF ENGINE Removal Of Engine Suspension Bushing If engine suspension frame and the cushion rubber of rear shock absorber bushing damaged. Then, with the bushing remover / pressor, Ø 28mm & Ø 20mm, to press the bushing out, and replace it with new one. -
Page 91: Engine Suspension Frame
This chapter Contents 5. REMOVAL OF ENGINE Engine Suspension Frame Removal Remove the right side bolt of engine suspension frame. Engine suspension bolt (right side) Remove the left side bolt of engine suspension frame. Engine suspension bolt (left side) Check if the engine suspension frame bushing and cushion rubber for damage. -
Page 92: Installation Of Engine
This chapter Contents 5. REMOVAL OF ENGINE Installation Of Engine Check if the bushings of engine suspension frame and shock absorber for damaged. If so, replace with new ones. Install the engine according to the reversing order of removal. Caution Note both feet and hands safety for squeezing as engine installation. - Page 93 This chapter Contents 5. REMOVAL OF ENGINE NOTES: 5-10...
- Page 94 Contents Home page 6. Cylinder Head/Valve Mechanism Illustration....6-1 Valve Stem Replacement ..6-9 Precautions In Operation...6-2 Valve Seat Inspection And Service ..........6-10 Troubleshooting ......6-3 Cylinder Head Reassembly ..6-12 Cylinder Head Removal .....6-4 Cylinder Head Installation ..6-14 Cylinder Head Disassembly ..6-6 Valve Clearance Cylinder Head Inspection ..6-7 Adjustment......
-
Page 95: Precautions In Operation
This chapter Contents 6. Cylinder Head/Valve Precautions In Operation General Information • This chapter is contained maintenance and service for cylinder head, valve, and camshaft as well as rocker arm. • Cylinder head service cannot be carried out when engine is in frame. Specification Unit: mm Item... -
Page 96: Troubleshooting
This chapter Contents 6. Cylinder Head/Valve Troubleshooting Engine performance will be effected by troubles on engine top-end. The troubles usually can be determinated or by performing cylinder compression test and judging the abnormal noise generated. Rough Idle • Low compression pressure Low compression pressure Valve Improper valve adjustment... -
Page 97: Cylinder Head Removal
This chapter Contents 6. Cylinder Head/Valve Cylinder Head Removal Bolt x 2 Remove: Remove the cooling fan cover. (screw x 2, bolt x Screw x 2 Remove the right cover of engine. (screw x 4) Down Screw x 2 Screw x 2 Remove the left cover of engine. - Page 98 This chapter Contents 6. Cylinder Head/Valve Turn the flywheel in counter clockwise motion with T type wrench until the “T” mark on flywheel aligned with the mark on the crankcase so that the hole on the camshaft sprocket is forward up and piston is at TDC position.
-
Page 99: Cylinder Head Disassembly
This chapter Contents 6. Cylinder Head/Valve Cylinder Head Disassembly Remove the adjustment hole cap for the EX & IN valve clearance. (bolt x 6) Adjustment hole cap Firstly, remove the camshaft stopper, and then Stopper drive a 6mm bolt into camshaft. Finally, remove the camshaft and rocker arm. -
Page 100: Cylinder Head Inspection
This chapter Contents 6. Cylinder Head/Valve Remove valve, valve stem and valve spring. Cylinder Head Inspection Camshaft Inspect cam lobe height for damaged. Service Limit: IN: Replacement when less than 25.29mm EX: Replacement when less than 25.12mm Inspect the camshaft bearing for looseness or wear out.
Need help?
Do you have a question about the ATTILA RS-21 EFi 150 and is the answer not in the manual?
Questions and answers