ZKTeco X7 User Manual
Hide thumbs
Also See for X7:
- User manual (15 pages) ,
- User manual (7 pages) ,
- System user manual (16 pages)
Table of Contents
Advertisement
Advertisement
Table of Contents

Related Manuals for ZKTeco X7


Summary of Contents for ZKTeco X7
- Page 1 Version: 1.2.1...
-
Page 2: Equipment Installation
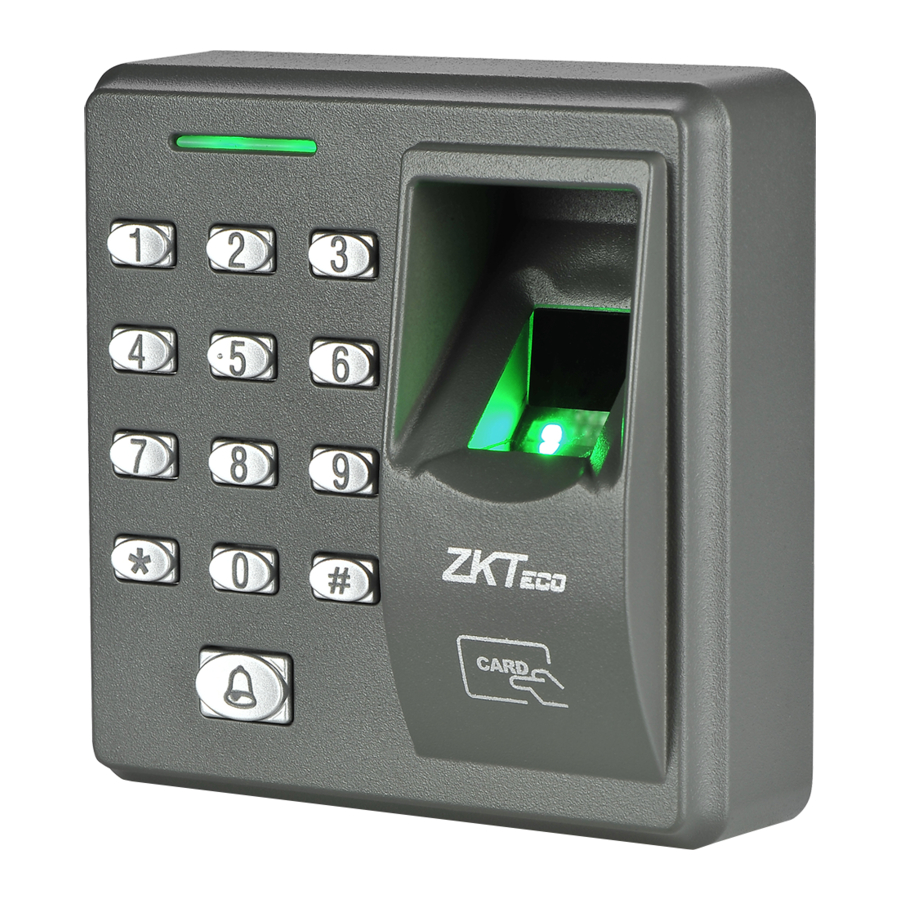
1. Equipment Installation (1) Remove the screw on (2) Take away the back cover. (3) Fix the back cover on the the bottom of device. wall according to the mounting paper. (4) Fix the device to the (5) Fix the screw. Tamper Alarm Button back cover. -
Page 3: Lock Connection
3. Lock Connection Warning: No operation when power on! (1) The system supports NO LOCK and NC LOCK. The NO LOCK (normally open at power on) is connected with NO terminal, and the NC LOCK is connected with NC terminal. (2) To prevent the generation of self-inductance EMF which would affect the system, when the electrical lock is linked to the Access Control System, it is required to connect one FR107 diode (equipped in the package, do not reverse the polarities) in... -
Page 4: Connected With Other Devices/Power
4. Connected with Other Devices Only devices with an alarm ≤ DC 12V can be connected. 5. Connect with Power Input DC 12V, 500mA (50mA in idle status) Positive is connected with +12V, negative is connected with GND (do not reverse the polarities). -
Page 5: Administrator Authentication
Instructions Step 1: Power on after the device is completely installed on the wall. Step 2: Authenticate administrator password and change it immediately. Adjust access control parameters, which include changing passwords for door opening, and setting unlocking duration, authentication mode, concealed mode, door sensor mode and alarm etc. -
Page 6: Open Door By Entering Administrator Password
Open Door by Entering Administrator Password 2. Press [0] or [#]. 3. Press [0] or [#]. 1. The administrator password (The indicator turns green (The indicator turns green and is authenticated. and makes a long beep.) makes a long beep.) 5.Exit. -
Page 7: Registering Cards In Batches
indicator turns red and makes three short beeps). When the indicator turns green, you can register the user again. If you fail to swipe card, press fingerprint or enter user ID for three times, the device will enter in idle status. ... - Page 8 2. When a password is successfully changed, you can immediately change the next password by entering another group ID. 1.4 User Authentication Card / Fingerprint / Password Authentication When the device is power-on, it enters user authentication state. 3. User authentication Succeed 1.
-
Page 9: Authentication Mode Configuration
2. After successful deletion, the device will automatically enter the process of deleting next user. Press [*] to exit. Deleting All Users 2. Press [9]. 3. Press [9]. 1. The administrator password (The indicator turns green (The indicator turns green and is authenticated. -
Page 10: Concealed Mode/Door Sensor Configurations
Note: Details about authentication modes are as follows: Authentication Mode Value Description Only password verification Only RF Card verification Only fingerprint verification FP/PW/RF fingerprint or password or RF Card verification RF Card and password verification (swipe card before RF&PW entering password) fingerprint and password verification (fingerprinting before FP&PW entering password) - Page 11 3.Press [5]. 2. Press [0]. 1. The administrator password (The indicator turns green (The indicator turns green and is authenticated. and makes a long beep.) makes a long beep.) 5. Conflagration succeeds. 6.Exit. 4.Configure the door sensor (The indicator turns red and (The indicator turns green mode (0: NO;1: NC;...
-
Page 12: Configuring Tamper Alarm/Door Sensor Delay
Configuring Tamper Alarm If this function is enabled, alarms will be raised when the device is dismantled from the wall. 2. Press [7]. 3. Configure Tamper Alarm 1. The administrator password (The indicator turns green Switch. (0: enable; 1: disable). is authenticated.
Need help?
Do you have a question about the X7 and is the answer not in the manual?
Questions and answers