Table of Contents
Advertisement
Advertisement
Table of Contents

Subscribe to Our Youtube Channel
Related Manuals for Tech4o traileader pro


Summary of Contents for Tech4o traileader pro
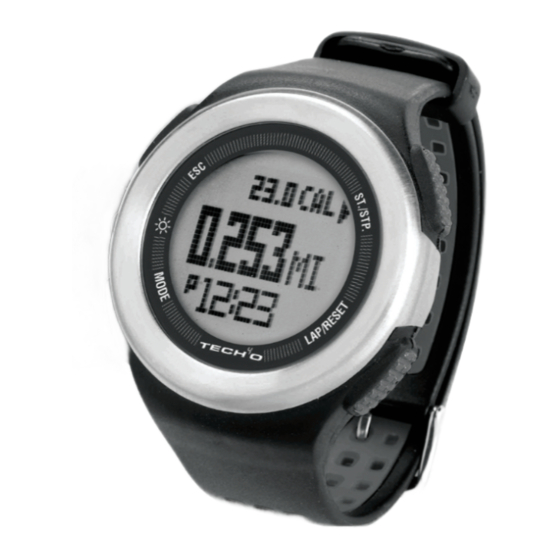
- Page 1 Traileader PRO with Heart Rate Monitor & PC Link...
-
Page 2: Table Of Contents
All instructions that relate to the Heart Rate features 5.0 Dual Time Zone Mode This Color. are in 5.1 Dual Time Zone Display Contents 5.2 Dual Time Zone Setting Overview TRAIL MODE MENU Introduction 6.0 Distance Mode TIME MODE MENU 6.1 Distance Mode Display 1.0 Time/Date/system/user/unit Mode 6.2 Distance Use... - Page 3 8.0 User Mode 11.0 Compass Mode 8.1 User Mode Display 11.1 Compass Display 8.2 User Mode Use 11.2 Compass Use 8.3 User Mode Set Menus 11.3 Compass Idle Refresh Save 11.4 Take a Reverse Bearing Session 11.5 Lock the Compass Bearing Daily Record 11.6 Calibrate the Compass View...
- Page 4 Thank you for purchasing one of our Tech 4 o Traileader Watches. Use this manual to guide you through the initial setup and calibration and keep it for later reference. Avoid exposing the watch to extreme temperatures, impacts, and moisture. Also, avoid using the watch near magnets, or objects and appliances that contain magnets, as inaccurate results will occur.
- Page 5 The Traileader Pro has two main Time mODe menu Trail mODe menu menus- Time & Trail. Learning to navigate these is key to a successful experience. See fig. 2 & 3 To access any Time Function Display when in another Time Mode Menu function - press M until the display you wish is visible.
-
Page 6: Time Mode Menu
Time mode menu 1.0 TIME/DATE/SySTEM/USER/UNIT MODE The Traileader’s Time/Date Mode displays: Current Time and Date, Altitude, Pressure, Weather, and Temperature. This mode is where many of the system setting are adjusted. 1.1 Time/Date Display Access the Time/Date Mode Display. See fig. 4 Display Features: * Top Row: One of the following- day of week, weather forecast, current temperature, altitude... -
Page 7: Set The Date
* Press M to confirm selection * Press ESC to exit Date • Press ESC to exit the Time/Date set menu 1.4 Set Up the System (LCD, Sound, Light, Pair) Access the Time/Date Mode Display. • Hold M 3 seconds to enter Time/Date/ System set menu •... -
Page 8: Enter Your Personal Data
M to enter and use ▲ or ▼ to enter your • Repeat to set additional alarms personal data 2.2 Alarm Function • Press ESC to exit the Time/Date/System/User set menu a scheduled alarm will chime for 30 seconds and then turn off. See www.tech4o.com for our stride length calculator. -
Page 9: Chronograph Mode
3.1 Chronograph Display Access the Chronograph Mode Display. See fig. 8. Display Features: * Top Row: CHR indicator * Middle Row: Running time / most recent lap time in hours, minutes and seconds * Bottom Row: Lap number and fig. 8 100th of a second lap time 3.2 Start/Stop the Chronograph Access the Chronograph Mode Display... -
Page 10: Countdown Timer Mode
Access the Chronograph Mode Display. 4.0 COUNTDOWN TIMER MODE See fig. 9. • Hold M for 3 seconds to access Chronograph Recall The countdown timer counts backwards, toward zero * Press ▲ or ▼ to scroll through the recorded lap from a programmable time and sounds convenient, times and total time interval beeps. -
Page 11: Countdown Timer Use
4.3 Countdown Timer Use Access the Countdown Timer Display. • Press ▲ to start the countdown timer • Press ▲ again to stop the countdown timer • Press ▼ to reset the countdown timer • The countdown timer will chime at these intervals: ▲... -
Page 12: Distance Mode
6.0 DISTANCE MODE Distance mode accurately tracks your Speed, Distance, Pace, Calories, and Steps. NOTE: Although your watch came programmed with a generic profile, we recommend that you calibrate a personal profile for the most accurate results. See section 1.5 6.1 Distance Mode Display Access Distance Mode Display. -
Page 13: Distance Mode Set Menus
• Press ▲ to scroll through the data in the top row of the display • Press and Hold ▲ at any time to stop recording • Hold ▼ 3 seconds to clear all recorded ▼ data for that session •... -
Page 14: Session (Menu 2)
▲ ▲ ▼ ▼ ▼ ▼ ▼ ▼ ▼ ▼ ▼ ▼ ▼ ▼ ▼ ▼ ▼ ▼ ▲ fig. 16 ▼ • Press M to select the Session * Press ▲ or ▼ to scroll through the collected data * Press ESC to exit the records * Press ESC to exit Session ▼... -
Page 15: Sleep (Menu 4)
7.0 HEART RATE MODE • Press ▼ to scroll to Sleep The Traileader Pro's Heart Rate Mode supports • Press M to select the Sleep the following 6 data gathering functions. * Press ▲ or ▼ to adjust the sleep timer for Distance Mode •... -
Page 16: Heart Rate Chest Strap
fig. 17 fig. 18 7.1 Heart Rate Chest Strap 7. 2 Heart Rate Mode Display The chest strap captures, displays and saves heart Access the Heart Rate Mode Display See fig. 18. rate data. This strap must be worn with good contact The display will auto-scroll until the heart rate is on your bare skin. -
Page 17: Estimated Maximum Heart Rate & Percentage Of
▲ ▲ ▲ ▲ ▲ ▲ Tom is 53 fig. 19 fig. 20 Current heart Display Features: * Top Row: Stats (exercise time, HR in-zone time, max HR, min HR, average HR , and calories if his current heart rate is 100 burned). -
Page 18: Heart Rate Data Acquisition
7.5 Heart Rate Data AcquIsition Access the Heart Rate Mode Display. Heart Rate mode automatically begins recording after a pre-programmed 10 second delay. The icon will flash when the mode is active. It ▼ will continue to record: * Unless you manually turn it off * Unless it no longer receives a signal from the chest strap NOTE:... -
Page 19: Heart Rate Set Menus
7.6 Heart Rate Set Menus ▲ ▼ The following 4 menus add supplemental functions and controls to the Heart Rate Mode. Save (menu 1) Saves the current session into today's record. If the previous session has NOT been saved, the software will automatically save it into today's record at ▼... -
Page 20: Daily Record
▲ ▼ ▼ ▼ ▼ ▼ ▼ ▼ ▼ ▼ ▼ ▼ fig. 23 ▲ Daily Record (menu 3) * Press ▼ to scroll to the day Provides a review of the 7 screens of collected data * Press M to access records for each day up to and including day 10. -
Page 21: Zone
▲ ▼ ▲ ▲ ▲ ▲ ▼ ▼ ▼ fig. 24 Zone (menu 4) * Press M to select Fitness Allows you to establish and set upper and lower targets * Press ▲ or ESC for YES / NO for the zone alert. * Press ▲... -
Page 22: User Mode
fig. 25 • Press ESC to exit Zone 8.0 USER MODE The User Mode allows you to choose from the 20 selections on the chart to create a custom display in the top, middle and bottom rows. See fig. 25. Important: This mode functions with the chest strap. -
Page 23: User Mode Use
8.2 User Mode Use • Hold ▼ for 3 seconds to clear all recorded statistics for that session Access the User Mode Display. • User Mode continues to measure exercise User mode automatically begins recording after an statistics; 8 second delay. * Unless you turn it off Note: When in the User Mode you may:... - Page 24 ▲ ▼ Session (menu 2) Provides a review of the 9 screens of collected statistical data for this current ▼ session. Access the User Mode Display. ▼ ▼ • Hold M for 3 seconds to enter User set menu • Press ▼ to scroll to Session •...
-
Page 25: Daily Record
▲ ▼ ▼ ▼ ▼ ▼ ▼ ▼ ▼ ▼ ▼ ▼ ▲ fig. 28 Daily Record (menu 3) Provides a review of the 7 screens of collected statis- * Press ▼ to scroll to the review day tics for each day up to and including day 10. * Press M to access records See fig. -
Page 26: View
View (menu 4) * Press ▲ or ▼ to scroll and choose a function for the middle row View mode allows you to choose exactly the informa- * Press M to confirm and move to bottom row tion you want displayed in the three rows of User * Press ▲... -
Page 27: Use The Altitude Difference Calculator
9.2 Set a Reference Altitude altitude. Whenever you set a reference altitude, Setting a reference altitude is key to ensuring accurate use a trusted source such as a topographical map, readings. Changes in air pressure skew altimeter read- trail head marker or summit sign for a benchmark. ings. -
Page 28: Start The Ascent / Descent Calculator
* Press ESC to exit Altimeter set menu a steep 3000 ft. incline. To end your hike, you descend 2500 ft. back your start. Your total • Press ▲ in the Altimeter Mode Display to ascent is 3500 ft. and your total descent is 4000 see the altitude difference calculator’s ft. -
Page 29: Clear The As/Ds Calculator
9.6 Clear the AS/DS Calculator NOTE: The altitude alarm will not sound if you exit the Altimeter Mode Access the Altimeter Mode Display. • Hold M 3 seconds to enter Altimeter set menu 9.8 View the Altimeter Log Book • Press ▼ to scroll to AS/DS The altimeter contains a logbook that tracks maximum * Press ▼... -
Page 30: Switch Between Meters & Feet
in the 1st column, the next latest reading is in the 2nd column and all other readings follow in the same manner. See fig. 32. To Access the Altimeter Mode Display • Hold M 3 seconds to enter Altimeter set menu •... -
Page 31: Barometer Mode
10.0 BAROMETER MODE 10.1 Barometer Display The barometer measures atmospheric pressure that Access Barometer Mode Display. is used to forecast changing weather. High pressure is Display Features: associated with clear skies. Low pressure is associated * Top Row: Press ▲ to scroll through pressure with cloudy skies and/or wet weather. -
Page 32: Sea Level Pressure
Sea Level Pressure Access the Barometer Mode Display. • Hold M 3 seconds to enter Barometer set menu • Press M to select SLP * Press ▲ or ▼ to adjust the Seal Level Pressure to match your current, known Sea Level Pressure * Press ESC to confirm and exit SLP •... -
Page 33: Change Units Of Measure
- maximum and minimum temperatures, and 11.2 Compass Use - time the measurement occurred Keep the watch parallel to the horizon. The compass * Press M to view a graphical history of the reading will flash if there is any distortion. Be sure previous 48 hours’... -
Page 34: Calibrate The Compass
adjusted bearing based on change of direction. It complete the rotation * Press ESC to confirm and exit Calibrate only displays the locked bearing. • Press ESC to exit Compass set menu Access the Compass Mode Display. • Press ▼ to lock the current compass bearing •... -
Page 35: Logbook Mode
See the declination maps for North America and Europe on the two reference pages at the end of section 16.0. 12.0 LOgBOOk MODE The logbook mode allows you to: record, store, delete and retrieve data, to link to a Windows® PC, monitor the memory, set the mode to auto and establish a sampling rate. -
Page 36: Stop/Start
Stop/Start • Press ESC to return to PC Link (menu 2) • Press ESC to exit Logbook set menu Access the Logbook Mode Display. Log Rate See fig. 39 on following page. (menu 4) • Hold M 3 seconds to enter Logbook set menu Important: Once a log is started, the rate can- •... - Page 37 ▲ ▼ ▲ ▲ ▲ ▲ ▲ ▲ ▲ ▲ ▲ ▲ ▲ ▲ ▲ ▲ ▲ ▲ ▲ ▼ fig. 39...
-
Page 38: Erase
13.0 Battery Replacement NOTE: If the chest strap fails to initialize [no The Traileader Pro uses 1 battery for the watch signal], reset the strap. and 1 for the Chest strap. Both are CR2032. A. Remove the battery and turn it upside down 13.1 Watch... -
Page 39: Pc Link
2. Attach the USB PC Link to your computer then place the watch and chest strap within 15 ft. of the PC 3. When complete, open the "Wireless Data Manager" program and follow the on screen instructions to pair the watch and chest strap to the PC program. See fig. -
Page 40: Troubleshooting
15.0 TROUBLESHOOTINg Barometric pressure reading is incorrect Speed & Distance measurements are off If you believe that the pressure reading of your watch is • You will achieve the most accurate results by properly setting up a personal profile incorrect, adjust it. See section 8.2. -
Page 41: Limited Warranty
What is covered? Johnson Outdoors Gear LLC warrants If the product is found to be defective in material or your Tech4o® brand product to be free from defects in workmanship, we shall, at our option, either repair or materials or workmanship and to perform accurately, for... -
Page 42: Declination Map For North America
DECLINATION MAP FOR NORTH AMERICA... -
Page 43: Declination Map For Europe
DECLINATION MAP FOR EUROPE... - Page 44 Ontario Canada L7L 6B6 Phone: 905.634.0023 Toll Free: 1.800.263.6390 Europe: Nigor Net BV Kabelweg 100, 1014 BC Amsterdam Phone: +31 (0)20-5818550 Web: www.tech4o.eu E-mail: geor@nigor.net For technical help: www.tech4o.com Johnson Outdoors Gear LLC © 2010, All Rights Reserved Rev. A July 10...
Need help?
Do you have a question about the traileader pro and is the answer not in the manual?
Questions and answers