Table of Contents
Advertisement
Quick Links
Advertisement
Table of Contents

Related Manuals for Tech4o Traileader


Summary of Contents for Tech4o Traileader
- Page 1 TRAILEADER INSTRUCTIONS...
-
Page 2: Table Of Contents
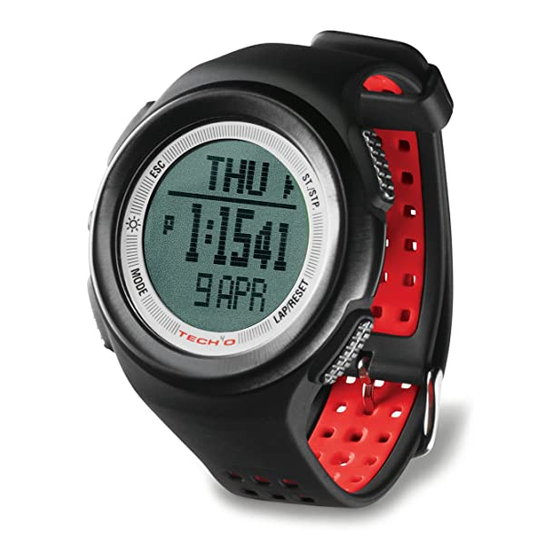
Table of conTenT OVERVIEW 7.0 AlTIMETEr MODE: p 20 TIME MENU / SYSTEM SETTING 8.0 BArOMETEr MODE: p 26 1.0 TIME/DATE MODE: p. 5 9.0 COMpASS MODE: p. 29 2.0 AlArM MODE: p. 9 3.0 ChrOnOgrAph MODE: p. 11 10.0 TrOuBlEShOOTIng: p. - Page 3 Thank you for purchasing the Tech 4 O Traileader. The Traileader represents the next generation of outdoor watches in style and technology. The Traileader combines key outdoor functions as well as your speed and distance measurements via accelerometer technology. Follow this manual to guide you through the initial setup and calibration. Keep it for later reference as you learn the more advanced features.
- Page 4 TImE mEnu TRaIl mEnu Note: The Traileader watch has two main menus. See fig. 2 & 3. Understanding the two menus and their corresponding functions will be the key to navigating and understanding your new watch and to aid you in your initial setup and future use.
-
Page 5: Time/Date Mode
• To access the Time/Date display while currently in a: * Time Menu function - continue The TraiLeader’s Time/Date mode not only pressing M until the display in fig. 4 is displays the current time and date , but also a... - Page 6 altitude is maintained for several hours. For Access the Time/Date display (See section 1.1 a more in depth explanation of the altitude/ for how to access the Time/Date display) • Hold M for 3 seconds to enter Time/Date/ pressure/weather relationship, reference System set menu section 10.0 Troubleshooting.
- Page 7 • Press LAP/RST(DOwn) to scroll to Date * Press ESC to confirm your selection • Press M to select the Date and exit LCD * Press ST/STP(+) or LAP/RST( - ) • Press ESC to exit General to adjust the year •...
- Page 8 1.6 TuRn On/OFF HOuRLy CHIME • Press LAP/RST(DOwn) to scroll to General • Press M to select General * Press LAP/RST(DOwn) to scroll Access the Time/Date display (See section 1.1 for how to access the Time/Date display) to Light • Hold M for 3 seconds to enter Time/Date/System * Press M to confirm your selection set menu * Press ST/STP(+) or LAP/RST( - )
-
Page 9: Alarm Mode
2.0 ALARM MODE * Press ESC to confirm your selection and exit Pressure The Traileader has several alarm features. • Press ESC to exit Unit Alarm mode can be set for a specific day • Press ESC to exit the Time/Date/System set... - Page 10 * TRAIL MEnu function - press ESC twice to access the Time Menu and press ST/STP(uP) or LAP/ RST(DOwn) to scroll to ST/STP ALARM 1 OR 2 fig.6 the ALM icon • Display Features: * Top Row: Alarm number 1 or 2 * Press ST/STP to select between the two alarms * Middle Row: Alarm Time...
-
Page 11: Chronograph Mode
3.0 CHROnOGRAPH MODE CHROnOGRAPH uSE see fig. 9 3.2 START/STOP THE CHROnOGRAPH The TraiLeader's chronograph can record up to 50 laps that are automatically stored for later reference. Stored laps can also be recalled Access the Chronograph (See section 3.1 for while the chronograph is still in operation. - Page 12 time will display for 10 seconds while the total elapsed time will continue ST/STP counting in the background * After 10 seconds the total elapsed time will display LST/RST * Repeat the above steps to record additional laps • Press ST/STP to stop the chronograph 3.4 CHROnOGRAPH RECALL VIEw RECORDED LAP TIMES Access the Chronograph...
-
Page 13: Countdown Timer Mode
4.0 COunTDOwn TIMER MODE 4.1 for how to access the Countdown Timer display) • Countdown Timer Mode has five preset The countdown timer is useful for counting timers (3, 5, 10, 15, and 45min) and one backwards from a programmable time with user programmable timer beeps at convenient intervals. -
Page 14: Dual Time Mode
• The countdown timer will automatically reset after it expires 5.0 DuAL TIME ZOnE MODE The Traileader always uses this to set and keep an alternate time zone for travel convenience 5.1 DuAL TIME ZOnE DISPLAy • To access Dual Time Zone display while currently fig. -
Page 15: Trail Menu
* Press ST/STP(+) or LAP/RST( - ) 6.0 SPEED & DISTAnCE MODE to adjust the hour * Press M to confirm your selection The TraiLeader’s Speed & Distance mode * Press ST/STP(+) or LAP/RST( - ) uses accelerator technology to accurately track your: Speed, Distance, Pace,... - Page 16 scroll to the SP/DIST icon • Display Features: Top Row: Exercise stats (exercise time, speed, Save pace, steps, and calories) * Press ST/STP to scroll through the 5 different Recall exercise stats Middle Row: Exercise distance Stride fig. 13 Bottom Row: Current time 6.2 SPEED &...
- Page 17 STRIDE LEnGTH for that day and clear the current exercise statistics from Speed & Distance mode. Please visit www.tech4o.com and use our online stride length calculator for help • Press ST/STP to save the current recorded in determining your walking, hiking, and data OR running stride lengths.
- Page 18 6.6 ADJuST yOuR RunnInG SLEEP TIMER STRIDE LEnGTH Speed and Distance mode is equipped with Please visit www.tech4o.com and use our an automatic sleep timer in order to online stride length calculator for help conserve battery power. If no movement...
- Page 19 6.1 for how to access the Speed & walked and the distance measured by the Distance display) Traileader is not usually a sensitivity issue • Hold M for 3 seconds to enter Speed & but rather an adjustment needed to the Distance set menu stride lengths.
-
Page 20: Altimeter Mode
• Press ESC to exit Speed & Distance settings menu 7.1 ALTIMETER MODE DISPLAy 7.0 ALTIMETER MODE • To access Altimeter mode display while The altimeter in your Traileader watch uses currently in a: an advanced pressure sensor to determine * TRAIL MEnu your altitude. - Page 21 • Display Features: Alt.Dif. * Top Row: Altitude stats (change in Altitude difference counter altitude, total ascent, total descent, altitude graph, current temperature) Ref.Alt. Reference altitude * Press ST/STP to scroll through the 5 setting different altitude stats * Middle Row: Current Altitude * Bottom Row: Current time 7.2 SET A REFEREnCE ALTITuDE See fig, 16...
- Page 22 * Press ST/STP to confirm and exit Ref. Alt. OR • Press ST/STP in the altimeter mode display * Press ESC to cancel and exit Ref. Alt. to view the altitude difference calculator’s • Press ESC to exit Altimeter set menu measurements 7.3 uSE THE ALTITuDE DIFFEREnCE Note: The altitude difference calculator is...
- Page 23 * Press ST/STP to begin recording and DS) CALCuLATOR exit Start • Press ESC to cancel and exit AS/DS The Traileader is equipped with an auto • Press ESC to exit Altimeter set menu ascent/descent calculator that keeps track of your total vertical distance mountain icon will flash in altimeter ascended and descended.
- Page 24 7.8 VIEw THE ALTIMETER LOG BOOK • Press M to select Alt. Alm. * Press ST/STP to toggle between the two The Traileader’s altimeter contains a logbook altitude alarms that tracks maximum and minimum * Press LAP/RST to toggle altitude alarm on...
- Page 25 Access the Altimeter Display • Press LAP/RST(DOwn) to scroll to Chart (See section 7.1 for how to access the Altimeter display) • Press M to select Chart • Hold M for 3 seconds to enter Altimeter set * Press ST/STP to toggle between Daily menu and History •...
-
Page 26: Barometer Mode
Traileader will be used. Access the Altimeter Display (See section 7.1 for how to access the Altimeter display) •... - Page 27 * Press ST/STP to scroll through the three different trail stats * Middle Row: Current Pressure * Bottom Row: Current time Note: The Traileader’s weather forecasting system uses changes in air pressure to predict future weather conditions. Be mindful that changes in altitude also effect air pressure and will skew the weather forecasting system’s...
- Page 28 8.4 VIEw THE BAROMETER LOG BOOK * Press ST/STP or LAP/RST to adjust the Seal Level Pressure to match your The Traileader’s Barometer contains a current, known Sea Level Pressure logbook that tracks the maximum and * Press ESC to confirm and exit SLP minimum pressure and temperature •...
-
Page 29: Compass Mode
The digital compass on the Traileader • Press LAP/RST(DOwn) to scroll to Vw. Log provides the confidence in knowing that • Press M to select Vw. Log a quick check of your direction is always * Press ST/STP(+) or LAP/RST( - ) to at hand. - Page 30 9.2 COMPASS uSE 9.4 TAKE A REVERSE COMPASS BEARInG • Keep the watch parallel to the horizon, or parallel The Traileader allows you to quickly take a to the ground (assuming the ground is level) reverse bearing of a distant landmark. A •...
- Page 31 Access the Compass Display always points to the constantly shifting (See section 9.1 for how to access the Compass display) Magnetic North. There is another “North • Press LAP/RST to lock the current compass Pole.” True North is static and located bearing geographically about 800 miles north of •...
-
Page 32: Troubleshooting
10.2 THE SPEED & DISTAnCE 10.0 TROuBLESHOOTInG MEASuREMEnTS ARE OFF? 10.1 BATTERy REPLACEMEnT This situation could arise due because of a few minor issues: The Traileader comes with a user serviceable Have you properly set up your personal battery. Replacement battery: CR2032 profile? ¬... - Page 33 Declination Map for North America...
- Page 34 Declination Map for Europe...
- Page 35 • Although the TraiLeader comes set up 10.3 wHy IS My wATCH nOT READInG with a general profile, you can achieve THE CORRECT ALTITuDE? much more accurate results by taking 5 minutes to properly set up your own All altitude readings are based on measured personal profile.
- Page 36 10.4 HOw DO I SET My KnOwn reading on your Traileader watch WILL (REFEREnCE) ALTITuDE? BE DIFFERENT due to weather, altitude, and other factors.
-
Page 37: Registration
What is not covered? • For more accurate results, remove the Normal wear, and damage due to the abrasion, TraiLeader from your wrist and allow to melting, misuse, alteration, and abuse (including any disassembly) are not covered by this warranty. Digital acclimate for five minutes. -
Page 38: Function Index
How to obtain warranty service or repair of your FunCTIOnS InDEX: watch? Should a defect covered by this warranty appear in TIME MEnu your watch, call our Consumer Service Department 1.0 Time/Date Mode: p. 5 toll-free at 1.800.572.8822 for return authorization and instructions. - Page 39 7.2 Set A Reference Altitude 4.0 COunTDOwn TIMER MODE: p. 13 7.3 Use the Altitude Difference 4.1 Countdown Timer Display Calculator 4.2 Countdown Timer Setting 7.4 Start Assent/Descent Calculator 4.3 Countdown Timer Use 5.0 DuAL TIME MODE: p. 14 7.5 Stop Assent/Descent Calculator 7.6 Clear Assent/Descent Calculator 5.1 Dual Time Zone Display 7.7 Set Altitude Alarm...
- Page 40 P.O. Box 92257 Kabelweg 100 10.6 The Compass Isn't Accurate? 1090 AG Amsterdam 1014 BC Amsterdam 10.7 The Temperature Reading Isn't T+31-20-5818 555 T+31-20-5818 559 Accurate? E info@nigor.net For technical help: www.tech4o.com Johnson Outdoors Inc. © 2007 Rev. A 10.07...
Need help?
Do you have a question about the Traileader and is the answer not in the manual?
Questions and answers