
Related Manuals for Air Oasis NANO INDUCT Sanifier


Summary of Contents for Air Oasis NANO INDUCT Sanifier
- Page 1 NANO INDUCT Owner’s Manual For use with models: NIND14, NIND9, NIND6 For safety and to ensure proper use carefully read the contents of this manual before operating or installing the unit.
-
Page 2: Table Of Contents
Thank You for Choosing The nano Induct Sanifier ® Congratulations, you own the most advanced induct air purifier available! Before operating the nano Induct™ please read this manual in its entirety. Doing so will give you important information to keep you safe from harm and ensure you get the most benefits from your Sanifier . -
Page 3: Important Safety Instructions
Important Safety Instructions When operating any electrical appliance, basic precautions should always be fol- lowed for safety. RISK OF FIRE, ELECTRIC SHOCK, OR INJURY • Carefully read the entire contents of this manual. Cooling Vents • Do not use outdoors, in moist areas or on wet surfaces. •... -
Page 4: Status Indicator Lights
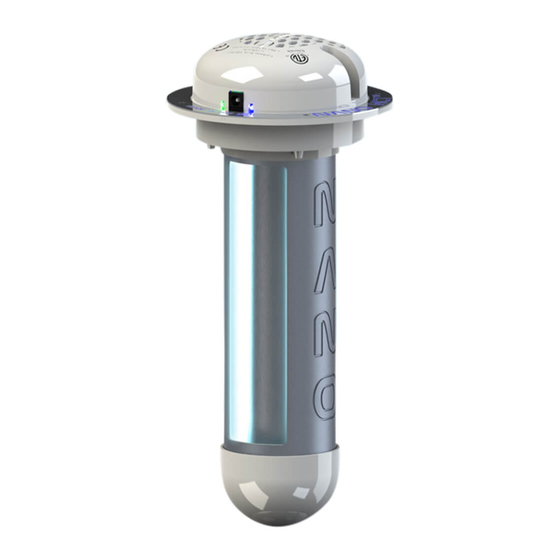
Status Indicator Lights The Status Indicator Lights are located on the side of the Ballast Assembly. The in- dicator lights will provide you with important information about the operating status of your unit. They will provide you with the following information: “Lamp Status”... -
Page 5: Placement And Installation
Placement and Installation Placement Suggestions The nano Induct units are designed to be installed within the duct of an HVAC sys- tem. We recommend they be mounted on the supply side plenum. • We recommend you leave the Rotational UV Shields in the closed position. The shields should only be opened for specialized applications. - Page 6 Installation and servicing of air-conditioning equipment can be hazardous due to system pressure and electrical components. Only trained and qualified service personnel should install, repair, or service air-conditioning equipment. Air Oasis and its affiliates are not responsible for any damage to the HVAC system, nano Induct or injury to yourself or others if you elect to install the device without utilizing qualified technicians.
- Page 7 Duct AHPCO Cell Cross Hairs Pin Orientation Retainer Ring Cross Hairs 3. Clean a one inch area around the hole where the NIND will be mounted. Re- move the wax paper from the gasket. Insert the NIND into the 3 3/4” hole, aligning the cross hairs parallel to the duct.
- Page 8 Air Flow Label Ballast Assembly 6. Secure the NIND with four self tapping 3/4” screws being careful not to over- tighten. 7. Secure the power adapter with included self tapping 1/2” screws. 8. Adhere the two included warning labels in close proximity to the NIND device.
-
Page 9: Initial Startup
Installation and servicing of air-conditioning equipment can be hazardous due to system pressure and electrical components. Only trained and qualified service personnel should install, repair, or service air-conditioning equipment. Air Oasis and its affiliates are not responsible for any damage to the HVAC system, NIND or injury to yourself or others if you elect to install the NIND without utilizing qualified technicians. -
Page 10: Maintenance
Maintenance AHPCO Cell Replacement Process ® The entire Cell should be replaced every two years. Failure to replace the Cell will decrease the effectiveness of the unit. After two years of use the blue Lamp Replacement light will begin to blink as a reminder that it’s time to replace the AH- Cell. -
Page 11: Limited Warranty
Induct Limited Warranty Air Oasis gives you the following limited warranty for this product only if it was origi- nally purchased directly from Air Oasis or an Air Oasis authorized dealer. Air Oasis will repair or replace, free of charge to the original purchaser, any part that is found to be defective in material or workmanship within two (2) years of the date of purchase. -
Page 12: Troubleshooting Guide
Cell has been replaced. Contact an Air Oasis authorized dealer to purchase a new AHPCO ® Cell. If the above does not repair the symptom please contact an Air Oasis Customer Service Representative: Phone: 1-800-936-1764 E-mail: feedback@airoasis.com Web: www.airoasis.com Mail: Air Oasis Customer Service 3401 Airway Blvd..
Need help?
Do you have a question about the NANO INDUCT Sanifier and is the answer not in the manual?
Questions and answers