Table of Contents
Advertisement
Available languages
Available languages
Advertisement
Chapters
Table of Contents

Related Manuals for Summit SP5DS2DBLK


Summary of Contents for Summit SP5DS2DBLK
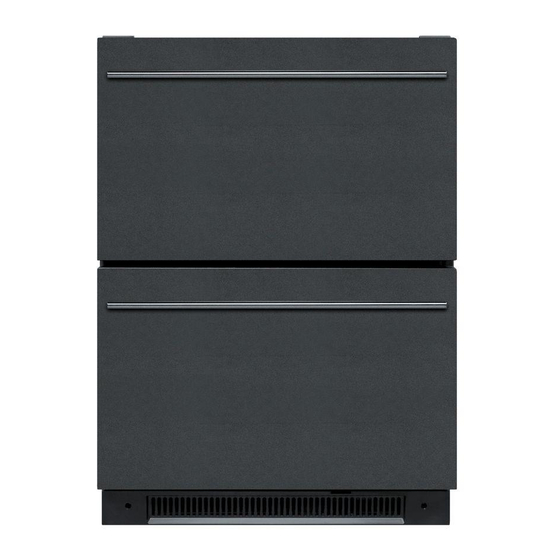
- Page 1 Dual-Drawer Refrigerator Réfrigérateur à deux tiroirs User Manual | Guide d'utilisation Models | Modèles : SP5DS2DBLK (Black exterior | extérieur noir) SP5DS2DSSHH (Stainless steel door | porte en acier inoxydable)
-
Page 2: Important Safeguards
Important Safeguards When using this appliance, always exercise basic safety precautions, including the following: 1. Read all of the instructions before using this appliance. 2. Use this appliance only for its intended purpose as described in this use and care guide. 3. -
Page 3: Table Of Contents
..................Auto Defrost ................... 10 Cleaning ....................10 Troubleshooting .................. 11 Limited Warranty .................. 12 Thank you for using our Summit product. This easy-to-use manual will Model number: guide you in getting the best use of your refrigerator. Serial number: Remember to record the model and serial number. -
Page 4: Parts And Overall Dimensions
Parts And Overall Dimensions... -
Page 5: Pre-Installation Instructions
Pre-Installation Instructions This refrigerator is for built-in use only. Before use, this product must be installed properly. To allow for proper ventilation, leave a clearance of at least 3/16” on either side, 1/16” at the top and 2” at the rear when installing. Be sure that airflow under the appliance is not blocked. -
Page 6: Installation
Installation 1. Take off hinge cover(Part #1, page 3) with an upward motion. Refer to illustration below: 2. Take the anti-tip bracket and screws from the accessory bag. Tighten the anti-tip bracket on the top of the product with screws as follows in the illustration. -
Page 7: Interior Parts
Interior Parts Crisper One crisper with cover is located in the upper drawer. Purpose: Convenient storage of fresh vegetables. The user can remove the crisper if it is not needed. Adjustable Divider There is an adjustable divider in each drawer. These can be adjusted for flexibility in food storage. - Page 8 Purpose: User can separate the upper compartment with divider according to personal needs. This feature also keeps foods from falling down or spilling when the drawers are opened or closed. Adjust the divider in the lower compartment by referring to illustration: The divider in the lower compartment is fixed between the embossments of the front and back walls of the drawer.
-
Page 9: Drawers
Drawers Upper Drawer Can hold any item under 12 inches tall. Lower Drawer Lower drawer is separated by a step. Foods or beverages whose height is less than 12 inches can be kept in the space without the step. Smaller items can be placed on the step. -
Page 10: Centigrade And Fahrenheit Conversion
Centigrade and Fahrenheit Conversion Press and hold “SELECT” for 3 seconds. The temperature display will change from Fahrenheit to Centigrade and the unit will beep once. Press and hold “SELECT” again for 3 seconds, and the display will change from Centigrade back to Fahrenheit. -
Page 11: Door Ajar Alarm
Door Ajar Alarm If the door of unit is ajar for more than 3 minutes, the system will give a beeping alarm. If you want to stop it, please press “SET” button. Auto Defrost: The unit defrosts automatically. The water on the back wall will drain into a water tray and be evaporated by the compressor. -
Page 12: Troubleshooting
Troubleshooting If Refrigerator does not operate: Check if refrigerator is plugged in. Check the circuit breaker to see if there is power in the AC outlet. If Refrigerator is too warm: Frequent drawer openings. Allow time for recently added food items to reach the desired temperature. -
Page 13: Limited Warranty
Any parts determined to SUMMIT is not liable for consequential be defective will be replaced by or incidental damage. SUMMIT at no charge to you. Plastic parts, liners and outer cabinets are warranted to be manufactured to SUMMIT APPLIANCE DIV. - Page 15 Dépannage ....................23 Garantie limitée ..................24 Merci d'utiliser ce produit Summit. Ce guide facile à suivre vous aidera à utiliser votre réfrigérateur de façon optimale. Rappelez-vous de prendre en note les numéros de modèle et de série. Ils sont indiqués sur l'étiquette à...
-
Page 17: Directives À Suivre Avant L'installation
Directives à suivre avant l’installation Ce réfrigérateur est destiné à un usage en tant qu'appareil encastré uniquement. Avant l’utilisation, il doit être correctement installé. Pour permettre une bonne ventilation, laissez un espace libre d'au moins 3/16" de chaque côté, 1/16" en haut et 2" à l'arrière lors de l'installation. -
Page 18: Installation
Français Installation 1. Retirez le couvercle à charnière (page 15, pièce 1) en le soulevant. Consultez l’illustration ci-dessous : 2. Sortez le support antibasculement et les vis du sac d’accessoires. Serrez le support antibasculement sur le dessus du produit avec les vis comme suit, tel que montré dans l'illustration. -
Page 19: Pièces Internes
Pièces internes Bac à légumes Un bac à légumes est placé dans le tiroir supérieur. Utilité : Rangement pratique des légumes frais. L’utilisateur peut enlever le bac à légumes s’il n’est pas requis. Diviseur ajustable Chaque tiroir est doté d’un diviseur ajustable. L'utilisateur peut l’ajuster selon ses besoins pour le rangement des aliments. - Page 20 Français Ajustez le diviseur du compartiment inférieur en vous référant à l'illustration : Le diviseur du compartiment inférieur est fixé entre les parties en relief de la paroi avant et arrière du tiroir. Vous pouvez choisir différentes parties en relief pour diviser le tiroir en différents sections.
-
Page 21: Tiroir Inférieur
Panneau de commande... -
Page 22: Conversion Des Degrés Celsius Et Fahrenheit
Français Conversion des degrés Celsius et Fahrenheit : Appuyez sur la touche « SELECT » et maintenez-la enfoncée pendant 3 secondes. L'affichage de la température passera des degrés Fahrenheit à Celsius. L'appareil émettra alors un son. Appuyez sur la touche « SELECT » et maintenez-la enfoncée pendant 3 secondes. L'affichage de la température passera des degrés Celsius à... -
Page 23: Alarme De Porte Ouverte
Alarme de porte ouverte : Si la porte de l’appareil demeure ouverte plus de 3 minutes, le système émet une alarme sonore. Si vous désirez l’arrêter, veuillez appuyer sur la touche « SET ». Dégivrage automatique : L’appareil peut effectuer un dégivrage automatique. L’eau de la paroi arrière se vidange dans le réservoir d’eau et s’évapore par le condensateur. -
Page 24: Dépannage
Français Dépannage Si le réfrigérateur ne fonctionne pas : Vérifiez si le réfrigérateur est branché. Vérifiez s'il y a du courant dans la prise c.a. en inspectant le disjoncteur. Si le réfrigérateur est trop chaud : Ouvertures fréquentes de la porte. Laissez le temps aux aliments récemment ajoutés d'atteindre la température souhaitée. -
Page 25: Garantie Limitée
Garantie Limitée Summit 5. Les produits vendus ou utilisés en Summit Appliances garantit ce produit contre dehors de l’Amérique continentale (50 tout défaut de fabrication sur les pièces et main États) ou du District of Columbia. d’oeuvre pour une période d’un an à compter de 6.
Need help?
Do you have a question about the SP5DS2DBLK and is the answer not in the manual?
Questions and answers