Subscribe to Our Youtube Channel
Summary of Contents for Vicon IQeye Alliance-mx
- Page 1 IQeye Alliance-mx Vandal-Resistant IP Camera Installation and Operating Instructions...
-
Page 2: Table Of Contents
Contents Unpacking Service Description Installation Parts List Mounting Options Removal of Dome Cover Mounting the Enclosure, Camera, and Lens Assembly Connect Camera Camera Positioning, Field-of-View Set-up and Focus Complete the Dome Camera Installation PC Configuration of Alliance-mx Factory Reset... -
Page 3: Unpacking
> Lens Cover > IQtools CD-ROM 2 Service If the unit needs repair service or parts, the customer should contact Vicon Industries for authorization to return, as well as shipping instructions. Refer to Shipping Instructions at the end of this manual. -
Page 4: Description
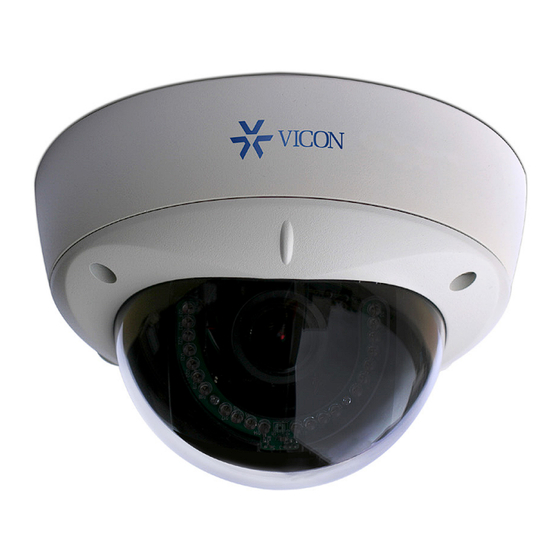
3 Description Alliance-mx dome cameras provide exceptional image quality in the most demanding indoor/outdoor environments. With support for up to 5MP resolution, the Alliance-mx uses Main profile H.264 to deliver exceptional high-definition clarity at up to 30 frames-per-second. Simultaneous H.264 and MJPEG video streaming offers flexibility to optimize live viewing and recording while providing access to video for other applications. -
Page 5: Mounting Options
6 Mounting Options The Alliance-mx camera is designed to be used in one of the following configurations. NOTE: If the Alliance-mx is to be installed on a hard surface that prohibits direct access to cabling, the optional IQM-BOX, which includes the IQA-CAB, must be used. If the surface allows running cables directly to the camera dome, such as a drop ceiling, the optional IQA-CAB only can be used for the audio in/out, I/O relay, and analog video output if needed. -
Page 6: Removal Of Dome Cover
7 Removal of Dome Cover 1. Using the supplied Torx T-20 security wrench, loosen the three tamper-proof screws holding the dome cover to the enclosure assembly (Figure 7.1). These screws are captive (held to the dome cover) and should not be removed from the dome cover trim ring. - Page 7 In addition, follow local regulations and laws that may have specific requirements governing the installation of security equipment on a ceiling tile surface. Vicon also strongly recommends the use of a ceiling tile brace and other mounting...
-
Page 8: Connect Camera
9 Connect Camera 1. Optional: Insert the Micro SD card in Micro SD card slot (not supplied). 2. Optional: Route and connect the IQA-CAB cable when using an external microphone and Optional IQA-CAB powered loudspeaker, I/O relay or analog output Cable Assembly Figure 9.1 to the Alliance-mx dome camera... -
Page 9: Complete The Dome Camera Installation
11 Complete the Dome Camera Installation 1. Attach the tether from the dome trim ring to the tether mounting point in the enclosure as shown in Figure 11.1. 2. Rotate the black shroud inside the dome trim ring cover so it aligns with the camera position. -
Page 10: Factory Reset
1. Download and install IQfinder from the Vicon website. Launch and scan for camera on the newtork by clicking the refresh button. The detected cameras will be displayed in the IQfinder window. Select a camera from the list and click “Assign IP” to edit the selected camera’s network settings. Refer to Figure 12.1. -
Page 11: Shipping Instructions
Shipping Instructions Use the following procedure when returning a unit to the factory: 1. Call or write Vicon for a Return Authorization (R.A.) at one of the locations listed below. Record the name of the Vicon employee who issued the R.A. -
Page 12: Vicon Standard Equipment Warranty
“autopan” or “tour” modes of operation. Such continuous operation is outside the scope of this warranty. 10. Any product sold as “special” or not listed in Vicon’s commercial price list: One year from date of original retail purchase. NOTE: •... - Page 13 (f) to consumables (such as storage media or batteries) (g) to products that have been purchased “as is” and Vicon the seller or the liquidator expressly disclaim their warranty obligation pertaining to the product, (h) to any non-...
- Page 14 THE TERMS OF THIS WARRANTY APPLY ONLY TO SALES MADE WHILE THIS WARRANTY IS IN EFFECT. THIS WARRANTY SHALL BE OF NO EFFECT IF AT THE TIME OF SALE A DIFFERENT WARRANTY IS POSTED ON THE COMPANY’S WEBSITE, WWW.VICON- SECURITY.COM. IN THAT EVENT, THE TERMS OF THE POSTED WARRANTY SHALL APPLY...
- Page 16 135 Fell Court Hauppauge, NY 11788 www.vicon-security.com 901-0380 Rev A...


Need help?
Do you have a question about the IQeye Alliance-mx and is the answer not in the manual?
Questions and answers