Table of Contents
Advertisement
Available languages
Available languages
Quick Links
Grandstream Networks, Inc.
126 Brookline Avenue
Boston, MA 02215, USA
Tel : +1 (617) 566 – 9300
Fax: +1 (617) 247 – 1987
www.grandstream.com
For Warranty and RMA information, please visit www.grandstream.com
深圳市南山高新科技园中区
科发路2号1栋(朗峰大厦)5楼
电话: +86 755-2601-4600
传真: +86 755-2601-4601
www.grandstream.cn
GXV3610_HD/FHD
Day/Night Fixed Dome HD IP CAMERA
Quick Start Guide
Advertisement
Table of Contents

Related Manuals for Grandstream Networks GXV3610_HD/FHD


Summary of Contents for Grandstream Networks GXV3610_HD/FHD
-
Page 1: Quick Start Guide
GXV3610_HD/FHD Day/Night Fixed Dome HD IP CAMERA Grandstream Networks, Inc. 126 Brookline Avenue 深圳市南山高新科技园中区 Boston, MA 02215, USA 科发路2号1栋(朗峰大厦)5楼 Tel : +1 (617) 566 – 9300 电话: +86 755-2601-4600 Quick Start Guide Fax: +1 (617) 247 – 1987 传真: +86 755-2601-4601 www.grandstream.com... - Page 2 Content English............1 Español...........9 Français..........17 简体中文..........25 Deutsch..........33 Italiano..........41 Русскй..........49 Português..........57 Polski............65...
-
Page 3: Connecting The Gxv3610_Hd/Fhd
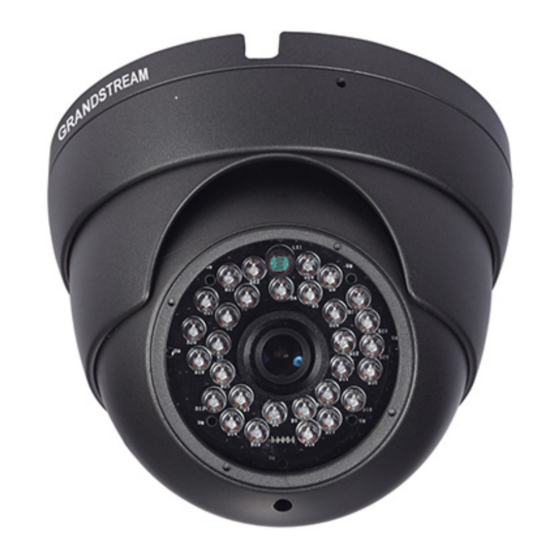
CONNECTING THE GXV3610_HD/FHD RECAUTIONS • Do not attempt to open, disassemble, or modify the Refer to the illustration below when following the device instructions on the next page. • Do not use a third party power adapter • Do not expose this device to temperatures outside the range of -20 °C to +50 °C for operating or -30 °C... - Page 4 Use the Hex Key losing the screw in the middle ring to adjust camera during installation and tight it when done. GXV3610_HD/FHD CONFIGURATION Configuring the GXV3610_HD/FHD using Firefox, Chrome or Microsoft Internet Explorer (with related plug-in installed) Connect the GXV3610_HD/FHD to a DHCP Server Enabled Network...
- Page 5 tep 5: Double click on the detected device. The tep 9: Here is a sample screenshot with successful default browser(MS IE in this example) will Active-X or Plug-in installation. Click on the open displaying the camera’s webGUI. play button to view the video feed. tep 6: A pop-up window will prompt for user name &...
-
Page 6: Gxv3610_Hd/Fhd Specifications
100.2°(D) x 77°(H) x 54°(V) IR Cut Filter Yes. Mechanical tep 2: Run the GS_Search tool as above. It will show the original IP of the GXV3610_HD/FHD Day & Night Mode Color & B/W mode (default IP address 192.168.1.168). IR LED covering up to 10m Minimum 0.05 Lux... -
Page 7: Contenido Del Paquete
RECAUCIONES CONEXIÓN DE LA GXV3610_HD/FHD • No abrir, desarmar o intentar modificar este equipo Consulte la siguiente ilustración y siga las instruccio- • No use adaptadores de corriente distintos al sumi- nes de la siguiente pagina. nistrado • No exponga este dispositivo a temperaturas fuera del rango de -20 °C a +50 °C en funcionamiento y... - Page 8 Apriete el tornillo cuando culmine. CONFIGURACION DE LA GXV3610_HD/FHD Configuración de la GXV3610_HD/FHD us- ando Firefox, Chrome o con Microsoft Internet Explorer Conecte la GXV3610_HD/FHD a una red con un servidor DHCP activo...
- Page 9 Paso 9: Aquí esta una captura de pantalla con un Paso 5: Haga Doble click en el dispositivo detectado. ejemplo de una instalación exitosa del El navegador por defecto (MS IE por Active-X o del Plug-in. Haga clic en el botón ejemplo) se abrirá...
- Page 10 Paso 4: Haga Click en “Modificar IP”. La dirección IP Responsividad HD: 5.48V/lux-sec (550nm) FHD: 1.9V/lux-sec (550nm) deseada se aplicara en la GXV3610_HD/FHD. Rango dinámico de HD: 120dB con 44dB SNR Por favor, descargue el Manual del usuario, consulte FHD: 100dB con 39dB SNR pixeles la documentación en línea y preguntas frecuentes...
-
Page 11: Contenu Du Pack
RECAUTIONS CONNEXION DU GXV3610_HD/FHD • Ne pas tenter d’ouvrir, de désassembler, ou de modifier le dispositif Reportez-vous à l’illustration ci-dessous en suivant les • Ne pas utiliser un adaptateur d’alimentation tiers instructions sur la page suivante. • Ne pas exposer cet appareil à des températures en dehors de la plage des -20°C à... - Page 12 CONFIGURATION DU GXV3610_HD/FHD Configurer le GXV3610_HD/FHD en utilisant le navigateur Firefox, Chrome ou Microsoft Inter- net Explorer (avec plugin installé) Connecter le GXV3610_HD/FHD à un serveur...
- Page 13 Etape 5: Double cliquez sur l’appareil détecté. Le Etape 9: Voici une capture d’écran montrant une navigateur par défaut (MS IE dans cet exemple) installation réussie de l’Active-X ou Plugin. s’exécutera en affichant l’interface web de la caméra. Etape 6: Une fenêtre pop-up invitant à entrer un nom d’utilisateur et un mot de passe apparaîtra.
- Page 14 Connecter le GXV3610_HD/FHD en utilisant SPECIFICATIONS DU GXV3610_HD/ une adresse IP Statique Sensibilité Capteur Mode Jour & Nuit. Si la caméra ne reçoit pas de réponse du serveur DHCP d'Images Obturateur: ou qu’il n’y pas de serveur DHCP sur le réseau, au bout 1/10000 - 1/30 seconde de 3 minutes, vous pouvez y accéder par l’adresse IP...
- Page 15 GXV3610_HD/FHD 连接方法 注意事项 •请不要打开、拆卸或修改该设备 请参照下图以及下一页的操作说明。 •请不要使用第三方的电源适配器 •请不要在超出-20至50摄氏度环境下使用此设备; 请不要在超出-30至60摄氏度环境下保存此设备 •请不要将GXV3610_HD/FHD暴露在超出相对 湿度10-90%范围外的环境下 •请准确安装保证GXV3610_HD/FHD正常工作 包装内容 网络接口 电源接口 方案A: GXV3610_HD/FHD一 个 12V DC 电源一个 使用12V DC 电源 适配器供电 墙体固定零件四个 网线一根 方案B: 使 用 RJ 45 以 太 网 接口通过PoE供电 注意: 选择A方案使用电源适配器给设备供电 六角扳手一个 快速入门指南一本 螺丝四个...
- Page 16 步骤 1: 通过浏览器访问地址下载并安装 GS_Search 方案A 步骤 1: 将电源适配器与GXV3610_HD/FHD连线上的 http://www.grandstream.com/products/tools/surveil- 12V DC 端口相连; lance/GS_Search.zip 步骤 2: 将RJ45网线一端与 GXV3610_HD/FHD 连线上 的网络接口相连,另一端与集线器、交换机或 步骤 2: 运行下载的 GS_Search 工具 路由器相连。 方案B 步骤 3: 点击 按键,搜索该网段下的设备IP 地址 步骤 1: 将RJ45网线一端与GXV3610_HD/FHD连线上 的网络接口相连,另一端与以太网供电 (PoE) 交 步骤 4: 搜索到的设备IP地址及HTTP端口将显示在以...
- Page 17 步骤 9: 插件安装成功后,用户可以看到如下图所示 步骤 5: 双击界面上检测到的设备,默认浏览器( 的 Web 界面。点击播放按钮观看视频 如IE浏览器)将会打开并显示 GXV3610_ HD/FHD 的Web界面 步骤 6: 界面将会跳出输入用户名及密码的验证框出 厂时默认的用户名和密码均为 admin 步骤 7: 登陆到GXV3610_HD/FHD网络界面后 , 浏览器将提示您安装插件。参照提示下载插 件Active-X 或Video Plug-in 步骤 8: 如果由于浏览器设置或网速慢等原因无法下 载安装插件,请使用以下链接下载插件文件。 保存并安装插件,重启浏览器。此时浏览器将 显示GXV3610_HD/FHD Web界面中的 视频 • 插件 http://www.grandstream.com/products/tools/surveil- 步骤 10: 点击Web界面左侧的菜单进行更多的高级...
- Page 18 GXV3610_HD/FHD参数 通过默认的静态IP地址访问 如果将GXV3610_HD/FHD置于非 DHCP环境下或 图像传感器 白天和夜晚模式 三分钟后未从 DHCP服务器得到响应,它将使用默 快门: 1/10000 - 1/30 秒 灵敏度 认的静态IP地址 192.168.1.168。 3.6 mm 焦距 步骤 1: 将您的PC与GXV3610_HD/FHD通过 RJ-45网线相连 F1.8 通光孔径 视场角 (FOV) 100.2°(D) x 77°(H) x 54°(V) 步骤 2: 在PC上运行GS_Search工具 光圈 是,机械 GXV3610_HD/FHD的初始IP地址将会 显示: 白天/夜晚模式...
- Page 19 WICHTIGE HINWEISE ANSCHLIESSEN DES GXV3610_HD/FHD • Versuchen Sie nicht, das Gerät zu öffnen, zu zerlegen Orientieren Sie sich bei den Anweisungen auf der oder zu modifizieren. nächsten Seite an der folgenden Abbildung. • Verwenden Sie keine Netzteile von anderen Herstell- ern.
- Page 20 Schritt 2: Stecken Sie ein RJ45-Ethernet-Kabel in die Netzwerkbuchse des rückwärtigen Kabels in Schritt 2: Starten Sie das Tool GS_Search. der GXV3610_HD/FHD. Stecken Sie das and- ere Ende in einen Switch/Hub oder Router. Schritt 3: Klicken Sie auf die Taste „...
- Page 21 Video anzuse- tors sind beide auf “admin” voreingestellt. hen. Schritt 7: Wenn Sie sich bei der Web-Benutzeroberfläc- he der GXV3610_HD/FHD anmelden, wird Ihnen gemeldet, dass ein ActiveX- Element bzw. ein Video-Plug-In benötigt wird. Befolgen Sie die angezeigten Anweisungen- zum Herunterladen und Installieren des ActiveX-Elements (Internet Explorer) bzw.
- Page 22 TECHNISCHE DATEN DER GXV3610_HD/FHD GXV3610_HD/FHD über eine statische IP-Adresse anschließen Wenn die Kamera innerhalb von drei Minuten keine Empfindlichkeit Tages- und Nachtmodus. Antwort vom DHCP-Server oder dem Netzwerk ohne des Bildsensors Blende: 1/10000 – 1/30 Sekunde DHCP-Funktion erhält, kann sie über die Standard-IP- Adresse 192.168.1.168 angesprochen werden.
-
Page 23: Contenuto Dell'imballaggio
CONTENUTO DELL’IMBALLAGGIO Porta di rete Porta di alimentazione Opzione A: Adattatore di alimentazione 1 GXV3610_HD/FHD 1 alimentatore da12 V nella presa c.a. 1 cavo Ethernet 4 ancoraggi a parete Opzione B: Cavo Ethernet RJ45 nello switch PoE (Power over Ethernet) NOTA: scegliere l’opzione A se si utilizza l’alimentatore... - Page 24 Una volta terminato stringere bene la vite. CONFIGURAZIONE DI GXV3610_HD/FHD Configurazione di GXV3610_HD/FHD mediante Firefox, Chrome o Microsoft Internet Explorer (con plug-in installato) Collegamento di GXV3610_HD/FHD a una rete abilitata per server DHCP...
- Page 25 “admin” come configurazione di fabbrica predefinita. Passo 7: una volta eseguito l’accesso all’interfaccia Web del dispositivo GXV3610_HD/FHD, verrà richiesto un plug-in video o Active-X. Seguire le istruzioni visualizzate per scaricare e installare Active-X o il plug-in video.
- Page 26 Passo 2: eseguire lo strumento GS_Search come indic- ato in precedenza. Verrà visualizzato l’IP orig- Modalità giorno e modalità a colori e in B/N. inale del dispositivo GXV3610_HD/FHD notte LED IR fino a 10m (indirizzo IP predefinito 192.168.1.168). Illuminazione 0.05 Lux...
-
Page 27: Предварительные Условия
• Нормальная работа камеры возможна только при правильной установке КОМПЛЕКТ ПОСТАВКИ Сетевой порт Порт питания Вариант A: 1 x GXV3610_HD/FHD Питание 1 x 12 В Адаптер питания на вывод переменного тока Вариант B: 1 x кабель Ethernet 4 x стеновых анкера... - Page 28 FHD. Вставьте другой конец адаптера в выход http://www.grandstream.com/products/tools питания переменного тока. /surveillance/GS_Search.zip Шаг 2: вставьте кабель Ethernet RJ45 в сетевое гнездо отвода кабеля в GXV3610_HD/FHD. Вставьте Шаг 2: запустите инструмент Grandstream GS_Search. другой конец в узел/выключатель или маршрутизатор. Шаг 3: для запуска определения устройства щелкните...
- Page 29 Шаг 5: дважды щелкните на обнаруженное Шаг 9: приведен образец снимка при успешной устройство. Откроется обозреватель по установке Active-X или подключенного модуля. умолчанию (в данном примере IE) Для просмотра внешнего видеосигнала и отобразит веб-интерфейс камеры. щелкните кнопку “Воспроизведение”. Шаг 6: во всплывающем окне появится имя пользователя...
- Page 30 СПЕЦИФИКАЦИИ GXV3610_HD/FHD Подключите GXV3610_HD/FHD с помощью Чувствительность дневной и ночной режим. Static IP датчика изображений Затвор: 1/10000 - 1/30 секунды Фокусная длина 3.6 mm Если камера не получает сигнал от сервера DHCP или от сети без сервера DHCP через 3 минуты, его можно...
-
Page 31: Conteúdo Do Pacote
PRECAUÇÕES CONEXÃO DA GXV3610_HD/FHD • Não tente abrir, desmontar ou modificar o dispositivo. De acordo com a ilustração abaixo, siga as in- • Não use adaptador de energia de terceiros. struções na página seguinte. • Não exponha este dispositivo fora do intervalo de temperaturas de -20 °... - Page 32 NOTA: Para ajustar a câmera durante a instalação, soltar o parafuso no centro do anel com a chave hexagonal. Aperte o parafuso quando finalize. CONFIGURAÇÃO DE GXV3610_HD/FHD Configurando o GXV3610_HD/FHD usando Firefox, Chrome ou Microsoft Internet Explorer Ligue a GXV3610_HD/FHD em uma rede com um servidor DHCP ativo...
- Page 33 Passo 5: Dê um duplo clique no dispositivo detecta- Passo 9: Segue abaixo exemplo de imagem de do. O navegador padrão (Internet Explorer, uma instalação com sucesso do Active-X e por exemplo) se abrirá, mostrando a inter- Plug-in. Clique no botão reproduzir para face web da câmara.
- Page 34 0 lux com IR LED Resposta HD: 5.48V/lux-sec (550nm) Passo 4: Clique em “Modificar IP”. O endereço IP de- FHD: 1.9 V/lux-sec (550nm) sejado será aplicado no GXV3610_HD/FHD. Dynamic Range HD: 120dB com 44dB SNR Pixel FHD: 100dB com 39dB SNR Para informações mais detalhadas, favor efetuar...
- Page 35 OSTRZEŻENIA Podłączanie GXV3610_HD/FHD • Nie wolno otwierać, rozbierać oraz modyfikować Prosimy o korzystanie z ilustracji poniżej przy stoso- urządzenia waniu instrukcji ze strony następnej • Nie wolno używać zasilaczy innych producentów • Nie wystawiać sprzętu na temperatury spoza poda- nego zasięgu -20 °C do +50 °C dla działania i -30 °C do +60 °C dla przechowywania...
- Page 36 UWAGA: Podczas instalacji użyj kluczy ampulowych na środkowym kręgu aby dopasować ustawienia dla kamery. KONFIGURACJA GXV3610_HD/FHD Konfiguracja kamery GXV3610_HD/FHD przy użyciu Firefox, Chrome lub Microsoft Internet Ex- plorer (z zainstalowanym odpowiednią wtyczką) Podłącz kamerę do sieci z serwerem DHCP...
- Page 37 Działanie 5: Wybierz poszukiwaną kamerę, urucho- Działanie 9: Poniżej przykładowe zrzuty ekranu z mienie jej otworzy okno z interfejsem GUI zainstalowaną wtyczką wideo. kamery w domyślnej przeglądarce. Wybranie “Play” pokaże obraz z kamery. Działanie 6: Pojawi się okienko z logowaniem, domyślnym Loginem i hasłem jest “admin”, podobnie jak po resecie do ustawień...
- Page 38 Podłączenie kamery GXV3610_HD/FHD przy SPECYFIKACJA GXV3610_HD/FHD użyciu statycznego adresu IP Jeżeli kamera nie otrzyma adresu z serwera DHCP lub Sensor obrazu Tryb dnia i nocy takiego nie ma w sieci to po 3 minutach przyjmie Staty- Czułość Migawka: 1/10000 - 1/30 czny adres IP 192.168.1.168.
Need help?
Do you have a question about the GXV3610_HD/FHD and is the answer not in the manual?
Questions and answers