Motorola EMS APX 7500 User Manual
Hide thumbs
Also See for EMS APX 7500:
- Quick reference card (146 pages) ,
- Brochure (8 pages) ,
- Product spec sheet (5 pages)
Table of Contents
Advertisement
Advertisement
Table of Contents

Related Manuals for Motorola EMS APX 7500


Summary of Contents for Motorola EMS APX 7500
- Page 1 EMS APX 7500 11/2/15...
-
Page 2: Table Of Contents
Feature Page Zone/Modes-‐Names a nd L ocation 3,4,5 Turn O n Parts a nd C ontrols,Volume Accessing P reprogrammed F unctions Menu a nd N avigation PTT a nd L ED I ndicators Status ... - Page 3 VB F IRE/EMS HOSP/LG VB P OLICE 1 VB P OLICE 2 EM M GMT CHESAPEAKE NORFOLK CURRITUCK FIRE/EMS HOSP/LG POLICE 1 POLICE 2 DIG E M CHES NORFOLK CURR 1 E MS C OMMAND 1 V A B EACH G EN 1 ...
- Page 4 PD M UTUAL A ID VB S HERIFF DIG S CHOOLS SCHOOLS PUBLIC W KS PUBLIC U TL MISC/GEN MISC/SERV M/AID SHERIFF SCHOOLS SCHOOLS PUB W RKS PUB U TL MIS/GEN MIS S ER 1 ...
- Page 5 VHF M A 1 VHF M A 2 VHF F ED M A 1 VHF F ED L AW MARINE V HF 1 MARINE V HF 2 FIRE/EMS ...
-
Page 6: Turn O N
To turn off the radio, press the Power On/Off Button after the Turning On the Radio LEDs light up. Press the Power On/Off Button Validating Compatibility During Power Up briefly to power on the radio. The radio validates and updates the software and hardware of After a short time, the red, yellow Power On/ your control head(s) during power up. -
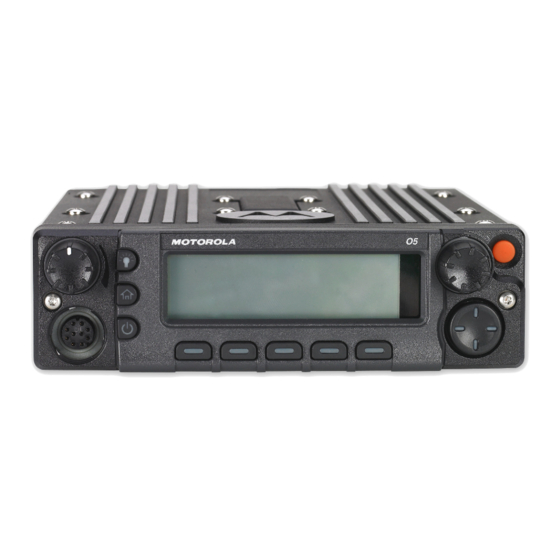
Page 7: Parts A Nd C Ontrols,Volume
Radio Parts and Controls Adjusting the Volume To increase the volume, O5 Control Head and Microphone rotate the Volume Knob clockwise. Volume Knob Mode Knob To decrease the volume, Volume Knob Dim Button Orange Button* rotate the Volume Knob Push-to-Talk Home Button counterclockwise. -
Page 8: Accessing P Reprogrammed F Unctions
Accessing the Preprogrammed Functions You can access various radio functions through one of the following ways: • A short or long press of the relevant programmable buttons. • Use the Menu Select Button ( Using the Menu Select Buttons The Menu Select Buttons allow to access the menu entries of features. -
Page 9: Menu A Nd N Avigation
Using the Advance Programmable Buttons Using the Navigation Buttons This feature is to help you to shorten the process of applying Home Button certain common features. The H button returns you to the home (default) display. In most Orange Button* cases, this is the current mode. -
Page 10: Ptt A Nd L Ed I Ndicators
LED Indicator Push-To-Talk (PTT) Button LED indicator shows the operational status of your radio. The PTT button on the side of the microphone serves two basic Red LED purposes: Button • Yellow LED While a call is in progress, the PTT button allows the radio to transmit to other radios in the Green LED... -
Page 11: Status Icons
Status Icons Monitor (Carrier Squelch) Selected channel is being monitored (during The liquid crystal display (LCD) of your radio shows the radio conventional operation only). status, text entries, and menu entries. In-Call User Alert The following are the icons that appear on the radio’s display. •... - Page 12 Vote Scan Enabled User Login Indicator (IP Packet Data) The vote scan feature is enabled. • On = User is currently associated with the radio. Secure Operation • Off = User is currently not associated with the • On = Secure operation. radio.
-
Page 13: Intelligent Lighting Indicators
Intelligent Lighting Indicators This feature temporary changes the radio’s display backlight color and the alert text background color to help signal that a radio event has occurred. Note: This feature must be preprogrammed by a qualified radio technician. Backlight Event When The radio initiates an emergency alarm or call. -
Page 14: Alert Tones
Alert Tones An alert tone is a sound or group of sounds. Your radio uses alert tones to inform you of your radio’s conditions. The following table lists these tones and when they occur. You Hear Tone Name Heard Radio Self Test Fail When radio fails its power-up self test. - Page 15 You Hear Tone Name Heard Valid Key-Press When correct key is pressed. Radio Self Test Pass When radio passes its power-up self test. Clear Voice At beginning of a non-coded communication. Short, Medium-Pitched Priority Channel When activity on a priority channel is received. Tone Received Emergency Alarm Entry...
- Page 16 You Hear Tone Name Heard Fast Ringing When system is searching for target of Private Call. Ringing Enhanced Call Sent When waiting for target of Private Call to answer the call. Phone Call Received When a land-to-mobile phone call is received. Gurgle Dynamic Regrouping (When the PTT button is pressed) a dynamic ID has been received.
-
Page 17: Select Z One/Channel
Selecting a Radio Channel Selecting a Zone A channel is a group of radio characteristics, such as transmit/ A zone is a group of channels. receive frequency pairs. Note: Your radio must be preprogrammed to allow you to use Use the following procedure to select a channel. these features. -
Page 18: Receive A Nd R Espond T O A C All
Receiving and Responding to a Radio Call Receiving and Responding to a Talkgroup Call To receive a call from a group of users, your radio must be Once you have selected the required channel and/or zone, you configured as part of that talkgroup. can proceed to receive and respond to calls. -
Page 19: Make A R Adio C All
Making a Radio Call Making a Talkgroup Call To make a call to a group of users, your radio must be You can select a zone, channel, subscriber ID, or talkgroup by configured as part of that talkgroup. using: Procedure: •... -
Page 20: Repeater Or Direct Operation
Repeater or Direct Operation Monitoring Features The REPEATER operation increases the radio’s range by Radio users who switch from analog to digital radios often assume that the lack of static on a digital channel is an indication that the radio is connecting with other radios through a repeater. -
Page 21: Conventional Mode Operation
Conventional Mode Operation Selecting a Talkgroup This feature allows you to monitor channel traffic on conventional channels by defeating the coded squelch. Thus Procedure: you can to listen to another user active on the channel. This > < to TGRP. -
Page 22: Scan Lists
Scan Lists Editing the Scan List This feature lets you change scan list members and priorities. Scan lists are created and assigned to individual channels/ Procedure: groups. Your radio scans for voice activity by cycling through the channel/group sequence specified in the scan list for the current >... - Page 23 Press to exit scan list programming and return to the Press H to exit scan list programming and return to the Home screen. Home screen. See Viewing and Changing the Priority Status on page 52 for Viewing and Changing the Priority Status more information on how to add and/or change the priority of the currently displayed channel in the scan list.
- Page 24 Scan Turning Scan On While Disregarding the Squelch Code (Conventional Channels Only) This feature allows you to monitor traffic on different channels Procedure: by scanning a preprogrammed list of channels. > < to MON. Turning Scan On or Off Press the Menu Select button directly below MON.
- Page 25 The radio does not begin scanning again for a predetermined Deleting a Nuisance Channel hang time after you release the PTT button, allowing the other If a channel continually generates unwanted calls or noise party to respond. If the other party responds within the hang (termed a “nuisance”...
- Page 26 Changing Priorities Status While Scan is On Restoring Priorities in a Scan List While the radio is scanning, the dynamic priority change feature Procedure: allows you to temporarily change any channel in a scan list To restore the original channel priorities in a scan list, do one of (except for the Priority-One channel) to the Priority-Two the following: channel.
-
Page 27: Emergency Operation
Emergency Operation The Emergency feature is used to indicate a critical situation. If the Orange button is preprogrammed to send an emergency signal, this signal overrides any other communication over the selected channel. Your radio supports 5 Emergency modes: • Emergency Call •... - Page 28 Sending an Emergency Alarm Sending an Emergency Call (Trunking Only) This feature allows you to send a data transmission, which Procedure: identifies the radio sending the emergency, to the dispatcher. Press preprogrammed Emergency button. Procedure: A tone sounds and the display alternates EMERGENCY and Press the preprogrammed Emergency button.
- Page 29 A high-pitched tone sounds, indicating that the alarm has Sending an Emergency Alarm with Emergency been received by the trunked system’s central controller. Call A dispatcher acknowledgment (four high-pitched tones) This feature gives your radio priority access on a channel for follows, accompanied by an ACK RECEIVED display.
- Page 30 Special Considerations for Emergencies • If you press the emergency button while in a channel that has no emergency capability, a low-pitched tone sounds. • If the unit is out of the range of the system and/or the emergency alarm is not acknowledged, a tone sounds and the display shows NO ACKNOWLEDGE.
-
Page 31: Gps
The Global Positioning System (GPS) • Under any other metal or concrete roof or structure • Between tall buildings or under dense tree-cover This feature uses information from the Global Positioning System (GPS) satellites orbiting the Earth to determine the •... - Page 32 Enhancing GPS Performance The radio also stores four (4) preprogrammed waypoints. These Sometimes, the GPS feature may be unable to complete a coordinates cannot be deleted. location calculation successfully. You then see a message indicating that your radio cannot connect to enough visible Programmable Waypoints Preprogrammed Waypoints satellites.
- Page 33 Accessing the Outdoor Location Feature Note: An ON menu key may be present on the location menu Follow the procedure below to turn off the GPS (This feature is if it is preprogrammed by the dealer or system enabled by a qualified radio technician.): administrator.
- Page 34 Press the Menu Select button directly below OK once you Saving a Waypoint are done. Procedure: The display shows SAVED AS <WAYPOINT NAME>. While in the current location display: Press the Menu Select button directly below OPTN. The display shows SAVED AS HOME. >...
- Page 35 Press the Menu Select button directly below BACK to return Editing the Alias of a Waypoint to previous Waypoint screen. Procedure: While in the current location display: Press or the PTT button (if preprogrammed) to exit this menu. Press the Menu Select button directly below OPTN. >...
- Page 36 Press the Menu Select button directly below CNCL to return Press the Menu Select button below EDIT to change the to the Waypoints main screen. number/coordinates. The display shows <WAYPOINT NAME> UPDATED. A blinking cursor appears in the EDIT LOCATION screen. <...
- Page 37 Deleting a Single Saved Waypoint Deleting All Saved Waypoints Procedure: Procedure: Press the Menu Select button directly below OPTN. While in the current location display: > < Press the Menu Select button directly below OPTN. to WAYPOINTS and press the Menu Select button directly below SEL.
- Page 38 Measuring the Distance and Bearing from a Using the Location Feature While in Saved Waypoint Emergency Mode When the Emergency feature is activated by pressing the Procedure: emergency button, the radio exits the Location menu and While in the current location display: returns to the home (default) display so that you can see which Press the Menu Select button directly below OPTN.
-
Page 39: Failsoft/ O Ut O F R Ange/Site T Runking
Going Out-of-Range OUT OF RANGE when your radio goes out of the range of the system, it can no longer lock onto a control channel. Using the Failsoft System Procedure: The failsoft system ensures continuous radio communications during a trunked system failure. If a trunking system fails A low-pitched tone sounds. -
Page 40: Selecting A Radio Profile
Selecting a Radio Profile This feature allows you to manually switch the visual and audio settings of the radio. The display, backlight, alert tones, and audio settings are defined according to the preprogrammed radio settings of each radio profile. Please refer to a qualified technician for more information. -
Page 41: Display B Acklight, D Igital P Tt, T Ime--Out--Timer
Using the Time-Out Timer Using the Digital PTT ID Feature This feature turns off your radio’s transmitter. You cannot transmit longer than the preset timer setting. This feature allows you to the radio ID (number) of the radio from whom you are currently receiving a transmission. -
Page 42: Accessing Radio Information
Accessing General Radio Information Note: Press at any time to return to the Home screen. Your radio contains information on the following: • Radio Information Procedure: > < • IP Display to INFO. • Control Assignments Press the Menu Select button directly below INFO. Note: If the feature inactivity timer is enabled, your radio >... - Page 43 Viewing IP Information Viewing Control Assignments This feature displays the device name, IP address, and status of This feature displays the programmable radio functions your radio. assigned to the controls of your radio for the currently selected Note: The device name of your radio is preprogrammed.
-
Page 44: Radio C Are
• Caring for Your Radio Do not use solvents to clean your radio. Spirits may permanently damage the radio housing. • The following are suggestions to assist you in troubleshooting Do not submerge the radio in the detergent a u t i o n solution.
Need help?
Do you have a question about the EMS APX 7500 and is the answer not in the manual?
Questions and answers