Table of Contents
Advertisement
Available languages
Available languages
Quick Links
AG-91D-EU COVER
28/11/2005
Microwave oven with grill and convection
Mikrowellengerät mit grill und heissluft
Four à micro-ondes avec gril et convection
Magnetronoven met grill en hetelucht
Horno microondas con grill y convección
12:49
Page A
MCC4060E
Micro-ondas com grill e convecção
Operating instructions
Gebrauchsanweisung
Notice d'utilisation
Gebruiksaanwijzing
Instrucciones de Manjo
Livro de instruções
PERFEKT IN FORM UND FUNKTION
UK
D
F
NL
E
P
Advertisement
Chapters
Table of Contents

Related Manuals for AEG MCC4060E


Summary of Contents for AEG MCC4060E
- Page 1 AG-91D-EU COVER 28/11/2005 12:49 Page A MCC4060E Microwave oven with grill and convection Mikrowellengerät mit grill und heissluft Four à micro-ondes avec gril et convection Magnetronoven met grill en hetelucht Horno microondas con grill y convección Micro-ondas com grill e convecção...
-
Page 2: Dear Customer
28/11/2005 12:44 Page B Dear Customer, Thank you for buying an AEG-Electrolux microwave oven and putting your trust in the AEG Electrolux brand name. Before using your AEG-Electrolux microwave oven for the first time, please read the instruction book thoroughly. This will enable you to take advantage of all the features that the appliance offers. -
Page 3: Table Of Contents
1. AG-91D-EU ENGLISH 28/11/2005 12:44 Page 1 Contents Important safety instructions ..........2 - 3 Oven &... -
Page 4: Important Safety Instructions
Do not attempt to replace the oven lamp yourself or allow anyone who is not authorised by AEG-Electrolux to do so. If the oven lamp fails, please consult your dealer or contact your local AEG-Electrolux service agent. -
Page 5: Important Safety Instructions
1. AG-91D-EU ENGLISH 28/11/2005 12:44 Page 3 Important safety instructions To avoid the possibility of explosion and sudden AUTO COOK and AUTO COOK FROM FROZEN boiling: operation as they will become hot. Before cleaning make sure they are not hot. WARNING: Liquids and other foods must not be To avoid misuse by children heated in sealed containers since they are liable to... -
Page 6: Oven & Accessories
• The turntable rotates clockwise or counter clockwise. The rotary direction may change each time you start the oven. This does not affect cooking performance. • When you order accessories, please mention two details: part name and model name to your dealer or AEG- Electrolux service agent... -
Page 7: Control Panel
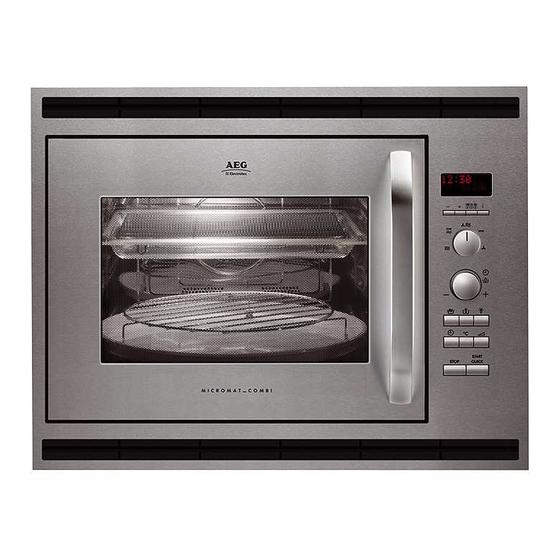
1. AG-91D-EU ENGLISH 28/11/2005 12:44 Page 5 Control panel Digital display and indicators: COOKING indicator START indicator GRILL indicator CONVECTION indicator MICROWAVE indicator INFORMATION indicator Operating buttons: INFORMATION button LANGUAGE button COOKING MODE knob for microwave cooking for microwave cooking with GRILL for microwave cooking with CONVECTION for GRILL for CONVECTION... -
Page 8: Before Operation
1. AG-91D-EU ENGLISH 28/11/2005 12:44 Page 6 Before operation Your oven has an energy save mode. COOKING HINTS: 1. Plug in the oven. Nothing will appear on the The oven has an ‘Information Display System’ which display at this time. offers you step by step instructions to easily guide you through each feature, and enable you to gain 2. -
Page 9: Using The Stop Button
1. AG-91D-EU ENGLISH 28/11/2005 12:44 Page 7 Using the STOP button Use the STOP button to: 1. Erase a mistake during programming. 2. Stop the oven temporarily during cooking. 3. Cancel a programme during cooking, press the STOP button twice. Setting the clock There are two setting modes: 12 hour clock and 24 hour clock. -
Page 10: Energy Save Mode
1. AG-91D-EU ENGLISH 28/11/2005 12:44 Page 8 Energy save mode Your oven comes set for the energy save mode. If you do nothing for 3 minutes after a preceding operation, i.e. closing the door or at the end of cooking, the power will go off automatically. -
Page 11: What Are Microwaves
1. AG-91D-EU ENGLISH 28/11/2005 12:44 Page 9 What are microwaves? Like radio and television waves, microwaves are THE CHARACTERISTICS OF MICROWAVES electromagnetic waves. Microwaves penetrate all non-metal objects made of Microwaves are produced by a magnetron inside the glass, china, earthenware, plastic, wood or paper. This is why the microwaves never make these materials hot. -
Page 12: Microwave Cooking
1. AG-91D-EU ENGLISH 28/11/2005 12:44 Page 10 Microwave cooking Your oven can be programmed for up to 90 minutes. Cooking Time: Increasing unit: (90.00). The input unit of cooking (defrosting) time 0-5 minutes 10 seconds varies from 10 seconds to five minutes. It depends on 5-10 seconds 30 seconds the total length of the cooking (defrosting) time as... -
Page 13: Grill Cooking
1. AG-91D-EU ENGLISH 28/11/2005 12:44 Page 11 Grill cooking The grill heating element at the top of the oven cavity has one power setting only. Example: To cook cheese on toast for 5 minutes (Place toast on the high rack.) 3. -
Page 14: Convection Cooking
1. AG-91D-EU ENGLISH 28/11/2005 12:44 Page 12 Convection cooking Your oven can be used as a conventional oven using the convection facility and 10 pre-set oven temperatures. Press Convection button Oven Temp (˚ C) Example 1: To cook with preheating To pre-heat to 180°... - Page 15 1. AG-91D-EU ENGLISH 28/11/2005 12:44 Page 13 Convection cooking Example 2: To cook without preheating To cook at 250° C for 20 minutes. 1. Select the cooking 4. Press the START/ QUICK 2. Use the TIMER/WEIGHT 3. Select the desired mode by rotating button.
-
Page 16: Dual Cooking
1. AG-91D-EU ENGLISH 28/11/2005 12:44 Page 14 Dual cooking Your oven has 2 DUAL cooking modes combining 1) Convection & microwave, 2) Grill with microwave. To select the DUAL cooking mode rotate the COOKING MODE dial to the desired setting, then choose the cooking time. -
Page 17: Dual Cooking
1. AG-91D-EU ENGLISH 28/11/2005 12:44 Page 15 Dual cooking Example 2: To cook for 20 minutes on DUAL 2 using 90 W microwave power and GRILL. 1. Select the cooking 2. Enter the desired 3. Press the MICROWAVE mode by rotating the cooking time (20 POWER LEVEL button cooking mode dial to... -
Page 18: Other Convenient Functions
1. AG-91D-EU ENGLISH 28/11/2005 12:44 Page 16 Other convenient functions 1. LESS ( ▼ ) / MORE ( ▲ ) button The LESS ( ▼ ) and MORE ( ▲ ) buttons allow you to decrease or increase programmed setting times easily, (for a less well or more well cooked result), when cooking in progress. - Page 19 1. AG-91D-EU ENGLISH 28/11/2005 12:44 Page 17 Other convenient functions 2. START/QUICK FUNCTION The START/QUICK button allows you to operate the two following functions: a) 30 seconds cooking You can cook on your desired cooking mode for 30 seconds without entering the cooking time. Example: To cook for 30 seconds on 630 W microwave power.
-
Page 20: Other Convenient Functions
1. AG-91D-EU ENGLISH 28/11/2005 12:44 Page 18 Other convenient functions 3. TO CHECK SETTINGS WHILE THE OVEN IS OPERATING You can check the power level and the actual oven temperatures ie: when pre-heating. TO CHECK THE POWER LEVEL: As long as your finger is To check the microwave power level during cooking pressing the button, the press the MICROWAVE POWER LEVEL button. -
Page 21: Suitable Ovenware
1. AG-91D-EU ENGLISH 28/11/2005 12:44 Page 19 Suitable ovenware Ovenware material Mode of operation Micro- Convec- Grill Combination wave tion Ovenproof glass and ceramic dishes (without any metal parts, e.g. Pyrex, oven-to-tableware, glass tray). Non ovenproof glass and porcelain (e.g table crockery Glass ceramic and vitroceramic made of fire / frostproof material (e,g. -
Page 22: Cooking Charts
1. AG-91D-EU ENGLISH 28/11/2005 12:44 Page 20 Cooking charts BAKING USING THE GLASS TRAY WITH THE CONVECTION FUNCTION MENU TIME MODE POSITION Quiche Preheat 200 ˚C Cook base for 15‘00, directly in glass tray, lower 1) 20’00 200 ˚C position, rotate after 1) 2) 12’00 200 ˚C Banana Loaf Cake... -
Page 23: Recipes For Glass Tray And Convection
1. AG-91D-EU ENGLISH 28/11/2005 12:44 Page 21 Recipes for glass tray & convection Banana loaf Preheat the oven. 1. Grease and line loaf tin. Ingredients 2. Cream butter and sugar together. 120 g butter 3. Add egg and coffee essence and beat again. 170 g caster suger 4. -
Page 24: Recipes For Glass Tray And Convection
1. AG-91D-EU ENGLISH 28/11/2005 12:44 Page 22 Recipes for glass tray & convection 1. Grease and line the springform. Cherry almond cake 2. Cream the margarine and sugar until light and fluffy. Ingredients 3. Beat in the eggs one at a time. 175 g margarine 4. -
Page 25: Recipes For Glass Tray And Grill
1. AG-91D-EU ENGLISH 28/11/2005 12:44 Page 23 Recipes for glass tray & grill Onion soup 1. Slice the onions, place in a bowl with the stock, salt and pepper, cook for Ingredients 8 min. 900 W 20 g butter 2. Put the soup in to 4 soup bowls. 250 g onions 3. -
Page 26: Automatic Operations
1. AG-91D-EU ENGLISH 28/11/2005 12:44 Page 24 Automatic operations The AUTOMATIC OPERATIONS automatically work out the correct cooking mode and cooking time. You can choose from 5 AUTO COOK menus, 4 AUTO COOK FROM FROZEN menus and 7 AUTO DEFROST menus. Warning: For AUTO COOK and AUTO COOK FROM FROZEN: AUTOMATIC buttons... -
Page 27: Automatic Operations
1. AG-91D-EU ENGLISH 28/11/2005 12:44 Page 25 Automatic operations Example: To cook 300 g of Rice using AUTO COOK (AC-1) 1. Press the AUTO COOK 3. Press the START/QUICK button to 2. Enter the weight by rotating the button once to select Rice. start cooking. -
Page 28: Auto Cook Chart
1. AG-91D-EU ENGLISH 28/11/2005 12:44 Page 26 Auto cook chart MENU NO. WEIGHT (Increasing PROCEDURE Unit) / UTENSILS AC-1 0,1 - 0,3 kg (100 g) • Place in a big bowl and add boiling water. Rice (par-boiled) Big bowl & lid •... -
Page 29: Auto Cook From Frozen Chart
1. AG-91D-EU ENGLISH 28/11/2005 12:44 Page 27 Auto cook from frozen chart MENU NO. WEIGHT (Increasing PROCEDURE Unit) / UTENSILS ACF-1 Cook 0,3 - 1,0 kg* (100 g) • Transfer meal to suitable casserole dish. Frozen Ready Meals Casserole dish & lid •... -
Page 30: Auto Defrost Chart
1. AG-91D-EU ENGLISH 28/11/2005 12:44 Page 28 Auto defrost chart MENU NO. WEIGHT (Increasing PROCEDURE Unit) / UTENSILS AD-1 Defrost 0,2 - 1,0 kg (100 g) • Place the food on a plate in the centre of the turntable. Steaks, Chops (see note on page 29) •... -
Page 31: Recipes For Auto Cook Ac-4
1. AG-91D-EU ENGLISH 28/11/2005 12:44 Page 29 Auto defrost chart NOTES: 1. Steaks, Chops and Chicken legs should be frozen in one layer. 2. Minced meat should be frozen in the thin shape. 3. After turning over, shield the defrosted portions with small, flat pieces of aluminium foil. 4. -
Page 32: Recipes For Auto Cook Ac-5
1. AG-91D-EU ENGLISH 28/11/2005 12:44 Page 30 Recipes for auto cook AC-5 Carrot cake 1. Grease the dish. 2. Cream the egg yolks and sugar with a hand mixer. (This recipe makes approx. 1,1 kg) 3. Add the carrots, lemon juice and almonds. Ingredients 4. -
Page 33: Care And Cleaning
1. AG-91D-EU ENGLISH 28/11/2005 12:44 Page 31 Care & cleaning Oven Interior CAUTION: DO NOT USE COMMERCIAL OVEN 1. For cleaning, wipe any splatters or spills with a soft CLEANERS, STEAM CLEANERS, ABRASIVE, HARSH damp cloth or sponge after each use while the oven CLEANERS, ANY THAT CONTAIN SODIUM is still warm. -
Page 34: What To Do If
- there has not been a power outage..the interior light is not working ? - If the fuses continue to blow, please contact - Call an authorised AEG-Electrolux service an authorised AEG-Electrolux service agent. agent. The interior light bulb can be ... -
Page 35: Service & Spare Parts
Standard guarantee conditions We, AEG-Electrolux, undertake that if within 24 months of the date of the purchase this AEG-Electrolux appliance or any part thereof is proved to be defective by reason only of faulty workmanship or materials, we will, at our discretion repair or replace the same FREE OF CHARGE for labour, materials or carriage on condition that: •... -
Page 36: Specifications
1. AG-91D-EU ENGLISH 28/11/2005 12:44 Page 34 Specifications AC Line Voltage : 230 V, 50 Hz, single phase Distribution line fuse/circuit breaker : Minimum 16 A AC Power required: Microwave : 1.5 kW Grill : 2.8 kW Grill/Microwave : 2.8 kW Convection : 2.8 kW Convection/Microwave... -
Page 37: Important Information
Ecologically responsible disposal of packaging materials and old appliances Packaging materials AEG-Electrolux microwave ovens require effective packaging to protect them during transportation. Only the minimum packaging necessary is used. Packaging materials (e.g. foil or styrofoam) can place children at risk. -
Page 38: Installation
1. AG-91D-EU ENGLISH 28/11/2005 12:44 Page 36 Installation INSTALLING THE APPLIANCE 1. Remove all packaging and check carefully for any signs of damage. 2. If the microwave is fitted in position C, ensure that the minimum air gaps are maintained as shown in the diagram. - Page 39 THIS APPLIANCE MUST BE EARTHED The manufacturer declines any liability should this safety measure not be observed. If the plug that is fitted to your appliance is not suitable for your socket outlet, you must call your local authorised AEG-Electrolux service agent.
- Page 40 Sehr geehrte Kundin, sehr geehrter Kunde, Wir bedanken uns für den Kauf dieses Mikrowellengerätes und das damit der Marke AEG-ELECTROLUX entgegengebrachte Vertrauen. Zur Nutzung aller Vorteile dieses Gerätes lesen Sie bitte die Gebrauchsanweisung sorgfältig durch. Danach bewahren Sie diese bitte zum Nachlesen gut auf.
- Page 41 2. AG-91D-EU German 28/11/2005 12:45 Page 39 Inhalt Wichtige Sicherheitshinweise ..........40 - 42 Gerät &...
-
Page 42: Wichtige Sicherheitshinweise
2. AG-91D-EU German 28/11/2005 12:45 Page 40 Wichtige Sicherheitshinweise WICHTIG FÜR IHRE SICHERHEIT: LESEN SIE DIE FOLGENDEN HINWEISE AUFMERKSAM DURCH, UND BEWAHREN SIE DIE BEDIENUNGSANLEITUNG AUF Zur Vermeidung von Feuer Die Einstellungen nach dem Starten des Gerätes überprüfen um sicherzustellen, dass das Gerät wie Mikrowellengeräte sollten während des Betriebs gewünscht arbeitet. - Page 43 Erwärmung verschüttet werden, müssen Sie sofort das Gerät explodieren können. Zum Kochen oder Aufwärmen ausschalten, den Netzstecker ziehen und den AEG- von Eiern, die nicht verquirlt oder verrührt wurden, Electrolux-Kundendienst anfordern. das Eigelb und Eiweiß anstechen, damit es nicht Niemals das Netzkabel bzw.
- Page 44 2. AG-91D-EU German 28/11/2005 12:45 Page 42 Wichtige Sicherheitshinweise Zur Vermeidung von Fehlbedienung durch Kinder Kein Metallgeschirr verwenden, da Mikrowellen reflektiert werden und dies zu Funkenbildung führt. WARNUNG: Kinder dürfen das Gerät nur unter Keine Konserven in das Gerät stellen. Aufsicht benutzen oder wenn sie ausreichende Nur den für dieses Gerät vorgesehenen Drehteller Anweisungen zur sicheren Benutzung erhalten...
-
Page 45: Gerät & Zubehör
Uhrzeigersinn. Die Drehrichtung kann sich bei jedem erneuten Starten des Geräts ändern. Dies hat keine Auswirkungen auf das Garergebnis. • Bei der Bestellung von Zubehör teilen Sie Ihrem Händler oder dem AEG-Electrolux-Kundendienst bitte folgende Angaben mit: Name des Zubehörteils und Bezeichnung des Modells. -
Page 46: Bedienblende
2. AG-91D-EU German 28/11/2005 12:45 Page 44 Bedienblende Anzeigen und Symbole: 1 Symbol für GARVORGANG 2 Symbol für START 3 Symbol für GRILL 4 Symbol für HEISSLUFT 5 Symbol für MIKROWELLE 6 Symbol für INFORMATION Bedienungstasten 7 INFORMATIONS-Taste 8 SPRACHEN-Taste 9 Drehknopf für die Wahl der BETRIEBSART für Mikrowellengaren für Mikrowellengaren mit GRILL... -
Page 47: Vor Inbetriebnahme
2. AG-91D-EU German 28/11/2005 12:45 Page 45 Vor Inbetriebnahme Ihr Gerät verfügt über einen Energiesparmodus. HINWEISE ZUM GAREN: 1. Verbinden Sie das Gerät mit der Steckdose. Die Das Gerät verfügt über ein "Informations- Anzeige zeigt dabei noch nichts an. anzeigesystem", das Ihnen schrittweise Anleitungen für die verschiedenen Funktionen in einer gewünschten 2. -
Page 48: Verwendung Der Stop-Taste
2. AG-91D-EU German 28/11/2005 12:45 Page 46 Verwendung der Stop-Taste Verwendung der STOP-Taste: 1. Löschen eines Eingabefehlers während des Programmierens. 2. Unterbrechen des Gerätes während des Betriebs. 3. Zum Löschen eines Programms während des Betriebs die STOP-Taste zweimal drücken. Einstellen der Uhr Die Uhr läuft im 12 Stunden- oder im 24 Stunden-Format. -
Page 49: Energiesparmodus
2. AG-91D-EU German 28/11/2005 12:45 Page 47 Energiesparmodus Das Gerät wird mit eingestelltem “Energiesparmodus” geliefert, d.h. die Stromversorgung wird abgeschaltet Falls Sie 3 Minuten nach einer vorangegangenen Bedienung, der Beendigung des Garvorgangs oder nach dem Anschließen des Mikrowellengerätes, nichts weiter unternehmen, schaltet das Gerät automatisch in den Energiesparmodus. -
Page 50: Was Sind Mikrowellen
2. AG-91D-EU German 28/11/2005 12:45 Page 48 Was sind Mikrowellen? Mikrowellen sind wie Radio- und Fernsehwellen, Eigenschaften der Mikrowellen elektromagnetische Wellen. Mikrowellen durchdringen alle nichtmetallischen Mikrowellen werden im Mikrowellengerät vom Gegenstände aus Glas, Porzellan, Keramik, Kunststoff, Magnetron erzeugt und versetzen die Wassermoleküle Holz und Papier. -
Page 51: Garen Mit Der Mikrowelle
2. AG-91D-EU German 28/11/2005 12:45 Page 49 Garen mit der Mikrowelle Ihr Gerät lässt sich bis zu 90 Minuten programmieren. Garzeit: Zeiteinheiten: (90.00). Die Zeiteinheiten zum Garen (Auftauen) 0-5 Minuten 10 Sekunden variieren von 10 Sekunden bis fünf Minuten, in 5-10 Minuten 30 Sekunden Abhängigkeit von der Gesamtgar- oder Auftauzeit, wie... -
Page 52: Grillbetrieb
2. AG-91D-EU German 28/11/2005 12:45 Page 50 Grillbetrieb Die Leistung des oben an der Garraumdecke befindlichen Grillheizelements ist nicht regulierbar. Beispiel: So backen Sie Käsetoast in 5 Minuten (legen Sie das Toast auf den hohen Rost). 3. Drücken Sie die START/QUICK- 2. -
Page 53: Heissluftbetrieb
2. AG-91D-EU German 28/11/2005 12:45 Page 51 Heissluftbetrieb Sie können Ihr Gerät mit Hilfe der Heißluftfunktion und den 10 voreingestellten Temperaturstufen wie einen konventionellen Herd benutzen. HEISSLUFT-Taste drücken Gerätetemperatur (° C) Beispiel 1: Garen mit Vorheizen So heizen Sie auf 180° C vor und garen für 20 Minuten bei 180° C. 1. - Page 54 2. AG-91D-EU German 28/11/2005 12:45 Page 52 Heissluftbetrieb Beispiel 2: Garen ohne Vorheizen So garen Sie für 20 Minuten bei 250° C. 1. Stellen Sie den 2. Mit dem ZEIT/ 4. Die START/QUICK- 3. Die gewünschte Drehknopf für die Wahl GEWICHTS-Knopf Taste drücken.
-
Page 55: Kombi-Betrieb
2. AG-91D-EU German 28/11/2005 12:45 Page 53 Kombi-Betrieb Ihr Mikrowellengerät verfügt über 2 KOMBI-Betriebsarten, bei denen die Mikrowelle entweder mit der Heissluft oder mit dem Grill kombiniert werden. Um einen KOMBI-Betrieb zu wählen, drehen Sie zuerst den Drehknopf für die Wahl der BETRIEBSART in die gewünschte Einstellung und dann stellen Sie die Garzeit ein. Im allgemeinen verkürzt die KOMBI-Betriebsart die Gesamtgarzeit. - Page 56 2. AG-91D-EU German 28/11/2005 12:45 Page 54 Kombi-Betrieb Beispiel 2: So garen Sie für 20 Minuten im KOMBIBETRIEB 2 mit 90 W Mikrowellenleistung und GRILL. 1. Stellen Sie den Drehknopf für 2. Die gewünschte 3. Drücken Sie die die Wahl der BETRIEBSART in Garzeit eingeben MIKROWELLEN- die Einstellung...
-
Page 57: Andere Nützliche Funktionen
2. AG-91D-EU German 28/11/2005 12:45 Page 55 Andere nützliche Funktionen 1. KÜRZER ( ▼ )/LÄNGER ( ▲ )-Taste Mit den KÜRZER ( ▼ ) und LÄNGER ( ▲ ) -Tasten können Sie die programmierten Zeiteinstellungen problemlos verkürzen oder verlängern (um die Speisen mehr oder weniger durchzugaren). a) Ändern der vorprogrammierten Zeiteinstellung: Drücken Sie die KÜRZER ( ▼... - Page 58 2. AG-91D-EU German 28/11/2005 12:45 Page 56 Andere nützliche Funktionen 2. START/QUICK FUNKTION Mit der START/QUICK-Taste können Sie die folgenden beiden Funktionen ausführen: a) 30 Sekunden kochen Sie können die gewünschte Betriebsart 30 Sekunden lang direkt einschalten, ohne die Garzeit einzugeben. Beispiel: So garen Sie für 30 Sekunden bei 630 W Mikrowellenleistung.
- Page 59 2. AG-91D-EU German 28/11/2005 12:45 Page 57 Andere nützliche Funktionen 3. ÜBERPRÜFEN DER EINSTELLUNG WÄHREND DES BETRIEBS Sie können die Leistungsstufe und die Gerätetemperatur überprüfen z.B. beim Vorheizen. ÜBERPRÜFEN DER LEISTUNGSSTUFE: Solange Sie die Taste mit Um während des Garvorgangs die Mikrowellenleistung dem Finger drücken, zu überprüfen, drücken Sie die MIKROWELLEN- wird die Leistungsstufe...
-
Page 60: Geeignetes Geschirr
2. AG-91D-EU German 28/11/2005 12:45 Page 58 Geeignetes Geschirr Ofenfestes Material Betriebsart Mikrowelle Heißluft Grill Kombination Ofenfestes Glas- und Keramikgeschirr (ohne Metallteile, z.B. Pyrex, Koch- und Serviergeschirr, Glastablett). Nicht-ofenfestes Glas und Porzellan (z.B. Tischgeschirr 1) . Glaskeramik aus feuerfestem /kältebeständigem Material (z.B. Arcoflam). Ofenfestes Steingut 2) . -
Page 61: Gartabellen
2. AG-91D-EU German 28/11/2005 12:45 Page 59 Gartabellen BACKEN MIT DEM GLASTABLETT UND HEISSLUFT MENU ZEIT BETRIEBSART POSITION Quiche Vorheizen 200 ˚C Boden für 15’00 backen, direkt auf dem Glastablett, 1) 20’00 200 ˚C unterer Einschub, nach 1) drehen 2) 12’00 200 ˚C Bananenbrot Vorheizen... -
Page 62: Rezepte Für Glastablett & Heißluft
2. AG-91D-EU German 28/11/2005 12:45 Page 60 Rezepte für Glastablett & Heißluft Bananenbrot Den Ofen vorheizen. 1. Die Kastenform einfetten und mit Backpapier auslegen. Zutaten 2. Butter und Zucker schaumig schlagen. 120 g Butter 3. Ei und Kaffeeessenz hinzufügen und wieder verrühren. 170 g Zucker 4. - Page 63 2. AG-91D-EU German 28/11/2005 12:45 Page 61 Rezepte für Glastablett & Heißluft Kirsch-Mandel-Kuchen 1. Die Springform einfetten und mit Backpapier auslegen. 2. Margarine und Zucker rühren, bis sie leicht und Zutaten schaumig sind. 175 g Margarine 3. Die Eier nacheinander einrühren. 175 g Zucker 4.
-
Page 64: Rezepte Für Glastablett & Grill
2. AG-91D-EU German 28/11/2005 12:45 Page 62 Rezepte für Glastablett & Grill Zwiebelsuppe 1. Die Zwiebeln schneiden, mit der Brühe in eine Schüssel geben, Salz und Pfeffer hinzufügen, Zutaten 8 Min. 900 W 20 g Butter 2. Die Suppe auf 4 Suppentassen verteilen. 250 g Zwiebeln 3. -
Page 65: Automatik-Betrieb
2. AG-91D-EU German 28/11/2005 12:45 Page 63 Automatik-Betrieb Bei Benutzung eines AUTOMATIKPROGRAMMS erfolgt die Einstellung der Leistungsstufe und Garzeit automatisch. Sie können 5 AUTO-GAREN Menüs, 4 AUTO-GAREN VON TK Menüs und 7 AUTO-AUFTAUEN-Menüs auswählen. Warnung: AUTOMATIK-Tasten Für AUTO-GAREN und AUTO-GAREN VON TK: Garraum, Tür, Außenseiten, Drehteller, Roste und Geschirr werden besonders heiß. - Page 66 2. AG-91D-EU German 28/11/2005 12:45 Page 64 Automatik-Betrieb Beispiel: So kochen Sie 300 g Reis mit der AUTO-GAREN (AC-1): 1. Drücken Sie die 3. Drücken Sie die START/QUICK- 2. Geben Sie durch Drehen des AUTO-GAREN-Taste Taste, um mit dem ZEIT/GEWICHTS-Knopfes im einmal für Reis.
-
Page 67: Tabelle: Auto-Garen
2. AG-91D-EU German 28/11/2005 12:45 Page 65 Tabelle: Auto-Garen MENÜ Nr. MENGE (Gewichtseinheit) VERFAHREN / GESCHIRR AC-1 0,1 - 0,3 kg (100 g) • In eine große Schüssel geben und kochendes Wasser Reis Große Schüssel mit Deckel hinzufügen. (Ausgangstemp.: • Mit einem Deckel abdecken. Reis 20°... -
Page 68: Tabelle: Auto-Garen Von Tk
2. AG-91D-EU German 28/11/2005 12:45 Page 66 Tabelle: Auto-Garen von TK MENÜ Nr. MENGE (Gewichtseinheit) VERFAHREN / GESCHIRR ACF-1 Garen 0,3 - 1,0 kg* (100 g) • Die Speise in ein geeignetes Mikrowellen-Gefäß geben. Tiefkühl- Schüssel mit Deckel • Falls vom Hersteller empfohlen, etwas Flüssigkeit * Wenn der Hersteller die Fertiggerichte zugeben. -
Page 69: Tabelle: Auto-Auftauen
2. AG-91D-EU German 28/11/2005 12:45 Page 67 Tabelle: Auto-Auftauen MENÜ Nr. MENGE (Gewichtseinheit) VERFAHREN / GESCHIRR AD-1 Auftauen 0,2 - 1,0 kg (100 g) • Die Speise auf einem Teller in die Mitte des Drehtellers Steaks und (Siehe HINWEIS Seite 68) stellen. -
Page 70: Rezepte Für Auto-Garen Ac-4
2. AG-91D-EU German 28/11/2005 12:45 Page 68 Tabelle: Auto-Auftauen HINWEIS: 1. Steaks, Koteletts und Hähnchenschenkel sollten nebeneinander (einlagig) eingefroren werden. 2. Hackfleisch sollte flach eingefroren werden. 3. Nach dem Wenden die aufgetauten Portionen mit dünnen Aluminiumstreifen abdecken. 4. Das Geflügel und das Hackfleisch sollten sofort nach dem Auftauen weiterverarbeitet werden. 5. -
Page 71: Rezepte Für Auto-Garen Ac-5
2. AG-91D-EU German 28/11/2005 12:45 Page 69 Rezepte für Auto-Garen AC-5 Möhrenkuchen 1. Die Backform einfetten. 2. Eigelb und Zucker mit einem Handrührgerät (Dieses Rezept ergibt ca. 1,1 kg) vermischen. Zutaten 3. Die Mohrrüben, Zitronensaft und Mandeln hinzugeben. 1 TL Butter oder Margarine zum Einfetten der Form 4. -
Page 72: Reinigung Und Pflege
2. AG-91D-EU German 28/11/2005 12:45 Page 70 Reinigung und Pflege Garraum VORSICHT: ZUR REINIGUNG DÜRFEN KEINESFALLS 1. Nach jedem Gebrauch das noch warme Gerät zur OFENREINIGER, DAMPFREINIGER, SCHEUERMITTEL, Reinigung mit einem weichen, feuchten Tuch oder SCHARFE REINIGUNGSMITTEL, NATRIUMHYDROXID Schwamm abwischen, um leichte Verschmutzungen ENTHALTENDE REINIGUNGSMITTEL ODER... -
Page 73: Was Tun, Wenn
– Ziehen Sie den Netzstecker oder schalten Sie – der Netzstecker eingesteckt ist, die Sicherung aus. – die Sicherungen in der Installation in – Rufen Sie den AEG-ELECTROLUX- Ordnung sind, Kundendienst oder Ihren Fachhändler. – eventuell der Strom ausgefallen ist, Sollten ... -
Page 74: Kundendienst
12:45 Page 72 Kundendienst Sehr geehrter Kunde, der Werkskundendienst von AEG-ELECTROLUX Hausgeräte ist ezentral organisiert. Damit bieten wir Ihnen überall einen zuverlässigen Service. Unter der für Sie kostengünstigen Rufnummer 0180 322 66 22 (EUR 0.09 /Minute) können Sie im Bedarfsfall einen unserer Spezialisten oder Service-Partner anfordern. -
Page 75: Garantiebedingungen
Deutschland im Rahmen der Vorschriften über den Verbrauchsgüterkauf gesetzliche Rechte, die durch diese Garantie nicht eingeschränkt werden. Diese Garantie räumt dem Verbraucher also zusätzliche Rechte ein. Dies vorausgeschickt, leisten wir, AEG-ELECTROLUX Hausgeräte GmbH, gegenüber dem Verbraucher Garantie für dieses Gerät für den Zeitraum von 24 Monaten ab Übergabe zu den folgenden Bedingungen: 1. -
Page 76: Kundendienst & Ersatzteile (Belgien)
Wenn ein Techniker für einen der oben Für allgemeine Fragen zu diesem AEG-ELECTROLUX- aufgeführten Fehler oder für die Reparatur eines Gerät oder für weitere Informationen über AEG- Fehlers gerufen wird, der auf einen unsachgemäßen ELECTROLUX-Produkte kann die Kundenbetreuung per Gebrauch bzw. eine falsche Installation Post oder per Telefon kontaktiert werden. -
Page 77: Garantiebedingungen (Belgien)
2. AG-91D-EU German 28/11/2005 12:45 Page 75 Garantiebedingungen (Belgien) Unsere Geräte werden mit größter Sorgfalt hergestellt. qualifizierte oder nicht-kompetente Personen, oder Trotzdem kann es einmal zu einem Defekt kommen. Unser infolge des Einbaus von nicht-originalen Zubehör- Kundendienst übernimmt auf Anfrage gerne die Reparatur, oder Ersatzteilen. -
Page 78: Technische Daten
2. AG-91D-EU German 28/11/2005 12:45 Page 76 Technische Daten Stromversorgung : 230 V, 50 Hz, Einphasenstrom Sicherung/Sicherungsautomat : Mindestens 16A Leistungsaufnahme: Mikrowelle : 1.5 kW Grill : 2.8 kW Grill/Mikrowelle : 2.8 kW Heißluftt : 2.8 kW Heißluft/Mikrowlle : 2.95 kW Leistungsabgabe: Mikrowelle : 900 W (IEC 60705) -
Page 79: Wichtige Hinweise
2. AG-91D-EU German 28/11/2005 12:45 Page 77 Wichtige Hinweise Umweltfreundliche Entsorgung von Verpackung und Altgerät Verpackung Unsere Mikrowellengeräte benötigen für den Transportweg eine wirksame Schutzverpackung. Dabei beschränken wir uns auf das unbedingt Notwendige. Verpackungsteile (z.B. Folien, Styropor) können für Kinder gefährlich sein. Erstickungsgefahr! Verpackungsteile von Kindern fernhalten. -
Page 80: Aufstellanweisungen
2. AG-91D-EU German 28/11/2005 12:45 Page 78 Aufstellanweisungen INSTALLIERUNG DES GERÄTES 1. Entfernen Sie das Verpackungsmaterial und überprüfen Sie das Gerät sorgfältig auf Beschädigungen. 2. Bei Installation des Geräts in Position C müssen unbedingt die im Diagramm angegebenen Lüftungsabstände gewahrt werden. - Page 81 • Netzkabel oder Stecker nicht in Wasser oder eine andere Flüssigkeit eintauchen. ELEKTRISCHE ANSCHLÜSSE WARNUNG: DIESES GERÄT MUSS GEERDET SEIN Bei Nichteinhaltung dieser Sicherheitsmaßnahme lehnt der Hersteller jegliche Haftung ab. Wenn der an Ihrem Gerät befindliche Stecker nicht auf Ihre Steckdose passt, müssen Sie Ihren örtlichen autorisierten AEG-Electrolux-Kundendienstvertreter herbei rufen.
- Page 82 3. AG-91D-EU French 28/11/2005 12:46 Page 80 Lors de sa fabrication, cet appareil a été construit selon des normes. directives at/ou décrets pour une utilisation sur le territoire français. Pour la sécurité des biens et des personnes ainsi que pour le respect de l’environnement, vous devez d’abord lire impérativement les préconisations suivantes avant toute utilisation de votre appareil.
- Page 83 12:46 Page 81 Cher Client, Merci d’avoir acheté un four à micro-ondes AEG-Electrolux et d’avoir fait confiance à la marque AEG-Electrolux. Avant d’utiliser votre four à micro-ondes AEG-Electrolux pour la première fois, veuillez lire attentivement la notice d’utilisation. Cela vous permettra de profiter pleinement de tous les avantages offerts par votre appareil.
- Page 84 3. AG-91D-EU French 28/11/2005 12:46 Page 82 Sommaire Avertissements importants de sécurité .........83 - 86 Four et accessoires .
-
Page 85: Avertissements Importants De Sécurité
3. AG-91D-EU French 28/11/2005 12:46 Page 83 Avertissements importants de sécurité AVERTISSEMENTS DE SECURITE IMPORTANTS : LES LIRE ATTENTIVEMENT ET LES CONSERVER SOIGNEUSEMENT POUR CONSULTATIONS ULTERIEURES Pour éviter tout danger d’incendie N’employez pas de récipients en matière plastique, papier, carton et tous matériaux qui ne supporteraient Vous devez surveiller le four lorsqu’il est en pas l’effet de la chaleur de la résistance. - Page 86 à micro-ondes. Si la lampe du four grille, adressez-vous au revendeur ou à un service après vente AEG-Electrolux. Percez la peau des aliments tels que les pommes de Si le cordon d’alimentation de cet appareil est terre et les saucisses avant de les cuire, car ils peuvent endommagé, faites-le remplacer par un professionnel...
- Page 87 3. AG-91D-EU French 28/11/2005 12:46 Page 85 Avertissements importants de sécurité Ne touchez pas la porte du four, le compartiment Pour éviter une anomalie de fonctionnement et pour extérieur, le compartiment arrière, la cavité du four, les éviter d’endommager le four. ouvertures de ventilation, les accessoires et les plats en Ne jamais faire fonctionner le four sans plateau GRIL mode, CONVECTION, en mode COMBINEE,...
- Page 88 3. AG-91D-EU French 28/11/2005 12:46 Page 86 Avertissements importants de sécurité REMARQUES: Certaines formes de récipients favorisent une Si vous avez des doutes quant à la manière de brancher pénétration plus homogènes des micro-ondes dans les le four, consulter un technicien qualifié. aliments.
-
Page 89: Four Et Accessoires
Cela n’affecte en rien la cuisson. • Lorsque vous commandez des accessoires, veuillez mentionner deux éléments: le nom de la pièce et le nom du modèle à votre revendeur ou à votre dépanneur agréé AEG-Electrolux. -
Page 90: Bandeau De Commande
3. AG-91D-EU French 28/11/2005 12:46 Page 88 Bandeau de commande Affichage numérique et symboles Symbole CUISSON EN MARCHE Symbole START Symbole GRIL Symbole CONVECTION Symbole MICRO-ONDES Symbole INFORMATION Touches de fonctionnement: Touche INFORMATION Touche LANGUE Touche mode CUISSON pour une cuisson micro-ondes pour une cuisson micro-ondes avec GRIL pour une cuisson micro-ondes avec CONVECTION pour GRIL... -
Page 91: Avant La Mise En Service
3. AG-91D-EU French 28/11/2005 12:46 Page 89 Avant la mise en service Le four dispose d'un mode d'économie d'énergie GUIDE DE CUISSON INTEGRE: 1. Branchez le four, aucune donnée ne s'affiche. Ce four dispose d’un système d’affichage des 2. Ouvrez la porte “CHOISIR LA LANGUE” clignote dans informations vous donnant accès à... -
Page 92: Touche Stop (Arret)
3. AG-91D-EU French 28/11/2005 12:46 Page 90 Touche STOP (ARRET) Utilisez la touche STOP (ARRET) pour: 1. Effacer une erreur lors de la programmation. 2. Faire une pause en cours de cuisson. 3. Annuler un programme en cours de cuisson (appuyez sur la touche STOP (ARRET) deux fois). -
Page 93: Mode D'economie D'énergie
3. AG-91D-EU French 28/11/2005 12:46 Page 91 Mode d’économie d’énergie Votre four est livré préréglé en mode d’économie d’énergie. Si vous n’utilisez pas le four pendant 3 minutes, par exemple après son branchement ou à la fin d’une cuisson, l’alimentation électrique est coupée automatiquement. Pour remettre le four sous tension, ouvrez la porte, puis refermez-la. -
Page 94: Que Sont Les Micro-Ondes
3. AG-91D-EU French 28/11/2005 12:46 Page 92 Que sont les micro-ondes? Les micro-ondes sont, tout comme les ondes radio et Les propriétés des micro-ondes télévision, des ondes électromagnétiques. Les micro-ondes traversent tous les objets non Dans le micro-ondes, les ondes sont générées par le métalliques, le verre, la porcelaine, la céramique, magnéton et font vibrer les molécules d’eau des la matière plastique, le bois et le papier. -
Page 95: Fonctionnement Manuel
3. AG-91D-EU French 28/11/2005 12:46 Page 93 Fonctionnement manuel Le four peut être programmé pour un temps de cuisson Cuisson: Palier de: maximal de 90 minutes (90.00). L’augmentation du 0-5 minutes 10 secondes temps de cuisson (décongélation) varie de 10 secondes 5-10 minutes 30 secondes à... -
Page 96: Cuisson Au Gril
3. AG-91D-EU French 28/11/2005 12:46 Page 94 Cuisson au gril L’élément chauffant du gril situé en haut de la cavité du four ne comporte qu’un seul niveau de puissance. Exemple: Pour faire cuire du pain grillé au fromage pendant 5 minutes. Placez le pain sur le trépied haut. 1. -
Page 97: Cuisson Par Convection
3. AG-91D-EU French 28/11/2005 12:46 Page 95 Cuisson par convection Votre four peut être utilisé comme un four conventionnel à l’aide de la fonction de convection et des 10 températures de four préréglées. Touche CONVECTION Temperature du four (° C) Exemple 1: Cuisson avec préchauffage Pour préchauffer à... - Page 98 3. AG-91D-EU French 28/11/2005 12:46 Page 96 Cuisson par convection Exemple 2: Cuisson sans préchauffage Pour faire cuire à 250° C pendant 20 minutes. 2. Utilisez le bouton 3. Sélectionnez la 4. Appuyez sur la touche 1. Sélectionnez le mode de rotatif DUREE/POIDS température de START/QUICK.
-
Page 99: Cuisson Combinée
3. AG-91D-EU French 28/11/2005 12:46 Page 97 Cuisson combinée Ce four dispose de 2 modes de cuisson COMBINEE (Convection et micro-ondes ou Gril et micro-ondes) pour une cuisson associant micro-ondes et gril ou micro-ondes et convection. Pour sélectionner le mode de cuisson COMBINEE, mettez le bouton rotatif MODE CUISSON sur le réglage voulu puis choisissez d’abord la durée de cuisson. - Page 100 3. AG-91D-EU French 28/11/2005 12:46 Page 98 Cuisson combinée Exemple 2: Pour faire cuire pendant 20 minutes à COMB. 2 l’aide de la puissance micro-ondes 90 W et GRIL. 3. Appuyez deux fois sur la touche 1. Sélectionnez le mode de cuisson 2.
-
Page 101: Autres Fonctions Pratiques
3. AG-91D-EU French 28/11/2005 12:46 Page 99 Autres fonctions pratiques 1. Touches MOINS ( ▼ )/ PLUS ( ▲ ) Les touches MOINS ( ▼ ) et PLUS ( ▲ ) vous permettent de diminuer ou d’augmenter facilement les réglages programmés (pour une cuisson plus ou moins avancée) en mode CUISSON ou en cours de cuisson. - Page 102 3. AG-91D-EU French 28/11/2005 12:46 Page 100 Autres fonctions pratiques 2. AJOUTER 30 SECONDES Le bouton START/QUICK permet d'activer les deux fonctions suivantes: a) Cuisson 30 secondes Vous pouvez faire cuire des aliments dans le mode de votre choix pendant 30 secondes sans définir de temps de cuisson.
- Page 103 3. AG-91D-EU French 28/11/2005 12:46 Page 101 Autres fonctions pratiques 3. VERIFICATION DES REGLAGES PENDANT LE FONCTIONNEMENT DU FOUR Vous pouvez vérifier le niveau de puissance, l’heure, la température du four. VERIFICATION DU NIVEAU DE PUISSANCE: Tant que votre doigt reste Pour vérifier le niveau de puissance du micro-ondes appuyé...
-
Page 104: Bien Choisir La Vaisselle
3. AG-91D-EU French 28/11/2005 12:46 Page 102 Bien choisir la vaissellle Ustensiles de cuisine Mode de fonctionnement Micro-ondes Convection Grill Combiné Plats en céramique et allant au four (sans parties métalliques, par ex. Pyrex, plats à servir allant au four, plats en verre). Verre ou faïence n’allant pas au four (par exemple, de la vaisselle de table 1) . -
Page 105: Tableaux De Cuisson
3. AG-91D-EU French 28/11/2005 12:46 Page 103 Tableaux de cuisson CUISSON SUR LE PLATEAU EN VERRE AVEC LA FONCTION CONVECTION MENU TEMPS MODE POSITION Quiche Préchauffage 200 ˚C Cuire la pâte pendant 15 m directement sur le plateau 1) 20’00 200 ˚C en verre en position inférieure, faites tourner après 1) 2) 12’00... -
Page 106: Recettes Avec Le Plateau En Verre En Mode Convection
3. AG-91D-EU French 28/11/2005 12:46 Page 104 Recettes avec le plateau en verre en mode convection Pain de banane Préchauffez le four. 1. Garnissez un étain de pain beurré de papier sulfurisé. Ingrédients 2. Fouettez le beurre et le sucre. 120 g de beurre 3. - Page 107 3. AG-91D-EU French 28/11/2005 12:46 Page 105 Recettes avec le plateau en verre en mode convection Gâteau aux cerises et aux amandes 1. Garnissez le fond amovible d’un moule beurré de papier sulfurisé. Ingrédients 2. Fouettez la margarine et le sucre pour obtenir un 175 g margarine mélange léger et onctueux.
-
Page 108: Recettes Avec Le Plateau En Verre En Mode Gril
3. AG-91D-EU French 28/11/2005 12:46 Page 106 Recettes avec le plateau en verre en mode grill Soupe à l’oignon 1. Coupez les oignons en rondelles, versez-les dans un bol avec le bouillon, le sel et le poivre et faites cuire Ingrédients pendant 20 g... -
Page 109: Fonctionnement Automatique
3. AG-91D-EU French 28/11/2005 12:46 Page 107 Fonctionnement automatique En FONCTIONNEMENT AUTOMATIQUE le four détermine automatiquement le mode et le temps de cuisson. Il offre 5 programmes CUISSON AUTOMATIQUE, 4 programmes de CUISSON DEPUIS L’ÉTAT CONGELÉ et 7 programmes de DECONGELATION AUTOMATIQUE. Bouton AUTOMATIQUE Avertissement: Pour les programmes CUISSON AUTOMATIQUE et... - Page 110 3. AG-91D-EU French 28/11/2005 12:46 Page 108 Fonctionnement automatique Exemple: Pour faire cuire du riz de 300 g avec CUISSON AUTOMATIQUE AC-1. 2. Entrez le poids en tournant 1. Pour le riz, appuyez une fois 3. Appuyez sur la touche le bouton rotatif sur la touche CUISSON START/QUICK.
-
Page 111: Tableaux De Cuisson Automatique
3. AG-91D-EU French 28/11/2005 12:46 Page 109 Tableaux de cuisson automatique MENU NO. QUANTITÉ / UTENSILES PROCEDURE AC-1 0,1 - 0,3 kg (100 g) • Placez dans un grand bol et ajoutez de l’eau. Grand bol et couvercle • Couvrez. (Temp. -
Page 112: Tableaux De Cuisson Depuis L'état Congelé
3. AG-91D-EU French 28/11/2005 12:46 Page 110 Tableaux de cuisson depuis l’état congelé MENU NO. QUANTITÉ / UTENSILES PROCEDURE ACF-1 Cuisson 0,3 - 1,0 kg* (100 g) • Versez le contenu dans un plat conçu pour la cuisson Plats préparés Bol et couvercle micro-ondes. -
Page 113: Tableaux De Décongélation Automatique
3. AG-91D-EU French 28/11/2005 12:46 Page 111 Tableaux de décongélation automatique MENU NO. QUANTITÉ / UTENSILES PROCÉDURE AD-1 0,2 - 1,0 kg (100 g) • Placez les aliments sur une assiette au centre du plateau Décongélation (Voir remarque à la page tournant. - Page 114 3. AG-91D-EU French 28/11/2005 12:46 Page 112 Tableaux de décongélation automatique MENU Nu. QUANTITÉ / UTENSILES PROCÉDURE AD-6 0,1 - 1,4 kg (100 g) • Retirez l’emballage du gâteau. Décongélation Plat • Placez sur un plat au centre du plateau tournant. Gâteau •...
-
Page 115: Recettes Pour Cuisson Automatique Ac-4
3. AG-91D-EU French 28/11/2005 12:46 Page 113 Recettes pour cuisson automatique AC-4 Gratin de pâtes aux courgettes 1. Versez l’eau, l’huile et le sel dans un bol, couvrez et amenez à ébullition. (Cette recette permet de confectionner un gratin 3-5 min. 900 W d’environ 1,5 kg). -
Page 116: Recettes Pour Cuisson Automatique Ac-5
3. AG-91D-EU French 28/11/2005 12:46 Page 114 Recettes pour cuisson automatique AC-5 Gâteau aux carottes 1. Beurrez le plat. 2. Mélangez les jaunes d’oeuf et le sucre au fouet. (Cette recette permet de confectionner un gâteau 3. Ajoutez les carottes, le jus de citron et les amandes. d’environ 1,1 kg) 4. - Page 117 3. AG-91D-EU French 28/11/2005 12:46 Page 115 Recettes pour cuisson automatique AC-5 Tarte aux pommes et au calvados 1. Mélangez la farine et la levure chimique. Ajoutez le sucre, le sucre vanillé, le sel, l’oeuf, l’huile d’amande (Cette recette permet de confectionner une tarte amère et le beurre.
-
Page 118: Entretien Et Nettoyage
3. AG-91D-EU French 28/11/2005 12:46 Page 116 Entretien et nettoyage Ne procédez au nettoyage qu’après avoir débranché Intérieur du four l’appareil. 1. Pour un nettoyage facile, essuyez les éclaboussures et les dépôts à l’aide d’un chiffon doux et mouillé ou ATTENTION : N’UTILISEZ PAS DE DÉCAPE FOURS une éponge après chaque utilisation et pendant que VENDUS DANS LE COMMERCE OU DE PRODUITS... -
Page 119: Que Faire Si
- qu’il n’y a pas de coupure de courant. - Contactez votre revendeur ou un service - Si les fusibles continuent de sauter, faites après vente AEG-Electrolux agréé. L’ampoule appel au service après vente de votre de l’éclairage intérieur peut seulement être magasin vendeur. -
Page 120: Service Et Garantie (France)
3. AG-91D-EU French 28/11/2005 12:46 Page 118 Service et garantie (France) SERVICE APRÈS VENTE En cas d’anomalie de fonctionnement, reportez-vous à la rubrique « En cas d’anomalie de fonctionnement ». Si malgré toutes les vérifications, une intervention s’avère nécessaire, le vendeur de votre appareil est le premier habilité... -
Page 121: Service Après-Vente Et Pièces De Rechange (Belgique)
Pour toute demande générale concernant votre appareil une utilisation ou une installation incorrecte, ce AEG-Electrolux ou pour d’autres informations sur des déplacement sera facturé, même si l’appareil est produits AEG-Electrolux, contactez notre Service sous garantie. -
Page 122: Déclaration De Conditions De Garantie (Belgique)
3. AG-91D-EU French 28/11/2005 12:46 Page 120 Déclaration de conditions de garantie (Belgique) Nos appareils sont produits avec le plus grand soin. Malgré 9. Ne sont pas couvertes par la garantie, les défectuosités cela, un défaut peut toujours se présenter. Notre service qui proviennent de réparations ou d’interventions clientèle se chargera de réparer ceci sur demande, pendant pratiquées par des personnes non qualifiées ou... -
Page 123: Fiche Technique
3. AG-91D-EU French 28/11/2005 12:46 Page 121 Fiche technique Tension d’alimentation : 230 V, 50 Hz, monophasé Fusible/disjoncteur de protection : 16 A minimum Consommation électrique: Micro-ondes : 1.5 kW Grill : 2.8 kW Grill/Micro-ondes : 2.8 kW Convection : 2.8 kW Convection/Micro-ondes : 2.95 kW Puissance:... -
Page 124: Information Importante
Matériaux d’emballage Les fours à micro-ondes dépendent d’un emballage efficace pour leur protection AEG-Electrolux pendant le transport. Seul l’emballage minimum nécessaire est utilisé. Les matériaux d’emballage (p. ex. film plastique ou polystyrène expansé) sont un danger pour les enfants. Risque d’asphyxie. Gardez les matériaux d’emballage hors de la portée des enfants. -
Page 125: Installation
3. AG-91D-EU French 28/11/2005 12:46 Page 123 Installation INSTALLATION DE L'APPAREIL 1. Retirez l'ensemble de l'emballage et vérifiez soigneusement que l'appareil n'a pas été endommagé durant le transport. 2. Si le four à micro-ondes doit être installé à la position C, veillez à... - Page 126 Le fabricant décline toute responsabilité si cette consigne de sécurité n’est pas respectée. Si la prise dont est dotée votre appareil ne convient pas à votre prise murale, vous devez contacter votre revendeur ou un service après vente AEG-Electrolux agréé.
- Page 127 Page 125 Electrolux Home Products France S.A.S. au capital de 67 500 000 € - 552 042 285 RCS SENLIS AEG-ELECTROLUX Pour tenir nos engagements, nous écoutons les Consommateurs Info Conso Electrolux est le lien privilégié entre la marque et ses Consommateurs. Il assure en permanence une double mission : satisfaire au mieux vos exigences et tirer parti de cette proximité...
-
Page 128: Geachte Klant
12:47 Page 126 Geachte klant Gefeliciteerd met de aankoop van deze AEG-Electrolux magnetron. Wij adviseren u deze gebruiksaanwijzing vóór het in gebruik nemen zorgvuldig door te lezen, zodat u alle voordelen van het apparaat leert kennen. Bewaar de gebruiksaanwijzing goed, zodat u nog eens iets kunt nalezen. De magnetron beloont u voor deze kleine moeite door onberispelijk te functioneren. - Page 129 4. AG-91D-EU Dutch 28/11/2005 12:47 Page 127 Inhoud Belangrijke aanwijzingen m.b.t. de veiligheid ........128-130 Apparaat en toebehoren .
-
Page 130: Belangrijke Aanwijzingen M.b.t. De Veiligheid
Wend u daarom in geval van Alleen voor magnetrons geschikt servies gebruiken, storing altijd tot onze service-afdeling. Alleen originele AEG-Electrolux onderdelen voldoen aan zie pag. 146. alle eisen! Het apparaat nooit zonder toezicht laten, als u Het apparaat niet met open deur gebruiken. Nooit op... - Page 131 4. AG-91D-EU Dutch 28/11/2005 12:47 Page 129 Belangrijke aanwijzingen m.b.t. de veiligheid Het aansluitsnoer en de stekker nooit in water of Om verbranding te voorkomen andere vloeistof leggen. Gebruik pannenlappen als u levensmiddelen uit de Het aansluitsnoer mag niet over de scherpe rand van ovenruimte neemt.
- Page 132 4. AG-91D-EU Dutch 28/11/2005 12:47 Page 130 Belangrijke aanwijzingen m.b.t. de veiligheid Overige aanwijzingen Geen voorwerpen op de ommanteling zetten als het Breng op geen enkele wijze veranderingen aan het apparaat in werking is. apparaat aan. Gebruik geen kunststof servies voor magnetrongebruik Het apparaat tijdens het gebruik niet bewegen.
-
Page 133: Apparaat En Toebehoren
4. AG-91D-EU Dutch 28/11/2005 12:47 Page 131 Apparaat en toebehoren 1. bevestigingspunten (4 plaatsen) 2. grillelement 3. heteluchtelement 4. ovenlamp 5. bedieningspaneel 6. inschuifrichels 7. afdekking van de microgolvengeleider 8. ovenruimte 9. aandrijfas 10. deurafdichtingen en afsluitvlakken 11. deurgreep 12. ventilatie-openingen 13. -
Page 134: Bedieningspaneel
4. AG-91D-EU Dutch 28/11/2005 12:47 Page 132 Bedieningspaneel Digitaal display en indicaties indicatie IN WERKING indicatie START indicatie GRILL indicatie HETELUCHT indicatie MAGNETRON indicatie INFORMATIE Bedieningstoetsen: toets INFORMATIE toets TAAL draaiknop voor het kiezen van de METHODE voor magnetron voor magnetron + grill voor magnetron + hetelucht voor grill voor hetelucht... -
Page 135: Vóór Het In Gebruik Nemen
4. AG-91D-EU Dutch 28/11/2005 12:47 Page 133 Vóór het in gebruik nemen Dit apparaat beschikt over een energiespaarstand. KOOKTIPS: 1. De stekker in het stopcontact steken. De indicatie De oven heeft een "informatie display systeem" dat u in geeft nog niets aan. de gewenste taal stap voor stap instructies geeft over de verschillende functies. -
Page 136: Gebruik Van Toets Stop
4. AG-91D-EU Dutch 28/11/2005 12:47 Page 134 Gebruik van toets STOP 1. Wissen van een invoerfout bij het programmeren. 2. Lopend proces even onderbreken. 3. Wissen van een programma tijdens het lopende proces door tweemaal indrukken. Instellen van de klok De klok kan als 12-uurs of als 24-uurs-klok worden ingesteld. -
Page 137: Energiespaarstand
4. AG-91D-EU Dutch 28/11/2005 12:47 Page 135 Energiespaarstand Het apparaat wordt geleverd met de energiespaarstand ingesteld. Als u 3 minuten na een voorafgaande bediening, beëindiging van het bereidingsproces of na het aansluiten van het apparaat verder niets onderneemt, schakelt het apparaat automatisch op de energiespaarstand. Open de deur om het apparaat weer in gebruik te nemen. -
Page 138: Wat Zijn Microgolven
4. AG-91D-EU Dutch 28/11/2005 12:47 Page 136 Wat zijn microgolven? Net als radio- en televisiegolven zijn microgolven DE EIGENSCHAPPEN VAN MICROGOLVEN elektromagnetische golven. Microgolven dringen door alle voorwerpen van glas, Microgolven worden in de oven door het magnetron porselein, aardewerk, kunststof, hout of papier. Daarom opgewekt en brengen de watermoleculen in maken de microgolven deze materialen niet heet. -
Page 139: Magnetron Solo
4. AG-91D-EU Dutch 28/11/2005 12:47 Page 137 Magnetron solo U kunt een bereidingstijd van max. 90 minuten bereidingstijd tijdseenheden instellen. 0-5 minuten 10 seconden De tijdseenheid varieert van 10 seconden tot 5 minuten, 5-10 minuten 30 seconden afhankelijk van de totale bereidingstijd zoals 10-30 minuten 1 minuut aangegeven in de tabel. -
Page 140: Grilleren
4. AG-91D-EU Dutch 28/11/2005 12:47 Page 138 Grilleren Het vermogen van het grillelement dat zich in de bovenkant van de ovenruimte bevindt is niet regelbaar. Voorbeeld: toast met kaas 5 minuten grilleren (leg de toast op het hoge rooster). 1. Draai knop METHODE op 2. -
Page 141: Hetelucht
4. AG-91D-EU Dutch 28/11/2005 12:47 Page 139 Hetelucht Met behulp van de heteluchtfunctie en de 10 voorgeprogrammeerde temperatuurstanden kunt u het apparaat als conventionele oven gebruiken. Toets HETELUCHT indrukken Oventemperatuur (°C) Voorbeeld 1: bakken/braden met voorverwarmen Voorverwarmen op 180°C en 20 minuten bakken/braden op 180°C. 1. - Page 142 4. AG-91D-EU Dutch 28/11/2005 12:47 Page 140 Hetelucht Voorbeeld 2: bakken/braden zonder voorverwarmen 20 minuten bakken/braden op 250°C. 4. Druk toets 1. Draai knop METHODE op 2. Voer met knop 3. Voer de gewenste START/QUICK in. voor hetelucht. TIJD/GEWICHT de temperatuur in bereidingstijd (20 (250°C).
-
Page 143: Gecombineerd Gebruik
4. AG-91D-EU Dutch 28/11/2005 12:47 Page 141 Gecombineerd gebruik Het apparaat heeft twee soorten gecombineerd gebruik: magnetron + hetelucht of magnetron + grill. Om gecombineerd gebruik te kiezen, draait u eerst draaiknop METHODE op de gewenste instelling en dan stelt u de bereidingstijd in. - Page 144 4. AG-91D-EU Dutch 28/11/2005 12:47 Page 142 Gecombineerd gebruik Voorbeeld 2: 20 minuten grilleren met 90 watt magnetronvermogen en grill. 1. Draai knop METHODE op 2. Voer de gewenste 3. Druk toets voor COMBI 2 bereidingstijd in (20 VERMOGENSSTAND minuten). 2 maal in (90 watt).
-
Page 145: Andere Nuttige Functies
4. AG-91D-EU Dutch 28/11/2005 12:47 Page 143 Andere nuttige functies 1. Toets MINDER ( ▼ ) / MEER ( ▲ ) Met de toetsen MINDER ( ▼ ) en MEER ( ▲ ) kunt u de geprogrammeerde tijdsinstellingen zonder problemen verkorten of verlengen (om de levensmiddelen minder of meer gaar te laten worden). - Page 146 4. AG-91D-EU Dutch 28/11/2005 12:47 Page 144 Andere nuttige functies 2. START/QUICKFUNCTIE Met toets START/QUICK kunt u de volgende functies bedienen. a. Direct starten U kunt direct 30 seconden lang de gewenste methode inschakelen, zonder een bereidingstijd in te voeren. Voorbeeld: 30 minuten 630 watt magnetronvermogen.
- Page 147 4. AG-91D-EU Dutch 28/11/2005 12:47 Page 145 Andere nuttige functies 3. TIJDENS HET GEBRUIK DE INSTELLING CONTROLEREN U kunt de vermogensstand en de temperatuur controleren, bijv. bij het voorverwarmen. VERMOGENSSTAND CONTROLEREN: Zolang u met uw vinger Om tijdens het bereidingsproces de vermogensstand te deze toets aanraakt, wordt controleren, drukt u toets VERMOGENSSTAND in.
-
Page 148: Geschikt Servies
4. AG-91D-EU Dutch 28/11/2005 12:47 Page 146 Geschikt servies ovenvast materiaal methode magnetron hetelucht grill combinatie ovenvast servies van glas en aardewerk (zonder metalen delen, bijv. Pyrex, ovenschaal, glasplateau) niet-ovenvast glas en porselein (bijv. tafelservies 1) glaskeramiek van vuurvast/koudebestendig materiaal (bijv. Arcoflam) ovenvast geglazuurd aardewerk 2) kunststof, hittebestendig tot 200°C 3) X 3) -
Page 149: Tabel Koken
4. AG-91D-EU Dutch 28/11/2005 12:47 Page 147 Tabel koken GLASPLATEAU EN HETELUCHT MENU TIJD in minuten METHODE POSITIE quiche voorverwarmen 200 ˚C Bodem 15 minuten bakken, direct op het glasplateau, 1) 20 200 ˚C onderste inschuifhoogte, na 1) omkeren, 2) 12 200 ˚C bananencake voorverwarmen... -
Page 150: Recepten Voor Glasplateau En Hetelucht
4. AG-91D-EU Dutch 28/11/2005 12:47 Page 148 Recepten voor glasplateau en hetelucht Bananencake De oven voorverwarmen. 1. De bakvorm invetten en met bakpapier bekleden. ingrediënten 2. Boter en suiker schuimig roeren. 120 g boter 3. Ei en koffie-extract toevoegen en nogmaals roeren. 170 g poedersuiker 4. - Page 151 4. AG-91D-EU Dutch 28/11/2005 12:47 Page 149 Recepten voor glasplateau en hetelucht Kersen-amandelcake 1. De springvorm invetten en met bakpapier bekleden. 2. Margarine en suiker door elkaar roeren tot een ingrediënten schuimige massa. 175 g margarine 3. De eieren één voor één erdoor roeren. 175 g poedersuiker 4.
-
Page 152: Recepten Voor Glasplateau En Grill
4. AG-91D-EU Dutch 28/11/2005 12:47 Page 150 Recepten voor glasplateau en grill Uiensoep 1. De uien snijden, met de bouillon in een schaal doen, zout en peper toevoegen ingrediënten 8 minuten 900 watt 20 g boter 2. De soep over 4 soepkommen verdelen. 250 g uien 3. -
Page 153: Automatische Programma's
4. AG-91D-EU Dutch 28/11/2005 12:47 Page 151 Automatische programma's De automatische programma's stellen zelf de vermogensstand en de bereidingstijd in. U kunt kiezen uit 5 automatische kookprogramma's, 4 automatische programma's voor koken van diepvriesproducten en 7 automatische ontdooiprogramma's. toetsen voor Waarschuwing: AUTOMATISCHE PROGRAMMA'S Voor automatische kookprogramma's en programma's... - Page 154 4. AG-91D-EU Dutch 28/11/2005 12:47 Page 152 Automatische programma's Voorbeeld: 300 g rijst koken met AUTOMATISCH KOOKPROGRAMMA AC-1: 2. Voer met knop TIJD/GEWICHT 1. Druk toets AUTOMATISCH 3. Druk toets START/QUICK in het gewenste gewicht in om het proces te starten KOKEN 1 maal in Controleer het display.
-
Page 155: Tabel Automatische Kookprogramma's
4. AG-91D-EU Dutch 28/11/2005 12:47 Page 153 Tabel automatische kookprogramma's MENUNUMMER HOEVEELHEID TIPS (gewichtseenheid)/SERVIES AC-1 0,1 - 0,3 kg (100 g) • In een grote schaal doen en kokend water toevoegen. rijst grote schaal met deksel • Deksel erop zetten. (uitgangstemperatuur •... -
Page 156: Tabel Diepvriesproducten Koken
4. AG-91D-EU Dutch 28/11/2005 12:47 Page 154 Tabel diepvriesproducten koken MENUNUMMER HOEVEELHEID TIPS (gewichtseenheid)/SERVIES ACF-1 koken 0,3 - 1,0 kg* (100 g) • Gerecht in een voor de magnetron geschikte schaal diepgevroren schaal met deksel doen. gerechten • Indien door de fabrikant aangegeven, wat vloeistof * Als de fabrikant aangeeft dat (uitgangstemperatuur toevoegen. -
Page 157: Tabel Automatische Ontdooiprogramma's
4. AG-91D-EU Dutch 28/11/2005 12:47 Page 155 Tabel automatische ontdooiprogramma's MENUNUMMER HOEVEELHEID TIPS (gewichtseenheid)/SERVIES AD-1 ontdooien 0,2 - 1,0 kg (100 g) • Op een bord in het midden van het draaiplateau zetten. biefstuk en (zie aanwijzing op pag. • Als het akoestische signaal klinkt, vlees omkeren, evt. uit karbonade 156) elkaar halen. - Page 158 4. AG-91D-EU Dutch 28/11/2005 12:47 Page 156 Tabel automatische ontdooiprogramma's MENUNUMMER HOEVEELHEID TIPS (gewichtseenheid)/SERVIES AD-7 ontdooien 0,1 - 1,0 kg (100 g) • Op een plat bord in het midden van het draaiplateau brood plat bord zetten. (uitgangstemperatuur • Als het akoestische signaal klinkt, sneetjes opnieuw -18°...
-
Page 159: Recepten Voor Automatische Kookprogramma's Ac-4
4. AG-91D-EU Dutch 28/11/2005 12:47 Page 157 Recepten voor automatische kookprogramma's AC-4 Aubergine-macaronischotel 1. Water, olie en zout in een schaal doen, afdekken en aan de kook laten komen. (voor ca. 1,5 kg) 3-5 minuten 900 watt ingrediënten 2. Macaroni in de schaal doen. Omroeren en laten 500 ml water intrekken. -
Page 160: Recepten Voor Automatische Kookprogramma's Ac-5
4. AG-91D-EU Dutch 28/11/2005 12:47 Page 158 Recepten voor automatische kookprogramma's AC-5 Worteltaart 1. Bakvorm invetten. 2. Eidooiers en suiker met een handmixer vermengen. (voor ca. 1,1 kg) 3. Wortelen, citroensap en amandelen toevoegen. ingrediënten 4. Bloem en bakpoeder met elkaar vermengen, aan het 1 tl boter of margarine om de vorm in te vetten wortelmengsel toevoegen en goed door elkaar roeren. - Page 161 4. AG-91D-EU Dutch 28/11/2005 12:47 Page 159 Recepten voor automatische kookprogramma's AC-5 Appeltaart met calvados 1. Bloem en bakpoeder vermengen, suiker, vanillesuiker, zout, ei, amandelolie en boter toevoegen en met de (voor ca. 1,3 kg) kneedhaak van een handmixer tot een deeg roeren. ingrediënten 2.
-
Page 162: Reiniging En Onderhoud
4. AG-91D-EU Dutch 28/11/2005 12:47 Page 160 Reiniging en onderhoud Ovenruimte VOORZICHTIG: GEBRUIK GEEN OVENREINIGERS, 1. Na elk gebruik het nog warme apparaat met een STOOMREINIGERS, SCHUURMIDDELEN, MIDDELEN zachte, vochtige doek of spons afnemen, om lichte MET BIJTENDE SODA OF SCHUURSPONSJES OM verontreinigingen te verwijderen. -
Page 163: Wat Te Doen Als
4. AG-91D-EU Dutch 28/11/2005 12:47 Page 161 Wat te doen als … … de magnetron niet goed functioneert? ... de magnetron niet uitschakelt? Controleer of - Trek de stekker uit het stopcontact of - de stekker in het stopcontact zit, schakel de zekering in de huisinstallatie uit. -
Page 164: Service
Noteer modelnummer en serienummer. Deze nummers beschreven. vindt u op het typeplaatje van het apparaat. Adres service-afdeling AEG fabrieksservice model ........Postbus 120 S-nr......... 2400 AC Alphen aan den Rijn... -
Page 165: Garantievoorwaarden Nederland
4. AG-91D-EU Dutch 28/11/2005 12:47 Page 163 Garantievoorwaarden NEDERLAND Onze producten worden met de grootst mogelijke 9. Het recht op garantie vervalt wanneer het defect werd zorgvuldigheid geproduceerd. Desondanks kan het veroorzaakt door herstelling of ingrepen door derden voorkomen dat er een defect optreedt. Onze servicedienst die niet bevoegd of niet deskundig zijn, of wanneer zal dit op verzoek herstellen, zowel binnen als buiten de het product voorzien werd van toebehoren of... - Page 166 4. AG-91D-EU Dutch 28/11/2005 12:47 Page 164 Garantievoorwaarden NEDERLAND Reparatievoorwaarden Onze reparatievoorwaarden zijn conform de afspraak tussen de Consumentenbond en Vlehan*. Art. 1 Aan de consument zal na een melding van een Art. 5 De consument ontvangt een gespecificeerde storing zo mogelijk direct, doch uiterlijk binnen één rekening met vermelding van type en serienummer werkdag worden medegedeeld op welke dag het van het apparaat, omschrijving van de diagnose,...
-
Page 167: Waarborgvoorwaarden België
4. AG-91D-EU Dutch 28/11/2005 12:47 Page 165 Waarborgvoorwaarden BELGIË Onze toestellen worden met de grootst mogelijke 10. Toestellen die gemakkelijk kunnen worden vervoerd zorgvuldigheid geproduceerd. Desondanks kan het dienen te worden overhandigd of gezonden naar onze voorkomen dat er een defect optreedt. Onze klantendienst klantendienst. -
Page 168: Technische Gegevens
4. AG-91D-EU Dutch 28/11/2005 12:47 Page 166 Technische gegevens Aansluiting aan : 230 V, 50 Hz, één fase Zekering : min. 16 A Opgenomen vermogen: magnetron : 1.5 kW grill : 2.8 kW grill/magnetron : 2.8 kW hetelucht : 2.8 kW hetelucht/magnetron : 2.95 kW Nuttig vermogen:... -
Page 169: Belangrijke Informatie
4. AG-91D-EU Dutch 28/11/2005 12:47 Page 167 Belangrijke informatie Milieuvriendelijke afvalverwerking van verpakking en oude apparaten Verpakking Onze magnetrons moeten worden vervoerd en hebben daarom een effectieve beschermende verpakking nodig. Daarbij beperken wij ons tot het absoluut noodzakelijke. Delen van de verpakking (bijv. folie, styropor) kunnen gevaarlijk zijn voor kinderen. Verstikkingsgevaar! Houd de verpakking uit de buurt van kinderen. -
Page 170: Installatie-Aanwijzing
4. AG-91D-EU Dutch 28/11/2005 12:47 Page 168 Installatie-aanwijzing INSTALLEREN VAN HET APPARAAT 1. Verwijder de verpakking en controleer het apparaat op transportschade. 2. Als de magnetron wordt ingebouwd in positie C, moeten de ventilatie-openingen (zie afbeelding) behouden blijven. 3. Breng m.b.v. het instelsjabloon (TMAPTA004URR0) vier bevestigingsblokken in de kast aan. - Page 171 4. AG-91D-EU Dutch 28/11/2005 12:47 Page 169 Installatie-aanwijzing AANSLUITING OP HET STROOMNET • Zorg ervoor dat de stekker makkelijk bereikbaar is, zodat hij in geval van nood snel uit het stopcontact kan worden getrokken. • Plaats het stopcontact niet achter de kast. •...
-
Page 172: Estimado Cliente
12:48 Page 170 Estimado cliente, Le agradecemos la compra de un horno microondas AEG-Electrolux y la confianza que ha depositado en la marca AEG-Electrolux. Antes de utilizar por primera vez su horno microondas AEG-Electrolux, sírvase leer atentamente el libro de instrucciones. Esto le permitirá sacar partido a todas las funciones que ofrece el aparato. - Page 173 5. AG-91D-EU Spanish 28/11/2005 12:48 Page 171 Indice Medidas importantes de seguridad ......... .172 - 174 Horno y accesorios .
-
Page 174: Medidas Importantes De Seguridad
5. AG-91D-EU Spanish 28/11/2005 12:48 Page 172 Medidas importantes de seguridad INSTRUCCIONES DE SEGURIDAD IMPORTANTES: LÉALAS ATENTAMENTE Y CONSÉRVELAS PARA CONSULTAS FUTURAS. Para evitar incendios Para hacer palomitas de maíz (popcorn) utilice sólo un horno de microondas especial para ello. Los hornos de microondas no deben dejarse No guarde comida ni ningún otro alimento dentro del funcionando sin que haya alguien controlando su... - Page 175 Si la lámpara se estropea, consúltelo con su distribuidor Para evitar quemaduras, compruebe siempre la o con un técnico de servicio AEG-Electrolux autorizado. temperatura de los alimentos y remuévalos antes Si se estropea el cable de alimentación de este aparato, de servirlos, prestando especial atención a la...
- Page 176 5. AG-91D-EU Spanish 28/11/2005 12:48 Page 174 Medidas importantes de seguridad Los niños pueden utilizar los hornos de microondas sólo No utilice envases o recipientes de plástico para la cuando estén bajo supervisión de las personas mayores. cocción a microondas si el horno está todavía caliente No apoyarse ni agarrarse de la puerta del horno.
-
Page 177: Horno Y Accesorios
Esto no afecta al rendimiento de la cocción. • Cuando encargue accesorios al comercio o técnico de servicio AEG-Electrolux autorizado, sírvase mencionar dos cosas del nombre de la pieza y la denominación del modelo. -
Page 178: Panel De Mandos
5. AG-91D-EU Spanish 28/11/2005 12:48 Page 176 Panel de mandos Display e indicadores digitales: 1 Indicador de COCCIÓN 2 Indicador de INICIO 3 Indicador de GRILL 4 Indicador de CONVECCIÓN 5 Indicador de MICROONDAS 6 Indicador de INFORMACIÓN Teclas de operación 7 Tecla de INFORMACIÓN 8 Tecla de IDIOMA 9 Mando de MODO DE COCCIÓN... -
Page 179: Antes De La Puesta En Funcionamiento
5. AG-91D-EU Spanish 28/11/2005 12:48 Page 177 Antes de la puesta en funcionamiento Su horno dispone de un modo de ahorro de energía. 4. Seleccione un idioma (Ver a continuación). 1. Enchufe el horno. No aparecerá nada en el NOTA: Si va a utilizar el horno en inglés, no tiene visualizador en esta ocasión. -
Page 180: Utilización De La Ecla De Stop
5. AG-91D-EU Spanish 28/11/2005 12:48 Page 178 Utilización de la tecla de STOP Utilización de la tecla de parada (STOP). 1. Borrar los erroes que haya cometido durante la programación. 2. Parar el horno temporalmente durante la cocción. 3. Cancelar un programa durante la cocción, pulse la tecla de parada STOP dos veces. -
Page 181: Modo De Ahorro De Energia
5. AG-91D-EU Spanish 28/11/2005 12:48 Page 179 Modo de ahorro de energia El horno viene preajustado para la modalidad “modo de ahorro de energía”. Si no realiza ninguna operación transcurridos 3 minutos desde la última acción, como por ejemplo, cierre la puerta o al final de una sesión de cocción, la alimentación se desactivará... -
Page 182: Que Son Las Microondas
5. AG-91D-EU Spanish 28/11/2005 12:48 Page 180 ¿Que son las microondas? Las microondas son - igual que las ondas de radio y PROPIEDADES televisión - ondas electromagnéticas. MICROONDAS En el horno de microondas, el magnetrón genera Las microondas penetran todos objetos no metálicos microondas haciendo que las moléculas del agua oscilen fabricados en materiales de vidrio, porcelana, cerámica, dentro de producto alimenticio. -
Page 183: Cocción Con Microondas
5. AG-91D-EU Spanish 28/11/2005 12:48 Page 181 Cocción con microondas El horno puede programarse para hasta 90 minutos Tiempo de cocción Unidad de incrementos (90.00). La unidad de entrada de tiempo de cocción 0-5 minutos 10 segundos (descongelación) varía de 10 segundos a 5 minutos. 5-10 minutos 30 segundos Depende del total de tiempo de cocción... -
Page 184: Cocción Al Grill
5. AG-91D-EU Spanish 28/11/2005 12:48 Page 182 Cocción al grill El elemento calefactor del grill de la cavidad del horno, sólo tiene un ajuste de potencia. Ejemplo: Para hacer una tostada de queso en 5 minutos usando sólo el GRILL: (Ponga la tostada en la rejilla alta). 3. -
Page 185: Cocción Por Convección
5. AG-91D-EU Spanish 28/11/2005 12:48 Page 183 Cocción por convección Este horno puede ser utilizado como horno convencional utilizando el dispositivo de convección a 10 temperaturas preajustadas. Pulse la tecla de CONVECCIÓN Temp. horno ( o C) Ejemplo 1: Para cocinar con precalentamiento Si desea precalentar el horno a 180 C y cocinar durante 20 minutos a 180 Cuando se alcance la... - Page 186 5. AG-91D-EU Spanish 28/11/2005 12:48 Page 184 Cocción por convección Ejemplo 2: cocción sin precalentamiento Si desea cocinar a 250 C durante 20 minutos. 1. Seleccione el modo de 2. Use el mando de 4. Pulse la tecla 3. Seleccione la TIEMPO/ PESO para cocción girando el START/QUICK.
-
Page 187: Cocción Combinada
5. AG-91D-EU Spanish 28/11/2005 12:48 Page 185 Cocción combinada El horno dispone de 2 modos de cocción COMBINADA que usan combina la cocción por microondas y la cocción por convección o la cocción microondas y la grill. Para elegir el modo de cocción COMBINADA, gire el mando de MODO DE COCCIÓN hasta la posición deseada y determine luego el tiempo de cocción. - Page 188 5. AG-91D-EU Spanish 28/11/2005 12:48 Page 186 Cocción combinada Ejemplo 2: Cocinar durante 20 minutos en DUAL 2 utilizando una potencia de microondas de 90 W y el GRILL. 1. Gire el mando de MODO DE 2. Introduzca el tiempo 3.
-
Page 189: Otras Funciones Cómodas
5. AG-91D-EU Spanish 28/11/2005 12:48 Page 187 Otras funciones cómodas 1. Teclas de MENOS ( ▼ )/MÁS ( ▲ ) Las teclas MENOS ( ▼ ) y MÁS ( ▲ ) permiten aumentar o disminuir fácilmente los tiempos programados (para que el alimento quede más o menos hecho) que se utilizan en las OPERACIONES AUTOMÁTICAS o cuando el horno ya está... - Page 190 5. AG-91D-EU Spanish 28/11/2005 12:48 Page 188 Otras funciones cómodas 2. FUNCIÓN DE COCCIÓN RÁPIDA La tecla de START/QUICK permite utilizar las dos funciones siguientes: a) Cocción de 30 segundos Es posible cocinar en el modo de cocción que desee durante 30 segundos sin introducir el tiempo de cocción. Ejemplo: Suponga que quiere realizar la cocción durante 1 minuto con una potencia de microondas de 630 vatios.
- Page 191 5. AG-91D-EU Spanish 28/11/2005 12:48 Page 189 Otras funciones cómodas 3. COMPROBACIÓN DE AJUSTES ESTANDO EL HORNO EN FUNCIONAMIENTO Durante el precalentamiento se puede comprobar el nivel de potencia, la hora y las temperaturas del horno. COMPROBACIÓN DEL NIVEL DE POTENCIA: El nivel de potencia Si desea comprobar la potencia durante la cocción aparecerá...
-
Page 192: Recipientes/Utensilios Adecuados
5. AG-91D-EU Spanish 28/11/2005 12:48 Page 190 Recipientes/Utensilios adecuados Material del recipiente Modo de funcionamiento Microondas Convección Grill Combinación Fuentes de cerámica y vidrio refractario (sin piezas de metal; por ejemplo Pyrex, recipientes para horno, bandejas de vidrio). Porcelana y vidrio no refractario (por ejemplo, vajilla de mesa 1). -
Page 193: Cuadros De Cocción
5. AG-91D-EU Spanish 28/11/2005 12:48 Page 191 Cuadros de cocción HORNEADO EN LA BANDEJA DE VIDRIO CON LA FUNCIÓN DE CONVECCIÓN MENÚ TIEMPO MODO POSICIÓN Quiche Precalentar 200 ˚C Cocinar la base durante 15'00, directamente en una 1) 20’00 200 ˚C bandeja de vidrio, posición inferior, y girar tras 1) 2) 12’00 200 ˚C... -
Page 194: Recetas Para La Bandeja De Vidro Y Convección
5. AG-91D-EU Spanish 28/11/2005 12:48 Page 192 Recetas para la bandeja de vidrio y convección Bizcocho de plátano Precalentar el horno. 1. Engrasar todo el recipiente del bizcocho. Ingredientes 2. Batir la mantequilla junto con el azúcar. 120 g mantequilla 3. - Page 195 5. AG-91D-EU Spanish 28/11/2005 12:48 Page 193 Recetas para la bandeja de vidrio y convección Tarta de cerezas y almendras 1. Engrasar todo el molde desmontable. 2. Batir la mantequilla y el azúcar hasta que quede una Ingredientes mezcla ligera y suave. 175 g margarina 3.
-
Page 196: Recetas Para La Bandeja De Vidro Y Grill
5. AG-91D-EU Spanish 28/11/2005 12:48 Page 194 Recetas para la bandeja de vidrio y grill Sopa de cebolla 1. Cortar la cebolla en rodajas, colocar en un cuenco con el caldo, la sal y la pimienta, y cocinar durante Ingredientes 8 Min. -
Page 197: Operación Automática
5. AG-91D-EU Spanish 28/11/2005 12:48 Page 195 Operación automática La OPERACIÓN AUTOMÁTICA calcula automáticamente el modo y tiempo de cocción correctos. Se pueden elegir 5 menús de COCCIÓN AUTOMÁTICA, 4 de COCCIÓN AUTOMÁTICA DESDE CONGELACIÓN y 7 de DESCONGELACIÓN AUTOMÁTICA. Advertencia: Teclas AUTOMÁTICA Con COCCIÓN AUTOMÁTICA y COCCIÓN AUTOMÁTICA... - Page 198 5. AG-91D-EU Spanish 28/11/2005 12:48 Page 196 Operación automática Ejemplo: Si desea cocinar Arroz que pesan 300 g con COCCIÓN AUTOMÁTICA (AC-1). 1. Pulsar la tecla de 3. Pulse la tecla de START/QUICK 2. Introduzca el peso deseado COCCIÓN AUTOMÁTICA una vez para iniciar la cocción.
-
Page 199: Cuadro De Cocción Automática
5. AG-91D-EU Spanish 28/11/2005 12:48 Page 197 Cuadro de cocción automática MENÚ Nú. CANTIDAD (Unidad de PROCEDIMIENTO incremento)/UTENSILIOS AC-1 0,1 - 0,3 kg (100 g) • Póngalo en un bol grande y añada agua. Arroz (vaporizado) Bol grande con tapa •... -
Page 200: Cuadro De Cocción Automática Desde Congelación
5. AG-91D-EU Spanish 28/11/2005 12:48 Page 198 Cuadro de cocción automática desde congelación MENÚ Nú. CANTIDAD (Unidad de PROCEDIMIENTO incremento)/UTENSILIOS ACF-1 Cocción 0,3 - 1,0 kg, (100 g) • Transferir el alimento a un plato adecuado para microondas. Comidas Peso totale * •... -
Page 201: Cuadro De Descongelación Automática
5. AG-91D-EU Spanish 28/11/2005 12:48 Page 199 Cuadro de descongelación automática MENÚ Nú. CANTIDAD (Unidad de PROCEDIMIENTO incremento)/UTENSILIOS AD-1 0,2 - 1,0 kg (100 g) • Poner la comida en un plato en el centro del plato giratorio. Descongelación (Ver la nota p.200) •... -
Page 202: Recetas Para Cocción Automática Ac-4
5. AG-91D-EU Spanish 28/11/2005 12:48 Page 200 Cuadro de descongelación automática NOTA: 1. Bistecs y chuletas deben congelarse en una sola capa. 2. La carne picada se debe congelar en pequeñas porciones. 3. Después de dar vuelta, proteger las partes descongeladas con trozos pequeños planos de lámina de aluminio. 4. -
Page 203: Recetas Para Cocción Automática Ac-5
5. AG-91D-EU Spanish 28/11/2005 12:48 Page 201 Recetas para cocción automática AC-5 Tarta de zanahorias 1. Untar el molde. 2. Batir, con la batidora de mano, las yemas y el azúcar (La receta produce approximadamente 1,1 kg) para obtener una masa cremosa. Ingredientes 3. -
Page 204: Cuidado Y Limpieza
5. AG-91D-EU Spanish 28/11/2005 12:48 Page 202 Cuidado y limpieza Interior del horno PRECAUCIÓN: UTILICE PRODUCTOS 1. Para limpiar el horno, quite las partes de comida COMERCIALES PARA LA LIMPIEZA DE HORNOS, derramada y las salpicaduras con un paño APARATOS DE LIMPIEZA A VAPOR, PRODUCTOS humedecido o con una esponja, después de usarlo y ABRASIVOS, PRODUCTOS FUERTES, NINGÚN mientras está... -
Page 205: Que Hacer Si
Cerciórese de que - Póngase en contacto con un agente - funcionen los fusibles de la caja de fusibles, autorizado de servicio de AEG-Electrolux. - no haya habido algún corte de energía..la iluminación interior no funciona? - Si se siguen fundiendo los fusibles, póngase - Llame a un técnico autorizado del servicio de... -
Page 206: Certificado De Garantia
5. AG-91D-EU Spanish 28/11/2005 12:48 Page 204 Certificado de garantía, Estimado Usuario : Queremos felicitarle por su compra y agradecerle la confianza depositada en nuestra Compañía. Su electrodoméstico dispone de una garantía de 24 meses para piezas, mano de obra y desplazamiento. - Page 207 5. AG-91D-EU Spanish 28/11/2005 12:48 Page 205...
-
Page 208: Conservar Durante Toda La Vigencia De La Garantía La Factura De Compra
5. AG-91D-EU Spanish 28/11/2005 12:48 Page 206 Conservar durante toda la vigencia de la garantía la factura de compra Condiciones de Garantía: ELECTROLUX HOME PRODUCTS ESPAÑA, S.A. garantiza al usuario del aparato cuyos datos de identificación figuran en el presente documento, durante el plazo de dos (2) años desde la fecha de su entrega, la reparación totalmente gratuita de las averías que experimente el aparato, incluyendo la presente garantía tanto el coste de las piezas de recambio como el de la mano de obra y, en su caso, el del desplazamiento del personal técnico del Servicio Oficial de la Marca al domicilio del usuario. -
Page 209: Especificaciones
Desechar los materiales de embalaje y los aparatos viejos de un modo responsable con el medio ambiente Material de embalaje Los hornos microondas AEG-Electrolux vienen eficazmente embalados para protegerlos durante el transporte. Solo se utiliza el embalaje imprescindible. Los materiales de embalaje (p. ej. papel metalizado o espuma de estireno) pueden suponer un riesgo para los niños. -
Page 210: Instalación
5. AG-91D-EU Spanish 28/11/2005 12:48 Page 208 Instalación INSTALACIÓN DEL APARATO 1. Retire todo el embalaje y compruebe con cuidado si hay alguna señal de desperfectos. 2. Si el microondas se coloca en la posición C, asegúrese de que haya los mínimos espacios de aire, tal y como se muestra en la imagen. - Page 211 El fabricante rechaza responsabilidad alguna en caso de incumplimiento de esta medida de seguridad. Si el enchufe instalado en su aparato no es adecuado para la toma de corriente de que dispone, debe llamar a su agente local autorizado de servicio de AEG- Electrolux.
-
Page 212: Caro Cliente
12:49 Page 210 Caro Cliente, Obrigado por ter adquirido um forno a micro-ondas AEG-Electrolux e por ter confiado na marca AEG-Electrolux. Antes de utilizar o seu forno a micro-ondas AEG-Electrolux pela primeira vez, leia atentamente este manual de instruções. Assim, poderá aproveitar ao máximo todas as funções incluídas neste aparelho. - Page 213 6. AG-91D-EU Portuguese 28/11/2005 12:49 Page 211 Índice Instruções de segurança importantes ........212 - 214 Forno &...
-
Page 214: Instruções De Segurança Importantes
óleo para fritar. É impossível controlar a de alimentação de imediato e contacte um agente temperatura do óleo, sendo que este pode incendiar-se. autorizado da AEG-Electrolux. Para fazer pipocas, utilize apenas recipientes próprios Não coloque o cabo de alimentação ou a ficha dentro para este efeito (especiais para micro-ondas). - Page 215 Não tente substituir a lâmpada do forno sozinho, nem Para evitar queimaduras, verifique a temperatura permita que alguém, não autorizado pela AEG-Electrolux, dos alimentos e mexa antes de servir. Deve o faça. Se a lâmpada se fundir, consulte o seu revendedor redobrar os cuidados caso os alimentos ou líquidos...
- Page 216 6. AG-91D-EU Portuguese 28/11/2005 12:49 Page 214 Instruções de segurança importantes Ao fazê-lo poderá danificá-lo. Sempre que utilizar um NOTA: prato tostador ou material térmico, coloque um Se não estiver seguro quanto à ligação do forno, isolador resistente ao calor, como por exemplo um contacte um electricista qualificado autorizado.
-
Page 217: Forno & Acessórios
Este facto não afecta de forma alguma a cozedura. • Ao encomendar acessórios, mencione dois itens: nome da peça e nome do modelo ao revendedor ou agente autorizado da AEG-Electrolux. -
Page 218: Painel De Controlo
6. AG-91D-EU Portuguese 28/11/2005 12:49 Page 216 Painel de controlo Visor digital e indicadores: 1 Indicador COZEDURA 2 Indicador INICIAR 3 Indicador GRILL 4 Indicador CONVECÇÃO 5 Indicador MICRO-ONDAS 6 Indicador INFORMAÇÃO Botões de funcionamento: 7 Botão INFORMAÇÃO 8 Botão IDIOMA 9 Manípulo MODO COZEDURA micro-ondas micro-ondas com GRILL... -
Page 219: Antes Da Utilização
6. AG-91D-EU Portuguese 28/11/2005 12:49 Page 217 Antes da utilização O forno possui um modo de poupança de energia. TRUQUES PARA A UTILIZAÇÃO DO FORNO: 1. Ligue o forno à corrente. Neste momento ainda não O forno possui um “Information Display System” que aparece nada no visor. -
Page 220: Utilizar O Botão Stop
6. AG-91D-EU Portuguese 28/11/2005 12:49 Page 218 Utilizar o botão STOP Utilize o botão STOP para: 1. Apagar um erro durante a programação. 2. Interromper o forno temporariamente durante a cozedura. 3. Cancelar um programa durante a cozedura (prima o botão STOP duas vezes). -
Page 221: Modo De Economia De Energia
6. AG-91D-EU Portuguese 28/11/2005 12:49 Page 219 Modo de economia de energia O seu forno é entregue com o modo de poupança de energia predefinido. Se depois de utilizar o forno, não fizer nada passados 3 minutos (por exemplo, depois de fechar a porta ou no final da cozedura) o forno desliga-se automaticamente. -
Page 222: O Que São As Micro-Ondas
6. AG-91D-EU Portuguese 28/11/2005 12:49 Page 220 O que são as micro-ondas? As micro-ondas são como as ondas electromagnéticas Propriedades das micro-ondas do rádio ou da televisão. As micro-ondas atravessam todos os objectos não- As micro-ondas são geradas no forno de micro-ondas metálicos de vidro, porcelana, cerâmica, plástico, através de um magnetrão provocando a oscilação das madeira e papel. -
Page 223: Cozinhar Em Micro-Ondas
6. AG-91D-EU Portuguese 28/11/2005 12:49 Page 221 Cozinhar em micro-ondas O seu forno pode ser programado para um tempo Tempo de cozedura Unidade de aumento máximo de 90 minutos (90.00). A unidade de 0-5 minutos 10 ssegundos introdução do tempo de cozedura (descongelação) varia 5-10 minutos 30 segundos entre os 10 segundos e os cinco minutos. -
Page 224: Cozedura Grill
6. AG-91D-EU Portuguese 28/11/2005 12:49 Page 222 Cozedura grill O elemento de aquecimento do grill, na parte superior da cavidade do forno, só tem um nível de potência. Exemplo: Para torrar pão com queijo durante 5 minutos (coloque o pão na grelha alta). 3. -
Page 225: Cozedura Convecção
6. AG-91D-EU Portuguese 28/11/2005 12:49 Page 223 Cozedura convecção O seu forno pode ser usado como um forno convencional utilizando o modo de convecção e as 10 temperaturas predefinidas. PRIMA O BOTÃO CONVECÇÃO Temp. forno (º C) Exemplo 1: Para cozinhar com pré-aquecimento Para pré-aquecer o forno a 180º... - Page 226 6. AG-91D-EU Portuguese 28/11/2005 12:49 Page 224 Cozedura convecção Exemplo 2: Para cozinhar sem pré-aquecimento Para cozinhar a 250º C durante 20 minutos. 1. Seleccione o MODO DE 2. Utilize o manípulo 4. Prima o botão 3. Seleccione a COZEDURA rodando o TEMPORIZADOR/PE START/QUICK.
-
Page 227: Cozedura Duplo
6. AG-91D-EU Portuguese 28/11/2005 12:49 Page 225 Cozedura duplo O seu forno integra 2 modos de cozedura DUPLO combinando 1) Convecção e micro-ondas e 2) Grill e micro-ondas. Para seleccionar o modo de cozedura DUPLO rode o manípulo MODO DE COZEDURA para a posição pretendida e depois seleccione o tempo de cozedura. - Page 228 6. AG-91D-EU Portuguese 28/11/2005 12:49 Page 226 Cozedura duplo Exemplo 2: Para cozinhar durante 20 minutos no modo DUPLO 2, utilizando uma potência de micro-ondas de 90 W e o GRILL. 1. Seleccione o MODO DE 2. Seleccione o tempo 3.
-
Page 229: Outras Funções Úteis
6. AG-91D-EU Portuguese 28/11/2005 12:49 Page 227 Outras funções úteis 1. Botão MENOS ( ▼ )/MAIS ( ▲ ) Os botões MENOS ( ▼ ) e MAIS ( ▲ ) permitem-lhe diminuir ou aumentar os tempos programados com toda a facilidade (para um resultado mais ou menos bem passado), durante o processo de cozedura. - Page 230 6. AG-91D-EU Portuguese 28/11/2005 12:49 Page 228 Outras funções úteis 2. FUNÇÃO DE COZEDURA RÁPIDA O botão START/QUICK permite-lhe aceder às funções seguintes: a) Cozedura em 30 segundos Pode cozinhar no modo de cozedura pretendido, durante 30 segundos, sem ter de seleccionar o tempo de cozedura.
- Page 231 6. AG-91D-EU Portuguese 28/11/2005 12:49 Page 229 Outras funções úteis 3. PARA VERIFICAR AS DEFINIÇÕES COM O FORNO EM FUNCIONAMENTO Pode verificar o nível de potência e a temperatura actual do forno (por exemplo, durante o pré-aquecimento). PARA VERIFICAR O NÍVEL DE POTÊNCIA: Enquanto estiver a premir o Para verificar o nível de potência do micro-ondas botão, o nível de potência...
-
Page 232: Recipientes Apropriados Para Micro-Ondas
6. AG-91D-EU Portuguese 28/11/2005 12:49 Page 230 Recipientes apropriados para micro-ondas Material dos recipientes Modo de funcionamento Micro-ondas Convecção Grill Combinado Vidro e cerâmica específicos para micro- ondas (sem peças metálicas, por exemplo, Pyrex, tabuleiros para servir à mesa, tabuleiros de vidro). Vidro e porcelana não específicos para micro-ondas (ex.: louça de mesa 1). -
Page 233: Tabelas De Cozedura
6. AG-91D-EU Portuguese 28/11/2005 12:49 Page 231 Tabelas de Cozedura COZEDURA UTILIZANDO O TABULEIRO DE VIDRO NO MODO DE CONVECÇÃO MENU TEMPO MODO POSIÇÃO Quiche Pré-aqueça 200 ˚C Cozinhar a base durante 15´00, directamente no 1) 20’00 200 ˚C tabuleiro de vidro, posição inferior, voltar depois de 1) 2) 12’00 200 ˚C Bolo de Banana... -
Page 234: Receitas Para O Tabuleiro De Vidro E Modo De Convecção
6. AG-91D-EU Portuguese 28/11/2005 12:49 Page 232 Receitas para o tabuleiro de vidro e modo de convecção Bolo de Banana Pré-aqueça o forno. 1. Unte e forre a tarteira. Ingredientes 2. Bata a manteiga com o açúcar. 120 g manteiga 3. - Page 235 6. AG-91D-EU Portuguese 28/11/2005 12:49 Page 233 Receitas para o tabuleiro de vidro e modo de convecção Bolo de Cerejas e Amêndoa 1. Unte e forre uma forma de mola com papel vegetal. 2. Bata a margarina com o açúcar até obter um creme Ingredientes leve e fofo.
-
Page 236: Receitas Para O Tabuleiro De Vidro E Modo De Grill
6. AG-91D-EU Portuguese 28/11/2005 12:49 Page 234 Receitas para o tabuleiro de vidro e modo de grill Sopa de Cebola 1. Corte as cebolas às rodelas, coloque-as numa tigela com o caldo e tempere com sal e pimenta. Cozinhe durante Ingredientes 8 Min. -
Page 237: Operações Automáticas
6. AG-91D-EU Portuguese 28/11/2005 12:49 Page 235 Operações Automáticas As OPERAÇÕES AUTOMÁTICAS seleccionam automaticamente o modo e o tempo de cozedura correctos. Pode seleccionar entre 5 menus COZEDURA AUTOMÁTICA, 4 menus COZEDURA AUTOMÁTICA DE CONGELADOS e 7 menus DESCONGELAÇÃO AUTOMÁTICA. Botão AUTOMATIC AVISO: Para COZEDURA AUTOMÁTICA e COZEDURA... - Page 238 6. AG-91D-EU Portuguese 28/11/2005 12:49 Page 236 Operações Automáticas Exemplo: Para cozinhar 300 g de Arroz utilizando o COZEDURA AUTOMÁTICA (AC-1). 1. Prima o botão 3. Inicie a cozedura premindo o 2. Seleccione o peso rodando o COZEDURA botão START/QUICK. manípulo TEMPORIZADOR/PESO AUTOMÁTICA para até...
-
Page 239: Tabela De Cozedura Automática
6. AG-91D-EU Portuguese 28/11/2005 12:49 Page 237 Tabela de cozedura automática N.º MENU PESO (Unidade de PROCEDIMENTO Aumento)/ UTENSÍLIOS 0,1 - 0,3 kg (100 g) • Coloque o arroz numa tigela grande e cubra com água a ferver. AC-1 Arroz (semi-cozido) Tigela grande e tampa •... -
Page 240: Tabela De Cozedura Automática Decongelados
6. AG-91D-EU Portuguese 28/11/2005 12:49 Page 238 Tabela de cozedura automática de congelados N.º MENU PESO (Unidade de PROCEDIMENTO Aumento)/ UTENSÍLIOS 0,3 - 1,0 kg* (100 g) • Transfira a refeição para uma caçarola própria para ACF-1 Cozedura Caçarola com tampa micro-ondas. -
Page 241: Tabela De Decongelação Automática
6. AG-91D-EU Portuguese 28/11/2005 12:49 Page 239 Tabela de descongelação automática N.º MENU PESO (Unidade de PROCEDIMENTO Aumento)/ UTENSÍLIOS 0,2 - 1,0 kg (100 g) • Coloque a refeição num prato raso no centro do prato AD-1 giratório. (Ver nota página 240) Descongelação •... -
Page 242: Receitas Para Cozedura Automática Ac-4
6. AG-91D-EU Portuguese 28/11/2005 12:49 Page 240 Tabela de descongelação automática NOTA: 1. Os bifes e costeletas devem ser congelados numa única camada. 2. A carne picada deve ser congelada numa camada fina. 3. Depois de voltar os alimentos, proteja as porções já descongeladas com pedaços de folha de alumínio. 4. -
Page 243: Receitas Para Cozedura Automática Ac-5
6. AG-91D-EU Portuguese 28/11/2005 12:49 Page 241 Receitas para cozedura automática AC-5 Bolo de Cenoura 1. Unte a forma. 2. Bata as gemas com o açúcar. (Esta receita corresponde a cerca de 1,1 kg) 3. Adicione as cenouras, o sumo de limão e a amêndoa. Ingredientes 4. -
Page 244: Cuidados & Limpeza
6. AG-91D-EU Portuguese 28/11/2005 12:49 Page 242 Cuidados & limpeza Interior do forno CUIDADO: NÃO UTILIZE PRODUTOS DE LIMPEZA 1. Limpe o forno depois de cada utilização, com o PARA FORNOS, PRODUTOS DE LIMPEZA À BASE DE forno ainda quente, removendo todos os salpicos e VAPOR, PRODUTOS DE LIMPEZA ABRASIVOS OU resíduos de alimentos com um pano, ou esponja, AGRESSIVOS OU QUE CONTENHAM HIDRÓXIDO... -
Page 245: O Que Fazer Se
... o micro-ondas não se desligar? correctamente? - Isole o aparelho da caixa de fusíveis. Verifique se - Contacte um agente autorizado da AEG- - os fusíveis incluídos na caixa de fusíveis Electrolux. estão a funcionar, ... a luz interior do micro-ondas não estiver - não houve nenhum corte de energia. -
Page 246: Certificado De Garantia
6. AG-91D-EU Portuguese 28/11/2005 12:49 Page 244 Certificado de garantia, Caro Utilizador : Queremos felicitá-lo pela sua compra e agradecer-Ihe a confiança depositada na nossa Empresa.. O seu electrodoméstico possui uma garantia de 24 meses para peças, mãode-obra e deslocações. Para beneficiar desta garantia NÃO ESQUEÇA DE REGISTAR O SEU ELECTRODOMÉSTICO. - Page 247 6. AG-91D-EU Portuguese 28/11/2005 12:49 Page 245...
- Page 248 6. AG-91D-EU Portuguese 28/11/2005 12:49 Page 246 Condições de garantia 1. O aparelho que acaba de adquirir possui uma garantia de 2 anos a partir da data de aquisição. Os pedidos de assistência na garantia são gratuitos, mediante apresentação do respectivo certificado juntamente com a factura de compra.
-
Page 249: Especificaçaões
Eliminação responsável em termos ecológicos das embalagens e aparelhos antigos Material de embalagem Os fornos a micro-ondas da AEG-Electrolux necessitam de uma embalagem eficaz para os proteger durante o transporte. Só são utilizadas as embalagens realmente necessárias. O material de embalagem (ex.: película transparente ou esferovite) pode colocar as crianças em risco. -
Page 250: Instalação
6. AG-91D-EU Portuguese 28/11/2005 12:49 Page 248 Instalação INSTALAÇÃO DO APARELHO 1. Retire todas as embalagens e verifique cuidadosamente a existência de sinais de danos. 2. Se o micro-ondas for instalado na posição C, certifique-se que os espaços de ar mínimos são cumpridos, conforme indicado no diagrama. - Page 251 O fabricante declina quaisquer tomada, deve contactar o seu agente autorizado local responsabilidades caso esta medida de da AEG-Electrolux. segurança não seja cumprida. This apparatus complies with the requirements of Council Directives 89/336/EEC and 73/23/EEC as amended by Council Directive 93/68/EEC.
- Page 252 More than 55 million Electrolux Group products (such as refrigerators, cookers, washing machines, vacuum cleaners, chain saws and lawn mowers) are sold each year to a value of approx. USD 14 billion in more than 150 countries around the world. AEG-Electrolux Hausgeräte GmbH Postfach 1036 D-90327 Nürnberg http://www.aeg.hausgeraete.de...
Need help?
Do you have a question about the MCC4060E and is the answer not in the manual?
Questions and answers