Table of Contents
Advertisement
Quick Links
Advertisement
Table of Contents

Related Manuals for Schwaiger DSR 5500


Summary of Contents for Schwaiger DSR 5500
- Page 1 DSR 5500 Digital SAT-Receiver Operating Instructions...
-
Page 2: Table Of Contents
Operating Instructions Contents Contents .............................2 General information ........................4 Safety and installation information....................4 Connecting up the receiver......................6 Controls, displays and connections ....................7 Remote control ...........................8 First-time installation........................9 Operating the receiver ......................11 Settings.............................13 Settings – System setup ......................14 Settings – OSD ........................14 Settings –... - Page 3 Channel list ..........................25 Channel list – sort manually ....................25 Channel list – editing favourites ..................26 Channel list – Deleting satellites ..................26 Timer ............................27 Timer – Sleep timer ......................27 Timer – Record timer ......................28 Programming the timer from the EPG: ................29 Information..........................29 Teletext .............................30 EPG –...
-
Page 4: General Information
General information Guarantee The guarantee period begins with the purchase of the product. Please confi rm this with your proof of purchase (receipt, invoice, delivery receipt etc.). Please keep these documents in a safe place. Our guarantee is based on our guarantee conditions in force at the time of purchase. In the case of a necessary repair, take or send in the unit to your specialist dealer. -
Page 5: Mains Connection
Mains connection WARNING: For units that are supplied with a mains adaptor, only use the original mains adaptor supplied with the unit! The mains adaptor / mains plug must only be connected to a 230 V~/50 Hz mains supply The mains adaptor / mains plug must be accessible at all times so that the unit can be unplugged from the mains outlet. -
Page 6: Connecting Up The Receiver
Connecting up the receiver The following connections are necessary before starting to use the reciever. You will fi nd the corresponding markings on the back of the unit (see diagram on the next page). Carry out the steps described below for connecting up the receiver: Use a SCART cable to connect the TV Scart socket on the receiver to the Scart socket on your television set.. -
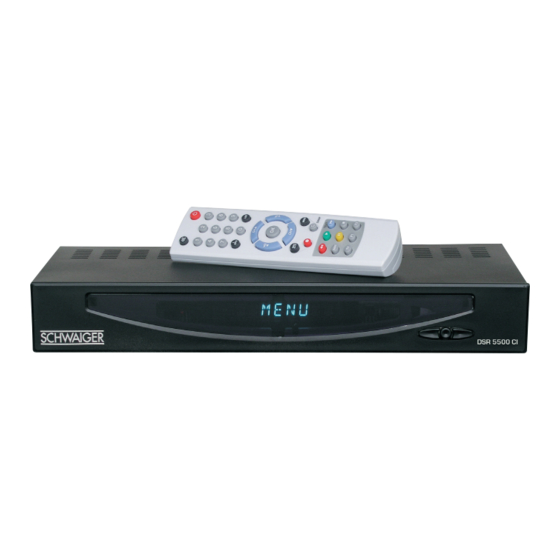
Page 7: Controls, Displays And Connections
Controls, displays and connections Front of unit Display: 1a LED Display Red LED is lit receiver is in standby mode. Channel name receiver is switched on. Timer recording is active FAIL short circuit or antenna input overload MENU OSD menu is being displayed INIT Installation assistant menu is being displayed ON/OFF button (standby) -
Page 8: Remote Control
Remote control On/off button Sound off (MUTE) Direct channel number input. In the menu: enter channel parameters i/EPG Call up the Electronic Programme Guide (EPG). LIST Display the channel list. VOL◀▶ Adjust volume. In the menu: scroll through lists or change entered values. CH ▲▼... -
Page 9: First-Time Installation
Inserting the batteries Open the battery compartment on the underside of the remote control and insert both 1,5 V batteries (AAA type, LR03). Make sure the polarity is correct! NOTE: If some remote control functions are no longer functioning properly, you should replace the set of batteries. - Page 10 Satellite In the last step with the installation assistant use the or CH buttons to select the satellite that you want to have at the beginning of the channel list and complete the installation with OK. Once again, you can use the EXIT button to make corrections.
-
Page 11: Operating The Receiver
Operating the receiver Switching on and off You can switch on the receiver with the OK, change channel or one of the number buttons. The last active channel will be displayed. (e.g. 0015) To switch the digital receiver into standby mode, press the button. The red LED will light up. NOTE: The digital receiver is only fully disconnected from the mains when it is unplugged from the mains outlet. - Page 12 Pressing the LIST button twice displays the following menu: Favourites list: a personal list of your favourite channels. Radio list: a list of the stored radio stations. TV list: a list of the stored TV channels. Alphabet: a list of the stored TV channels and radio stations in alphabetical order.
-
Page 13: Settings
Settings The Settings menu is for confi guring the basic functions of the receiver. With the stored settings you can receive ASTRA channels right away when the receiver is connected to a working, digital-compatible ASTRA satellite system. Only the difference in local time may have to be corrected so that the time displayed and the broadcast times are shown correctly. -
Page 14: Settings - System Setup
Settings – System setup 1) Scart output Using the VOL ◀ ▶ buttons, you can select the output signal for the scart socket (FBAS, RGB, YUV or Y/C) to suit your television set. 2) Time difference After switching the receiver on for the fi rst time you should set the difference between your local time and the received GMT time. -
Page 15: Settings - Sound
Settings – Sound 1) Start volume You can use the VOL ◀ ▶ buttons to set the start volume of the receiver. 2) Sound setting You can use the VOL ◀ ▶ buttons to choose between Stereo, Mono left or Mono right. 3) Audio channel TV You can use the VOL ◀... -
Page 16: Settings - Child Lock
Settings – Child lock Your receiver is equipped with a child lock. This secures the receiver against unauthorised use. When the child lock is activated, the receiver can only be switched on after entering a 4-digit PIN code. In the Main menu, use the CH buttons to move the cursor to the line Child lock and.press the OK button. -
Page 17: Installation
Installation This digital receiver was pre-confi gured in the factory so that it is ready to work right away with most satellite systems and LNB confi gurations without having to make any changes to settings. Any changes made in this menu have a direct effect on the reception characteristics of the receiver and should therefore only be carried out by qualifi... -
Page 18: Installation - Channel Search
6) Tone burst switch If the receiver is connected to a satellite system for the simultaneous reception of several satellites (multi-feed system), then assign the respective LNB (menu line 1) to its input on the tone burst switch using the VOL ◀ ▶ buttons. 7) DiSEqC mode You can use the VOL ◀... -
Page 19: Channel Search
Channel search Use the CH buttons to move the cursor to the line Satellite and use the VOL ◀ ▶ buttons to set the desired satellite. Select the line Search mode with CH and use the VOL ◀ ▶ buttons to select the desired search mode. -
Page 20: Installation - Factory Default Settings
Installation – Factory default settings This menu item is used to reset the receiver to the factory default settings. Afterwards it will revert to the three start menus as in the fi rst-time installation. Installation – Software download This feature allows you to update the receiver’s system software as well as menu texts and the channel list via the Astra 19.2°... - Page 21 2. Selecting the available data: Depending on what downloadable fi les are available (New software available) you can use CH choose between the following: Software: Betriebssoftware des Digitalreceivers Channel list: The digital receiver’s channel list OSD text: All the text that is displayed on the screen by the digital receiver Information: Information on the fi...
-
Page 22: Installation - Motor Settings
WARNING: As long as the receiver hasn’t started to store the data, the download can be cancelled at any time with EXIT. However, once the fi rst data is being stored, cancelling is no longer possible. Interrupting the download (e.g. by disconnecting the mains plug) may damage the receiver’s system software, text data or channel list! NOTE: If the download contains a new channel list, the receiver must be reset to factory defaults in order to... - Page 23 Motor commands: - button: turns the antenna to the east + button: turns the antenna to the west OK button: stops the motor 1 button: sets the eastern limit for the antenna 2 button: sets the western limit for the antenna 3 button: deletes the antenna limits 4 button:...
-
Page 24: Installation - Common Interface (Ci)
Installation – Common Interface (CI) On the back of the digital receiver there is a Common Interface slot. In combination with a card module (CAM Conditional Access Module) and a suitable Smart Card, this interface allows you to decode various encrypted channels. The Smart Card is inserted into the module. -
Page 25: Channel List
Channel list You can arrange the order of the pre-programmed channels according to your own wishes and delete channels you don’t need. This applies to both TV channels and radio stations. In the main menu, use the CH buttons to move the cursor to the line Channel list and press the OK button. -
Page 26: Channel List - Editing Favourites
Channel list – editing favourites You can store your favourite channels in a favourites list. In the menu Channel list use the CH buttons to move the cursor to the line Edit favourites list and press the OK button. Two tables will now be displayed: •... -
Page 27: Timer
Timer You can make your digital receiver switch off at a previously selected time or program a recording for a connected video recorder. A total of 10 record timers are available In the main menu, use the CH buttons to move the cursor to the line Timer and press the OK button. -
Page 28: Timer - Record Timer
Timer – Record timer In the Timer menu, use the CH buttons to move the cursor to the line Record timer and press the OK button. The following menu will appear: Aufnahme-Timer 20:07 Timer-Platz (1...10) 1 (inaktiv) Startzeit 00:00 Uhr Stoppzeit 00:00 Uhr Datum der Aufnahme... -
Page 29: Programming The Timer From The Epg
Programming the timer from the EPG: Pressing the i/EPG button calls up the programme table for the active channel. Here you can see all programmes together with their broadcast times. The current programme is highlighted. Use CH and VOL ◀ ▶ to select the programme you wish to record. By pressing the yellow button, all data will be transferred to the record timer. -
Page 30: Teletext
Teletext Switch on the channel for which you want to receive teletext. Then press the blue button to switch on teletext. The start page displayed is page 100. Use the 0-9 buttons to enter the three-digit number of the page you want to see. Your entry will be shown in the top left corner of the screen. -
Page 31: Audio Language
Audio language If a channel is being transmitted in more than one language, this will be displayed on the screen when changing channels. With the red and green buttons on the remote control, you can select the desired language and confi rm this with OK. With OK you can call up the display at any time and change the language. -
Page 32: Troubleshooting
Troubleshooting All electrical appliances are subject to problems but this doesn’t always mean that the equipment itself is faulty. Usually the cause of the problem is due to poor cables or connections. So before sending your unit in for servicing, please check the following points: problem possible causes tips and solutions... -
Page 33: Make A Contribution To Protecting The Environment
Make a contribution to protecting the environment Batteries and battery packs should not be thrown in the household refuse. As a consumer, you are legally obliged to return used batteries. You can hand in your old batteries at public collection points in your community or at any place where those batteries are sold. -
Page 34: Technical Specifi Cations
Technische Daten General • 4000 channel memory • 30 satellites (activated individually) • teletext and teletext generation for display on TV Fast OSD • quick channel changing for channel-hopping • no delays when displaying menus • large text for better readability •... - Page 36 Christian Schwaiger GmbH Würzburger Straße 17 D-90579 Langenzenn/Germany Hotline +49 (0)9101-702 299 www.schwaiger.de...
Need help?
Do you have a question about the DSR 5500 and is the answer not in the manual?
Questions and answers