Table of Contents
Advertisement
Advertisement
Table of Contents

Related Manuals for Unic Mira


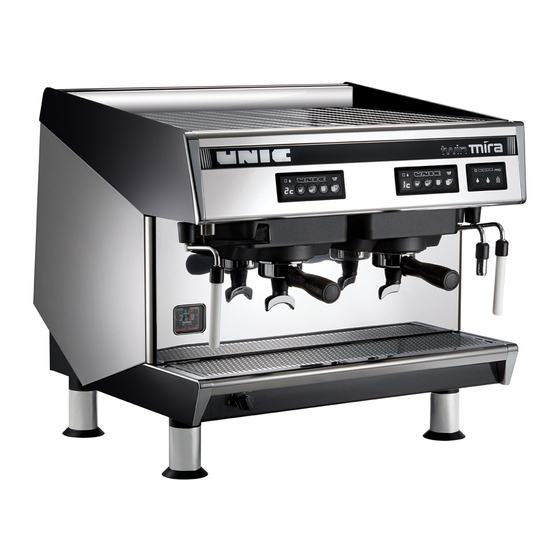
Summary of Contents for Unic Mira
-
Page 2: Table Of Contents
Contents list 1. SAFETY ADVICES……………………………………………………………………………………. 4 2. IMORTANT NOTES…………………………………………………………………………………… 4 3. PREPARATION OF THE SITE………………………………………………………………………. 5 Unpack the machine ......................5 Install the machine and preparation of the site ..............5 4. HYDRAULIC CONNECTION…………………………………………………………………………. 5 5. ELECTRIC CONNECTION…………………………………………………………………………… 6 ... - Page 3 10. CLEANING AND MAINTENANCE…………………………………………………………………. 16 After each use ........................16 Steam outlet tube: ......................16 Daily ............................. 16 Before service or after several hours of inactivity: ............16 After service: ........................16 Weekly ..........................17 ...
-
Page 4: Safety Advices
1. SAFETY ADVICES - This appliance is not intended for use by persons (including children) with reduced physical, sensory or mental capabilities, or lack of experience and knowledge, unless they have been given supervision or instruction concerning use of the appliance by a person responsible for their safety. -
Page 5: Preparation Of The Site
3. PREPARATION OF THE SITE The machine is delivered in a cardboard box screwed onto a wooden pallet. Unpack the machine - Cut the tightening strap with shears. - Open the cardboard box and take the accessories’ container out. - Undo the screws by slightly inclining the cardboard box. -
Page 6: Electric Connection
5. ELECTRIC CONNECTION - None of the switches must be in ON position. - Make sure that the voltage, frequency and power values marked on the descriptive plate of the machine are in conformity with the electric network mains. - Mount a plug on the end of the machine cable (plug with grounding: green/yellow wire). ... -
Page 7: Starting-Up
6. STARTING-UP Filling the boilers Turn on the shutoff valve. Plug in the machine. Set the charge switch to Position 1. (Do not set the charge switch to Position 2 until the boiler has been filled). ON/OFF SWITCH Steam boiler - As soon as the machine is turned on, the filling takes place automatically. -
Page 8: Checks And Adjustments
120°C. Pressure-release valve adjustment MIRA Model The HP valve is located on the right side of the machine: it is necessary to dismantle the sides and the rear panel. The valve is set above the pump; its adjusted pressure must just be greater than the water network pressure. -
Page 9: Pump-Pressure Adjustment
TWIN, TRI and QUATTRO MIRA Models The HP valve is located in the lower part at the left rear of the machine: it is necessary to dismantle the left side. The valve must open at about 13 bar (green scale of the pressure gauge). - Page 10 The keys from P1 to P4 can be programmed. The multiple doses (1, 2 or 3 cups) are calculated automatically from the programming of one of them on each box. Set the machine switch to Position 0. Keep the key P5 pressed and put again the machine on. Display of Pn then Pc and Pr by pressing several times the key P5 Pc = CALCULATED PROGRAMMING Insert a filter-holder ( with coffee ) into the unit...
-
Page 11: Cups Electronic Box (D2 Type)
2 Cups electronic box (d2 type) Continu / Stop key Use of the doses to be programmed - 4 coffee doses and 1 manual function, Continu/Stop are available. During the infusion, it is displayed : * 1c or 2c = 1 or 2 small cups * 1C or 2C = 1 or 2 large cups... -
Page 12: Cups Electronic Box (D3 Type)
3 Cups electronic box (d3 type) Continu / Stop key Use of the doses to be programmed - 6 coffee doses and 1 manual function, Continu/Stop are available. During the infusion, it is displayed : * 1c, 2c ou 3c = 1, 2 or 3 small cups * 1C, 2C or 3C = 1, 2 or 3 large cups... -
Page 13: Hot Water-Steam Box, Steamair Option
9. HOT WATER-STEAM BOX, STEAMAIR OPTION Hot water – steam box 1: led 2: programming key 3: hot water small dose 4: hot water large dose 5: steam dose Use An impulse on the keys 3 to 5 makes the corresponding dose flow: Hot water keys 3 and 4 –... -
Page 14: Components
Components Air/steam adjust Steam Outlet Steam Level 1 level 2 level 3 only Very fine foam Fine foam Medium foam Outlet cleaning: - Brake down the device and clean it once per day minimum. - After each use, rinse the outlet using the Steam. ... -
Page 15: Programming
Programming The programming mode allows adjusting the steam and hot water time together with the SteamAir level temperature adjustment. Hot water / steam delay time adjustment: To adjust the hot water and steam delay time you have to: - Switch off the machine by cutting the main switch. - Keep the programming key (2) pressed on, when switching on until orange blink of the led which confirms that you have entered the programming mode. -
Page 16: Cleaning And Maintenance
10. CLEANING AND MAINTENANCE - DO NOT FORGET TO REGENERATE YOUR WATER SOFTENER PERIODICALLY. - DON’T USE SCRUB OUT ABRASIVE PRODUCT AND SCOURING SPONGE, DON’T USE BLEACH OR DETERGENT COFFEE. After each use Steam outlet tube: After each use, clean the steam tube with a wet rag and push steam push-button for a short moment to eliminate the small amount of liquid that could left inside the tube. -
Page 17: Weekly
Weekly Cleaning with detergent tablet (automatic cycle) Filter holder: DHA Option: Take the 2 cups filter holder. Use 1 pair of cleaning-rinsing capsules. Inside each introduce 1 Detergent tablet. Place the rubber plug (DO-197) inside the Close the rotary cover. Engage the 2 filter. -
Page 18: Filter Holder
Filter holder Wash the filter-holders and the filters (removing the filter) in soapy water. Overflow tray: Remove the overflow tray to empty it and rinse it under the tap. Body: Clean the body of the machine using a soft cloth and alcohol for the stainless-steel parts and a non-abrasive detergent for the painted parts. -
Page 19: Water Softener
Water Softener Water Softener Regeneration: how? A - Water intake Use 1 kg of salt when the B - Water outlet softener is 400 mm high. C - Intake tap D - Outlet tap Use 2 kg of salt when the E - Discharge pipe softener is 600 mm high. -
Page 20: Water Softener Regeneration: When
Water Softener Regeneration: when? Example: Daily amount of used coffee: 3 kg Number of 7-centilitre cups: 420 Daily water consumption: 30 litres Daily number of 20-centilitre cups of tea: 150 Daily water consumption: 30 litres. Conclusion: - Total daily water consumption is 60 litres - Water hardness is 30°TH. -
Page 21: Connection To A Computer System
If the machine is not already equipped for connection to a computer system, a coffee machine of the MIRA range must be modified as follows: - Electronic box, ref 45124 and 45126 have to be replaced by electronic box ref. 45128 and 45137. -
Page 22: Trouble Shooting
TROUBLE SHOOTING VERY IMPORTANT! BEFORE TAKING ANY ACTION MAKE SURE THAT ALL THE ADJUSTMENTS ARE CORRECT. - TEMPERATURE 120°C STEAM PRESSURE 0,9 to 1 bar (14 PSI) - INFUSION PRESSURE 9 to 10 bar (140 PSI) High pressure valve opening: over 13 bar (188 PSI) - WATER SUPPLY PRESSURE 0 bar to 6 bar (0 PSI to 90 PSI) If the machine "sucks"... -
Page 23: Displayed Failures
12. DISPLAYED FAILURES Push button 1 Push button 2 See on § Problems in connection with the Push button 3 electronic boxes’ control button (page 24) Push button 4 Push button 5 Fuse See on § Fuse problems (page 24) Time See on §... -
Page 24: Problems In Connection With The Electronic Boxes' Control Button
Problems in connection with the electronic boxes’ control button If it is displayed P1, P2 ... or P5, this means that the corresponding key is in short-circuit and can't be used any more. Remedy: - Check that the front is not deformed - Change the electronic box ... -
Page 25: Dosage Problems
Dosage problems 105-second safety system of the coffee unit Thanks to such a safety system, the maximum infusion time is reduced and ranges to 1 minute and 45 seconds. As a result, the infusion process automatically stops, if the dosing device no longer works or if the flow capacity is insufficient so that the motor-pump and the valve of the unit are better protected. -
Page 26: Metering Safety System
Metering safety system During the infusion process, is displayed. This means that the dosing device has been no longer transmitting impulses to the unit electronic box for 5 seconds. If the metering interruption is only temporary, the infusion cycle will stop as soon as the number of metered impulses matches the number of programed impulses. -
Page 27: Dosing Device Safety System
Dosing device safety system Display of Display of The 9V power supply of the dosing The 9V power supply circuit of the device is short circuited: dosing device is opened: Terminal 30 (+) is earthed Terminal 30 (+) or earth are disconnected. -
Page 28: Other Failures
13. OTHER FAILURES Hydraulic problems of the coffee unit Doses lighter than initially set The obtained doses are lighter than initially set There is a leak located just after the dosing device The decompression way of the unit One of the connections located valve leaks during the infusion after the dosing device outlet leaks... -
Page 29: An Insufficient Infusion Pressure
An insufficient infusion pressure The infusion pressure is lower than 10 bar Set the pump as indicated on ( § 5.3 ) Setting operations are unsuccessful The pump is faulty The motor-pump is The motor-pump is no - dirty filter mechanically blocked longer power-supplied... -
Page 30: Problems In Connections With The Level Regulation
Problems in connections with the level regulation The steam boiler is flooded The steam boiler is flooded Problem generated by the Problem generated by the filling valve water level probe * The filling valve flap is no The probe is covered with an longer in place and generates insulating agent (scale) or the... -
Page 31: Insufficient Or No Heating Process
Insufficient or no heating process - After getting a few cups of coffee, the machine gets "cold". - Check the infusion time and adjust the grind accordingly. - Make sure that each pin of the heating element works. Impossible programing IMPOSSIBLE PROGRAMING ... -
Page 32: Technical Characteristics
118 à 120°C Height Steam pressure 0.9 à 1 bar Depth Pump pressure 9 bar 13 bar HP valve WEIGHT (kg) (8 bar MIRA) mono 3.2 bar LP valve WATTAGE only Dose of ground 110V mono 1.7 Kw 7 gr coffee 3.5 Kw...
Need help?
Do you have a question about the Mira and is the answer not in the manual?
Questions and answers