Table of Contents
Advertisement
Quick Links
Advertisement
Table of Contents

Summary of Contents for Akai KS390
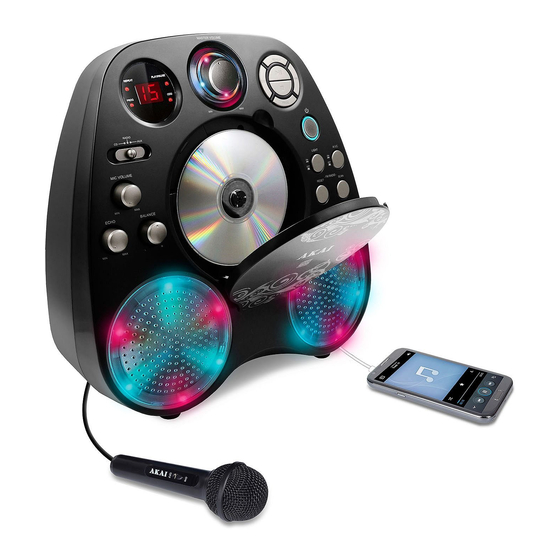
- Page 1 CD+G KARAOKE PLAYER WITH LIGHT EFFECT INSTRUCTION MANAUL KS390 Thank you for purchasing this CD player. Please read this instruction manual carefully before using this product to ensure proper use. Keep this manual in a safe place for future reference.
- Page 2 WARNINGS Warnings: WARNING: TO REDUCE THE RISK OF • This CD player employs a laser light beam. Only a FIRE OR SHOCK HAZARD, DO NOT EXPOSE qualified service person should remove the cover or THIS PRODUCT TO RAIN OR MOISTURE. attempt to service this device, due to possible eye injury.
-
Page 3: Important Safety Instructions
WARNINGS NOTE: This digital apparatus does not exceed the Class B limits for radio noise emissions from digital apparatus as set out in the Radio Interference Regulations of Industry Canada. These limits are designed to provide reasonable protection against harmful interference in a residential installation. This equipment generates, uses and can radiate radio frequency energy and, if not installed and used in accordance with the instructions, may cause harmful interference to radio communications. - Page 4 IMPORTANT SAFETY INSTRUCTIONS Outdoor Antenna Grounding – if an outside antenna is connected to the receiver, be sure the antenna system is grounded so as to provide some protection against voltage surges and built-up static charges. Article 810 of the National Electrical Code, ANSI/NFPA70, provides information with regard to proper grounding of the mast and supporting structure, grounding of the lead-in wire to an antenna-discharge unit, size of grounding conductors,...
-
Page 5: Control Location
CONTROL LOCATION FRONT VIEW BACK VIEW 1. LED Display 13. A.V.C Button 25. Left Loudspeaker 2. PLAY/PAUSE Indicator 14. LIGHT ON/OFF Button 26. LINE IN Jack 3. CDG Playing Indicator 15. SCAN Button 27. VIDEO OUT Jack 4. MASTER VOLUME Control 16. - Page 6 CONTROL LOCATION Battery Precautions (Use UM-2 or C-Size x 6 pcs) The precautions below should be followed when using batteries in this device: Use only the size and type of batteries specified. Be sure to follow the correct polarity when installing the batteries as indicated in the battery compartment.
-
Page 7: Making The Connections
MAKING THE CONNECTIONS CONNECTING POWER Plug the supplied power adaptor small end into the DC jack located on the rear panel, plug the adaptor into the standard AC wall socket. CAUTION: The unit s designed to operate from a mains supply of AC 100-240V~50/60Hz. -
Page 8: Audio Connection
MAKING THE CONNECTIONS SELECTING YOUR CDG MACHINE AS YOUR SOURCE/ INPUT Selecting your CDG Machine as a source/ input on your TV is very similar to connecting a VCR/ DVD or Satellite system. We have listed below the most common ways of selecting the source from your TV or VCR/ DVD player: In the set up menu of the TV or VCR / DVD player there may be an option for “Input Select”... -
Page 9: Loading A Disc
CD OR CD+G OPERATION The unit designed to play CDs and CD+Gs bearing the identification logo respectively. If the disc does not confirm to the standard, it may not play properly. TURNING ON/OFF • To turn on the CDG Machine, press the ON/OFF button once, the ON/OFF button will light up. •... - Page 10 CD OR CD+G OPERATION SKIP (FOR BOTH CD & CDG DISCS) • During STOP mode, you can skip up or down to your desired track by pressing SKIP AAAAA buttons. • To resume playing the selected song, press PLAY/PAUSE button. SEARCH (FOR AUDIO CD DISC ONLY) •...
-
Page 11: Line In Operation
LINE IN & RADIO OPERATION LINE IN OPERATION USING LINE IN to connect an audio cable (not included) from the LINE IN socket on rear of the unit to the external unit’s LINE OUT socket. Slide the CD/ RADIO/ AUX selector to AUX position. This will allow you to broadcast the external unit’s sound through this unit’s speaker. -
Page 12: Troubleshooting Guide
TROUBLE SHOOTING GUIDE If you have followed the instructions and are having difficulty operating the unit, locate the PROBLEM in the left column below. Check the corresponding POSSIBLE CAUSE column to locate and remedy the problem. PROBLEM POSSIBLE CAUSE SOLUTION No power when ON/OFF button No power plugs connection at Insert the adaptor plug into the... -
Page 13: Specification
TROUBLE SHOOTING GUIDE PROBLEM POSSIBLE CAUSE SOLUTION Connect the video cable to the Video cable is not connected CDG machine’s VIDEO OUT properly to the TV. and to the TV VIDEO IN. Source selector on TV is not set Using your TV remote to select to VIDEO.


Need help?
Do you have a question about the KS390 and is the answer not in the manual?
Questions and answers