Advertisement
QUICK START GUIDE
THIS QUICK START GUIDE WILL HELP SHOW YOU HOW EASY IT IS TO GET
YOUR PLUG-AND-PLAY FLIR VUE CONNECTED, RUNNING, AND MOUNTED.
STEP ONE
WHAT'S IN THE BOX?
YOUR FLIR VUE COMES WITH THE FOLLOWING COMPONENTS:
• FLIR Vue thermal camera
• Bench Cable – for connecting your FLIR Vue to the FLIR Camera Controller
GUI and an external video monitor
STEP TWO
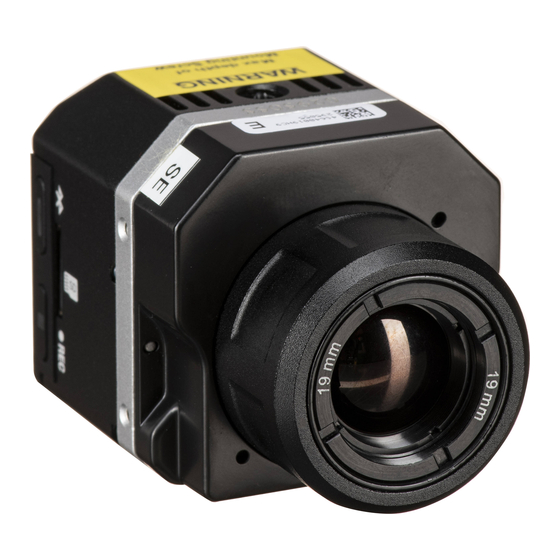
A QUICK TOUR
CAMERA BODY
LENS BARREL
LENS
STEP THREE
CONNECTING AND POWERING THE FLIR VUE
FLIR Vue is compatible with common cables that are used to provide power
to – and get video from – a GoPro 3 or 4's 10-pin mini-USB cable. A couple
of examples are shown below.
A number of vendors sell cables that are compatible with ImmersionRC
video transmitters, which is convenient because this brand of transmitter
supplies the 5VDC Power the FLIR Vue needs. Connect the ImmersionRC
video transmitter per the manufacturer's instructions.
(Step 3 continues on other side.)
M2X0.4-6 THREADED MOUNTING HOLES 2X ON
THE CAMERA'S LEFT SIDE, RIGHT SIDE, AND
BOTTOM (MOUNTING SCREWS NOT INCLUDED)
IMMERSIONRC
CONNECTOR:
RED – 5VDC POWER IN
BLACK – GROUND
YELLOW – VIDEO OUT
WHITE – NOT USED
TM
¼-20 THREADED
MOUNTING HOLE
MINI-USB CONNECTOR
Advertisement
Table of Contents

Related Manuals for FLIR Vue


Summary of Contents for FLIR Vue
- Page 1 WHAT’S IN THE BOX? YOUR FLIR VUE COMES WITH THE FOLLOWING COMPONENTS: • FLIR Vue thermal camera • Bench Cable – for connecting your FLIR Vue to the FLIR Camera Controller GUI and an external video monitor STEP TWO A QUICK TOUR CAMERA BODY ¼-20 THREADED...
- Page 2 STEP FIVE CARE AND FEEDING OF FLIR VUE FLIR Vue is a durable, easy to use camera that should give you years of reliable performance. There are just a couple of things to be aware of: • As mentioned before, only power FLIR Vue with a regulated 5VDC power source.
Need help?
Do you have a question about the Vue and is the answer not in the manual?
Questions and answers