Advertisement
INSTALLATION INSTRUCTIONS FOR PART 99-7950
2003-2005 Suzuki Grand Vitara
99-7950
KIT FEATURES
• DIN Head Unit Provision
• ISO DIN Head Unit Provision
KIT COMPONENTS
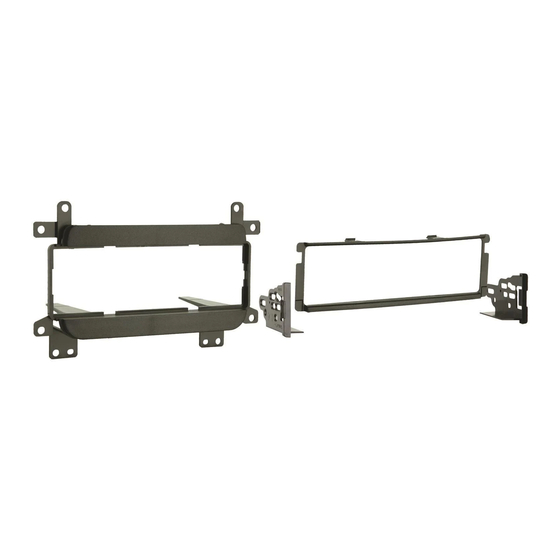
A) Radio Housing
I
B) ISO Brackets
A
Phillips Screwdriver I Flat Blade Screwdriver l Utility Knife l Stubby Phillips Screwdriver
1-800-221-0932
© COPYRIGHT 2003 METRA ELECTRONICS CORPORATION
APPLICATIONS
2003-2006 Suzuki XL7
2003-2004 Suzuki Aerio
I
C) ISO Trim Plate
B
TOOLS REQUIRED:
www.metraonline.com
C
Advertisement
Table of Contents

Summary of Contents for Metra Electronics 99-7950
- Page 1 INSTALLATION INSTRUCTIONS FOR PART 99-7950 2003-2006 Suzuki XL7 2003-2004 Suzuki Aerio 2003-2005 Suzuki Grand Vitara 99-7950 KIT FEATURES • DIN Head Unit Provision • ISO DIN Head Unit Provision KIT COMPONENTS A) Radio Housing B) ISO Brackets Phillips Screwdriver I Flat Blade Screwdriver l Utility Knife l Stubby Phillips Screwdriver 1-800-221-0932 ©...
- Page 2 99-7950 Dash Disassembly • - 2003-2006 Suzuki XL7 ---------------------------------------- 1 - 2003-2004 Suzuki Aerio -------------------------------------- 2 - 2003-2005 Suzuki Grand Vitara ------------------------------ 1 Kit Assembly • - Kit Assembly Notes ------------------------------------------- 3 - DIN Head Unit Provision with Pocket ------------------------ 4...
- Page 3 99-7950 2003-2006 XL7 2003-2005 GRAND VITARA Remove (2) Phillips screws from the bottom of the trim surrounding the radio , A/C controls and clock / hazard switch panel. Screws are facing up. (Figure A) Using stubby (short) Phillips screwdriver, remove the (2) Phillips screws securing clock / hazard switch panel and remove radio trim plate.
- Page 4 99-7950 2003-2004 AERIO Unsnap and remove entire panel surrounding radio and A/C vents below radio. Remove (4) Phillips screws holding radio to sub dash and remove radio.
- Page 5 KIT ASSEMBL Y NOTES NOTE You will need to cut and remove the tabs from the 99-7950 depending on which vehi- cle you are working with. The tabs are labeled with an (A) for the Aerio and a (V) for the grand Vitara and XL7.
- Page 6 99-7950 DIN Head Unit Provision ISO DIN Head Unit Provision Mount the ISO Brackets to the head unit with the screws supplied with the unit. Slide the head unit into the radio opening until the side clips engage. Snap the Trim plate into the Radio Housing.
- Page 7 99-7950 FINAL ASSEMBL Y 1 Locate the factory wiring harness in the dash and make the connection as shown. Metra recomends using the proper mating adapter and making the connections as shown. (Isolate and individually tape off the ends of any unused wires to prevent electrical short circuit.)
- Page 8 99-7950 INSTRUCTIONS 1-800-221-0932 www.metraonline.com REV. 01/16/06 © COPYRIGHT 2003 METRA ELECTRONICS CORPORATION INST99-7950...


Need help?
Do you have a question about the 99-7950 and is the answer not in the manual?
Questions and answers