Table of Contents
Advertisement
Available languages
Available languages
Quick Links
Download this manual
See also:
Owner's Manual
Advertisement
Chapters
Table of Contents

Related Manuals for Zippie RS


Summary of Contents for Zippie RS
- Page 1 Manual Wheelchair Fauteuil roulant manuel Handbewogen rolstoelen Owner's Manual Manuel d’utilisation Handleiding Zippie RS 000690689.02...
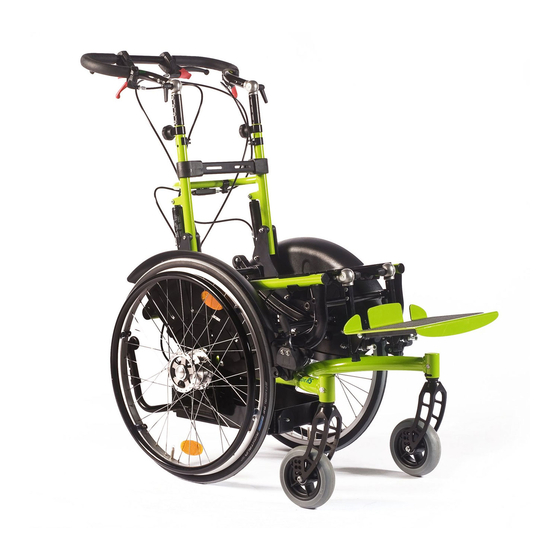
- Page 2 IF YOU ARE VISUALLY IMPAIRED, THIS DOCUMENT CAN BE VIEWED IN PDF FORMAT AT WWW.SUNRISEMEDICAL.CO.UK. SI VOUS SOUFFREZ DE DÉFICIENCE VISUELLE, CE DOCUMENT PEUT ÊTRE CONSULTÉ EN FORMAT PDF SUR WWW.SUNRISEMEDICAL.FR ALS U VISUEEL GEHANDICAPT BENT KAN DIT DOCUMENT OOK WORDEN GELEZEN IN PDF-FORMAAT OP: WWW.SUNRISEMEDICAL.NL Wheelchair Components We at SUNRISE MEDICAL have been awarded the ISO-9001 certificate, which affirms the quality of our products at every stage, from R &...
- Page 3 1.Trommelremhendels 1.Drum Brake Levers 1.Manettes pour frein à tambour 2.Kantelhendels 2.Tilt Levers 2.Leviers de bascule 3.Duwhandvat 3.Push Handle 3.Poignée 4.Rugsteun 4.Backpost 4.Montant du dossier 5.Zijkanten 5.Side Guard 5.Protège-vêtements 6.Zitting 6.Seat Plate 6.Plaque d’assise 7.Centraal gemonteerde voetplaat 7.Centre Mount Footplate 7.Palette centrale 8.Vork 8.Fork 8.Fourche...
- Page 4 ° 1450 1450 MAX. MIN. MAX. MIN. MAX. MIN. MAX. MIN. MAX. MIN.
- Page 5 M5 = 5,0 Nm M6 = 7,0 Nm M8 = 10,0 Nm 20 Nm 30 Nm 30 Nm 3 Nm 25 Nm 25 Nm 30 Nm 3 Nm 7 Nm 7 Nm 5 Nm 25 Nm 7 Nm 7 Nm 10 Nm 3 Nm 3 Nm...
- Page 6 6” 7” 8” 49 / 50...
-
Page 7: Area Of Application
The wheelchair can be used indoors as well as outdoors in self- propelled or attendant configurations, on dry, firm, relatively smooth surfaces. It is not recommended for use in a storm, torrential rain, snow and ice or other extreme weather conditions. Zippie RS Rev.1.0... -
Page 8: Table Of Contents
The manufacturer reserves the right to alter without notice any weights, measurements or other technical data shown in this manual. All figures, measurements and capacities shown in this manual are approximate, and do not constitute specifications. Dealer signature and stamp Zippie RS Rev.1.0... -
Page 9: General Safety Notes And Driving Limits
If you exceed the maximum load, this can lead to damage to the chair, or you may fall or tip over, lose control and may lead to serious injury of the user and other people. Zippie RS Rev.1.0... - Page 10 • With all moving parts there is a natural risk of finger traps. Please handle with care • The wheelchair should not be used in heavy rain, snow, slippery, or unsound surfaces. Do not use the wheelchair in hazardous environments. Zippie RS Rev.1.0...
-
Page 11: Warranty
The product or part having been altered from the manufacturer’s specifications, or repairs having been attempted prior to the service agent being notified. d) If the product has corrosion due to incorrect maintenance Zippie RS Rev.1.0... -
Page 12: Transportability
6. The tie-down restraints should be fitted to the main frame of the wheelchair as indicated in the diagram on the following page, and not to any attachments or accessories, e.g. not around the spokes of wheels, brakes or footrests. Fig.B Fig.A Zippie RS Rev.1.0... - Page 13 The wheelchair secured with front and rear wheelchair tie down restraints, (Fig.I). DANGER! The base is only permitted as a seat in the car, if the mounted seat shell is tested by ISO 16840-4. Fig.C PREFERRED ZONE Fig.H Fig.D Fig.F Fig.I Fig.E Fig.G Zippie RS Rev.1.0...
-
Page 14: Handling
Raise or lower to one of the three or four pre-drilled holes. c. Release pin (D). d. Adjust the second anti-tip tube wheel the same way. Both wheels should be at exactly the same height. Zippie RS Rev.1.0... -
Page 15: Brakes
They can also be set with the aid of the locking levers (1) to prevent rolling. These levers must snap audibly into place. Drum brakes do not depend on the aid of air pressure inside the tires. Your wheelchair cannot be moved when the drum brakes are set, (Fig.6.2). Zippie RS Rev.1.0... -
Page 16: Footrests
The lower leg length, (1), footboard angle, (3) and knee angle, (2), are all adjustable. Please loosen the butterfly screw and do the setting. Afterwards tighten the screw again. WARNING! Tighten all fittings after adjustment. Zippie RS Rev.1.0... -
Page 17: Castors
Castors should always be adjusted by an authorised dealer. The castor plates must be readjusted, and the wheel locks must be checked any time the rear wheel posi tion has been altered. Zippie RS Rev.1.0... -
Page 18: Seating And Positioning
You can choose 2 center of gravity positions. Each one gives the base a different characteristic. When using the passive position, (1), it is difficult to tip the base backwards, (very safe). The active position, (2), allows easier handling and better tipping performance. Zippie RS Rev.1.0... - Page 19 Angle adjustable push bar By loosen the clamp lever, (2), the angle/height of the push-bar can be adjusted. Tighten the clamp lever afterwards. DANGER! It clamp levers are not tightened the user can be injured while being lifted. Zippie RS Rev.1.0...
-
Page 20: Sideguards
Fig. 11.2 the eyelet on the belt. The belt is routed under the rear of the side panel. Adjust the belt position so buckles are in the centre of the seat. (Fig.11.1 - 11.2) Zippie RS Rev.1.0... - Page 21 The lap belt should be adjusted to suit the end user as detailed above. Sunrise Medical recommend that the length and fit of the belt be checked on a regular basis to reduce the risk of the end user inadvertently re-adjusting the belt to an excessive length. Zippie RS Rev.1.0...
-
Page 22: Tyres And Mounting
The wheelchair conforms to the following standards: a) Requirements and test methods for static, impact and fatigue strengths (ISO 7176-8) Crash Tested b) Requirements for resistance to ignition in accordance with ISO 7176-16 (EN 1021-1). Date of manufacture. Serial number. Zippie RS Rev.1.0... -
Page 23: Maintenance And Care
§ 6 infection protection law. Disposal or recycling should be done through a licensed agent or authorised place of disposal. Alternatively your wheelchair may be returned to your dealer for disposal. Zippie RS Rev.1.0... -
Page 24: Zippie Rs Rev.1.0
Zippie RS Rev.1.0... - Page 25 Le fauteuil est prévu pour une utilisation à l’intérieur comme à l’extérieur, sur des surfaces sèches et relativement peu accidentées, propulsé par l'utilisateur lui-même ou un accompagnateur. Il n'est pas prévu pour une utilisation par temps orageux, pluie torrentielle, neige et givre ou autres conditions météo extrêmes. Zippie RS Rev.1.0...
- Page 26 Le fabricant se réserve le droit de modifier sans préavis les poids, mesures et autres données techniques indiquées dans le présent manuel. Tous les chiffres, dimensions et capacités indiqués dans ce manuel sont approximatifs et ne constituent pas des caractéristiques. Tampon et signature du revendeur Zippie RS Rev.1.0...
- Page 27 • Ne dépassez JAMAIS la charge maximale de 125 kg combinée entre l'utilisateur et tout autre accessoire éventuellement embarqué. Toute charge supérieure pourrait endommager le fauteuil ou vous faire basculer, perdre le contrôle et entraîner de graves blessures pour vous et toute autre personne. Zippie RS Rev.1.0...
- Page 28 Manipulez le fauteuil avec précaution. • N'utilisez pas le fauteuil sous une forte pluie, dans la neige, sur une chaussée glissante ou sur des surfaces accidentées. N'utilisez pas le fauteuil dans des environnements dangereux. Zippie RS Rev.1.0...
-
Page 29: Garantie
Le produit, ou l’une de ses pièces, a été transformé ou une réparation a été entreprise avant d’en avoir notifié le service après-vente. d) Le produit présente des signes de corrosion résultant d'une maintenance inappropriée. Zippie RS Rev.1.0... -
Page 30: Transportabilité
à tout points d'attache ou accessoires, ex. pas autour des rayons des roues, freins ou repose-pied. Fig. B Fig. A Zippie RS Rev.1.0... - Page 31 La base ne peut servir de siège à bord d'un véhicule que si la coque d'assise est conforme à ISO 16840-4. Fig. C ZONE DE PRÉFÉRENCE Fig. H Fig. D Fig. F Fig. I Fig. E Fig. G Zippie RS Rev.1.0...
-
Page 32: Manipulation
Abaissez ou levez la roulette jusqu’à enclenchement dans l’un des trois ou quatre trous pré-percés. c. Relâchez la goupille (D). d. Réglez la seconde roulette anti-bascule de la même façon. Les deux roulettes anti-bascule doivent être exactement à la même hauteur. Zippie RS Rev.1.0... -
Page 33: Freins
éviter qu’ils ne se desserrent accidentellement. Les leviers doivent émettre un clic audible lorsqu'ils s’enclenchent. Le gonflage des pneus n’a aucune incidence sur les freins tambour. Le fauteuil est immobilisé si les freins à tambour sont enclenchés, (Fig. 6.2). Zippie RS Rev.1.0... -
Page 34: Repose-Pieds
(2). Desserrez les vis à oreilles de chacun et ajustez à la longueur ou à l'angle désiré. Resserrez les vis. AVERTISSEMENT ! Pensez à toujours resserrer les fixations après le réglage. Zippie RS Rev.1.0... -
Page 35: Roues Avant
Les réglages des roues avant doivent toujours être confiés à un revendeur agréé. En cas de modifications de la position de la roue arrière, les réglages de l’adaptateur de la roue avant et du frein doivent être contrôlés. Zippie RS Rev.1.0... -
Page 36: Assise Et Positionnement
Vous avez le choix entre 2 positions pour le centre de gravité. Chacune présente des caractéristiques particulières. En position passive (1), la base peut difficilement basculer en arrière (sécurité accrue). La position active (2) facilite la manipulation et l'inclinaison du fauteuil. Zippie RS Rev.1.0... - Page 37 Desserrez le levier de serrage (2) pour régler l'angle d'inclinaison/la hauteur du guidon. Resserrez le levier de serrage. DANGER ! Toujours serrer fermement le levier de serrage pour éviter tout risque de blessure lorsque le fauteuil est soulevé. Zippie RS Rev.1.0...
-
Page 38: Accoudoirs
à travers l'œillet de la ceinture. La ceinture est passée sous l'arrière du panneau latéral. Ajustez la position de la ceinture afin que les attaches soient au centre du siège. (Fig. 11.1 - 11.2) Zippie RS Rev.1.0... - Page 39 à l'utilisateur comme détaillé ci-dessus. Sunrise Medical recommande que la longueur et l'ajustement de la ceinture soient vérifiés régulièrement afin de réduire les risques de réajustement de la ceinture à une longueur excessive causés par inadvertance par l'utilisateur final. Zippie RS Rev.1.0...
-
Page 40: Pneus Et Montage Des Pneus
Exigences et méthodes d'essai pour la résistance statique, la résistance aux chocs et la résistance à la fatigue (ISO 7176-8) b) Exigences en matière de résistance à l’inflammation des Date de fabrication. parties rembourrées conformément à ISO 7176-16 (EN 1021-1). Numéro de série. Zippie RS Rev.1.0... -
Page 41: Maintenance Et Entretien
Par conséquent et conformément à l’article 6 de la réglementation relative à la protection contre les infections, il est recommandé de mettre au rebut la toile du siège et du dossier afin d'éviter toute contamination micro-bactérienne par les agents actifs. Zippie RS Rev.1.0... -
Page 42: Zippie Rs Rev.1.0
Zippie RS Rev.1.0... - Page 43 Het wordt niet aanbevolen om de rolstoel te gebruiken tijdens storm, zware regenval, sneeuw en ijs, of andere extreme weersomstandigheden. Zippie RS Rev.1.0...
- Page 44 Alle afbeeldingen, maten en mogelijkheden zoals getoond in deze handleiding zijn slechts indicatief en bevatten geen specificaties. Stempel en handtekening dealer Zippie RS Rev.1.0...
-
Page 45: Algemene Veiligheidstips En Rijbeperkingen
Als u de maximale belasting overschrijdt, kan dit leiden tot schade aan de stoel, of u kunt omvallen of omkantelen, de controle verliezen, wat ernstig letsel aan de gebruiker en andere personen tot gevolg kan hebben. Zippie RS Rev.1.0... - Page 46 Wees voorzichtig wanneer u iets wilt veranderen aan de rolstoel. • De rolstoel dient niet gebruikt te worden tijdens zware regenval, op met sneeuw bedekte ondergrond of op glibberige ondergrond. Gebruik de rolstoel niet in een gevaarlijke omgeving. Zippie RS Rev.1.0...
-
Page 47: Garantie
Verandering van de product of het onderdeel in afwijking van de specificaties van de fabrikant, of reparaties die getracht zijn voordat de dealer op de hoogte werd gesteld. d) Indien het product leidt aan corrosie door onjuist onderhoud. Zippie RS Rev.1.0... -
Page 48: Transport
6. De verankeringsbanden moeten aan het frame van de afgehouden worden door bijvoorbeeld armsteunen of wielen. rolstoel worden bevestigd zoals aangegeven in de tekening op de volgende pagina. Ze mogen niet worden bevestigd aan accessoires, wielen, remmen, voetsteunen en dergelijke. Fig. B Fig. A Zippie RS Rev.1.0... - Page 49 (Fig. I). GEVAAR! De basis mag alleen als stoel in een voertuig worden gebruikt als de bevestigde zitschaal is goedgekeurd volgens ISO 16840-4. Fig. C VOORKEURSGEBIED Fig. H Fig. D Fig. F Fig. I Fig. E Fig. G Zippie RS Rev.1.0...
-
Page 50: Gebruik
Trek de wielen omhoog of duw ze omlaag in een van de drie of vier voorgeboorde gaten. c. Laat de pen los (D). d. Pas het tweede anti-tip wiel op dezelfde wijze aan. De beide wielen moeten op exact dezelfde hoogte worden afgesteld. Zippie RS Rev.1.0... -
Page 51: Remmen
Deze pennen moeten hoorbaar op hun plaats klikken. Trommelremmen zijn niet afhankelijk van de luchtdruk binnen in de banden. U kunt uw rolstoel niet verplaatsen wanneer de trommelremmen ingeschakeld zijn (Fig. 6.2). Zippie RS Rev.1.0... -
Page 52: Voetensteunen
(1), de hoek van de voetplaat (3), en de hoek van de knie (2), kunnen allemaal worden aangepast. Maak de schroef los en stel de voetplaat naar wens in. Draai hierna de schroef weer aan. WAARSCHUWING! Draai alles goed aan nadat u iets hebt aangepast. Zippie RS Rev.1.0... -
Page 53: Zwenkwielen
De rolstoel beweegt niet in een rechte lijn als de zwenkwielen niet goed zijn aangepast. U moet de voorwielen laten afstellen door een erkend dealer. Telkens wanneer u de positie van het achterwiel hebt laten veranderen, moet u het balhoofd opnieuw aanpassen en de wielvergrendelingen controleren. Zippie RS Rev.1.0... -
Page 54: Zitten En Positioneren
Wanneer u de passieve positie (1) kiest, is het moeilijk om de basis naar achteren te kantelen (zeer veilig). Wanneer voor de actieve positie (2) wordt gekozen, is de stoel beter hanteerbaar en kan gemakkelijker kantelen. Zippie RS Rev.1.0... - Page 55 Door de klemhendels (2) los te maken, kan de hoek/hoogte van de duwstang worden aangepast. Zorg ervoor dat de klemhendels daarna goed worden vastgedraaid. GEVAAR! Als deze klemhendels niet goed vastgedraaid worden, kan de gebruiker gewond raken wanneer hij of zij wordt opgetild. Zippie RS Rev.1.0...
-
Page 56: Zijkanten
De gordel wordt onder de achterzijde van het zijpaneel geleid. Pas de gordel zodanig aan dat de sluiting zich in het midden van de stoel bevindt. (Fig. 11.1 - 11.2) Zippie RS Rev.1.0... - Page 57 OPMERKING: De heupgordel dient aangepast te worden aan de uiteindelijke gebruiker zoals hierboven omschreven. Sunrise Medical adviseert de lengte en bevestiging van de gordel regelmatig te controleren om te voorkomen dat de gordel onbedoeld te lang wordt. Zippie RS Rev.1.0...
-
Page 58: Banden En Montage
Gebruikershandleiding De rolstoel voldoet aan de volgende vereisten: a) Vereisten en testmethodes voor statische krachten, botskrachten en materiaalmoeheid (ISO 7176-8) Crashtest uitgevoerd b) Vereisten voor weerstand bij starten in overeenstemming met ISO 7176-16 (EN 1021-1). Productiedatum Serienummer. Zippie RS Rev.1.0... -
Page 59: Algemeen Onderhoud
(In overeenstemming Afvalverwerking of recycling dient plaats te vinden via een met de Wet Medische hulpmiddelen). erkende agent, afvalverwerking met vergunningen. Als alternatief kunt u uw handbike ook terugbrengen naar uw dealer voor verdere afvalverwerking. Zippie RS Rev.1.0... - Page 60 Sunrise Medical GmbH & Co. KG Kahlbachring 2-4 69254 Malsch/Heidelberg Deutschland Tel.: +49 (0) 7253/980-0 Fax: +49 (0) 7253/980-222 www.SunriseMedical.de Sunrise Medical Thorns Road Brierley Hill West Midlands DY5 2LD England Phone: 0845 605 66 88 Fax: 0845 605 66 89 www.SunriseMedical.co.uk Sunrise Medical S.L.
Need help?
Do you have a question about the RS and is the answer not in the manual?
Questions and answers