Table of Contents
Advertisement
Installer: Leave these instructions with consumer.
Consumer: Keep these instructions for future reference
DANGER
If you smell gas:
1. Shut off gas to the appliance.
2. Extinguish any open flame.
3. If odor continues, keep away from
the appliance and immediately call
your gas supplier or fire department.
WARNING
Do not store or use gasoline or other
flammable vapors and liquids in the
vicinity of this or any other appliance.
An LP-cylinder not connected for use
shall not be stored in the vicinity of this
or any other appliance.
DANGER
CARBON MONOXIDE HAZARD
This appliance can produce carbon
monoxide which has no odor.
Using it in an enclosed space can kill
you.
Never use this appliance in an enclosed
space such as a camper, tent, car or
home.
Questions, Problems, Missing Parts? Before returning to
your retailer, call our customer service department in the
US and Canada at 1-800-416-3511, Monday-Friday, 9 a.m.–
5 p.m. Eastern Time.
Sep-31-2014
ASSEMBLY INSTRUCTIONS
CSA Model 98300
SKU:272-4042
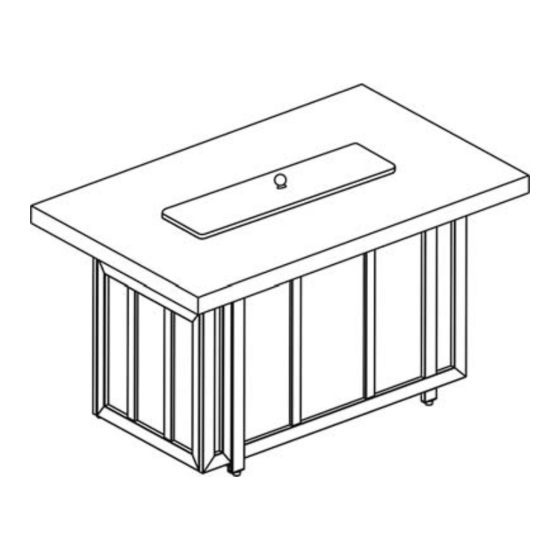
Palm Bay LP Firepit
.
WARNING:
Improper installation, adjustment alteration,
service or maintenance can cause injury or
property damage. Read the installation,
operating and maintenance instructions
thoroughly before installing or servicing this
equipment.
FOR
CYLINDER WITH TYPE 1 CONNECTION OR FOR
USE WITH NATURAL GAS AFTER CONVERSION
KIT IS INSTALLED (MUST BE PROFESSIONALLY
INSTALLED) ALSO THE LP REGULATOR MUST
BE SUPPLIED BY THE MANUFACTURER.
1
BRH01600
WARNING: For Outdoor Use Only
USE
WITH
20LB
WARNING:
USE FACTORY APPROVED
REPLACEMENT PARTS AND
ACCESSORIES ONLY. USE
OF UNAPPROVED PART OR
ACCESSORIES CAN VOID
THE WARRANTY ON THIS
PRODUCT AND RESULT IN
AHAZARDOUS CONDITION.
PLEASE CONTACT US FOR
INFORMATION REGARDING
REPLACEMNT
HOSES,THERMOCOUPLES,
ELECTRODES,IGNITION
MODULES,LAVAROCKS,LO
GS, FIRE ICE, ETC.
(9KG)
PROPANE
Advertisement
Table of Contents

Related Manuals for Patio Glow 98300


Summary of Contents for Patio Glow 98300
-
Page 1: Assembly Instructions
ASSEMBLY INSTRUCTIONS CSA Model 98300 SKU:272-4042 BRH01600 Palm Bay LP Firepit Installer: Leave these instructions with consumer. Consumer: Keep these instructions for future reference DANGER WARNING: If you smell gas: Improper installation, adjustment alteration, 1. Shut off gas to the appliance. -
Page 2: Table Of Contents
TABLE OF CONTENTS Important Safety Information Important About Propane Specification Parts Identification List Installation 7-11 Natural Gas Conversion Batteries Lighting Instructions Maintenance Troubleshooting Guide Warranty... -
Page 3: Important Safety Information
IMPORTANT SAFETY INFORMATION The installation must conform with local codes or, in the absence of local codes, with the National Fuel Gas Code, ANSI Z223.1/NFPA 54; International Fuel Gas Code. ; Natural Gas and Propane Installation Code, CSA B149.1; or Propane Storage and Handling Code, B149.2, as applicable. -
Page 4: Important About Propane
IMPORTANT SAFETY INFORMATION ABOUT PROPANE (LP) GAS A self contained LP-gas cylinder for use with this appliance must have a capacity of 20 lbs. and must be equipped with a Type 1 connector and an OPD (overfill protection device). See Figure 1. The LP-gas supply cylinder to be used must be constructed and marked in accordance with the specification for LP-gas cylinders of the U.S. -
Page 5: Parts Identification List
PARTS IDENTIFICATION LIST PART DESCRIPTION PART# CONTROL KNOB FP0245 GAS VALVE FP0307 THERMOCOUPLE FP0004 LP REGULATOR HOSE FP0308 ELECTRODE FP0003 ORIFICE ELBOW FP0310 IGNITION MODULE FP0006 PROPANE ORIFICE FP0312 “AAA” BATTERY(1.5V) HW0705 LAVA ROCK SET FP0002 FOOTCAP FC0553 HEX BOLT DRIVER HW0006 1/4"... - Page 6 FIREPIT TABLETOP FP1246 BACK PANEL FP1247 LEFT SIDE PANEL FP1248 RIGHT SIDE PANEL FP1249 DOOR PANEL FP1250 FIREPAN/BURNER FP1251 ASSEMBLY BURNER COVER FP1252 MIDDLE SUPPORT FP1253 LP SUPPORT FP0675 CONNECTOR FP1124...
-
Page 7: Installation
INSTALLATION 1.Identify parts packed in carton against the parts list. Remove all protective materials and set parts on a flat, non-abrasive surface. 2. Attach the back panel to side panels by using four 1/4"x40 mm bolts and washers as shown in Figure 2.Guide bolts through holes in back panel, into pre-drilled holes in the side panels. - Page 8 Figure 4 5. Put the door onto the bottom connector, then guide the pin on the bottom connector into the hole in the bottom side of the door. Guide the pin in the top connector into the hole in the top side of the door. Use a 1/4"x15 mm bolt and washer to attach the top connector to the right side panel as shown in Figure 5.
- Page 9 Figure 6 7. Attach the LP support to door panel by using four 1/4"x15 mm bolts and washers as shown in Figure 7. Do not over tighten. Figure 7 8. Place gas tank onto the LP support as shown in Figure 8. Figure 8...
- Page 10 9. Attach the metal ring ( as shown in Figure 9) pre-fitted with gas hose which is connected to the table top , into the hole of the door panel, then use hex bolt driver to screw 1/4"x5mm nut , the gas tank has fixed as shown in Figure 9a. Connect the regulator as shown in Figure.10 Screw the black handle clock-wise to tighten.
- Page 11 11. Pour the lava rocks into the burner pan completely covering the burner. See Figure 11. BURNER PAN IGNITION WELL Figure 11 12. Remove the cardboard cover from the ignition well as shown in Figure 12. Remove any lava rock or fire ice on top of ignition well. CARDBOARD COVER Figure 12 13.
-
Page 12: Natural Gas Conversion
Metal Rating Plate Serial Number Model Number: 98300 CAUTION: The gas pressure regulator provided with this appliance must be used. This regulator is set for an outlet pressure of 11 inches water column (2.7 kPa). The gas supply must be turned off at the LP-gas supply cylinder when this appliance is not in use. -
Page 13: Batteries
BATTERIES Make sure the control knob is in the "OFF" position. Unscrew the push button cap on the ignition module located on the control panel to access the battery compartment. The ignition module requires one Alkaline AAA size battery (1.5V). The negative (-) end goes in first. -
Page 14: Maintenance
MAINTENANCE The flames should look like those in Figure 18. To clean the burner, use a soft brush after the burner has cooled completely. Never use a vacuum cleaner on the burner. It is recommended that the fire pit be stored indoors during the winter if it will be subjected to freezing temperatures. -
Page 15: Warranty
90-DAY LIMITED WARRANTY What is Covered Under This Warranty? The item you have purchased is warranted against defects in materials and workmanship for the following parts as outlined below only when unit is installed and operated in accordance with the instructions in this Owner’s Manual and in compliance with local building and fire codes: ...
Need help?
Do you have a question about the 98300 and is the answer not in the manual?
Questions and answers