Advertisement
Table of Contents
- 1 Table of Contents
- 2 Important Safety Information
- 3 Important Information about Propane
- 4 Specification
- 5 Parts Identification List
- 6 Installation
- 7 Natural Gas Conversion
- 8 Batteries
- 9 Lighting Instructions
- 10 Burner Cover Assembly
- 11 Maintenance
- 12 Troubleshooting Guide
- 13 Warranty
- Download this manual
See also:
Assembly and Instruction Manual
ASSEMBLY INSTRUCTIONS RETAIN FOR FUTURE REFERENCE:
Installer: Leave these instructions with consumer.
Consumer: Keep these instructions for future reference
DANGER
If you smell gas:
1. Shut off gas to the appliance.
2. Extinguish any open flame.
3. If odor continues, keep away from
the appliance and immediately call
your gas supplier or fire department.
WARNING
Do not store or use gasoline or other
flammable vapors and liquids in the
vicinity of this or any other appliance.
An LP-cylinder not connected for use
shall not be stored in the vicinity of this
or any other appliance.
DANGER
CARBON MONOXIDE HAZARD
This appliance can produce carbon
monoxide which has no odor.
Using it in an enclosed space can kill
you.
Never use this appliance in an enclosed
space such as a camper, tent, car or
home.
Questions, Problems, Missing Parts? Before returning to
your retailer, call our customer service department in the
US and Canada at 1-888-383-1932, 9:00am - 5:00pm
Monday – Friday, EST. English and French, or you may
email customerservice@agio-usa.com.
Oct-01-2014
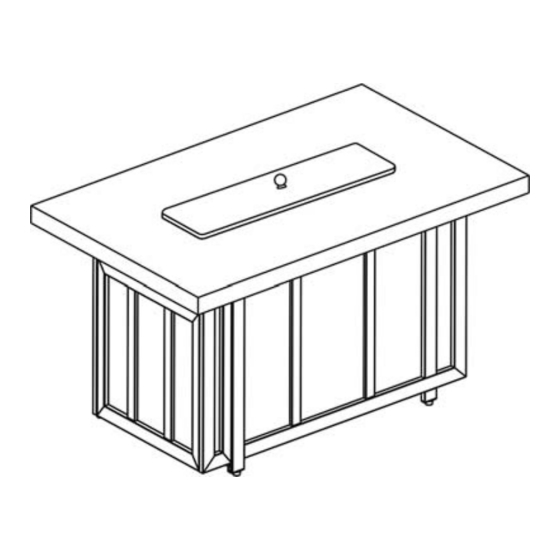
7PC ALUMICAST GATHERING HEIGHT DINING
ITM./ART. 855553
READ CAREFULLY BEFORE ASSEMBLY
CSA Model 98300
WARNING: Chemicals known to the State
of California to cause cancer and birth
defects or other reproductive harm are
created by the combustion of propane.
.
WARNING:
Improper installation, adjustment alteration,
service or maintenance can cause injury or
property damage. Read the installation,
operating and maintenance instructions
thoroughly before installing or servicing this
equipment.
WARNING: For Outdoor Use Only
FOR USE WITH 20LB (9KG) PROPANE
CYLINDER WITH TYPE 1 CONNECTION OR FOR
USE WITH NATURAL GAS AFTER CONVERSION
KIT IS INSTALLED (MUST BE PROFESSIONALLY
INSTALLED) ALSO THE LP REGULATOR MUST
BE SUPPLIED BY THE MANUFACTURER.
WARNING:
USE FACTORY APPROVED
REPLACEMENT PARTS AND
ACCESSORIES ONLY. USE OF
UNAPPROVED PART OR
ACCESSORIES CAN VOID THE
WARRANTY ON THIS
PRODUCT AND RESULT IN A
HAZARDOUS CONDITION.
PLEASE CONTACT US FOR
INFORMATION REGARDING
REPLACEMNT HOSES,
THERMOCOUPLES,
ELECTRODES, IGNITION
MODULES & FIRE ICE, ETC.
1
ARH07100
Advertisement
Table of Contents

Related Manuals for Patio Glow 98300


Summary of Contents for Patio Glow 98300
- Page 1 ITM./ART. 855553 ASSEMBLY INSTRUCTIONS RETAIN FOR FUTURE REFERENCE: READ CAREFULLY BEFORE ASSEMBLY ARH07100 CSA Model 98300 WARNING: Chemicals known to the State of California to cause cancer and birth defects or other reproductive harm are Installer: Leave these instructions with consumer.
-
Page 2: Table Of Contents
TABLE OF CONTENTS Important Safety Information Important Information About Propane Specification Parts Identification List Installation Natural Gas Conversion Batteries Lighting Instructions 9-10 Burner cover assembly Maintenance Troubleshooting Guide Warranty 12-13 For additional online video support on troubleshooting and set up, please feel free to visit our website at: www.agio-usa.com/support/firepits Oct-01-2014... -
Page 3: Important Safety Information
IMPORTANT SAFETY INFORMATION The installation must conform with local codes or, in the absence of local codes, with the National Fuel Gas Code, ANSI Z223.1/NFPA 54; International Fuel Gas Code; Natural Gas and Propane Installation Code, CSA B149.1; or Propane Storage and Handling Code, B149.2, as applicable. -
Page 4: Important Information About Propane
IMPORTANT SAFETY INFORMATION ABOUT PROPANE (LP) GAS An LP-gas cylinder for use with this appliance must have a capacity of 20 lbs. / 9kgs and must be equipped with a Type 1 connector and an OPD (overfill protection device). Figure 1 The LP-gas supply cylinder to be used must be constructed and marked in accordance with the specification for LP-gas cylinders of the U.S. -
Page 5: Parts Identification List
PARTS IDENTIFICATION LIST PART DESCRIPTION PART# CONTROL KNOB FP0245 GAS VALVE FP0307 THERMOCOUPLE FP0004 LP REGULATOR HOSE FP0308 ELECTRODE FP0003 GAS TUBE FP0309 ORIFICE ELBOW FP0310 IGNITION MODULE FP0006 ORIFICE BRACKET FP0311 PROPANE ORIFICE FP0312 NATURAL GAS ORIFICE FP0313 LP TANK RETAINING KNOB FP0585 FIRE ICE SET FP1078... -
Page 6: Installation
INSTALLATION 1. Carefully unpack all items from the box. Place the base in the final position. There must be a minimum of 24 in / 60.9 cm of clearance from the side of the table top to any combustible walls. 2. - Page 7 5. Slide the tank drawer out and place the LP tank in the drawer. Connect the regulator as shown in Figure 6. Screw the black handle clock-wise to tighten. Turn the handle counter clock-wise to remove. The hose must point down. Check that the valve is turned all the way clockwise to the "OFF"...
-
Page 8: Natural Gas Conversion
3. Stick the conversion label on the rating plate as shown in Figure 9. Metal Rating Plate Serial Number Model Number: 98300 CAUTION: The gas pressure regulator provided with this appliance must be used. . This appliance has been converted to use Natural Gas. Input 30,000 Btu/hr. -
Page 9: Batteries
BATTERIES Make sure the control knob is in the "OFF" position. Unscrew the push button cap on the ignition module located on the control panel to access the battery compartment. The ignition module requires one Alkaline AAA size battery (1.5V). The negative (-) IGNITION end goes in first. -
Page 10: Burner Cover Assembly
and continue to hold the control knob in for 10 to 15 seconds. Release the control knob. The control knob should pop back out and then remain lit. Note: If the fire does not light, turn the knob to the “OFF” position and wait five (5) minutes before trying again. -
Page 11: Troubleshooting Guide
TROUBLESHOOTING GUIDE PROBLEM CAUSE REMEDY Check that gas tank valve is open. Turn No Propane Gas at Burner control knob to “ON” and push control knob in. Make sure tank has propane gas. Burner won’t light Check that AAA battery is installed with negative (-) end first and has a charge. -
Page 12: Warranty
One Year Limited Warranty for Firepit What is covered under this warranty? Subject to the terms and conditions set forth below, fireplaces are warranted against defects in material and workmanship for a period of one year. If you have questions regarding care and maintenance of the item(s) you have purchased, please see the accompanying care and maintenance guide or visit our website at www.agio-usa.com. - Page 13 care or maintenance (including without limitation as provided in any “care and maintenance guide” or similar information we provide); normal wear and tear; damage caused by acts of nature, acts of force majeure, vandalism, fire or other casualty, or improper assembly; hardware against corrosion or rusting;...
Need help?
Do you have a question about the 98300 and is the answer not in the manual?
Questions and answers
Replacement for my 98 300 patio glow propane
The replacement part for the Patio Glow 98300 propane is the natural gas orifice from the conversion kit.
This answer is automatically generated