Table of Contents
Advertisement
Quick Links
Advertisement
Table of Contents

Subscribe to Our Youtube Channel
Related Manuals for Teleco ForceHDCL+


Summary of Contents for Teleco ForceHDCL+
- Page 1 USER’S MANUAL HIGH/DEFINITION MULTIMEDIA INTERFACE HD Sat Receiver with CI +...
-
Page 3: Table Of Contents
..................2 AFETY NSTRUCTIONS 1. INSTALLATION OF STB .................. 4 1.1 F ....................4 RONT ANEL 1.2 R ....................4 ANEL 1.3 C ....................5 ONNECTIONS 1.4 R ......................7 EMOTE 2. MAIN MENU ....................... 8 3. EDIT CHANNEL ....................8 3.1 TV C ................... -
Page 4: Safety Instructions
SAFETY CAUTION Safety Instructions DO NOT INSTALL YOUR RECEIVER: In a closed or poorly ventilated cabinet; Directly on top of or under any another equipment; On a surface which might obstruct the ventilation slots. DO NOT EXPOSE THE RECEIVER OR ITS ACCESSORIES: To direct sunlight or heat generated by any other nearby equipment;... - Page 5 Main features: Supports MPEG-2, MPEG-4(H.264) and fully DVB-S2 compliant Supports Common Interface, and Common Interface Plus DiSEqC 1.0, 1.1, 1.2 and USALS(DiSEqC 1.3) Fast channel filtering by first letter of channel name Digital sound through coaxial output (S/PDIF) Display showing 4 digit channel number or time Max.
-
Page 6: Installation Of Stb
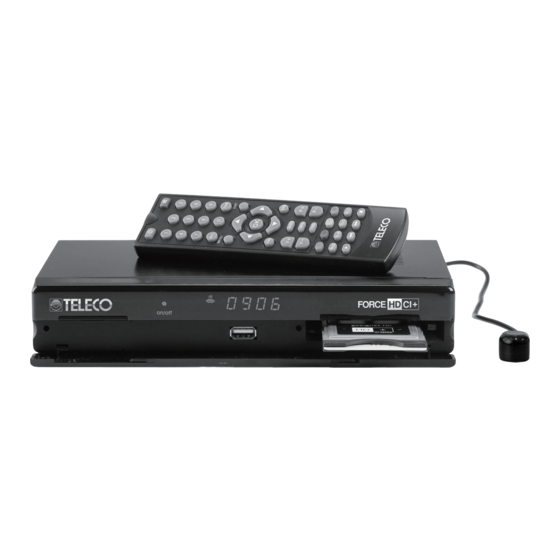
1. Installation of STB 1.1 Front Panel 1. Standby: Used to switch the set top box to on or standby. 2. CH+/CH- Button: Changes the current channel. Moves the cursor up/down in Menu state. Changes the current program to the previous/next program in No-menu state. -
Page 7: Connections
4. VIDEO This connector has a constant video signal for additional VCR-connections. 5. COAXIAL Use this coaxial output to connect your receiver to the input of your digital audio amplifier. 6. TV SCART Connector Use this connector to connect your receiver to your TV set using a SCART cable. 7. - Page 8 <Connecting multiple fixed dishes to your receiver using a DiSEqC 1.0 switch> If you want to watch programs from several satellites (For instance from Astra and from Hot Bird) it is advisable to use fixed dishes and a DiSEqC 1.0 switch. Have your Dealer aim the dishes at the requested satellites and connect the LNBs with coax cables to the IN connectors of the DiSEqC 1.0 switch.
-
Page 9: Remote
Connect the STB’s power cables into 12 Vdc power source (battery). Wait till when the display shows the message “Lock” and it is ready to select the program. 1.4 Remote All the features of the set-top box can be controlled with the remote control unit. : Switch between operation and standby modes : Press to temporarily mute 0-9: To enter a number or select a channel number to... -
Page 10: Main Menu
2. Main Menu The STB contains a facilitated user interface; this function makes it easier for the user to recall all the device functions. Operation Steps: Press “MENU”, you will display this main menu. If no menu is displayed on the screen, press the MENU key to display the main menu. - Page 11 3.1.2 Lock In the “TV Channel List” menu, you can select a channel by pressing the UP/DOWN key, then press the “RED” key and “OK” key to lock this channel. Press “OK” again to cancel the lock. If the “OK” key is pressed again the selected channel is unlocked.
-
Page 12: Delete All
3.2 Delete All In the “Edit Channel” menu, press the UP/DOWN key, select “Delete All”, and press the “OK” key, then choose to delete all channels. 4. Installation From the main menu, you can press the UP or DOWN key to select the “Installation” icon. From this menu, we can select “Antenna Connection”, “Satellite List”, “Antenna Setup”, “Single Satellite Search”, “Multi Satellite Search”, “TP... -
Page 13: Antenna Setup
Edit Press the UP or DOWN button to select one satellite, press the RED button to enter the “Edit Satellite” menu, press a numeric key to enter the new name. Press the GREEN button to add a new satellite. Delete Press the BLUE button to delete a selected satellite. -
Page 14: Tp List
4.6 TP List In this menu, you can edit the transponders, add transponders, delete transponders, and search channels with the selected transponder. Edit Press the UP or DOWN key to select one transponder, press the RED key to edit it by setting Frequency, Symbol Rate and Polarity. -
Page 15: Other
Search Press the UP or DOWN key to select one transponder, press the BLUE key to search channels by setting FTA Only, Scan Channel and Network Search. 4.7 Other In this menu, you can set LNB Power (On or Off), LNB Standby Loop (On or Off), Channel Play Type (All, Free or Scrambled) BER (On or Off) and Auto Standby. -
Page 16: Display Setting
5.3 Display Setting You can set Brightness, Contrast and Saturation. 5.4 Local Time Setting You can set your STB’s time. This function is useful for EPG and some timer functions. If a broadcaster provides GMT, you can set the time using GMT or set your own time by yourself. If the “GMT usage”... -
Page 17: Parental Lock
5.5 Parental Lock In “Parental Lock” menu, you can set Menu Lock, Channel Lock and change the password. 5.6 OSD Setting You can set OSD Timeout and OSD Transparency. 5.7 Favorite You can select the favorite group and press “OK” key to rename it. -
Page 18: Information
6.1 Information From the “Tools” menu, you can select the “Information” menu. In this menu, you can view the HW version and SW version. 6.2 Factory Setting You can restore factory settings by selecting “Load Factory Setting” and pressing the “OK” key. -
Page 19: Media Player
6.5 Media Player In this menu, you can play music and set up the media player. 6.6 Remove USB device safely Select this item and press OK key to remove an USB device safely. 7. Game There are two games in this menu (Othello and Sudoku), you can play them following the instructions. -
Page 20: Favorite List
8.2 Favorite List If you press “FAV” on the remote controller and you are not inside the menu, the favorite group list will be displayed on the screen. You can select one favorite group and press “OK” key to enter the favorite channel list. -
Page 21: Technical Specifications
9. Technical Specifications Tuner & Channel Decoder Input/Loop through F-type, IEC 169-24, Female Connector Frequency Range 950 ~ 2150MHz LNB Power & Polarisation Vertical : +13.5 Horizontal: +18.5 Current : Max.500mA with Overload Protection Frequency : 22 1KHz 22KHz Tone Amplitude : 0.65 0.2V Demodulation DVBS QPSK ,DVBS2 QPSK ,DVBS2 8PSK... - Page 22 S/PDIF COAXIAL Video CVBS output RCA A/V Audio L/R output USB2.0 Host Conditional Access Interface PCMCIA Front Panel one power button 7 segment 4 digit LED Display Power Supply Input Voltage 100~240VAC, 50/60Hz Type SMPS Running: Max. 8W when LNB Off, Power Consumption Standby: Max 2W with clock showing on LED display...
-
Page 23: Troubleshooting
10. Troubleshooting There may be various reasons for the faulty operation of the receiver. Check the receiver according to the procedures shown below. If, after checking the receiver, the problem persists, contact the dealer. Do not open the receiver cover. This may be a source of danger. Problem Possible causes What to do...
Need help?
Do you have a question about the ForceHDCL+ and is the answer not in the manual?
Questions and answers