Table of Contents
Advertisement
Quick Links
Advertisement
Table of Contents

Related Manuals for Teleco TSDR5000CI


Summary of Contents for Teleco TSDR5000CI
- Page 1 VOLT Digital DVB Menu TSDR5000CI Camping receiver V. 002...
-
Page 2: Table Of Contents
Favourites lists which were factory loaded Other immediate functions Menu and advanced functions Introduction Accessing the menu The favourites list Creating a list Modifying a list Deleting a list Installation Antenna/Satellite configuration Antenna configuration 2 - Digital DVB TSDR5000CI receiver... -
Page 3: Figures And Tables
Figure 10 – Service list management Figure 11 – Creating a list Figure 12 – Modifying a list Figure 12 A – Modifying a list Figure 12 B – Modifying a list Figure 13 – Deleting a list Digital DVB TSDR5000CI receiver - 3... - Page 4 Figure 47 – LNB configuration Figure 48 – Service installation Figure 49 – Services being installed Figure 50 – Service reception complete Figure 51 – Services saved Figure 52 – Clock setting Figure 53 - Reinstallation completed 4 - Digital DVB TSDR5000CI receiver...
-
Page 5: Information
Ftp: ftp: \\ 85.47.106.113 TELECO s.p.a. shall not be held responsible for any errors in drawing up this manual. All information which is contained herein is updated on the date of issue and the aforementioned revisions. TELECO s.p.a. reserves the right to make modifications according to technological changes. -
Page 6: Safety Information
Always observe safety information with the utmost care. Electronic devices on the TSDR5000CI receiver can generate potentially dangerous voltages. Electronic device covers must only be removed for maintenance and set-up purposes and only after taking all the required precautions. -
Page 7: General View
General view General view Remote control ON/OFF Mute TV/RADIO Menu Right, left, up, down and OK keys Page + e - Exit Audio Favourites list Info Pause Digital DVB TSDR5000CI receiver - 7... - Page 8 Image freeze (analogous to VHS pause function) Sat Finder: sound level and quality tone of the signal Page + / - Goes to next or previous page on a list. Mute Audio service disabled 8 - Digital DVB TSDR5000CI receiver...
-
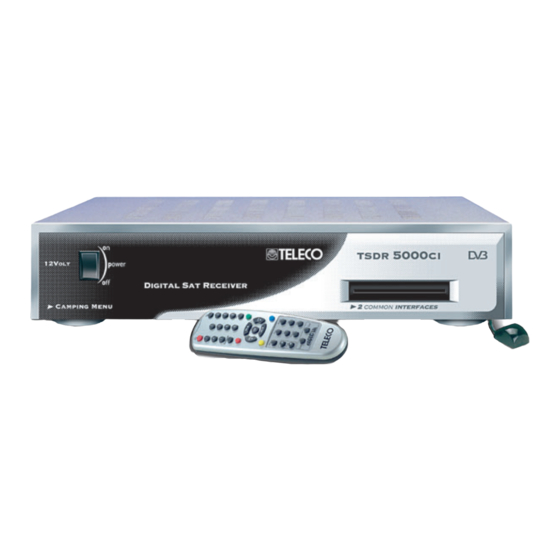
Page 9: Front View
Figure 1 - frontal panel Rear view Audio Power supply Antenna outputs LNB input input (9) VCR (4) (12) TV output S-VHS remote DataPort output (2) Computer (10) (11) port (3) Figure 2 - rear panel Digital DVB TSDR5000CI receiver - 9... - Page 10 TV does not have a SCART connector or a base band audio/video input. IR_Remote Remote control IR sensor connector DataPort DataPort connector for additional devices 12V Power supply 12 Volt power connector. 10 - Digital DVB TSDR5000CI receiver...
-
Page 11: Technical Specifications
• RS232 port for software update and service list management. • Software can be updated via satellite. • DataPort for connection with other TELECO devices. • 12 Volt power supply (-20 +20 %), 1 A max. Technical specifications Tuner •... -
Page 12: List Of Accessories
To be stored at a relative humidity of 5 - 95 % (not condensable) List of accessories The TSDR5000CI receiver is delivered inside a cardboard box to protect it from impact and compression. The receiver is supplied with the following accessories: •... -
Page 13: Installation
RGB mode (where the TV set has this feature), which gives better image quality. If your TV set does not have a SCART connection (or a base band audio/video input), the TSDR5000CI receiver can be connected with the modulator as described below. -
Page 14: Additional Connections
Connecting to a monitor in S-VHS If you are using a monitor or TV with a S-VHS input the TSDR5000CI receiver can be connected via the socket (6) labelled S-VHS. This type of connector provides a CVS video signal (i.e. with luminance and chrominance signals separated);... -
Page 15: Immediate Use Of The Receiver
The info banner will reappear and the figure you have just keyed in will appear in the upper-right corner of the screen. The service number can be incremented or decremented by one unit via the keys. 15 - Digital DVB TSDR5000CI receiver... -
Page 16: Favourites Lists Which Were Factory Loaded
These lists are in every respect a first customization of the receiver, which can easily be removed by the user. As such it CANNOT be restored any more if the receiver is brought back to its minimum setting (factory default). 16 - Digital DVB TSDR5000CI receiver... -
Page 17: Figure 5 - Volume
Per uscire premere il tasto EXIT. Another immediate-access function is selection of the audio service (AUDIO key). If the event is being broadcast with more than one audio service you can choose from among those available: Digital DVB TSDR5000CI receiver - 17... -
Page 18: Figure 8 - Audio Service Selection
Immediate use of the receiver Figure 8 - audio service selection To choose the desired audio service, use the right/left arrow keys then press OK to confirm. To exit without selecting any service, press the EXIT key. 18 - Digital DVB TSDR5000CI receiver... -
Page 19: Menu And Advanced Functions
• the OK key to confirm your choice • the EXIT key to leave the menu. The favourites list This sub-menu can be used to create, modify or delete a services list. Digital DVB TSDR5000CI receiver - 19... -
Page 20: Creating A List
Once the name of the list has been defined, use the keys to select the properties (Services, Coding mode, List type, Satellite) of the list being created and use the keys to choose the following options: 20 - Digital DVB TSDR5000CI receiver... - Page 21 In both cases the lists can be properly modified via the “Skip/Add” and “Delete” controls in the suitable menu (for more details see “Modifying a list “ section). Digital DVB TSDR5000CI receiver - 21...
-
Page 22: Modifying A List
When the service is On, it can be used under the normal navigation modes (Camping Menu or Full Screen display). When the service is Off, it cannot be used under the normal navigation modes, but it is inside the list which can be customized. 22 - Digital DVB TSDR5000CI receiver... -
Page 23: Figure 12 A - Modifying A List
OK to confirm. Then select pos. 6, press the Yellow key and press OK to confirm. Network ID (Blue key): the ser vices in the list are arranged by Network ID. Satellite ID (Green key): the order of the services in the list is determined by the Satellites which Digital DVB TSDR5000CI receiver - 23... -
Page 24: Deleting A List
To delete a list just select it and press OK . Remember that a deleted list cannot be recovered. Installation This sub-menu allows you to set all the main functions of your TSDR5000CI receiver. Note: these settings are important and must, therefore, always be modified with due care and attention as some parameters can limit or prevent proper operation of the receiver. -
Page 25: Antenna/Satellite Configuration
OK key. To leave the menu press the EXIT key. Antenna configuration Use this sub-menu to set the type of connection between your receiver and the antenna system: Digital DVB TSDR5000CI receiver - 25... -
Page 26: Satellite Configuration
Menu and advanced functions Figure 16 - Configuring the antenna The options are: • Mono (i.e. antenna connected directly to the receiver as with TELECO Voyager systems). • Multi (i.e. connections with multiswitch systems). • Motor (i.e. connection with motorised systems based on the DiSEqC protocol) •... -
Page 27: Adding A New Satellite
This sub-menu allows the user to add the name and technical specifications of a new satellite to the general satellites list. The list can contain up to 32 satellites. Figure 19 - Adding a new satellite Digital DVB TSDR5000CI receiver- 27... -
Page 28: Modifying The Satellites List
OK key. To leave the Select an item using the menu press the EXIT key. Adding a transponder Use this sub-menu to add a transponder associated with the desired satellite. 28 - Digital DVB TSDR5000CI receiver... -
Page 29: Deleting A Transponder
Select an item using the keys and confirm your choice by pressing the OK key. To leave the menu press the EXIT key. Deleting a transponder Use this sub-menu to delete a transponder associated with the desired satellite. Figure 22 - Deleting a transponder Digital DVB TSDR5000CI receiver - 29... -
Page 30: Lnb Configuration
OK key. To leave the menu press the EXIT key. Motor configuration Use this sub-menu to set the mechanical specifications of any DiSEqC motor connected to your receiver. 30 - Digital DVB TSDR5000CI receiver... -
Page 31: Service Installation
These functions must only be used if the receiver is connected to a DiSEqC motor. These functions are not available where the receiver is an incorporated part of the TELECO MagicSat system. To use the DiSEqC motor refer to the instructions provided by the makers. - Page 32 Type of service: (i.e. whether you wish to acquire all the available services or only those that are Free to Air). Once you have set the service installation mode, confirm by pressing the OK key and your receiver will start acquiring the new services. Figure 26 - Service acquisition 32 - Digital DVB TSDR5000CI receiver...
-
Page 33: Tv Configuration
OK key. To leave the Select an item using the menu press the EXIT key. TV configuration Use this sub-menu to set the receiver-TV connection specifications Digital DVB TSDR5000CI receiver - 33... -
Page 34: Set Time
Select an item using the and number keys and confirm your choice by pressing the OK key. To leave the menu press the EXIT key. Set time Use this sub-menu to set the clock on your receiver: 34 - Digital DVB TSDR5000CI receiver... -
Page 35: Vcr Configuration
To leave the menu press the EXIT key. VCR configuration Use this sub-menu to add, modify or delete a receiver switch-on or switch-off program so that you can set recording of the desired program: Figure 31 - VCR configuration Digital DVB TSDR5000CI receiver - 35... -
Page 36: Reinstallation
Symbol rate of the transponder. • FEC of the transponder. These parameters are generally preset to the correct values, yet can, at TELECO’s request, be adapted to carry out any updates. and number keys and confirm your choice by pressing the OK key. -
Page 37: User Settings
Use this menu to set the language in which menus and messages are displayed by your TSDR5000CI receiver and the default audio language. If the received service is available in the default language this language will be selected automatically. If it is not your receiver will provide the main audio service. -
Page 38: Access Control
Use this sub-menu to set and/or modify the PIN (Personal Identification Number) code, which gives access to any “padlocked” functions. To modify the PIN you must key in the previously assigned PIN. Note: the PIN code is factory-set to 1234 Figure 36 - PIN code 38 - Digital DVB TSDR5000CI receiver... -
Page 39: Information About System
If you access this sub-menu without inserting the CAM the following message appears: Figure 38 - Conditioned access Inserting a CAM may generate a message similar to the following (the message may change depending on the module inserted): Digital DVB TSDR5000CI receiver - 39... - Page 40 CAM and on the subscription to the card in the module (this information changes depending on the inserted module). There follow some examples of additional information relative to the inserted CAM and card. Figure 40 - Example of information on the CAM 40 - Digital DVB TSDR5000CI receiver...
- Page 41 Menu and advanced functions Figure 41 - Example of information on the SmartCard Digital DVB TSDR5000CI receiver - 41...
-
Page 42: Reinstalling Your Receiver
Note: the PIN code is factory-set to 1234. The memory of the receiver is fully cleared and the receiver goes off and again on in a few seconds. A few moments later the following message appears: 42 - Digital DVB TSDR5000CI receiver... - Page 43 Confirm with the OK key and the following appears: Figure 45 - Setting the language during re-initialisation Set the desired language with the right and left arrow keys, then confirm with the OK key. Then set the type of TV set connection: Digital DVB TSDR5000CI receiver - 43...
- Page 44 Once this task has been completed confirm with the OK key. The subsequent task consists of setting the type of converter connected to your receiver: Figure 47 - LNB configuration Once this task has been completed confirm with the OK key. Next, set the service installation mode: 44 - Digital DVB TSDR5000CI receiver...
- Page 45 During this task the screen displays the following message: Figure 49 - Services being installed Digital DVB TSDR5000CI receiver - 45...
- Page 46 Reinstalling your receiver Figure 50 - Service reception complete Figure 51 - Services saved 46 - Digital DVB TSDR5000CI receiver...
-
Page 47: Figure 53 - Reinstallation Completed
Unless specifically stated otherwise, it is advisable to leave the settings in automatic. At the end press the OK key again to confirm your choice. Re-installation of the receiver has now been successfully completed. Figure 53 - Reinstallation completed Digital DVB TSDR5000CI receiver - 47... -
Page 48: Glossary
The SmartCard is designed for use together with the Control Access device (see CAM), which must be must be able to read the information it contains. 48 - Digital DVB TSDR5000CI receiver... - Page 49 Glossary Digital DVB TSDR5000CI receiver - 49...
- Page 50 Glossary 50 - Digital DVB TSDR5000CI receiver...
- Page 51 Digital DVB TSDR5000CI receiver - 51...
- Page 52 Tel. 06155 797873 - Fax. 06155 797871 e-mail: telecogmbh@telecogroup.com info@zimmer-mobiltechnik.de www.telecogroup.com Service für Teleco Anlagen in Deutschland: 09001000690 Service für Teleco Anlagen in Österreich: 0900949470 Foto e disegni non contrattuali - Les photos et les dessins ne sont donnés qu’à titre indicatif.
Need help?
Do you have a question about the TSDR5000CI and is the answer not in the manual?
Questions and answers