Advertisement
Quick Links
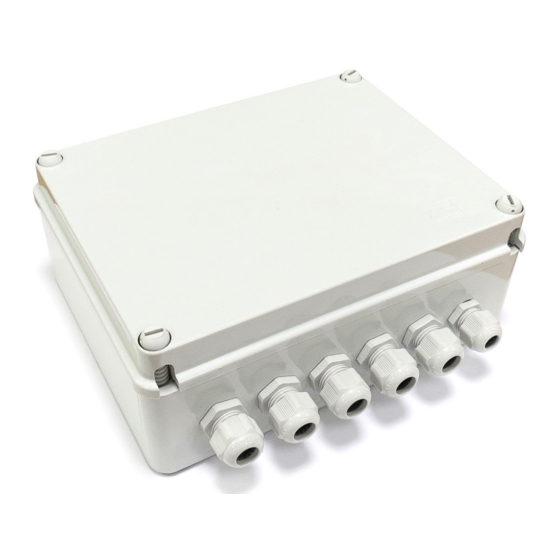
4 OUTPUT RADIO RECEIVER FOR THE CONTROL OF RLC LOAD
Product code
TVDMM868A06
Universal dimmer for the radio control of resistive, inductive, capacitive loads, LED and motors for fans.
4 output with 500W maximum power each at 230Vac or 250W each at 110Vac.
Power supply
230Vac 50/60Hz
110Vac 50/60Hz
Characteristics
Suitable for any type of load, thanks to the manual or automatic configuration of the output
Controlled by transmitters or wired push-buttons with function ON/OFF and Dimming (0%-100%)
Controlled by wireless movement sensors
Compatible with Green Mouse, for the automatic control of the lights
Short circuit protection
Timer for output activation (15 seconds - 20 minutes)
Up to 64 radio codes can be memorized
TVDMMXXXA06
This document is the property of Teleco Automation Srl who reserves all reproduction and copying rights
TELECO AUTOMATION SRL
Via dell'Artigianato, 16 - 31014 Colle Umberto (TV) ITALY
TELEPHONE: ++39.0438.388511 FAX: ++39.0438.388536 - www.telecoautomation.com
(868.3Mhz)
Minimum power (each output)
25W (R) - 25VA (L,C) - 7W (Led)
12W (R) - 12VA (L,C) - 4W (Led)
TVDMM916A06
Maximum power (each output)
500W (R) - 500VA (L,C) - 100W (Led)
250W (R) - 250VA (L,C) - 50W (Led)
DOC.: T888.01_EN
(916Mhz)
DATE: 29/06/20
Advertisement

Related Manuals for Teleco TVDMM868A06


Summary of Contents for Teleco TVDMM868A06
- Page 1 Short circuit protection Timer for output activation (15 seconds - 20 minutes) Up to 64 radio codes can be memorized TVDMMXXXA06 DATE: 29/06/20 DOC.: T888.01_EN This document is the property of Teleco Automation Srl who reserves all reproduction and copying rights...
-
Page 2: Wiring Diagram
Wiring diagram Safety Low- Voltage Zone DANGER Hi-Voltage Heatsink wired to ground Terminal Contact Terminal Contact 1: Line 2: Neutral wired input T5 3: Main GND wired input T6 4: GND 5: GND for L1 6: GND for L2 7: GND for L3 wired input T7 8: GND for L4 wired input T8... - Page 3 SELECTED OUTPUT PIR SETTING DIP SELECTED OUTPUT P1: ON/OFF/Dim L9 ON = Received radio transmission P2: memorize TX Output 1, 2, 3, 4 Output 1, 2, 3, 4 Output 1, 2, 3, 4 L10 ON = Powered P3: delete TX ON = output selected by ON = output selected by (see p.
-
Page 4: Dip Switch Configuration
DIP-Switch configuration WARNING: Dip-switch connected to high-voltage (load setting) cannot be used if the power is ON! Load setting dip-switch (high voltage) Setting is NOT possible when the power is ON FUNCTIONING MODE OFF = switching mode ON = dimming mode (default) Automatic identification of the load Identification of the load... - Page 5 1 - Transmitters Memorization Before memorizing the transmitters select the output associated to the transmission channel by pressing the button P4 (blue). The selection is indicated by the relative LED on. It is possible to memorize the transmitter to one or more outputs. 1.1 - Memorization of 7/42 channel transmitters Short presses of the buttons CH1..CH4 command the preset scenes.
- Page 6 1.3 - Memorization of one transmitter button with ON function The button memorized with On function turns on the control unit at the last output level. Press P2 three times Press P4* and hold it down to select the output 1- Select the output to 2- Press the button P2 three times 3- During the beep sound press...
- Page 7 1.6 - Memorization of Green Mouse (ONLY for output set as dimming mode) Green Mouse is a wireless transmitter for the automatic control of the light in a room. The light level is automatically adjusted as the variation of the natural light, keeping the level configured by the user through the command buttons 2 and 3.
- Page 8 PIR dip switch (page 3). • PIR WITH BOTH ON & OFF COMMAND: The movement sensor (PIR) Teleco TVTXSxx and the transmitter Teleco TVTXLR02x for standard movement sensors, transmit on 2 radio channels, which can be assigned to separate commands ON and OFF using the procedure at paragraph 1.3 and 1.4.
- Page 9 1.11 - Memorization of 7/42 channel transmitters with presets Short presses of the buttons CH1..CH4 command ON/OFF/DIM of the preset scenes. It works only if the scenario/s is or are memorized. CH5 and CH6 adjust the level of the load (Dim UP and Dim DOWN) only if the scenario/s is or are active.
- Page 10 1.12 - Changing the preset scenes of a transmitter associated to a single or 4 outputs 7/42 channel transmitter Adjust Press 5 sec. press 3- Hold down CH7 button for 1- Press the button relative to 2- Adjust the new value with the scene to modify.
- Page 11 a. The 4/7/42 channel transmitter is associated to more than one output. No other input available. Press Press P4 to select the output 1- Press the button relative to the scene to modify. 2- Press P4 to select the output to modify All the output associated to this transmitter will (the selection will be indicated by the turn the load on at the preset value.
- Page 12 c. The 4/7/42 channel transmitter is associated to more than one output as MASTER device and there are also transmitters associated to the single output. SINGLE OUTPUT TRANSMITTER MASTER (any type) (4/7/42 channels) Single output tx Press (1 or 2 or 3 or 4) 4 CH.
- Page 13 2.1 - To delete a transmitter Press Press P3 once Press P4* and hold it down to select the output 2- Press the button P3 once 1- Select the output to associate 3- During the sound press the button by pressing the button P4 (the and hold it down, the buzzer will to delete;...
- Page 14 3.1 - Activation/Deactivation of the Memory of the last value of the Load Activated: commanding the load with a short pulse, it will turn-on with the same values it had before the last OFF command. Deactivated: commanding the load with a short pulse, it will turn-on always at 100%. 1- Select the output using P4 2- Press P1 + P3 and hold them down.
- Page 15 Hereby Teleco automation s.r.l. declares that the product complies with the essential requirements and other relevant provisions, established by the Directive 1999/5/EC. The declaration of conformity can be consulted on the web site: www.telecoautomation.com/ce.
-
Page 16: Technical Specifications
Tel. +33.(0)472.145080 Tel. +49.(0)8122.9563024 Tel. +49.(0)8122.9563024 Tel. +32.67561967 Tel. +32.67561967 Tel. +61.(07)5502.7801 Tel. +61.(07)5502.7801 info@telecoautomation.com info@telecoautomation.com info@telecofrance.com info@telecofrance.com info.de@telecoautomation.com info.de@telecoautomation.com info@telecoautomation.be info@telecoautomation.be info@telecoautomation.com.au info@telecoautomation.com.au This document is the property of Teleco Automation Srl who reserves all reproduction and copying rights...
Need help?
Do you have a question about the TVDMM868A06 and is the answer not in the manual?
Questions and answers