Table of Contents
Advertisement
Advertisement
Table of Contents

Related Manuals for Zebex Barcode scanner


Summary of Contents for Zebex Barcode scanner
- Page 1 Z-3190BT Quick Reference Guide...
-
Page 2: Table Of Contents
Table of Contents Revision History....................2 Important Notice ....................2 General Handling Precautions ................2 Guidance for Printing ...................3 Laser Safety ......................3 For CE-Countries ....................3 Power Supply .......................4 Wireless Communication ..................4 Product Overview ......................8 Scanner and Accessories ....................9 Battery Installation .....................10 Installing Cable Clip ....................11 Connecting the Cradle ....................13... -
Page 3: Revision History
Revision History Changes to the original manual are listed below: Version Date Description of Version September. 02, 2011 Initial release October. 26, 2011 Corrected names and password setting procedure March. 26, 2012 Added wireless communication tips April. 25, 2012 Added cable clip installation June. -
Page 4: Guidance For Printing
Guidance for Printing This manual is in A6 size. Please double check your printer setting before printing it out. When the barcodes are to be printed out for programming, the use of a high-resolution laser printer is strongly suggested for the best scan result. Laser Safety This equipment generates, uses, and can radiate radio frequency energy. -
Page 5: Power Supply
Power Supply Use only original factory battery and the charging equipments. Using any other type of battery and charging equipment may damage the scanner and invalidate the warranty. Do not short the battery terminals. The battery could overheat. ... - Page 6 Near automatic doors or a fire alarm This unit supports security capabilities that comply with the wireless standard to provide a secure connection when the wireless technology is used, but security may not be enough depending on the setting. Be careful when communicating using wireless technology.
- Page 7 Tips to help improve your wireless network Position the access point (host/cradle) in a relatively empty space at central location. When possible, place the access point in a central location on the high ground (1m or above). If your access point is against an outside wall, the signal will be weak on the other side of the room.
- Page 8 Reduce wireless interference. The most common wireless technology, 802.11g (wireless-G), operates at a frequency of 2.4 gigahertz (GHz). Many cordless phones, microwave ovens, hospital equipments, refrigerator, LED, and other wireless electronics also use this frequency. If you use these wireless devices in your office, your device might not be able to "hear"...
-
Page 9: Product Overview
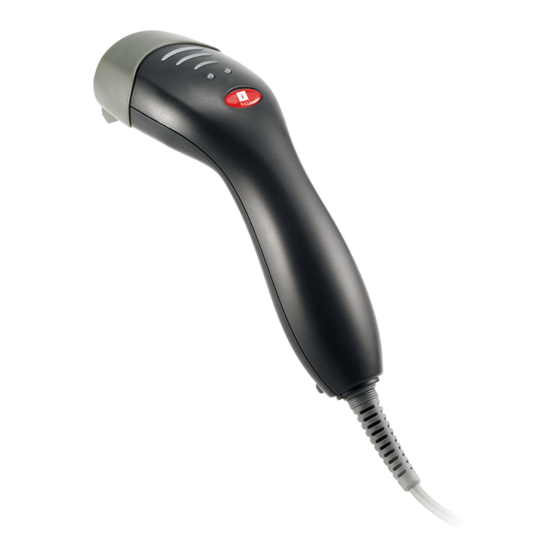
Product Overview This scanner is a gun type rugged wireless CCD/Laser barcode scanner with a state of the art scan engine. Featuring a superb scanning speed and able to withstand 1.5 meter drop, it is ideal for manufacturing and logistic sectors. -
Page 10: Scanner And Accessories
Scanner and Accessories The scanner package contains: Scanner/ Cradle (optional) Li-ion battery pack Communication cable for cradle (optional) Mini USB B to mini USB A cable 5V USB Power adapter CD-ROM or handbook (Containing manual and programming guide) Cable clip If any contents are damaged or missing, please contact your dealer immediately. -
Page 11: Battery Installation
Battery Installation Installing Batteries The rechargeable batteries are packed individually for shipping safety. Please follow the steps below to install the batteries. Always use the rechargeable batteries provided by the manufacturer to avoid any non-compatible danger or void the warranty. Unscrew the cap from the battery compartment at the bottom of the scanner and insert the battery. -
Page 12: Installing Cable Clip
Installing Cable Clip Cable clip is used to hold the mini USB cable in USB Online Mode. With the cable clip, you can easily transform your wireless scanner into a wired one. Please follow the instructions below to attach the cable clip to the scanner. Insert the cable clip to the strap hole as shown. - Page 13 Removing Cable Clip Detach the cable from the clip and detach the bottom part of the cable clip from the scanner handle. Unhook the left part of the cable clip from the strap hole then turn it clockwise. While in turning motion, push the cable clip all the way through.
-
Page 14: Connecting The Cradle
Connecting the Cradle The cradle host features wireless technology and is designed to support radio communication to the scanner. It can be used for both battery charging and radio communication. Take the desirable interface cable and insert the RJ-45 connector on the bottom of the cradle. -
Page 15: Charging The Battery
Charging the Battery The scanner offers two different ways to charge the battery: USB Cable or Cradle. To charge the battery using the cradle: Connect the cradle. Place the scanner on the cradle. You will hear a short beep sound from the scanner indicating scanner is in contact with the cradle. -
Page 16: Power On The Scanner
The scanner will power on automatically when charging. Batteries shipped may not be full charged and should be fully charged for maximum charge capacity. Recommended charging environment is temperature in 0°C~35°C (32°F~95°F). Power On the Scanner Ensure the battery is fully charged. Please refer to the previous section to charge the battery. -
Page 17: Spp Master/Spp Slave Mode
SPP Master/SPP Slave Mode The scanner communicates with the host through wireless connection. Please see User’s Manual for detail operation information. HID Mode The scanner communicates with the smart phone through wireless HID connection. Please see User’s Manual for detail operation information Paging the Scanner Ensure the cradle is properly connected to the host and LED indicator is showing steady blue. -
Page 18: Visible Indicators
Visible Indicators Group 2 Group 1 LED Status Indication Group_ 2 Group_1 Waiting for radio connection (flash time 0.5s : 0.5s). Blue Flashing Radio connecting. Blue fast Flashing Device connected (flash time 0.03s : 3s). Blue Slow Flashing A barcode was decoded successfully 1 Blue Flashing Data transmission Blue Fast... -
Page 19: How To Scan
How to Scan There are two ways to scan with this device. Handheld scanning Presentation scanning Handheld scanning Power on the scanner. Press the trigger and aim at the barcode as illustrated. When decoding is successful, the scanner beeps and the LED indicates blue. Presentation Scanning Put the scanner into the cradle for presentation scanning. -
Page 20: Default Parameters
Default Parameters Parameter Default Radio communication Wireless host Cradle Host Pairing mode Unlocked Data transmit Normal Radio protocol timeout 5 seconds Power off timeout 20 minutes Encryption Enable Cradle Host RS-232 communication Baud rate 9600 Parity none Data bits Stop bit RTS/CTS Terminator <CR><LF>... - Page 21 None Inter-message delay None Inter-character delay None Code Identifiers Default Identifier code as ZEBEX standard Disable Identifier code as AIM standard Disable Code 39 identifier code ITF 2 of 5 identifier code Chinese post code identifier code UPC-A identifier code...
-
Page 22: Programming Card
Programming Card Introduction This programming card contains only frequently-used programming bar code labels used to configure the scanners. For detailed programming instructions and safety notices please refer to the User’s Manual or Programming Guide. Programming Procedure Power up the scanner. Scan the Start of Configuration barcode. -
Page 23: System Settings
Start Of Configuration System Settings Return scanner to factory defaults Return cradle host to factory defaults Return to USB default (Communication cradle link required) Return to wand emulation default (Communication cradle link required) Return to RS232 default (Communication cradle link required) IBM PC/AT/PS2 keyboard emulation (Communication cradle link required) Return as USB-virtual COM port default... -
Page 24: Cradle Host Mode
Start Of Configuration Cradle Host Mode Connect the cradle and the computer. Please make sure the cradle LED is flashing blue indicating it’s not linked to any scanner. If the LED shows steady blue, the cradle is already paired to another scanner so you must unpair the scanner before continuing. -
Page 25: Wireless Mode
Start Of Configuration Wireless Mode SPP Slave Mode Turn on the host computer and activate its wireless connection. Select your wireless device. Or open the dialog wireless devices and click “Add”. Power on the scanner and program it with “SPP Slave mode” label. Scanner SPP Slave enable On Devices tab, click Add. -
Page 26: Spp Master Mode
Start Of Configuration SPP Master Mode Power on of the remote device and have its address ready in hand. Please also make it discoverable. Program the scanner with the “SPP Master enable” barcode. Scanner SPP Master enable Scan “Set wireless address” to set the address. Set wireless address (SPP Master only) Use the ASCII table in Programming Guide to input the 12 digit wireless address. -
Page 27: Hid Mode
Start Of Configuration HID mode Power on the scanner and program it with “HID Mode”. To connect a smart mobile phone (for example, Android phone), the Smart phone mode must also be enabled. HID mode Smart phone mode Enable wireless function on your host and follow the instructions in your host to set it to discover other wireless devices in its surrounding. -
Page 28: Usb Online Mode
Start Of Configuration USB Online Mode The scanner connects directly to a USB host to recharge and transmit data. You may enable or disable the functions using the following settings. Disable USB communication USB online scan disable Enable USB communication USB online scan enable Set USB as the primary connection USB online scan, Ignore radio communication... -
Page 29: Data Transmit Method
Start Of Configuration Data Transmit Method The data transfer method includes three types: Normal (default), Out-of-Range Mode, and Batch Mode. Users may modify this setting according to their preferences. Normal When the scanner is within the connection range, the scanned data will be transferred to the host computer immediately. -
Page 30: Clearing Batch
Start Of Configuration Clearing Batch Use the settings in this section to clear the stored data. “Confirm Setting” label must be read to save the settings in this section. Clear batch data after send Clear batch data by scanning “Delete batch data” label Confirm Setting (for address and pin code setting required) Delete batch data Batch Transfer... -
Page 31: Batch Mode Sounds Settings
Start Of Configuration Batch Mode Sounds Settings Use the settings in this section to setup the sound. Out of range resend data with beeper sound Out of range resend data without beeper sound in Out of range mode. Send Batch Data without beep Send Batch Data with Beep End Of Configuration... -
Page 32: Appendix
Appendix ASCII Code 39 Table... - Page 33 Enter Full ASCII ---CR Function key-----“Enetr(num.)”...
- Page 36 593-33190E-202...
Need help?
Do you have a question about the Barcode scanner and is the answer not in the manual?
Questions and answers