Table of Contents
Advertisement
Quick Links
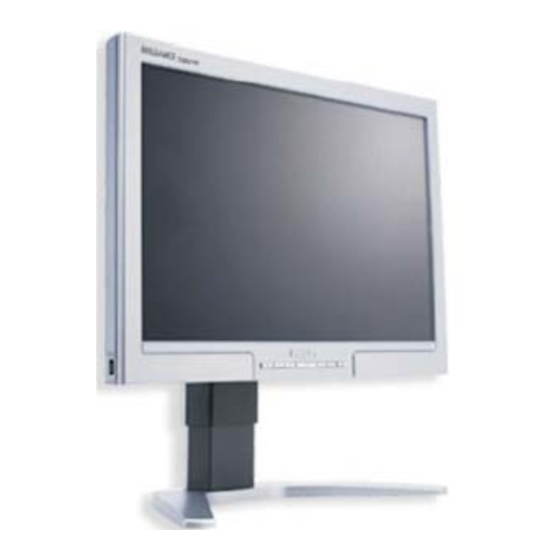
LCD Colour Monitor
Service
Service
Service
Description
Important Safety Notice---- ------------------------------ 2
Technical Data----------------------------------------------3
Instalation/On Screen Display------------------------4~6
Troubleshooting--------------------------------------------9
Warning Message ----------------------------------------10
Lock/unlock,Aging,Factory mode ---------------------11
Mechanical Instructions----------------------------12~13
Color adjustment -----------------------------------------14
---------------------------------------------15
DDC DATA --------------------------------------------24~25
ISP Instruction----------------------------------------26~27
Wiring Diagram-------------------------------------------31
Block Diagram---------------------------------------------32
ANY PERSON ATTEMPTING TO SERVICE THIS CHASSIS MUST FAMILIARIZE HIMSELF WITH THE CHASSIS
AND BE AWARE OF THE NECESSARY SAFETY PRECAUTIONS TO BE USED WHEN SERVICING ELECTRONIC
EQUIPMENT CONTAINING HIGH VOLTAGES.
CAUTION: USE A SEPARATE ISOLATION TRANSFORMER FOR THIS UNIT WHEN SERVICING.
REFER TO BACK COVER FOR IMPORTANT SAFETY GUIDELINES
Published by Philips CE
TABLE OF CONTENTS
------------------------------------7
--------------------------------8
---16~23
-------------28~29
Copyright reserved
200PW8ES/00
Page
Description
Scaler Board Diagram -----------------------------33~44
Power Board Diagram -----------------------------45~48
USB Board Diagram--------------------------------49~50
Key Board Diagram---------------------------------51~52
General product specification--------------------53~68
Exploded View -------------------------------------------69
Repair tips--------------------------------------------70~71
Repair Flow chart-----------------------------------72~74
Spare&Recommended parts list-----------------75~81
Different parts list----------------------------------------82
SAFETY NOTICE
Subject to modification
Chassis: HUDSON 8
Horizontal frequencies
30 - 83 kHz
----------------------------------------------83
Nov,28, 2007
Page
GB
3122 785 17640
Advertisement
Table of Contents

Related Manuals for Philips 200PW8ES/00


Summary of Contents for Philips 200PW8ES/00
-
Page 1: Table Of Contents
Technical Data----------------------------------------------3 Power Board Diagram -----------------------------45~48 Instalation/On Screen Display------------------------4~6 USB Board Diagram--------------------------------49~50 Failure Mode Of Panel ------------------------------------7 Key Board Diagram---------------------------------51~52 Philips Pixel Defect Policy --------------------------------8 General product specification--------------------53~68 Troubleshooting--------------------------------------------9 Exploded View -------------------------------------------69 Warning Message ----------------------------------------10 Repair tips--------------------------------------------70~71 Lock/unlock,Aging,Factory mode ---------------------11... -
Page 2: Important Safety Notice
Proper service and repair is important to the safe, reliable operation of all Philips Consumer Electronics Company** Equipment. The service procedures recommended by Philips and described in this service manual are effective methods of performing service operations. Some of these service operations require the use of tools specially designed for the purpose. -
Page 3: Technical Data
Technical Data HUDSON 8 Pin No. Description Type NR. : LM201W01 (LG.PHILIPS) T.M.D.S. data2- Outside dimensions : 459.4(H) x 296.4 (V) x 22.8(D) mm (Typ.) Pixel Pitch ( mm ) : 0.258mm x 0.258mm T.M.D.S. data2+ Color pixel arrangement : RGB vertical stripes T.M.D.S. - Page 4 EDFU pack Connecting to Your PC Connect the power cord and DVI cable to the back of the monitor firmly. (Philips has pre-connected VGA cable for the first installation.) To switch monitor's power On and Off To access OSD menu...
- Page 5 Installation HUDSON 8 VESA mounting holes Hold the monitor base with both hands and firmly fix the base plate into four-pronged base attachments. Install the wall mount 3)Fastening base stand with the monitor. VESA Standard Mounting Place monitor face down on a smooth surface. Unscrew the 4 screws at the base.
-
Page 6: Instalation/On Screen Display
Description of the On Screen Display On-Screen Display (OSD) is a feature in all Philips LCD monitors. It allows an end user to adjust screen performance or select functions of the monitors directly through an on-screen instruction window. A user friendly on screen display interface is shown as below : Basic and simple instruction on the control keys. -
Page 7: Failure Mode Of Panel
Failure Mode Of Panel HUDSON 8 Quick reference for failure mode of LCD panel this page presents problems that could be made by LCD panel. It is not necessary to repair circuit board. Simply follow the mechanical Polarizer has bubbles instruction on this manual to eliminate failure by replace LCD panel. -
Page 8: Philips Pixel Defect Policy
Philips guarantees that any monitor with an unacceptable number of defects will be during the warranty period, a TFT LCD panel in a Philips flat panel monitor must have pixel or sub pixel defects exceeding the repaired or replaced under warranty. -
Page 9: Troubleshooting
Troubleshooting HUDSON 8 Common Problems Having this problem Check these items No Picture Make sure the power cord is plugged into the power out let and Power LED not lit) into the back of the monitor. First, ensure that the power button on the front of the monitor is in the OFF position, then press it to the ON position. -
Page 10: Warning Message
Warning Message HUDSON 8 Warning message table Attention Signals Display Time Condition CANNOT DISPLAY THIS 30 mins This warning appears when the input signal from your computer is not in VIDEO MODE, CHANGE a standard video mode or is out of the monitor s scanning range. After COMPUTER DISPLAY 30 mins, monitor enters sleeping mode. -
Page 11: Lock/Unlock,Aging,Factory Mode
Lock/Unlock,Aging,Factory Mode HUDSON 8 Front Control After 15 seconds, bring up: AGING... After 15 seconds, bring up: ---------- ---------- repeatly Connect Signal cable again=> go back to normal display To Lock/Unlock OSD FUNCTION(User Mode) The OSD function can be locked by pressing"MENU"button for more than 10 seconds, the screen shows following windows for 4 seconds. -
Page 12: Mechanical Instruction
Mechanical Instruction HUDSON 8 Front View Fig.5 Fig.1 Back View Fig.6 Fig.2 Fig.7 Step 1.Remove the Base Unscrews four screws asFig.3 Fig.8 Step 3. Rremove the Front cover assy Unscrews eight screws as Fig 9 Fig.3 Step 2. Remove the Back cover assy 1. - Page 13 Mechanical Instruction HUDSON 8 6. Unplug three connectors as Fig 15 2. Unscrew four screws as Fig 11 Fig.15 3.Unplug five connectors as Fig 12 ,Fig 13 Fig.16 Fig.12 Fig.13 Fig.17 4.Unscrew seven screws as Fig 14. Insulation material Fig.14 5.
-
Page 14: Color Adjustment
Color Adjustment HUDSON 8 Alignment procedure Clear image Clear image 1. Turn on the LCD monitor. 2.Turn on the Timing/pattern generator. See Fig.1 3. Preset LCD color Analyzer CA-110 -Remove the lens protective cover of probe CA-A30. -Set measuring/viewing selector to measuring position for reset analyzer.(zero calibration) as Fig.2 Measurement/viewing selector Measurement/viewing selector... -
Page 15: Smart Manage
The solution includes three essential components, Philips SmartManage Administrator, and Philips SmarControl and Agent. Philips SmartManage is a solution joint developed by Philips and Altiris Inc. SmartManage Features and Benefits The Philips SmartManage is a working console for IT management... -
Page 16: Ddc Instructions& Serial Number Definition
DDC Instructions HUDSON 8 General Pin Assignment The digital only connector contains 24 signal contacts organized in DDC Data Re-programming three rows of eight contacts. Signal pin assignments are listed in the In case the DDC data memory IC or main EEPROM which storage all following table: factory settings were replaced due to a defect, the serial numbers have to be re-programmed"Analog DDC IC, &... - Page 17 DDC Instructions HUDSON 8 Configuration and procedure 3. At the submenu, type the letter of your computer's hard disk drive followed by :EDID46 (for example, C:\EDID46, as shown in Fig. 6). There is no Hardware DDC (DDC IC) anymore. Main EEPROM stores all factory settings and DDC data (EDID code) which is also called Software DDC.
- Page 18 DDC Instructions HUDSON 8 Re-programming Analog DDC IC Step 1: After initialize alignment box, connecting all cables and box as shown in Fig. 10 (unplug the 15th pin of the D-SUB cable connecting with monitor) 1=Power connector 2=D-SUB connector Fig. 12 DC Power 8-12V 3.
- Page 19 DDC Instructions HUDSON 8 Fig. 18 Fig. 15 Click Next , bring up Fig.19. Click Next , bring up Fig.16. Fig. 19 Fig. 16 Click Next , bring up Fig. 20. In this step, please confirm the Descriptor Data Type is Monitor Click Next , bring up Fig.17.
- Page 20 DDC Instructions HUDSON 8 Click Next , bring up Fig. 21. Fig. 24 Step 6: Save DDC data Sometimes, you may need to save DDC data as a text file for using in other IC chip. To save DDC data, follow the steps below: Fig.
- Page 21 DDC Instructions HUDSON 8 Re-programming Digital DDC IC 3. Click OK button to confirm your selection. 4. Click icon (Read EDID function) to read DDC EDID data from monitor. The EDID codes will display on screen as shown in Fig. 30. Step 1: After initialize alignment box, connecting all cables and box as shown in Fig.
- Page 22 DDC Instructions HUDSON 8 Step 4: Modify DDC data (Monitor Serial No.) Click Next , bring up Fig. 32. Click Next , bring up Fig. 33. Click Next , bring up Fig. 34. Fig. 36 Click Next , bring up Fig. 37. NOTE: You must modify the Serial NO.
-
Page 23: Serial Number Definition
DDC Instructions HUDSON 8 Click Next , bring up Fig. 39. Click Save. In this step, please confirm the Descriptor Data Type is Monitor Step 7: Exit DDC program Range Limits, and all the items are same as below. Pull down the File menu and select Exit as shown in Fig. 42. Fig.39 Fig.42 Step 8: Turn off the monitor, exit the factory mode. -
Page 24: Ddc Data
EDID Version#: Max. H. rate: 83KHz EDID Revision#: Max. Pixel Clock: 170MHz <-x-EDID Structure Version/Revision-x-> Detailed Timing: FC (Monitor Name) 'Philips 200PW' <-x-Detailed Timing Descriptions-x-> <---Basic Display Parameters/Features---> Video i/p definition: Analog Extension Flag: Signal Level Standard: 0.700V/0.300V(1.000Vpp) Checksum: Setup:... - Page 25 Week of Manufacture: Max. H. rate: 83KHz Year of Manufacture: 2001 Max. Pixel Clock: 170MHz <-x-Vendor/Product Identification-x-> Detailed Timing: FC (Monitor Name) 'Philips 200PW‘ ' <-x-Detailed Timing Descriptions-x-> <---EDID Structure Version/Revision---> EDID Version#: Extension Flag: EDID Revision#: Checksum: <-x-EDID Structure Version/Revision-x-> ********************************************************************** 128 bytes EDID Data (Hex): <---Basic Display Parameters/Features--->...
-
Page 26: Isp Instructions
ISP Instructions HUDSON 8 Configuration and procedure "Easywriter " The software is provided by Novatek to upgrade the firmware of CPU. It is a windows-based program, which cannot be run in MS-DOS. DDC2BI_ISP TOOL (3138 149 53161) is for the interface between "Parallel Port of PC"... -
Page 27: Isp Instruction
ISP Instruction HUDSON 8 If there is a warring message coming as shown in Fig 12. , you have to check the AC power, Video cable, or Novatek MCU. Fig. 8 Press the AUTO to running program , the firmware be updated as shown in Fig. -
Page 28: Faqs (Frequently Asked Questions)
Q: Can the Philips LCD Monitor be mounted on the wall? A: Yes. Philips LCD monitors have this optional feature. For standard VESA mount holes on the rear cover allows the user to mount the Philips monitor on most of the VESA standard arms or accessories. We recommend to contact your Philips sales representative for more information. - Page 29 Q: Can I connect my LCD monitor to any PC, workstation or Mac? A: Yes. All Philips LCD monitors are fully compatible with standard PCs, Macs and workstations. You may need a cable adapter to connect the monitor to your Mac system. Please contact your Philips sales representative for more information.
-
Page 30: Safety Test Requirements
Safety Test Requirements HUDSON 8 3. Equipments and Connection All units that are returned for service or repair must pass the original manufactures safety tests. Safety testing requires both Hipot and Ground Continuity testing. 3.1. Equipments For example : HI-POT TEST INSTRUCTION - ChenHwa 9032 PROGRAMMABLE AUTO SAFETY TESTER 1.Application requirements... -
Page 31: Wiring Diagram
Wiring Diagram HUDSON 8... -
Page 32: Block Diagram
Block Diagram HUDSON 8... - Page 33 Scaler Board Diagram-1 HUDSON 8 +12V +12V R730 CN701 NC/10K 1/10W 5% R731 Q710 R735 +12V 6 0R05 1/8W Dimming R736 BL_ON_OFF NC/100K 1/10W 5% 10K 1/10W 5% PS_ON / IDX C701 C702 R737 Q711 R741 +12V 1000uF/16V 0.1uF R732 NC/AM9435P-T1-PF NC/0R05 1/8W +12V...
- Page 34 Scaler Board Diagram-2 HUDSON 8 +5V_PWR CN401 R401 10K 1/10W 5% +5V_PWR R402 RX2-IN R403 100R 1/10W 5% 0R05 1/10W 5% RX2- DVI_CONNECT_MCU SDA_DVI RX2+IN R405 4K7 1/10W 5% Q402 R404 RX2+ DVI_5V D401 4K7 1/10W 5% 2N7002 Q403 UDZSNP5.6B RX4- 2N7002 R406...
- Page 35 Scaler Board Diagram-3 HUDSON 8 +3.3AVDD +3.3V AVDD_PLL +3.3AVDD AVDD_PLL2 AVDD_MPLL FB405 FB406 FB407 +3.3AVDD +3.3V 120 OHM 120 OHM 120 OHM C425 C427 C424 C426 C428 C429 0.1uF 0.1uF 22uF 16V 22uF 16V 22uF 16V 0.1uF +1.8V FB408 VDDC +1.8V +3.3V FB409...
-
Page 36: Scaler Board Diagram
Scaler Board Diagram-4 HUDSON 8 +3.3V FB413 +3.3V_MC +3.3V_MC +3.3V_MQ +3.3V_MC +3.3V_MQ +3.3V 120 OHM C465 C466 C467 C468 C469 C470 C471 C472 C473 C474 C475 C476 0.1uF 0.1uF C464 0.1uF 0.1uF 0.1uF 0.1uF 0.1uF 0.1uF 22uF 16V 0.1uF 0.1uF 0.1uF 0.1uF FB414... - Page 37 Scaler Board Diagram-5 HUDSON 8 VCPU VCPU R482 NC/4K7 1/10W 5% VCPU 2 VCPU C482 U406 C483 22uF 16V RESET 0.1uF C484 22pF RESET D427 C480 NC/MAX810STRG R499 U407 NC/UDZS5.6B X402 RIGHT_KEY OSCI HWRESET HWRESET 4 12MHz 1M 1/10W 5% OSCO KEY 1 PB1/ADC1...
- Page 38 Scaler Board Diagram-6 HUDSON 8 +VLCD TXO0- LVB0N RXOIN0- TXO0+ LVB0P RXOIN0+ TXO1- LVB1N RXOIN1- +VLCD 2 TXO1+ LVB1P RXOIN1+ TXO2- LVB2N RXOIN2- TXO2+ LVB2P RXOIN2+ TXOC- LVBCKN RXOCKIN- TXOC+ LVBCKP FB702 RXOCKIN+ TXO3- LVB3N RXOIN3- 120 OHM TXO3+ LVB3P RXOIN3+ LVA0N TXE0-...
- Page 39 Scaler Board Layout-1 HUDSON 8 C401 A1 C464 B3 C724 C4 FB414 B3 R435 A3 R498 C4 R715 A4 C402 A1 C465 B3 C725 A2 FB415 C3 R437 B1 R499 C2 R716 B4 C403 A1 C466 B3 C726 A2 FB416 C3 R438 B1 R500 C2 R717 A3 C404 A1 C467 B3 C727 A4 FB417 C1 R439 B1 R501 C2 R719 B4 C405 A1 C468 B3 C728 B4 FB701 B3 R440 A1 R503 C2 R720 A3 C406 A1 C469 B3 C729 B4 FB702 A3 R441 B1 R504 C2 R721 A3...
- Page 40 Scaler Board Layout-1(top left) HUDSON 8...
- Page 41 Scaler Board Layout-1(top right) HUDSON 8...
- Page 42 Scaler Board Layout-1(bottom left) HUDSON 8...
- Page 43 Scaler Board Layout-1(bottom right) HUDSON 8...
- Page 44 Scaler Board Layout-2 HUDSON 8...
-
Page 45: Power Board Diagram
Power Board Diagram-1 HUDSON 8 R918 100 OHM 1/4W C912 R941 R942 R919 0.001uF R939 R940 F902 +12V 100 OHM 1/4W R920 L904 0R05 1/4W 100 OHM 1/4W 3.5uH ZD902 FB901 C918 C919 C917 C922 RLZ13B T901 C920 BEAD D906 0.1uF YG868C10RSC 470uF/25V... - Page 46 Power Board Diagram-2 HUDSON 8 CN801 C801 47pF/3KV C803 C806 470UF/25V D801 NC C802 47pF/3KV +12V Q801 4uF7 25V AM4502C-T1-PF C804 47pF/3KV R801 C805 CONN C807 2.4K OHM 1/10W R802 PT801 470R 1/4W 0.1uF ZD801 R804 R803 ZD802 C808 RLZ5.6B 4uF7 25V 15pF/6KV 10K 1/10W 5%...
- Page 47 Power Board Layout-1 HUDSON 8 fBD901 C1 D811 C3 J828 B2 C801 B4 D813 B3 J829 B3 C802 B4 D814 B3 J830 B3 C803 A3 D816 B3 J831 B3 C804 A4 D901 B2 J832 B3 C808 A4 D902 B1 J833 B3 C830 C4 D905 A2 J835 B3 C832 B3 D906 A2 J836 B3 C834 C4 F901 C3 J837 B3...
- Page 48 Power Board Layout-2 HUDSON 8 C805 B3 FB27 C4 R853 C3 C806 B3 FB29 >4 R854 B3 C807 B3 IC801 B3 R855 A3 C809 B3 IC901 B1 R856 A3 C810 A4 JP801 B3 R857 A3 C811 A4 L805 A2 R858 B3 C812 A3 Q801 B3 R859 C2 C813 B2 Q802 A2 R860 A3 C814 A2 Q803 A2 R861 A3...
-
Page 49: Usb Board Diagram
USB Board Diagram HUDSON 8 USB5V VBUS0 USB_POWER F701 VBUS1 VBUS_DET PTCR FB701 VBUS0 U702 VBUS1A 1K 1/16W 5% USB5V 120 OHM C733 L701 0.1UF 25V R701 U701 C705 35uH +-10% OCSET OUTPUT 100K 1/16W 5% USB2504 100uF/16V R766 OUTPUT Upstream C721 0.1uF 16V... - Page 50 USB Board Layout HUDSON 8 C703 A2 CN703 A2 L703 A4 C701 A2 C752 A1 R729 A3 C704 A2 CN704 A4 L704 A3 C702 A2 F701 A4 R748 A3 C705 A4 CN705 A1 L705 A3 C709 A2 F702 A4 R749 A3 C706 A4 D701 A1 R708 A2 C710 A3 FB701 A4 R750 A2 C707 A3 F703 A3 R728 A3...
-
Page 51: Key Board Diagram
Key Board Diagram HUDSON 8 LED_G 6951 LED_R 2952 2951 100N 50V 100N 50V 1951 SKHHAM2520-PL 1960 3951 SKHHAM2520-PL 63367 7P 2.0MM 100R 1/10W 5% LED_G 1952 LED_R 3952 SKHHAM2520-PL K_PWR 24K 1/10W KEY2 KEY1 1953 3953 0R05 1/10W 5% SKHHAM2520-PL 1961 1954... - Page 52 Key Board Layout HUDSON 8...
-
Page 53: General Product Specification
.HDCP support .USB HUB 2.0 SUPPORT .SMART Bright .SMART Contrast .SMART Image .SMART CONTROL & SMART MANAGEMENT REQUIREMENT .PerfecTune (FGA, FACTORY GAMMA Alignment_ .POWER ON PHILIPS LOGO REQUIREMENT .WEEE REQUIREMENT .RoHS REQUIREMENT 20 inch LCD Monitor TYPE :200PW8 BRAND : PHILIPS... - Page 54 5.2 Mechanical data files -ProE files required 5.3 Location of Philips logo -Per Philips make-up sheet 5.4 Gap between panel and front bezel < 1.2mm 5.5 Location of Control icons - Per Philips Graphic sheet 5.6 Color for resin/paint -Per Philips make-up sheet 5.7 Resins 5.8 If paint is used...
- Page 55 30 minutes that brightness stability is optimal, and follow strictly after panel specification. PRODUCT PROFILE This display monitor unit is a color display monitor enclosed in PHILIPS styling cabinet which has an integrated tilt base. Priority : 1. LPL Type : S-IPS + film Supplier offer the Panel specification.
- Page 56 The input signals are applied to the display through DVI-D cable. Length : 1.8 M +/- 50 mm Connector type : DVI-D male with DDC-2B pin assignments White connector thumb-operated jackscrews With transplant pin protective cover 20 inch LCD Monitor TYPE : 200PW8 BRAND : PHILIPS 2007-11-23 2007-11-23...
- Page 57 Can save those timing that not in Preset mode and can be showed (not over scalar or Panel spec.) It needs to reserve the 10 timings space in memory size. 3.3.1 Mode storing capacity Factory preset modes : 17 User modes : 20 20 inch LCD Monitor TYPE :200PW8 BRAND : PHILIPS 2007-11-23 2007-11-23...
- Page 58 Yes: Auto adjustment for displaying timing mode and recall factory preset Power On Logo : Power On à show up Philips logo 3 seconds à change to input signal . This picture is reference only. The official drawing will send out by PM.
- Page 59 The setting in main OSD will show preset values of that SmartImage profile enabled. 3.14.1.6 Profile Definitions (system integrators to input at design stages) Office Work 20 inch LCD Monitor TYPE :200PW8 BRAND : PHILIPS 2007-11-23 2007-11-23...
- Page 60 When demo mode is On, press 3 seconds or more to turn off the demo mode. When the demo mode is enabled, the blue LED will flash until demo mode disabled 20 inch LCD Monitor TYPE : 200PW8 BRAND : PHILIPS 2007-11-23 2007-11-23...
- Page 61 Output 2 x 3 Wrms, with T.H.D. < 10%. 3.16 1 User visible strings on .inf file Philips 200PW (20inch LCD MONITOR 200PW8) 2 Manufacturer ID ( EDID data) 3 Product ID, "xxxx" 4 codes MSB(byte 12): 08 LSB (byte 11): 5C...
- Page 62 5.1 Cosmetic - Philips ID 5.2 Mechanical data files - ProE files required 5.3 Location of Philips logo - Per Philips make-up sheet 5.4 Gap between panel and front bezel < 1.2mm 5.5 Location of Control icons - Per Philips Graphic sheet 5.6 Color for resin/paint -...
- Page 63 Plastic resin type selection should be referred to "TY R83-2-9002-1". 5.11 Texture/Glossing of housing · The texture area and texture no should follow Philips make-up sheet. · The exterior surfaces shall have a uniform texture. · Philips must approve the mold texturing.
- Page 64 Note: recommend at 5 to 35°C, Humidity less than 60 % 6.2 Transportation tests Refer to 5.15.2 Display disturbances from external environment According to IEC 801-2 for ESD disturbances Display disturbances to external environment 20 inch LCD Monitor TYPE : 200PW8 BRAND : PHILIPS 2007-11-23 2007-11-23...
- Page 65 According to MIL-STD-105D Control II level AQL: 0.4 (major) 1.5 (minor) (Please also refer to annual quality agreement) Customer acceptance criteria: UAW0377/00 Philips’Flat Panel Monitors Pixel Defect Policy Philips’Flat Panel Monitors Pixel Defect Policy BRIGHT DOT DEFECTS ACCEPTABLE LEVEL 200PW8 MODEL...
- Page 66 GENERAL PRODUCT SPECIFICATION(Continued) HUDSON 8 Fig 2: Cross talk pattern Gray level 46 (64 Gray level) Fig 3: Cross talk Pattern Center at Gray level 0 (Black) 20 inch LCD Monitor TYPE : 200PW8 BRAND : PHILIPS 2007-11-23 2007-11-23...
- Page 67 GENERAL PRODUCT SPECIFICATION(Continued) HUDSON 8 SEPARATE SYNC. VIDEO HORIZONTAL VIDEO VERTICAL COMPOSITE SYNC. VIDEO HORIZONTAL FIG-4 TIMING CHART -1 20 inch LCD Monitor TYPE :200PW8 BRAND : PHILIPS 2007-11-23 2007-11-23...
- Page 68 10.2 EMC Requirements Supplier DVT EMI test result must be submitted prior to DVT samples delivery, and PVT EMI test result must be submitted again prior to PVT samples delivery. Which also has to meet Philips' immunity testing specification. 10.3 RoHS Restriction on the use of certain hazardous substances.
-
Page 69: Exploded View
Exploded View HUDSON 8 Type:200PW8ES/00(LPL) -
Page 70: Repair Tips
Repair Tips HUDSON 8 0. Warning preferably be equipped with a thermal control (soldering temperature: 225 to 250 C). All ICs and many other semi-conductors are susceptible to - The chip, once removed, must never be reused. electrostatic discharges (ESD). Careless handling during 1.4 Attachment of SMDs repair can reduce life drastically. - Page 71 More Information For more information on how to handle BGA devices, visit this URL: http://www.atyourservice.ce.philips.com (needs subscription). After login, select Magazine , then go to Workshop Information . Here you will find Information on how...
-
Page 72: Repair Flow Chart
Repair Flow Chart HUDSON 8 AC IN Power Board Control Board Scaler Board LCD Panel No power (power indicator off) Check 12V/5V Bad power board Bad Scaler Board Check Scaler Board Check Control Board Check Control Wires Check LCD Panel... - Page 73 Repair Flow Chart HUDSON 8 Bad Power Board Power Board Check Scaler Board Bad Scaler Board...
- Page 74 Repair Flow Chart HUDSON 8 Check Power Board Check LCD Panel Control Board Board...
-
Page 75: Spare&Recommended Parts List
P37G0032 1 VO VB SUPER ERGO BASE ASSY 705GZ734016 BASE_200W7_SILVER 705GZ734017 BASE STAND_200W7_SILVER Z15G0015 1 JIG for base A15G0253 1101A Philips 200PW8 mainframe 705GZ734015 BEZEL ASSY-SILVER Z33G0010 1A1C CONTROL KNOB Z34G0044 VVA1T BEZEL-SLIVER Z34G0045 VV C BEZEL- DECO U703 056G 133 32 NS... -
Page 76: Spare Parts List
065G121022615M CHIP 22uF 16V X5R 20% A15G0253 1101A Philips 200PW8 mainframe C431 065G0603104 32 CHIP 0.1UF 50V X7R A15G0254 1101A Philips 200PW8 invertor shielding C432 065G0603104 32 CHIP 0.1UF 50V X7R 705TZ715017 MAIN FRAME+WIRE ASSY C433 065G0603104 32 CHIP 0.1UF 50V X7R... - Page 77 Spare Parts List HUDSON 8 R478 061G0603470 RST CHIPR 47 OHM +-5% 1/10W C710 065G121022615M CHIP 22uF 16V X5R 20% R479 061G0603220 RST CHIPR 22 OHM +-5% 1/10W C712 065G0603104 32 CHIP 0.1UF 50V X7R R480 061G0603470 RST CHIPR 47 OHM +-5% 1/10W C714 067G215C101 4H CAP 105 ?100UF M 25V...
- Page 78 4.7U/25V X7R Q401 057G 417 13 T KEC 2N3906S-RTK/PS C807 065G1206475 22 4.7U/25V X7R Q402 057G 763904 TRA FET 2N7002 SOT-23 PHILIPS C808 065G 6J1506ET 15PF 5% SL 6KV Q403 057G 763904 TRA FET 2N7002 SOT-23 PHILIPS C809 065G1206475 22 4.7U/25V X7R...
- Page 79 Spare Parts List HUDSON 8 R812 061G0805204 RST CHIPR 200 KOHM +-5% 1/8W C815 065G0603105 12 CHIP 1UF 16VX7R 0603 R813 061G0603220 RST CHIPR 22 OHM +-5% 1/10W C815 065G0603105 22 CHIP 1UF 25V X7R 0603 C816 061G0603205 RST CHIPR 2 MOHM +-5% 1/10W R814 061G0805205 RST CHIPR 2 MOHM +-5% 1/8W...
- Page 80 FILTER Q901 057G 667 21 STP10NK70ZFP L805 071G 57G800 B CHIP BEAD HCB3216KF-800T30 bullwill Q903 057G 417 4 PMBS3904/PHILIPS-SMT(04) L805 071G 57G800 TA CHIP BEAD 80R/3000mA HCB3216KF-800T30 Q903 057G 417 12 T KEC 2N3904S-RTK/PS L901 073L 174 50 HH LINE FITER...
- Page 81 Spare Parts List HUDSON 8 L704 073G253SA10 TA SMD CHOCK 67ohm/400mA WCM2012F2SF-670T04 C712 065G0805475 05 CHIP 4.7UF/6.3V X5R L705 073G253S 10 B COMMON FILTER CHOKE WCM2012F2SF-670T04 C713 065G0402103 12 CAP CHIP 0402 10N 16V X7R L705 073G253SA10 TA SMD CHOCK 67ohm/400mA WCM2012F2SF-670T04 C713 065G040210312K CAP CHIP 0402 10N 16V X7R +/-10%...
-
Page 82: Different Parts List
Different Parts List HUDSON 8 This chapter will be updated... -
Page 83: Revision List
Revision List HUDSON 8 Manual 3122 785 17640 -First release -ALL chapters... - Page 84 4. When the HV circuitry is operating properly there is no possibility of an x- tube must be the same type as the original, including suffix letter, or a Philips radiation problem. High voltage should always be kept at the approved type.
Need help?
Do you have a question about the 200PW8ES/00 and is the answer not in the manual?
Questions and answers