Sign In
Upload
Manuals
Brands
Lexmark Manuals
All in One Printer
1
Lexmark 1 Manuals
Manuals and User Guides for Lexmark 1. We have
2
Lexmark 1 manuals available for free PDF download: User Manual
Lexmark 1 User Manual (171 pages)
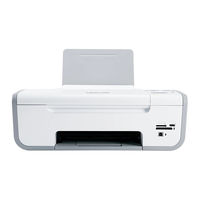
Lexmark X5070: User Guide
Brand:
Lexmark
| Category:
All in One Printer
| Size: 3.4 MB
Table of Contents
Safety Information
2
Table of Contents
3
Finding more Information
9
Finding Information about the Printer
9
Operating System Notice
12
Setting up the Printer
13
Checking the Box Contents
13
Understanding the Parts of the Printer
14
Getting the Printer Ready to Fax
16
Choosing a Fax Connection
16
Using an RJ11 Adapter
17
Connecting Directly to a Telephone Wall Jack
20
Connecting Directly to a Telephone Wall Jack in Germany
20
Connecting to a Telephone
21
Connecting to an Answering Machine
22
Connecting to a Computer with a Modem
23
Using a Digital Phone Service
25
Understanding the Control Panel
25
Using the Control Panel
25
Saving Settings
28
Understanding the Settings Menu
28
Installing Another Language Control Panel
30
Installing the Printer Software
30
Understanding the Printer Software
31
Turning Printing Voice Notification on or off
33
Security Information
34
Loading Paper and Original Documents
35
Loading Paper
35
Using the Automatic Paper Type Sensor
35
Loading Envelopes
35
Loading Labels
36
Loading Greeting Cards, Index Cards, Photo Cards, and Postcards
36
Loading Transparencies
37
Loading Iron-On Transfers
37
Loading Custom-Size Paper
37
Loading Banner Paper
37
Loading Original Documents into the Automatic Document Feeder (ADF)
38
Faxing Using the Control Panel
40
Sending a Fax Using the Control Panel
40
Entering a Fax Number Using the Control Panel
40
Sending a Fax Using the Control Panel
41
Sending a Fax While Listening to a Call (on Hook Dial) Using the Control Panel
41
Sending a Broadcast Fax at a Scheduled Time
42
Receiving a Fax Using the Control Panel
42
Receiving a Fax Automatically Using the Control Panel
42
Setting a Fax Manual Answer Code Using the Control Panel
43
Receiving a Fax Manually
43
Using Caller ID from the Control Panel
43
Receiving a Fax with an Answering Machine Using the Control Panel
44
Forwarding Faxes Using the Control Panel
44
Using the Control Panel Phonebook
45
Customizing Fax Settings Using the Control Panel
46
Understanding the Fax Menu
46
Setting up Quick Dial Buttons Using the Control Panel
47
Setting up a Fax Header Using the Control Panel
47
Setting up a Fax Footer Using the Control Panel
48
Blocking Junk Faxes Using the Control Panel
49
Blocking Unwanted Changes to Fax Settings Using the Control Panel
50
Setting up a Dialing Prefix Using the Control Panel
50
Setting the Distinctive Ring Using the Control Panel
51
Setting the Number of Rings before Receiving a Fax Automatically Using the Control Panel
51
Changing Caller ID Pattern Using the Control Panel
52
Printing Fax Activity Reports Using the Control Panel
52
Canceling a Fax after a Document Is Loaded Using the Control Panel
52
Faxing Using the Computer
53
Sending a Fax Using the Software
53
Receiving a Fax Using the Computer
53
Receiving a Fax Automatically Using the Computer
53
Setting a Fax Manual Answer Code Using the Computer
54
Using Caller ID from the Software
54
Receiving a Fax with an Answering Machine Using the Computer
54
Forwarding Faxes
55
Using the Computer Phone Book
55
Customizing Fax Settings Using the Computer
56
Customizing Settings Using the Fax Setup Utility
56
Setting Auto Answer to on
57
Setting up Quick Dial Buttons Using the Computer
58
Creating a Fax Cover Page Using the Productivity Studio
58
Blocking Junk Faxes
58
Using the Fax Solutions Software
59
Setting up a Dialing Prefix
60
Setting the Distinctive Ring
60
Setting the Number of Rings before Receiving a Fax Automatically
60
Setting up Speed Dial
61
Setting up to Fax While Behind a PBX
61
Printing Fax Activity Reports
62
Printing
63
Printing Basic Documents
63
Printing a Document
63
Printing a Web Page
63
Printing Photos or Images from a Web Page
64
Printing Multiple Copies of a Document
64
Printing on both Sides of the Paper
65
Collating Copies
65
Printing Multiple Pages on One Sheet (N-Up)
66
Pausing Print Jobs
66
Canceling Print Jobs
66
Printing Specialty Documents
66
Choosing Compatible Specialty Paper Types
66
Printing Envelopes
67
Printing Greeting Cards, Index Cards, Photo Cards, and Postcards
67
Printing a Document as a Poster
67
Printing an Image as a Poster
68
Printing a Booklet
68
Assembling a Booklet
69
Printing Iron-On Transfers
69
Printing on Custom-Size Paper
69
Printing Transparencies
70
Printing a Banner
70
Watermark
70
Changing Printer Settings
70
Saving and Deleting Print Settings
70
Resetting Printer Software to Factory Default Settings
71
Resetting the Printer to Factory Default Settings
71
Copying
73
Making a Copy
73
Adjusting Copy Quality
73
Making a Copy Lighter or Darker
74
Copying Multiple Images on One Page Using the Control Panel
74
Collating Copies Using the Control Panel
74
Enlarging or Reducing an Image
75
Understanding the Copy Menu
75
Canceling a Copy after Document Is Loaded
76
Scanning
77
Scanning Using the Control Panel
77
Scanning a Document
77
Understanding the Scan Menu
77
Scanning to a Computer over a Network
78
Scanning Using Only the Computer
78
Scanning a Document Using the Computer
78
Scanning Text for Editing Using the Computer
78
Scanning Images for Editing
78
Creating a PDF from a Scanned Item
79
Customizing Scan Settings Using the Computer
79
Saving a Scanned Image on the Computer
80
Changing the Productivity Studio Scan Settings
80
Adding a File to an E-Mail Message
80
Adding a New Scanned Image to an E-Mail Message
81
Scanning Documents or Images for E-Mailing
81
Changing the Productivity Studio E-Mail Screen Preferences
81
Canceling a Scan Job
82
Working with Photos
83
Retrieving and Managing Photos
83
Inserting a Flash Drive
83
Connecting a Pictbridge-Enabled Digital Camera
84
Understanding the Pictbridge Menu
84
Transferring All Photos from a CD or Flash Drive Using the Computer
86
Transferring Selected Photos from a CD or Flash Drive Using the Computer
86
Changing the Productivity Studio Temporary Files Preferences
87
Changing the Productivity Studio Searched Folders Preferences
87
Changing the Productivity Studio Library Preferences
87
Changing the Productivity Studio Transfer Settings
87
Editing Photos
88
Cropping a Photo
88
Rotating a Photo
88
Changing the Resolution / Size of a Photo
88
Applying One-Click Auto Fixes to a Photo
88
Reducing the Red-Eye Effect in a Photo
89
Blurring/Sharpening a Photo
89
Enhancing a Photo
89
Changing the Hue / Saturation of a Photo
89
Changing the Gamma Value of a Photo or Image
90
Despeckling a Photo
90
Changing the Brightness / Contrast Settings of a Photo
90
Applying a Color Effect to a Photo
90
Changing the Exposure Setting of a Photo
91
Removing Wavy Patterns from Scanned Photos, Magazines, or Newspapers
91
Printing Photos
91
Printing Photos from a CD or Flash Drive Using the Computer
91
Viewing / Printing Photos from the Productivity Studio
92
Printing Photo Packages
92
Creating Photo Greeting Cards
92
Using a Pictbridge-Enabled Digital Camera to Control Printing Photos
93
Creating and Viewing a Slideshow
94
Connecting the Printer to a Network
95
Networking Overview
95
Finding Your MAC Address
95
Sharing a Printer in a Windows Environment
95
Finding a Printer/Print Server Located on Remote Subnets
96
Direct IP Printing
96
Ping the Printer
96
Maintaining the Printer
98
Removing a Used Print Cartridge
98
Installing Print Cartridges
99
Refilling Print Cartridges
101
Using Genuine Lexmark Print Cartridges
101
Aligning Print Cartridges
101
Cleaning the Print Cartridge Nozzles
101
Wiping the Print Cartridge Nozzles and Contacts
102
Preserving the Print Cartridges
103
Cleaning the Scan Lens and White Roller
103
Cleaning the Exterior of the Printer
104
Ordering Supplies
105
Ordering Print Cartridges
105
Ordering Paper and Other Supplies
105
Troubleshooting
107
Setup Troubleshooting
107
Software Does Not Install
108
Page Does Not Print
109
Cannot Print from Digital Camera Using Pictbridge
110
Solving Printer Communication Problems
110
Understanding Warning Levels
110
Removing and Reinstalling the Software
110
Fax Troubleshooting
111
Can Send but Not Receive Faxes
113
Can Receive but Not Send Faxes
114
Printer Receives a Blank Fax
115
Received Fax Has Poor Print Quality
116
Caller ID Information Is Not Displayed
116
Fax Error
116
Failed to Connect
117
Fax Mode Unsupported
117
Remote Fax Error
118
Phone Line Busy
118
Phone Line Error
119
Jams and Misfeeds Troubleshooting
120
Paper Jam in the Printer
120
Paper or Specialty Media Misfeeds
121
Banner Paper Jams
122
Paper Continues to Jam
122
Print Troubleshooting
123
Improving Print Quality
123
Poor Text and Graphic Quality
124
Print Speed Is Slow
125
Partial Document or Photo Prints
126
Checking the Print Cartridges
126
Ink Levels Seem Incorrect
127
Ink Levels Seem to Go down too Quickly
127
A Blank or Incorrect Page Prints
128
Characters on Printout Are Missing or Unexpected
128
Colors on Printout Are Faded or Differ from Colors on the Screen
128
Glossy Photo Paper or Transparencies Stick Together
129
Page Prints with Different Fonts
129
Print Is too Dark or Smudged
129
Printed Characters Are Improperly Formed or Are Not Aligned Correctly
130
Printouts Have Alternating Bands of Light and Dark Print
130
Transparencies or Photos Contain White Lines
130
Vertical Straight Lines Are Not Smooth
131
White Lines Appear in Graphics or Solid Black Areas
131
Checking the Printer Status
132
Settings Are Not Saved
132
Checking Printer Readiness
132
Checking the Spool Settings for Banner Printing
133
Resolving Font Problems
133
Printer Is Busy Printing Another Job
134
Ready or Busy Printing Is Listed as the Status
134
Printing a Test Page
134
Printing a Test Page Using the Control Panel
135
Test Page Does Not Print
135
Removing an External Print Server
136
Checking the Port Setting
136
Printer Is Plugged in but Does Not Print
137
Printer Is Trying to Print to File
137
Printer Is Not Able to Communicate with the Computer
139
Wrong Printer Is Attached
139
Updating the Printer Software
140
Bidirectional Communication Is Not Established
140
Experiencing Poor Quality or Incorrect Output
140
Copy Troubleshooting
141
Copier Does Not Respond
141
Poor Copy Quality
142
Scan Troubleshooting
143
Scan was Not Successful
144
Scanning Takes too Long or Freezes the Computer
144
Poor Scanned Image Quality
144
Partial Document or Photo Scans
145
Cannot Scan to a Computer over a Network
145
Error Messages on the Printer Display
146
Alignment Error
146
Clear Carrier Jam
147
Clear Paper Jam
148
Computer Not Connected
148
Cover Open
149
Document Load Error
149
Load Document
150
Memory Failure
151
Pictbridge Communications Error
151
Error Messages on the Computer Screen
152
Communication Not Available
152
General Printing Problem
153
Out of Memory
153
Out of Paper
153
Fixing a Printing Failure
153
Paper Jam
154
Notices
155
Product Information
155
Edition Notice
155
Industry Canada Compliance Statement
156
Noise Emission Levels
157
Notice to Users of the Canadian Telephone Network
158
Power Consumption
159
Off Mode
160
Statement of Limited Warranty
160
Extent of Limited Warranty
161
Limitation of Liability
161
Index
164
Advertisement
Lexmark 1 User Manual (144 pages)
Lexmark Printer User's Guide
Brand:
Lexmark
| Category:
All in One Printer
| Size: 3.37 MB
Table of Contents
Table of Contents
3
Safety Information
9
Introduction
10
Finding Information about the Printer
10
Customer Support
11
Limited Warranty
12
Setting up the Printer
13
Bypassing Security Warnings During Software Installation
13
Setting up the Printer as a Copier Only
13
Understanding the Parts of the Printer
20
Using the Printer Control Panel Buttons and Menus
22
Using the Printer Control Panel
22
Using the Printer Menus
23
Menus List
24
Using the Copy Menu
25
Using the Scan Menu
26
Using the Photo Menu
26
Using the Pictbridge Menu
27
Using the Setup Menu
27
Saving Settings
28
Changing Temporary Settings into New Default Settings
29
Using the Printer Software
30
Installing Printer Software
30
Installing the Optional XPS Driver (Windows Vista Users Only)
31
Using the Windows Printer Software
32
Using the Macintosh Printer Software
33
Switching between the Rear USB Port and the Quick Connect Laptop Port (Selected Models Only)
34
Using Windows
34
Installing the Printer on a Wireless Network (Selected Models Only)
36
Wireless Network Compatibility
36
Information You will Need to Set up the Printer on a Wireless Network
36
Installing the Printer on a Wireless Network
37
Wireless Installation Instructions (France Only)
37
Configuring an IP Address Manually
38
Interpreting the Colors of the Wi-Fi Indicator Light
38
Changing Wireless Settings after Installation
39
Using the Network Setup Menu
39
Installing the Printer on Other Computers
40
Advanced Wireless Setup
41
Creating an Ad Hoc Wireless Network
41
Adding a Printer to an Existing Ad Hoc Wireless Network
44
Frequently Asked Questions
45
What Is a Network
45
How Are Home Networks Configured
45
Why Do I Need an Installation Cable
47
How Do I Attach the Installation Cable
48
What Is the Difference between Infrastructure and Ad Hoc Networks
48
Finding the Signal Strength
49
How Can I Improve Wireless Signal Strength
50
What Is an SSID
51
How Do I Find out What Type of Security My Network Is Using
51
Can I Use My Printer on a USB and a Wireless Connection at the same Time
51
What Is a MAC Address
52
How Do I Find the MAC Address
52
What Is an IP Address
52
What Is TCP/IP
53
How Do I Locate IP Addresses
53
How Are IP Addresses Assigned
54
What Is a Key Index
54
Loading Paper
55
Loading Various Paper Types
55
Iron-On Transfers
57
Banner Paper
58
Loading Original Documents on the Scanner Glass
59
Using the Automatic Paper Type Sensor
60
Printing
61
Printing Basic Documents
61
Printing a Document
61
Printing Web Pages
61
Printing Multiple Copies of a Document
62
Collating Printed Copies
62
Printing the Last Page First (Reverse
63
Printing Multiple Pages on One Sheet (N-Up)
63
Printing Documents from a Memory Card or Flash Drive
64
Printing Specialty Documents
65
Choosing Compatible Specialty Paper Types
65
Printing Envelopes
66
Printing Labels
66
Printing on Custom-Size Paper
67
Saving and Deleting Print Settings
68
Managing Print Jobs
69
Pausing Print Jobs
69
Resuming Print Jobs
70
Canceling Print Jobs
71
Working with Photos
73
Inserting a Memory Card
73
Inserting a Flash Drive
74
Retrieving and Managing Photos
75
Transferring Photos from a Memory Device to the Computer
75
Transferring Photos from a Memory Card to a Flash Drive
77
Printing Photos
77
Printing Photos Using the Printer Control Panel
77
Printing Photos from the Computer Using the Printer Software
78
Printing Photos from a Memory Device Using the Printer Software
79
Applying Color Effects to Photos Using the Printer Control Panel
80
Printing Photos from a Pictbridge-Enabled Digital Camera
81
Printing Photos Stored on a Memory Device Using the Proof Sheet
82
Printing Photos from a Digital Camera Using DPOF
83
Copying
84
Making Copies
84
Copying Photos
84
Enlarging or Reducing Images
84
Adjusting Copy Quality
85
Making a Copy Lighter or Darker
85
Collating Copies Using the Printer Control Panel
85
Repeating an Image on One Page
86
Copying Multiple Pages on One Sheet (N-Up)
86
Canceling a Copy Job
87
Scanning
88
Scanning Original Documents
88
Scanning Color or Black-And-White Original Documents
90
Scanning Photos for Editing
90
Scanning to a Computer over a Network
90
Canceling Scan Jobs
91
Faxing
92
Sending a Fax Using the Computer
92
Receiving a Fax
93
Maintaining the Printer
95
Maintaining Print Cartridges
95
Installing Print Cartridges
95
Removing a Used Print Cartridge
96
Refilling Print Cartridges
97
Using Genuine Lexmark Print Cartridges
97
Aligning Print Cartridges
98
Cleaning the Print Cartridge Nozzles
98
Checking Ink Levels
99
Wiping the Print Cartridge Nozzles and Contacts
100
Preserving the Print Cartridges
101
Cleaning the Scanner Glass
101
Cleaning the Exterior of the Printer
101
Ordering Supplies
102
Ordering Print Cartridges
102
Ordering Paper and Other Supplies
103
Resetting to Factory Settings
103
Troubleshooting
104
Using the Printer Troubleshooting Software (Windows Only)
104
Setup Troubleshooting
104
Incorrect Language Appears on the Display
104
Power Button Is Not Lit
105
Software DID Not Install
105
Page Does Not Print
106
Solving Printer Power Problems
109
Removing and Reinstalling the Software
109
Enabling the USB Port in Windows
110
Wireless Troubleshooting
111
Wireless Troubleshooting Checklist
111
Printing a Network Setup Page
112
Wireless Configuration Does Not Continue after the USB Cable Is Attached
112
Cannot Print over Wireless Network
113
Cannot Print and There Is a Firewall on the Computer
116
Wi-Fi Indicator Light Is Not Lit
116
Wi-Fi Indicator Light Is Green but the Printer Does Not Print (Windows Only)
116
Wi-Fi Indicator Light Is Blinking Orange During Installation (Windows Only)
118
Wi-Fi Indicator Light Is Blinking Orange During Installation (Macintosh Only)
121
Wi-Fi Indicator Light Is Still Orange
123
Wireless Print Server Not Installed
125
Communication Not Available" Message Displays When Printing Wirelessly
125
Communication with Printer Lost When Connected to Virtual Private Network (VPN)
125
Resetting the Internal Wireless Print Server to Factory Default Settings
125
Notices
127
Product Information
127
Edition Notice
127
United States Government Rights
128
Exposure to Radio Frequency Radiation
129
Industry Canada Compliance Statement
129
European EC Directives Conformity Statement for Radio Products
130
Noise Emission Levels
132
Power Consumption
133
Power Saver
134
Off Mode
134
Total Energy Usage
134
Networking Glossary
138
Index
140
Advertisement
Related Products
Lexmark 1270 - X Color Inkjet
Lexmark 17M4000
Lexmark 16T0000 - PrinTrio Photo P3150
Lexmark 13R0174 - P 315 Color Inkjet Printer
Lexmark 16A0310 - OptraImage 242
Lexmark 1150 - X PrinTrio Color Inkjet
Lexmark 13B0500
Lexmark 13B0501
Lexmark 13B0502
Lexmark 17K0000
Lexmark Categories
Printer
All in One Printer
Printer Accessories
Software
Print Server
More Lexmark Manuals
Login
Sign In
OR
Sign in with Facebook
Sign in with Google
Upload manual
Upload from disk
Upload from URL