Sign In
Upload
Manuals
Brands
HP Manuals
Laptop
Compaq Presario,Presario 2128
HP Compaq Presario,Presario 2128 Manuals
Manuals and User Guides for HP Compaq Presario,Presario 2128. We have
7
HP Compaq Presario,Presario 2128 manuals available for free PDF download: Service Manual, Installation Manual, Reference Manual, User Manual, Release Note, Maintenance Manual
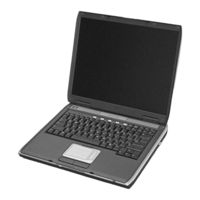
HP Compaq Presario,Presario 2128 Installation Manual (166 pages)
HP StorageWorks Core Switch 2/64 and SAN Director 2/128 Installation Guide (AA-RVUSC-TE, January 2005)
Brand:
HP
| Category:
Switch
| Size: 5.01 MB
Table of Contents
Installation Guide
1
Table of Contents
3
About this Guide
9
Intended Audience
9
Related Documentation
9
Tables
10
Document Conventions and Symbols
10
Document Conventions
10
Rack Stability
11
Getting Help
11
HP Technical Support
11
HP Authorized Reseller
12
HP Storage Web Site
12
Overview
13
Core Switch 2/64 and SAN Director 2/128 Models
13
Key Features
14
Upgrading Ports
14
Hardware Components
15
Core Switch 2/64 and SAN Director 2/128 (Port Side)
16
Core Switch 2/64 and SAN Director 2/128 (Nonport Side)
17
Figures
16
High Availability
18
Reliability
18
Serviceability
19
Optional Management Features
19
Interoperability
19
Security
20
Network Manageability
20
Management Summary
20
Managing the Switch
21
Management Options for Core Switch 2/64 and SAN Director 2/128
21
Optional Hardware Kits
22
Core Switch 2/64 and SAN Director 2/128 Orderable Hardware
22
Installing and Configuring the Switch
25
Unpacking and Verifying Carton Contents
26
Carton Contents
26
Carton Contents Checklist
27
Installation Overview
28
Selecting an Operating Location
28
Cooling Requirements
29
Power Requirements
29
Installing the Switch as a Stand-Alone Unit
30
Removing the Chassis Door
30
Sequence for Detaching the Chassis Door from the Hinges
30
Installing the Switch on a Flat Surface
31
Installing the Switch in a Rack
32
Pre-Installation Checklist
32
Items Required for Installation
33
Important Rack Mount Guidelines
34
Attaching the Rack Mount Shelf Brackets
35
Installing the Switch in Specified Racks
35
Installing the Left and Right Rack Mount Shelf Brackets
36
Attaching the Retainer Nuts-For Rails with Square Holes
37
Installing the Retainer Nuts on the Rails
37
Attaching the Clip Nuts-For Rails with Round Holes
38
Attaching the Upper Rack Mount Bracket Assemblies to the Chassis
38
Attaching the Left and Right Flat Upper Rack Mount Brackets
39
Attaching L-Shaped Brackets to Rails
40
Finalizing the Rack Mount Procedure
40
Sliding the Switch into the Rack
40
Attaching the Upper Rack Mount Bracket to the L-Shaped Brackets
41
Securing the Chassis to the Rails
41
Reinstalling the Chassis Door
42
Securing the Chassis Port Side to Rack Rails
42
Powering on the Switch
43
ON/OFF Switch for a 16-Port Card
43
AC Panel and Power Cord Retainers
44
Establishing a Serial Connection
45
Manage Cables
47
Cable Guide (Pillar)
48
Cable Management Tray
48
Effective Cable Management (Director 2/128 Shown)
50
PID Format Summary
51
Mixed Fabric Environment with Different Switch Platforms
51
Configuration Overview
52
Core Switch 2/64
52
SAN Director 2/128
53
Initial Configuration Parameters
53
Core Switch 2/64
53
SAN Director 2/128
54
Core Switch 2/64 Default Parameters
54
Setting up a Configuration
55
Director 2/128 Default Parameters
55
Configure IP Addresses for CP Cards
56
Configure IP Address for the Switch
57
Establish an Ethernet Connection
58
Customize a Switch Name
59
Specify Status Policies
59
Set the Domain ID
60
Connect to the Fabric and Configure Fabric Parameters
60
Enable Software Licenses
61
Back up the Configuration
62
Operating the Switch
63
Interpreting LED Activity
64
16-Port Cards
64
Front of 16-Port Card
65
16-Port Card LED Patterns
66
CP Cards
68
Front of CP Card
69
CP Card LED Patterns
70
Power Supplies
71
Power Supply Leds
72
Power Supply LED Patterns
73
Blower Assemblies
74
Blower Assembly Leds
74
WWN Card
75
Blower Assembly LED Patterns
75
Data Stored on the WWN Card
76
Messages that Can Indicate WWN Card Failure
76
WWN Bezel Leds
77
WWN Bezel LED Patterns
77
Diagnostics and Troubleshooting Overview
78
Obtaining Chassis and Component Status
79
Environmental Status and Maintenance Commands
79
Interpreting POST and Boot Results
80
Post
80
Boot
81
Diagnostics
81
Troubleshooting the Switch
82
Installing Frus
87
Replacing the Chassis Door
87
Replacing the Cable Management Tray
88
Upper Door Hinge
88
Replacing the Cable Guides (Pillars)
90
Replacing a 16-Port Card and Filler Panel
90
Preliminary Steps
90
Replacing a 16-Port Card
91
Port Card Removal and Replacement
92
Removing the Existing16-Port Card
93
Removing a Filler Panel
94
Removing and Replacing a Filler Panel
94
Installing a 16-Port Card
95
Card Guides Inside each Card Slot
96
Installing a Filler Panel
97
Replacing a CP Card
97
CP Card Removal and Replacement
99
Identifying a Failed CP Card
100
Recording Critical Switch Information
100
Removing a CP Card
103
Installing a CP Card
104
Verifying Operation of the New CP Card
105
Replacing a Power Supply and Filler Panel
110
Replacing a Power Supply
111
Power Supply Removal and Replacement
112
Replacing a Blower Assembly
113
Blower Assembly Removal and Replacement
114
Replacing the WWN Bezel and Card
115
Identifying a Failed WWN Card
115
Messages that Might Indicate a WWN Card Failure
116
Replacing a WWN Card
117
Installing a WWN Card
121
WWN Bezel and Card Removal and Replacement
121
Replacing the WWN Bezel
122
Setting up and Installing Modems
123
Using High-Availability Connectivity
123
Two Modems Attached for High Availability
124
Connecting Modems
125
Setting up a Remote Modem System
126
Verifying the Modem Connection
127
Terminal Emulator Configuration Settings
127
Running Routine Operations
131
Backing up System Configuration Settings
131
Restoring the System Configuration Settings
132
Upgrading Firmware
132
Verifying Optional Software Licenses
133
Enabling Licensed Features
133
A Technical Specifications
135
System Architecture
135
Core Switch 2/64 and SAN Director 2/128 System Specifications
135
System Size and Weight
137
System FRU Weights
137
FRU Weights
137
Facility Requirements
138
Power Specifications
138
Power Cords
140
Power Cord Types (International)
140
Fibre Channel Port Specifications
143
CP Card Specifications
143
Memory Specifications
143
Battery Specifications
144
Terminal Serial Port Specifications
144
Terminal Serial Port Pinouts
144
Modem Serial Port Specifications
145
Modem Serial Port Pinouts
145
B Electrostatic Discharge
147
Grounding Methods
147
C Regulatory Compliance Notices
149
FCC EMC Statement (USA)
149
EMC Statement (Canada)
149
EMC Statement (European Union)
149
Germany Noise Declaration
150
VCCI EMC Statement (Japan)
150
Power Cord Statement (Japan)
150
RRL EMC Statement (Korea)
151
Laser Safety
151
Battery Replacement Notice
152
Glossary
153
Index
161
Advertisement
HP Compaq Presario,Presario 2128 Service Manual (188 pages)
Notebook PC
Brand:
HP
| Category:
Laptop
| Size: 11.78 MB
Table of Contents
Table of Contents
3
Table 1-1. Notebook Products
7
Table 1-2. Product Comparisons
49
Features
54
Figure 1-1. Front View
54
Figure 1-2. Back View
55
Figure 1-3. Bottom View
56
Figure 1-4. Front View
57
Figure 1-5. Back View
58
Figure 1-6. Bottom View
59
Operation
60
Table 1-3. Activating Power Modes
60
Table 1-4. Main Status Lights (Front of Notebook)
61
Table 1-5. Keyboard Status Lights
61
Table 1-6. Fn Hot Keys
62
Figure 1-7. Resetting the Notebook
63
Specifications
64
Table 1-7. Specifications
64
Table 1-8. Accessories
68
Figure 1-8. Replaceable Module Diagram
70
Internal Design
70
Table 1-9. Functional Structure Description
71
Removal and Replacement
72
Table 2-1. Removal Cross-Reference
72
Table 2-2. Required Equipment
73
Table 2-3. Recommended Screw Torque Values
73
Disassembly Flowchart
74
Figure 2-1. Disassembly Flow
74
Figure 2-2. Removing the Battery
75
Removing the Battery
75
Figure 2-3. Removing an SDRAM Module
76
Removing a SDRAM Module
76
Figure 2-4. Removing an SDRAM Module
77
Figure 2-5. Removing the Mini-PCI Card
78
Removing the Wireless LAN Mini-PCI Card
78
Figure 2-6. Removing the Mini-PCI Card
79
Figure 2-7. Removing the Hard Disk Drive
80
Removing the Hard Disk Drive
80
Figure 2-8. Removing the Hard Disk Drive Tray
81
Replacing Small Parts
82
Table 2-4. Replacing Small Parts
82
Removing the Keyboard Cover
83
Figure 2-9. Removing the Keyboard Cover
84
Figure 2-10. Disconnecting the Speaker Cable
85
Figure 2-11. Removing the Speaker Assembly
86
Removing the Speaker Assembly
86
Removing the Keyboard
87
Figure 2-12. Removing the Keyboard
88
Figure 2-13. Removing the Switchboard PCA
89
Figure 2-14. Removing the Switchboard PCA
90
Removing the Switchboard PCA
90
Removing the CD/DVD Drive
91
Figure 2-15. Removing the CD/DVD Drive
92
Figure 2-16. Removing the CD/DVD Drive
93
Removing the Display Assembly
94
Figure 2-17. Removing the Display Assembly
95
Removing the Top Case
97
Figure 2-18. Removing the Top Case
98
Figure 2-19. Removing the Top Case Screws
100
Figure 2-20. Removing the Top Case Screws
101
Figure 2-21. Removing the Top Case
102
Removing the Floppy Drive
103
Figure 2-22. Removing the Floppy Drive
104
Figure 2-23. Removing the Floppy Drive
106
Removing the Infrared (I/R) PCA
107
Figure 2-24. Removing the I/R PCA
108
Removing the Audio PCA
109
Figure 2-25. Removing the Audio PCA
110
Figure 2-26. Removing the Heat Sink (with Fan)
111
Removing the Heat Sink (with Fan)
111
Figure 2-27. Removing the Heat Sink (with Fan)
113
Removing the CPU Module
115
Figure 2-28. Removing the CPU Module
116
Figure 2-29. Removing the CPU Module
118
Removing the RJ11/1394 Connector Module
119
Figure 2-30. Removing the RJ11/1394 Connector Module
120
Removing the Motherboard
121
Figure 2-31. Removing the Motherboard
122
Removal Procedure
123
Figure 2-32. Removing the Hard Disk Drive Guide
124
Figure 2-33. Disconnecting the Motherboard Cables
125
Figure 2-34. Removing the Motherboard
127
Figure 2-35. Example of Serial Number Label
130
Replacing Components on a Bottom Case
130
Figure 2-36. Replacing the Antennas
131
Figure 2-37. Removing a PCMCIA Door
131
Repairing the BIOS IC
132
Figure 2-38. Boot-Block Jumper
133
Removing Other Components
134
Table 2-5. Removing Components
134
Troubleshooting and Diagnostics
136
Support by Authorized Service Providers
136
Table 3-1. ASP Support Options
136
Troubleshooting
137
Figure 3-1. Basic Troubleshooting Steps
137
Checking for Customer Abuse
138
Troubleshooting the Problem
138
Verifying the Repair
139
Table 3-2. Scope of Diagnostic Tools
140
Table 3-3. Troubleshooting Suggestions
141
Diagnostic Tools
153
Table 3-4. POST Terminal-Error Beep Codes
155
Table 3-5. POST Messages
158
Table 3-6. Sycard Pcctest Commands
160
Bios Setup Utility
161
Table 3-7. BIOS Setup Menus and Parameters
162
Replaceable Parts
164
Figure 4-1. Exploded View
165
Figure 4-2. Exploded View
166
Table 4-1. Replaceable Parts
167
Table 4-1. Replaceable Parts
168
Table 4-2. Accessory Replaceable Parts
175
Table 4-3. Part Number Reference
176
Reference Information
185
Password Removal Policy
185
Hewlett-Packard Display Quality Statement
186
Table 5-1. LCD Guidelines
187
Service Notes and Obsolete Parts
188
HP Compaq Presario,Presario 2128 Reference Manual (149 pages)
Compaq Notebook Series
Brand:
HP
| Category:
Laptop
| Size: 7.62 MB
Table of Contents
Table of Contents
7
1 Getting Started with Your Notebook
12
Identifying Parts of the Notebook
12
Front Panel and Right Panel Components
13
Left Panel and Back Panel Components
15
Bottom Panel Components
17
Status Lights
19
Setting up Your Notebook
21
Step 1: Insert the Battery Pack
21
Step 2: Connect AC Power
22
Step 3: Connect a Phone Line
23
Step 4: Turn on the Notebook
24
Step 5: Set up Windows
25
2 Basic Operation
26
Operating Your Notebook
26
Default Power Settings
27
To Reset the Notebook
28
To Change the Boot Device
28
To Use the Touchpad
29
To Use the Tap to Click Function of the Touchpad
30
To Use the Function Hot Keys
31
To Use the One-Touch Buttons
32
To Use the Windows and Applications Keys
33
To Type Alternate Graphics Using the ALT GR Key
34
Using Cds or Dvds
35
To Insert or Remove a CD or DVD
35
To Play DVD Movies
36
To Create or Copy Cds
36
To Write to DVD Media
37
Securing Your Notebook
37
To Set up Password Protection
37
To Lock Your Notebook
38
To Attach a Security Cable
39
To Protect against Viruses
40
To Lock the Hard Drive
40
Taking Care of Your Notebook
41
To Protect Your Hard Drive
41
To Maintain Your Notebook
41
To Safeguard Your Data
42
To Extend the Life of the Display
42
To Clean Your Notebook
42
3 Battery Packs and Power Management
43
Managing Power Consumption
43
How the Notebook Manages Power Automatically
44
To Change Timeout Settings and Create Power Schemes
45
Using Battery Power
45
To Check Battery Status
46
To Respond to a Low-Battery Warning
47
To Recharge the Battery Pack
47
To Get the most from Your Battery Packs
48
4 Modem and Network Connections
50
Using the Modem
50
To Connect the Modem
51
Special Restrictions in Certain Countries
52
To Change Your Modem Settings
53
Connecting to a Local Area Network (LAN)
54
Using a Wireless LAN Adapter
55
Making Wireless Network Connections
57
(Select Models Only)
57
Checking the Wireless Connection Status
58
Connecting to a Wireless Network
58
To Prepare for Connections
58
To Turn Wireless Communication on and off
59
5 Add-On Devices
61
Connecting External Devices
61
To Insert or Remove a PC Card
61
Removing a Pc Card
62
To Connect an Audio Device
63
To Use an External Monitor
64
To Connect a 1394 Device (Select Models Only)
66
To Connect an Infrared Device (Select Models Only)
66
Using the Infrared Port
67
Avoiding Standby While Using Infrared
67
To Use a Port Replicator (Select Models Only)
68
Installing Additional RAM (Memory)
71
To Install a RAM Expansion Module
71
To Remove a RAM Expansion Module
73
Replacing the Hard Drive
74
To Replace the Hard Drive
74
To Replace the Hard Drive Holder
76
To Prepare a New Hard Drive
77
Troubleshooting
78
Troubleshooting Your Notebook
78
Audio Problems
79
CD-ROM and DVD Problems
80
Display Problems
81
Hard Drive Problems
82
Heat Problems
83
Infrared Problems
83
Keyboard and Pointing Device Problems
83
Local Area Network (LAN) Problems
85
Memory Problems
86
Modem Problems
86
PC Card (PCMCIA) Problems
89
Performance Problems
90
Power and Battery Pack Problems
91
Printing Problems
94
Serial, Parallel and USB Problems
95
Startup Problems
96
Wireless Problems
98
The Network
99
Configuring Your Notebook
100
To Run the BIOS Setup Utility
100
Main Menu
101
System Devices Menu
102
Security Menu
102
Boot Menu
103
Exit Menu
104
To Change Video Memory Settings Using BIOS Setup Utility
105
Updating Software and Drivers from the Web
105
Using System Recovery Features
105
Safeguarding Your Data
106
Operating System (OS) CD Repair
107
OS CD Reinstall
108
Reinstalling Drivers
109
Restoring Software Applications
109
7 Reference Information
110
Modem Reference Information
110
Modem Reference (Conexant)
110
Voice Commands
121
Safety Information
125
Power Cords
125
Battery Safety
126
Laser Safety
127
LED Safety
127
Mercury Safety
128
Exposure to Radio Frequency Radiation
128
Wireless Notice
129
U.s.a
129
Regulatory Information
129
Canada
132
European Union
133
Japan
136
Korea
137
New Zealand
138
Russia
140
Brazil
140
International
140
Advertisement
HP Compaq Presario,Presario 2128 Service Manual (126 pages)
Notebook PC
Brand:
HP
| Category:
Laptop
| Size: 6.54 MB
Table of Contents
Table of Contents
3
Product Information
7
Table 1-1. Notebook Products
7
Table 1-2. Product Comparisons
19
Features
21
Figure 1-1. Front View
21
Figure 1-2. Back View
22
Figure 1-3. Bottom View
23
Operation
24
Turning the Notebook on and off
24
Table 1-3. Activating Power Modes
24
Checking the Status of the Notebook
25
Table 1-4. Main Status Lights (Front of Notebook)
25
Table 1-5. Keyboard Status Lights
25
Using Fn Hot Keys
26
Table 1-6. Fn Hot Keys
26
Resetting the Notebook
27
Figure 1-4. Resetting the Notebook
27
Specifications
28
Table 1-7. Specifications
28
Table 1-8. Accessories
31
Figure 1-5. Replaceable Module Diagram
33
Internal Design
33
Table 1-9. Functional Structure Description
34
Removal and Replacement
35
Table 2-1. Removal Cross-Reference
35
Table 2-2. Required Equipment
36
Table 2-3. Recommended Screw Torque Values
36
Disassembly Flowchart
37
Figure 2-1. Disassembly Flow
37
Figure 2-2. Removing the Battery
38
Removing the Battery (User-Replaceable)
38
Figure 2-3. Removing an SDRAM Module
39
Removing a SDRAM Module (User-Replaceable)
39
Figure 2-4. Removing the Mini-PCI Card
40
Removing the Wireless LAN Mini-PCI Card (User-Replaceable)
40
Figure 2-5. Removing the Hard Disk Drive
41
Removing the Hard Disk Drive (User-Replaceable)
41
Figure 2-6. Removing the Hard Disk Drive Tray
42
Replacing Small Parts (User-Replaceable)
43
Table 2-4. Replacing Small Parts (User-Replaceable)
43
Removing the Keyboard Cover (User-Replaceable)
44
Figure 2-7. Removing the Keyboard Cover
45
Figure 2-8. Removing the Speaker Assembly
46
Removing the Speaker Assembly (User-Replaceable)
46
Removing the Keyboard (User-Replaceable)
47
Figure 2-9. Removing the Keyboard
48
Figure 2-10. Removing the Switchboard PCA
49
Removing the Switchboard PCA (User-Replaceable)
49
Figure 2-11. Removing the CD/DVD Drive
50
Removing the CD/DVD Drive (User-Replaceable)
50
Removing the Display Assembly (Authorized Service Providers Only)
51
Figure 2-12. Removing the Display Assembly
52
Removing the Top Case (Authorized Service Providers Only)
54
Figure 2-13. Removing the Top Case
55
Removing the Floppy Drive (Authorized Service Providers Only)
56
Figure 2-14. Removing the Floppy Drive
57
Removing the Infrared (I/R) PCA (Authorized Service Providers Only)
58
Figure 2-15. Removing the I/R PCA
59
Figure 2-16. Removing the Heatsink (with Fan)
60
Removing the Heatsink (with Fan) (Authorized Service Providers Only)
60
Removing the CPU Module (Authorized Service Providers Only)
62
Figure 2-17. Removing the CPU Module
63
Removing the Motherboard (Authorized Service Providers Only)
64
Figure 2-18. Removing the Motherboard
65
Figure 2-19. Example of Serial Number Label
68
Replacing Components on a Bottom Case
68
Figure 2-20. Replacing the Antennas
69
Figure 2-21. Removing a PCMCIA Door
69
Repairing the BIOS IC (Authorized Service Providers Only)
70
Figure 2-22. Boot-Block Jumper
71
Removing Other Components (Authorized Service Providers Only)
72
Table 2-5. Removing Components
72
Troubleshooting and Diagnostics
74
Support by Authorized Service Providers
74
Table 3-1. ASP Support Options
74
Troubleshooting
75
Figure 3-1. Basic Troubleshooting Steps
75
Checking for Customer Abuse
76
Troubleshooting the Problem
76
Verifying the Repair
77
Suggestions for Troubleshooting
78
Table 3-2. Scope of Diagnostic Tools
78
Table 3-3. Troubleshooting Suggestions
79
Diagnostic Tools
91
E-Diagtools Diagnostic Program
91
Power-On Self-Test
92
Table 3-4. POST Terminal-Error Beep Codes
93
Table 3-5. POST Messages
96
Sycard Pcctest 450/460 PC Card (Optional)
98
Table 3-6. Sycard Pcctest Commands
98
Windows Management Instrumentation (WMI)
99
BIOS Setup Utility
99
Table 3-7. BIOS Setup Menus and Parameters
100
Replaceable Parts
102
Figure 4-1. Exploded View
103
Table 4-1. Replaceable Parts
104
Table 4-2. Accessory Replaceable Parts
112
Table 4-3. Part Number Reference
113
Reference Information
122
Password Removal Policy
122
Hewlett-Packard Display Quality Statement
123
Table 5-1. LCD Guidelines
124
Service Notes and Obsolete Parts
125
HP Compaq Presario,Presario 2128 User Manual (39 pages)
HP Compaq Presario,Presario 2100: Network Guide
Brand:
HP
| Category:
Laptop
| Size: 0.96 MB
Table of Contents
Table of Contents
3
Introduction
5
The Integrated 54G™ Solution
5
Enterprise Users
5
Home Users
6
Using the Integrated 54G™ Enabled Notebook
6
Features and Requirements
6
Completing the Setup
7
Modes of Operation
7
Infrastructure Mode
7
Characteristics
7
Advantages
7
Disadvantages
7
Requirements
7
Ad Hoc Mode
8
Characteristics
8
Advantages
8
Disadvantages
8
Requirements
8
Configuring a Network Profile
8
Configuring a Profile for a Listed Network that Does Not Require a WEP Key
9
Configuring a Profile for a Listed Network that Requires Awep Key
11
Configuring a Profile for a Network that Is Not Listed and Does Not Require a WEP Key
13
Configuring a Profile for a Network that Is Not Listed and Requires a WEP Key
15
Network Tasks
18
View Status of this Connection
18
Change Settings of this Connection
18
Changing the Values of the Network Adapter Properties
18
Adding a New Network to the List of Preferred Networks
20
Viewing or Modifying the Wireless Network Properties
20
Setting up an Ad Hoc Group Network for Connecting to the Internet
22
Setting up Internet Connection Sharing (ICS) on the Host Computer
22
Adding an Ad Hoc Network
22
Adding an Ad Hoc Network that Does Not Require a WEP Key
22
Adding an Ad Hoc Network that Requires a WEP Key
25
Specifications
28
Physical Characteristics
28
Temperature and Humidity Limitations
28
Power Characteristics
28
Networking Characteristics
28
Radio Characteristics
29
Regulatory Information
30
Operational Information
30
Wireless Interoperability
30
Safety
30
Canada-Industry Canada (IC)
30
Europe-EU Declaration of Conformity
31
France
31
Guidelines for Public WLAN Experimentation
32
Metropolitan Departments
33
USA-Federal Communications Commission (FCC)
34
Interference Statement
35
Radio Approvals
35
Troubleshooting
36
Cannot Connect to the Network
36
Performance and Connectivity Problems
36
Glossary
38
HP Compaq Presario,Presario 2128 Release Note (25 pages)
Fabric OS 4.2.x
Brand:
HP
| Category:
Storage
| Size: 0.49 MB
Table of Contents
About this Document
3
Release Notes Information
3
Supported Switches
4
Technical Support
4
Standards Compliance
5
Important Notes
6
Other Notes
12
Documentation Updates
20
Issues and Workarounds
22
HP Compaq Presario,Presario 2128 Maintenance Manual (14 pages)
HP Compaq Presario,Presario 2100: Supplementary Guide
Brand:
HP
| Category:
Laptop
| Size: 0.84 MB
Table of Contents
Table of Contents
3
1 Maintaining Your Software and Personal Data
4
Installing a Retail Version of an Operating System
4
Virus Protection
5
Backup Utilities
5
2 Maintaining Your Hardware
6
Monitoring Notebook Temperature
7
Cleaning Your Notebook
7
Cleaning the Keyboard
8
Cleaning the Display
9
Cleaning the Touchpad
9
Cleaning an External Mouse
10
Caring for Drives
12
3 Preparing the Notebook for Shipping or Traveling
13
Traveling with the Notebook
13
Advertisement
Related Products
HP Compaq Presario,Presario 2120
HP Compaq Presario,Presario 2122
HP Compaq Presario,Presario 2125
HP Compaq Presario,Presario 2127
HP Compaq Presario,Presario 2121
HP Compaq Presario,Presario 2123
HP Compaq Presario,Presario 2126
HP Compaq Presario,Presario 2129
HP Compaq Presario,Presario 2124
HP Mini 210-1008VU
HP Categories
Desktop
Laptop
Server
Monitor
Switch
More HP Manuals
Login
Sign In
OR
Sign in with Facebook
Sign in with Google
Upload manual
Upload from disk
Upload from URL