HP NX9010 Service Manual
Notebook pc
Hide thumbs
Also See for NX9010:
- Specification (22 pages) ,
- Hardware and software manual (251 pages) ,
- Maintenance and service manual (197 pages)
Table of Contents
Advertisement
HP Pavilion ze5300 Notebook PC
HP Pavilion ze5200 Notebook PC
HP Pavilion ze4300 Notebook PC
HP Pavilion ze4200 Notebook PC
HP Pavilion ze4100 Notebook PC
HP nx9010 Notebook PC
HP nx9005 Notebook PC
HP nx9000 Notebook PC
Compaq Evo Notebook N1050v Series
Compaq Evo Notebook N1010v Series
Compaq Presario 2500 Series Mobile PC
Compaq Presario 2100 Series Mobile PC
Compaq Presario 1100 Series Mobile PC
Technology Code KE
Service Manual
Advertisement
Table of Contents
Troubleshooting

Related Manuals for HP NX9010


Summary of Contents for HP NX9010
-
Page 1: Service Manual
HP Pavilion ze5300 Notebook PC HP Pavilion ze5200 Notebook PC HP Pavilion ze4300 Notebook PC HP Pavilion ze4200 Notebook PC HP Pavilion ze4100 Notebook PC HP nx9010 Notebook PC HP nx9005 Notebook PC HP nx9000 Notebook PC Compaq Evo Notebook N1050v Series... - Page 2 Intel, Celeron, and Pentium are trademarks of Intel Corporation in the U.S. and/or other countries. HP shall not be liable for technical or editorial errors or omissions contained herein or for incidental or consequential damages in connection with the furnishing, performance, or use of this material. The information in this document is provided “as is”...
-
Page 3: Table Of Contents
Contents Product Information... 1-1 Features ...1-48 Operation...1-54 Specifications ...1-58 Internal Design ...1-64 Removal and Replacement... 2-1 Disassembly Flowchart ...2-3 Removing the Battery...2-4 Removing a SDRAM Module...2-5 Removing the Wireless LAN Mini-PCI Card ...2-7 Removing the Hard Disk Drive...2-9 Replacing Small Parts ...2-11 Removing the Keyboard Cover...2-12 Removing the Speaker Assembly...2-15 Removing the Keyboard...2-16... - Page 4 Figures Figure 1-1. Front View ... 1-48 Figure 1-2. Back View... 1-49 Figure 1-3. Bottom View ... 1-50 Figure 1-4. Front View ... 1-51 Figure 1-5. Back View... 1-52 Figure 1-6. Bottom View ... 1-53 Figure 1-7. Resetting the Notebook ... 1-57 Figure 1-8.
- Page 5 Tables Table 1-1. Notebook Products ...1-1 Table 1-2. Product Comparisons...1-43 Table 1-3. Activating Power Modes ...1-54 Table 1-4. Main Status Lights (front of notebook) ...1-55 Table 1-5. Keyboard Status Lights...1-55 Table 1-6. Fn Hot Keys...1-56 Table 1-7. Specifications...1-58 Table 1-8. Accessories ...1-62 Table 1-9.
- Page 6 This manual provides reference information for servicing the HP Pavilion ze5300, ze5200, ze4300, ze4200, and ze4100 Notebook PCs, HP nx9010, nx9005, and nx9000 Notebook PCs, Compaq Evo Notebook 1050v and 1010v Series, and Compaq Presario 2500, 2100, and 1100 Series Mobile PCs.
-
Page 7: Product Information
The following list of HP and Compaq notebook products is current at the time of publication but is subject to change. Notebook Product Nx9010 Notebook PC DG071A ABG Pentium 4-D 2.66-GHz 15.0-in SXGA+ 40 GB DG071A AB1 Pentium 4-D 2.66-GHz 15.0-in SXGA+ 40 GB DG071A AKL Pentium 4-D 2.66-GHz 15.0-in SXGA+ 40 GB... - Page 8 Notebook Product DG231A ABF Pentium 4-D 2.8-GHz DG231A ABH Pentium 4-D 2.8-GHz DG231A ABN Pentium 4-D 2.8-GHz DG231A ABT Pentium 4-D 2.8-GHz DG231A ABU Pentium 4-D 2.8-GHz DG231A ABV Pentium 4-D 2.8-GHz DG231A ABY Pentium 4-D 2.8-GHz DG231A ABZ Pentium 4-D 2.8-GHz DG231A AB7 Pentium 4-D 2.8-GHz DG231A AB8...
- Page 9 Notebook Product DG232A ABT Pentium 4-D 2.66-GHz 15.0-in XGA DG232A ABU Pentium 4-D 2.66-GHz 15.0-in XGA DG232A ABV Pentium 4-D 2.66-GHz 15.0-in XGA DG232A ABY Pentium 4-D 2.66-GHz 15.0-in XGA DG232A ABZ Pentium 4-D 2.66-GHz 15.0-in XGA DG232A AB7 Pentium 4-D 2.66-GHz 15.0-in XGA DG232A AB8 Pentium 4-D 2.66-GHz 15.0-in XGA DG232A AB9...
- Page 10 Notebook Product DG233A ABU Celeron-D 2.0-GHz DG233A ABV Celeron-D 2.0-GHz DG233A ABY Celeron-D 2.0-GHz DG233A ABZ Celeron-D 2.0-GHz DG233A AB7 Celeron-D 2.0-GHz DG233A AB8 Celeron-D 2.0-GHz DG233A AB9 Celeron-D 2.0-GHz DG233A ACB Celeron-D 2.0-GHz DG233A AKB Celeron-D 2.0-GHz DG233A AKC Celeron-D 2.0-GHz DG233A AKD Celeron-D 2.0-GHz...
- Page 11 Notebook Product DG234A ABV Celeron-D 2.0-GHz DG234A ABY Celeron-D 2.0-GHz DG234A ABZ Celeron-D 2.0-GHz DG234A AB7 Celeron-D 2.0-GHz DG234A AB8 Celeron-D 2.0-GHz DG234A AB9 Celeron-D 2.0-GHz DG234A ACB Celeron-D 2.0-GHz DG234A AKB Celeron-D 2.0-GHz DG234A AKC Celeron-D 2.0-GHz DG234A AKD Celeron-D 2.0-GHz DG234A AKN Celeron-D 2.0-GHz...
- Page 12 Notebook Product DG241T ABH Pentium 4-D 2.66-GHz DG241T ABU Pentium 4-D 2.66-GHz DG241T ABZ Pentium 4-D 2.66-GHz DG242T ABD Celeron-D 2.0-GHz DG242T ABE Celeron-D 2.0-GHz DG242T ABF Celeron-D 2.0-GHz DG242T ABH Celeron-D 2.0-GHz DG242T ABU Celeron-D 2.0-GHz DG242T ABZ Celeron-D 2.0-GHz DG243T ABD Celeron-D 2.0-GHz DG243T ABE...
- Page 13 Notebook Product DG638A AB1 Pentium 4-D 2.8-GHz DG639A AB1 Celeron-D 2.0-GHz DG640A ABJ Pentium 4-D 2.8-GHz DG642A ABJ Pentium 4-D 2.66-GHz 14.1-in XGA DG647A UUF Pentium 4-D 2.66-GHz 15.0-in XGA DG890A AKL Celeron-D 2.2-GHz DG893A ABG Pentium 4-D 2.4-GHz DG895A ABG Pentium 4-D 2.4-GHz DG895A AKL Pentium 4-D 2.4-GHz...
- Page 14 Notebook Product Nx9005 Notebook PC DF988A ABA Athlon 1.8-GHz DF988A ABC Athlon 1.8-GHz DF989A ABA Athlon 1.8-GHz DF989A ABC Athlon 1.8-GHz DF990A AB1 Athlon 2.0-GHz DF992A ABG Athlon 1.8-GHz DF992A AB1 Athlon 1.8-GHz DF992A AKL Athlon 1.8-GHz DF992A UUF Athlon 1.8-GHz DF993A AB1 Athlon 1.8-GHz DF994A AB1...
- Page 15 Notebook Product DG194A AKC Athlon 2.0-GHz DG194A AKD Athlon 2.0-GHz DG194A AKN Athlon 2.0-GHz DG194A AK8 Athlon 2.0-GHz DG194A A2M Athlon 2.0-GHz DG194A UUG Athlon 2.0-GHz DG194A UUZ Athlon 2.0-GHz DG195A ABB Athlon 1.47-GHz DG195A ABD Athlon 1.47-GHz DG195A ABE Athlon 1.47-GHz DG195A ABF Athlon 1.47-GHz...
- Page 16 Notebook Product DG195A UUG Athlon 1.47-GHz DG195A UUZ Athlon 1.47-GHz DG196A ABB Athlon 1.47-GHz DG196A ABD Athlon 1.47-GHz DG196A ABE Athlon 1.47-GHz DG196A ABF Athlon 1.47-GHz DG196A ABH Athlon 1.47-GHz DG196A ABN Athlon 1.47-GHz DG196A ABT Athlon 1.47-GHz DG196A ABU Athlon 1.47-GHz DG196A ABV Athlon 1.47-GHz...
- Page 17 Notebook Product DG201A ABA Athlon 1.53-GHz DG201A ABM Athlon 1.53-GHz DG202A ABA Athlon 1.53-GHz DG202A ABM Athlon 1.53-GHz DG203A ABA Athlon 1.53-GHz DG203A ABM Athlon 1.53-GHz DG220T ABD Athlon 1.67-GHz DG220T ABE Athlon 1.67-GHz DG220T ABF Athlon 1.67-GHz DG220T ABH Athlon 1.67-GHz DG220T ABU Athlon 1.67-GHz...
- Page 18 Notebook Product DG832A ABE Athlon 1.67-GHz DG832A ABF Athlon 1.67-GHz DG832A ABH Athlon 1.67-GHz DG832A ABN Athlon 1.67-GHz DG832A ABT Athlon 1.67-GHz DG832A ABU Athlon 1.67-GHz DG832A ABV Athlon 1.67-GHz DG832A ABY Athlon 1.67-GHz DG832A ABZ Athlon 1.67-GHz DG832A AB7 Athlon 1.67-GHz DG832A AB8 Athlon 1.67-GHz...
- Page 19 Notebook Product Nx9000 Notebook PC DF981A AB1 Pentium 4-M 2.53-GHz 15.0-in UXGA DF982A AB1 Pentium 4-M 2.4-GHz DF983A AB1 Pentium 4-M 2.2-GHz DF986A ABJ Pentium 4-M 2.4-GHz DF987A ABJ Pentium 4-M 2.4-GHz DG211A ABB Pentium 4-M 2.0-GHz DG211A ABD Pentium 4-M 2.0-GHz DG211A ABE Pentium 4-M 2.0-GHz DG211A ABF...
- Page 20 Notebook Product DG211A UUZ Pentium 4-M 2.0-GHz DG212A ABB Pentium 4-M 2.0-GHz DG212A ABD Pentium 4-M 2.0-GHz DG212A ABE Pentium 4-M 2.0-GHz DG212A ABF Pentium 4-M 2.0-GHz DG212A ABH Pentium 4-M 2.0-GHz DG212A ABN Pentium 4-M 2.0-GHz DG212A ABT Pentium 4-M 2.0-GHz DG212A ABU Pentium 4-M 2.0-GHz DG212A ABV...
- Page 21 Notebook Product DG213A ABH Pentium 4-M 2.0-GHz DG213A ABN Pentium 4-M 2.0-GHz DG213A ABT Pentium 4-M 2.0-GHz DG213A ABU Pentium 4-M 2.0-GHz DG213A ABV Pentium 4-M 2.0-GHz DG213A ABY Pentium 4-M 2.0-GHz DG213A ABZ Pentium 4-M 2.0-GHz DG213A AB7 Pentium 4-M 2.0-GHz DG213A AB8 Pentium 4-M 2.0-GHz DG213A AB9...
- Page 22 Notebook Product DG224T ABD Pentium 4-M 2.0-GHz DG224T ABE Pentium 4-M 2.0-GHz DG224T ABF Pentium 4-M 2.0-GHz DG224T ABH Pentium 4-M 2.0-GHz DG224T ABU Pentium 4-M 2.0-GHz DG224T ABZ Pentium 4-M 2.0-GHz DG225T ABD Pentium 4-M 2.0-GHz DG225T ABE Pentium 4-M 2.0-GHz DG225T ABF Pentium 4-M 2.0-GHz DG225T ABH...
- Page 23 Notebook Product DG876A AB0 Celeron 1.8-GHz DG877A AB0 Pentium 4-M 2.2-GHz DG878A AB0 Pentium 4-M 2.4-GHz DG879A AB5 Pentium 4-M 2.0-GHz DG882A ABJ Pentium 4-M 2.0-GHz DG883A ABJ Celeron 1.8-GHz DG884A ABJ Celeron 1.8-GHz DG885A ABJ Celeron 1.8-GHz Service Manual Standard Hard CD/DVD...
- Page 24 Notebook Product Pavilion ze5300 Notebook PC DC809A ABA Pentium 4-D 2.4-GHz DC809A ABM Pentium 4-D 2.4-GHz DC964A ABA Pentium 4-D 2.4-GHz DC965A ABA Pentium 4-D 2.66-GHz 15.0-in SXGA+ 60 GB DC966A ABA Pentium 4-D 2.66-GHz 15.0-in XGA DC967A ABA Pentium 4-D 2.4-GHz DC968A ABA Pentium 4-D 2.4-GHz DF568A ABM...
- Page 25 Notebook Product Pavilion ze5200 Notebook PC DB395A ABA Pentium 4-D 2.0-GHz DB396A ABA Pentium 4-D 2.4-GHz DB397A ABA Pentium 4-D 2.4-GHz DB399A ABA Pentium 4-D 2.0-GHz DC603A ABA Pentium 4-D 2.4-GHz DC604A ABM Pentium 4-D 2.4-GHz DC605A ABM Pentium 4-D 2.8-GHz DC659A UUZ Pentium 4-D 2.8-GHz DC671A ABA...
- Page 26 Notebook Product Pavilion ze4300 Notebook PC DC950A ABA Celeron 1.8-GHz DC958A ABA Athlon 1.53-GHz DC972A ABA Athlon 1.53-GHz DC974A ABA Athlon 1.47-GHz DC975A ABA Athlon 1.8-GHz DC976A ABA Athlon 1.8-GHz DC978A ABA Athlon 1.47-GHz DF567A ABM Celeron 2.0-GHz DF577A UUG Athlon 2.0-GHz DF579A ABF Athlon 1.53-GHz...
- Page 27 Notebook Product DF936A ABA Athlon 1.47-GHz DF964A ABD Athlon 2.0-GHz DF965A ABE Athlon 1.67-GHz DF965A UUG Athlon 1.67-GHz DF966A ABE Athlon 2.0-GHz DF966A ABH Athlon 2.0-GHz DF966A ABU Athlon 2.0-GHz DF995A AB1 Pentium 4-M 2.4-GHz DF995A AKL Pentium 4-M 2.4-GHz DF995A UUF Pentium 4-M 2.4-GHz DF996A AB1...
- Page 28 Notebook Product DG024A ABL Celeron 2.0-GHz DG025A ABD Celeron 2.2-GHz DG026A AB0 Pentium 4-M 2.0-GHz DG027A UUZ Pentium 4-M 2.2-GHz DG190A ABZ Athlon 1.67-GHz DG190A UUG Athlon 1.67-GHz DG204A ABU Celeron 1.8-GHz DG207A ABG Pentium 4-M 2.2-GHz DG217A AB1 Athlon 2.0-GHz DG604A ABH Athlon 1.67-GHz DG605A ABE...
- Page 29 Notebook Product Pavilion ze4200 Notebook PC DB385A ABA Celeron 1.7-GHz DB386A ABA Celeron 1.8-GHz DB953A ABA Celeron 1.6-GHz DC590A ABA Celeron 1.8-GHz DC591A ABA Celeron 1.6-GHz DC592A ABA Celeron 1.6-GHz DC594A ABF Celeron 1.6-GHz DC595A ABF Celeron 1.8-GHz DC596A ABF Celeron 2.0-GHz DC596A ABN Celeron 2.0-GHz...
- Page 30 Notebook Product DC709A ABH Athlon 1.53-GHz DC709A ABU Athlon 1.53-GHz DC710A ABE Athlon 1.67-GHz DC710A ABH Athlon 1.67-GHz DC711A ABE Athlon 1.8-GHz DC713A ABD Athlon 1.8-GHz DC760A ABG Pentium 4-M 1.9-GHz DC761A ABU Celeron 2.0-GHz DC761A UUZ Celeron 2.0-GHz DC762A ABC Celeron 1.6-GHz DC762A ABL Celeron 1.6-GHz...
- Page 31 Notebook Product DC816A UUZ Pentium 4-M 2.2-GHz DC850A ABD Celeron 1.8-GHz DD506A ABF Athlon 1.47-GHz DD506A ABZ Athlon 1.47-GHz DD507A ABH Athlon 1.8-GHz DD508A ABH Athlon 1.53-GHz DD508A ABU Athlon 1.53-GHz DD509A ABH Athlon 1.67-GHz DD510A ABN Celeron 2.0-GHz DD511A ABN Celeron 1.6-GHz DD665A ABU Athlon 1.8-GHz...
- Page 32 Notebook Product Pavilion ze4100 Notebook PC F5855 H/ABA Celeron 1.6-GHz F5856 H/ABA Celeron 1.8-GHz F5859 H/ABA Celeron 1.6-GHz F5861 H/ABA Celeron 1.6-GHz F5868 H/ABU Pentium 4-M 1.8-GHz F5869 H/ABF Celeron 1.8-GHz F5869 H/ABU Celeron 1.8-GHz F5870 H/ABF Pentium 4-M 1.7-GHz F5870 H/ABU Pentium 4-M 1.7-GHz F5871 H/ABA...
- Page 33 Notebook Product Compaq Evo Notebook N1050v Series DC749A ABF Celeron 1.6-GHz DC749A ABH Celeron 1.6-GHz DC750A ABF Pentium 4-M 1.8-GHz DC750A ABH Pentium 4-M 1.8-GHz DC751A ABF Pentium 4-M 1.8-GHz DC751A ABH Pentium 4-M 1.8-GHz DC767T ABD Celeron 1.6-GHz DC767T ABE Celeron 1.6-GHz DC767T ABF Celeron 1.6-GHz...
- Page 34 Notebook Product Compaq Presario 2500 Series Mobile PC DB390A ABA Pentium 4-D 2.4-GHz DB391A ABA Pentium 4-D 2.4-GHz DC606A AB2 Pentium 4-D 2.4-GHz DC607A ABM Pentium 4-D 2.0-GHz DC609A ABM Pentium 4-D 2.66-GHz 15.0-in XGA DC660A ABU Pentium 4-D 2.8-GHz DC714A ABD Pentium 4-D2.53-GHz DC715A ABC...
- Page 35 Notebook Product DC723A AB0 Pentium 4-D 2.53-GHz 15.0-in XGA DC724A AB0 Pentium 4-D 2.53-GHz 15.0-in XGA DC725A AB0 Pentium 4-D 2.4-GHz DC726A ABO Pentium 4-D 2.4-GHz DC727A AB1 Pentium 4-D 2.66-GHz 15.0-in SXGA+ 40 GB DC728A AB1 Pentium 4-D 2.4-GHz DC730A ABF Pentium 4-D 2.53-GHz 15.0-in XGA DC731A ABB...
- Page 36 Notebook Product DC754A ABV Pentium 4-D 2.53-GHz 15.0-in XGA DC755A ABE Pentium 4-D 2.4-GHz DC755A ABZ Pentium 4-D 2.4-GHz DC755A UUG Pentium 4-D 2.4-GHz DC817A ABU Pentium 4-D 2.53-GHz 15.0-in XGA DC969A ABA Pentium 4-D 2.66-GHz 15.0-in XGA DC970A ABA Pentium 4-D 2.4-GHz DC972A ABA Pentium 4-D 1.8-GHz...
- Page 37 Notebook Product DG017A ABU Celeron 2.0-GHz DG017A UUG Celeron 2.0-GHz DG079A AB2 Pentium 4-D 2.53-GHz 14.1-in XGA DG081A AB2 Pentium 4-D 2.53-GHz 14.1-in XGA DG082A AB5 Pentium 4-D 2.53-GHz 14.1-in XGA DG083A AB5 Pentium 4-D 2.53-GHz 15.0-in XGA DG084A AB1 Pentium 4-D 2.8-GHz DG085A AB1 Pentium 4-D 2.66-GHz 15.0-in SXGA+ 40 GB...
- Page 38 Notebook Product DG097A AB5 Pentium 4-D 2.53-GHz 15.0-in XGA DG098A ABB Pentium 4-D 2.66-GHz 15.0-in XGA DG098A ABE Pentium 4-D 2.66-GHz 15.0-in XGA DG098A ABF Pentium 4-D 2.66-GHz 15.0-in XGA DG098A ABT Pentium 4-D 2.66-GHz 15.0-in XGA DG098A ABZ Pentium 4-D 2.66-GHz 15.0-in XGA DG098A AK8 Pentium 4-D 2.66-GHz 15.0-in XGA DG099A ABE...
- Page 39 Notebook Product Compaq Presario 2100 Series Mobile PC DB381A ABA Athlon 1.53-GHz DB382A ABA Athlon 1.67-GHz DB383A ABA Athlon 1.46-GHz DB954A ABA Celeron 1.6-GHz DC582A ABM Celeron 1.6-GHz DC583A ABA Celeron 1.7-GHz DC584A ABA Celeron 1.8-GHz DC585A AB2 Pentium 4-M 1.9-GHz DC586A AB5 Pentium 4-M 1.9-GHz DC587A AB5...
- Page 40 Notebook Product DC708A ABG Athlon 1.53-GHz DC735A ABC Celeron 1.6-GHz DC735A ABL Celeron 1.6-GHz DC736A AB0 Pentium 4-M 2.0-GHz DC736A AB2 Pentium 4-M 2.0-GHz DC737A AB0 Celeron 1.7-GHz DC738A AB2 Celeron 1.6-GHz DC738A ACJ Celeron 1.6-GHz DC738A AKL Celeron 1.6-GHz DC738A UUF Celeron 1.6-GHz DC739A ACJ...
- Page 41 Notebook Product DC742A AK8 Celeron 1.6-GHz DC742A UUG Celeron 1.6-GHz DC743A ABB Celeron 1.8-GHz DC743A ABV Celeron 1.8-GHz DC743A ABZ Celeron 1.8-GHz DC743A UUG Celeron 1.8-GHz DC744A ABB Celeron 2.0-GHz DC744A ABT Celeron 2.0-GHz DC744A ABV Celeron 2.0-GHz DC744A AB7 Celeron 2.0-GHz DC744A AB9 Celeron 2.0-GHz...
- Page 42 Notebook Product DC805A ABF Pentium 4-M 2.0-GHz DC806A ABH Celeron 1.6-GHz DC806A AB7 Celeron 1.6-GHz DC806A UUG Celeron 1.6-GHz DC807A AK8 Celeron 1.8-GHz DC808A ABE Celeron 2.0-GHz DC808A ABH Celeron 2.0-GHz DC808A ABY Celeron 2.0-GHz DC808A AB7 Celeron 2.0-GHz DC808A AK8 Celeron 2.0-GHz DC809A ABB Pentium 4-M 1.8-GHz...
- Page 43 Notebook Product DD516A AB5 Pentium 4-M 1.8-GHz DD517A ABA Athlon 1.67-GHz DD664A ABU Athlon 1.46-GHz DD668A ABU Celeron 1.6-GHz DD669A UUG Celeron 1.7-GHz DD670A AB5 Pentium 4-M 1.8-GHz DD671A AB5 Pentium 4-M 2.0-GHz DD679A ABD Pentium 4-D 2.53-GHz 15.0-in XGA DE227A UUF Athlon 1.40-GHz DE228A AB0...
- Page 44 Notebook Product DF840A ABC Athlon 1.8-GHz DF840A ABL Athlon 1.8-GHz DF841A ABC Athlon 2.0-GHz DF841A ABL Athlon 2.0-GHz DF846A ABF Pentium 4-M 2.2-GHz DF846A AK8 Pentium 4-M 2.2-GHz DF847A AB2 Pentium 4-M 1.8-GHz DF954A ABA Athlon 1.67-GHz DF955A ABA Athlon 2.0-GHz DF956A ABA Athlon 1.53-GHz DF967A AB5...
- Page 45 Notebook Product DF976A ABG Athlon 2.0-GHz DF977A AB0 Athlon 1.67-GHz DF978A AB5 Athlon 1.67-GHz DF979A ABC Athlon 1.53-GHz DF979A ABL Athlon 1.53-GHz DG028A AB2 Celeron 1.8-GHz DG029A AB5 Pentium 4-M 1.8-GHz DG031A AB1 Pentium 4-M 2.2-GHz DG032A AB1 Pentium 4-M 2.0-GHz DG033A AB1 Pentium 4-M 2.0-GHz DG034A AB1...
- Page 46 Notebook Product DG047A AB2 Pentium 4-M 2.0-GHz DG048A ACJ Pentium 4-M 2.2-GHz DG048A AB0 Pentium 4-M 2.2-GHz DG049A AB5 Pentium 4-M 2.0-GHz DG050A AB5 Pentium 4-M 2.0-GHz DG052A AB5 Celeron 2.0-GHz DG053A AB2 Celeron 1.7-GHz DG054A ABA Celeron 1.7-GHz DG054A AB2 Celeron 1.7-GHz DG054A ABA Pentium 4-M 2.0-GHz...
- Page 47 Notebook Product DG327A ABZ Pentium 4-M 2.2-GHz DG615A AB2 Celeron 1.8-GHz DG616A AB2 Pentium 4-M 2.2-GHz DG608A ABF Athlon 1.67-GHz DG609A ABZ Athlon 1.67-GHz DG610A ABV Athlon 1.67-GHz DG617A ABH Celeron 1.8-GHz DG618A ABY Celeron 1.8-GHz DG619A AK8 Celeron 1.8-GHz DG620A ABF Celeron 2.0-GHz DG620A ABZ...
- Page 48 Notebook Product Compaq Presario 1100 Series Mobile PC F5781 H/ABU Celeron 1.6-GHz F5781 H/ABZ Celeron 1.6-GHz F5782 H/ABZ Celeron 1.6-GHz F5783 H/ABZ Celeron 1.8-GHz F5876 H/ABD Celeron 1.6-GHz F5877 H/ABD Celeron 1.6-GHz F5880 H/ABD Celeron 1.8-GHz 1-42 Product Information Standard Hard CD/DVD SDRAM/...
-
Page 49: Table 1-2. Product Comparisons
Windows XP Professional or Home preinstalled. System Power States On, Standby, Hibernate, Off. *Intel Desktop Pentium 4-D, Intel Mobile Pentium 4-M, and Intel Celeron Mobile processors. All models feature HP TopTools, and are ACPI compliant. Service Manual Table 1-2. Product Comparisons Product Information 1-43... - Page 50 Windows XP Professional or Home preinstalled. Operating System Power States On, Standby, Hibernate, Off. *Intel Desktop Pentium 4-D, Intel Mobile Pentium 4-M, and Intel Celeron Mobile processors. All models feature HP TopTools, and are ACPI compliant. 1-44 Product Information Service Manual...
- Page 51 Windows XP Professional or Home preinstalled. Operating System Power States On, Standby, Hibernate, Off. *Intel Desktop Pentium 4-D, Intel Mobile Pentium 4-M, and Intel Celeron Mobile processors. All models feature HP TopTools, and are ACPI compliant. Service Manual Product Information 1-45...
- Page 52 Windows XP Professional or Home preinstalled. System On, Standby, Hibernate, Off. Power States *Intel Desktop Pentium 4-D, Intel Mobile Pentium 4-M, and Intel Celeron Mobile processors. All models feature HP TopTools, and are ACPI compliant. 1-46 Product Information Service Manual...
- Page 53 Windows XP Professional or Home preinstalled. Operating System Power States On, Standby, Hibernate, Off. *Intel Desktop Pentium 4-D, Intel Mobile Pentium 4-M, and Intel Celeron Mobile processors. All models feature HP TopTools, and are ACPI compliant. Service Manual Product Information 1-47...
-
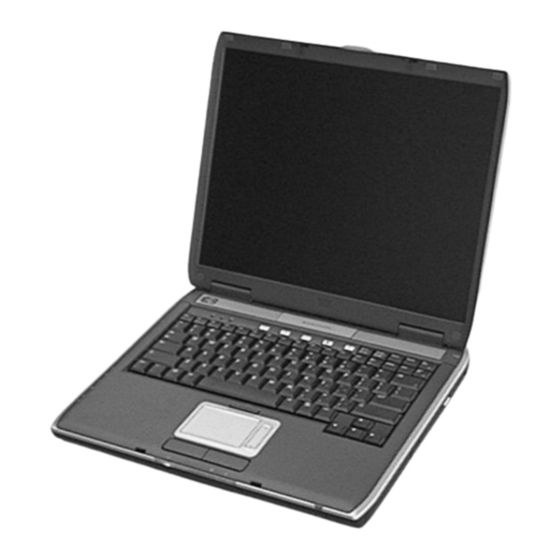
Page 54: Features
Features The following illustrations show the notebook’s main external features. For an exploded view of the notebook, see page 4-2. HP Pavilion 4300, 4200, and 4100, HP nx9005 and nx9000, and Compaq Presario 2100 Notebook open/close latch. One-touch buttons. Keyboard status lights. -
Page 55: Figure 1-2. Back View
HP Pavilion 4300, 4200, and 4100, HP nx9005 and nx9000, and Compaq Presario 2100 13. AC adapter jack. 14. Two universal serial bus (USB) ports. 15. LAN port.* 16. S-video port.* 17. Parallel port (LPT1). Use this port for a parallel printer or other parallel device. -
Page 56: Figure 1-3. Bottom View
HP Pavilion 4300, 4200, and 4100, HP nx9005 and nx9000, and Compaq Presario 2100 28. Hard disk drive. 29. Battery latch. 30. SDRAM door. 1-50 Product Information Figure 1-3. Bottom View 31. Reset button. 32. Port replicator connect.* 33. Mini-PCI door (no user parts inside). -
Page 57: Figure 1-4. Front View
HP Pavilion 5300 and 5200, HP nx9010, and Compaq Presario 2500 Notebook open/close latch. One-touch buttons. Keyboard status lights. Power button. Turns the notebook on and off. Touch pad, scroll pad, click buttons, plus on-off button. Main status lights (left to right): power mode, hard disk activity, battery. -
Page 58: Figure 1-5. Back View
HP Pavilion 5300 and 5200, HP nx9010, and Compaq Presario 2500 15. AC adapter jack. 16. Two universal serial bus (USB) ports. 17. LAN port.* 18. External keyboard/mouse port. 19. Parallel port (LPT1). Use this port for a parallel printer or other parallel device. -
Page 59: Figure 1-6. Bottom View
HP Pavilion 5300 and 5200, HP nx9010, and Compaq Presario 2500 27. Hard disk drive. 28. Battery latch. 29. Mini-PCI door (no user parts inside). 30. SDRAM door. Service Manual Figure 1-6. Bottom View 31. Port replicator connect.* 32. Reset button. -
Page 60: Operation
Operation This section gives an overview of the notebook’s operation. Turning the Notebook On and Off You can start and stop your notebook using its power button. However, at certain times you might want to use other methods to start or stop the notebook—depending on power considerations, types of active connections, and start-up time. -
Page 61: Table 1-4. Main Status Lights (Front Of Notebook)
Checking the Status of the Notebook The main status lights on the front of the notebook report power status, battery status, and hard disk activity. Table 1-4. Main Status Lights (front of notebook) Meaning Power status On: notebook is on (even if the display is off). Blinking: notebook is in Standby mode. -
Page 62: Table 1-6. Fn Hot Keys
Using Fn Hot Keys The combination of the Fn key plus another key creates a hot key—a shortcut key sequence—for various system controls. To use a hot key, press and hold Fn, press the appropriate second key, then release both keys. Hot Key Effect Fn+F1... -
Page 63: Figure 1-7. Resetting The Notebook
Note To boot from a CD, insert a bootable CD (such as the Recovery CDs) into the CD/DVD drive, then restart. Press Esc when the HP logo appears, then select the CD/DVD drive as the temporary boot device. Service Manual Figure 1-7. -
Page 64: Specifications
The following tables list the specifications for the notebook and its accessories. These are subject to change: for the latest versions, see the HP Notebook Web site ( www.hp.com/notebooks ). Size (14-inch display): 328 × 272 × 33 mm (12.9 × 10.7 × 1.3 in). - Page 65 Processor and HP nx9010: 2.4-, 2.53-, or 2.66-GHz Intel Desktop Pentium 4 processor-D with Bus Architecture (continued) Intel Speed Step technology, 512-KB L2 cache, and 1.2- to 1.3-V core low-power processor with 400-MHz processor system bus. 2.0-GHz Intel Mobile Celeron-D processor with 256-KB L2 cache and 1.45-V core low-power processor with 133-MHz processor system bus.
- Page 66 24x CD-ROM, or 8x DVD, or CD-RW, or CD-RW/DVD drive (or higher). At least 128 MB SDRAM preinstalled. HP Pavilion ze5200, ze4200, ze4100, Compaq Evo N1050v, Compaq Presario 2500, and Compaq Presario 2100 Two slots for PC2100 DDR-266 SDRAM modules.
- Page 67 Modem Software-based modem. Data speed: 56 Kbps (V.92) maximum. (certain models) Fax speed: 14.4 Kbps, Class 1 and 2. Modulation: V.21, V.22, V.22bis, V.23, V.32, V.32bis, V.34, V.90, V.92, X2, Bell 103, Bell 212A. Synchronous transfer: V.80. Compression: V.42bis, MNP5. Error correction: V.42, MNP2-4.
-
Page 68: Table 1-8. Accessories
SPS-DRV HD 60 GB (5400 rpm) 319416-001 SPS-DRV HD 80 GB (4200 rpm) 320692-001 1-62 Product Information Table 1-8. Accessories Pavilion ze4300, ze4200, Pavilion nx9005, ze5200, nx9010, N1050v, Presario Presario 2500 2100 • • • • • • • •... - Page 69 F4640-60977 319468-002 Docking F4808-60901 Port Replicator Assy F4808-60902 Simple Port Replicator hp/Compaq Service Manual Pavilion ze4300, ze4200, Pavilion nx9005, Pavilion ze5200, ze4200, nx9010, N1050v, nx9000, Presario Presario Presario 2500 2100 2100 • • • • • • • • •...
-
Page 70: Internal Design
Internal Design The motherboard PCA is the central component of the notebook’s design. It plays a role in virtually all system functions. The CPU module and most other subsystems connect to the motherboard. The following figure shows the connections among the notebook’s replaceable electronic modules. Table 1-9 on page 1-65 lists the roles that these modules play in the notebook’s functional subsystems. -
Page 71: Table 1-9. Functional Structure Description
Table 1-9. Functional Structure Description Bootup CPU module Motherboard Hard disk drive Floppy drive Processor CPU module Motherboard Memory Motherboard SDRAM module Battery Power Motherboard Switchboard PCA AC adapter Motherboard Display SDRAM module Display assembly Hard disk Motherboard Hard disk drive Motherboard Floppy drive Floppy drive... -
Page 72: Removal And Replacement
This chapter tells you how to remove and replace the notebook’s components and assemblies. The items marked by • in the following table are user-replaceable. Table 2-1. Removal Cross-Reference Assembly, display (page 2-23). • Assembly, speaker (page 2-15). • Battery, main (page 2-4). •... -
Page 73: Table 2-2. Required Equipment
• #0 and #1 Phillips screwdrivers, preferably magnetized. • Small flat-blade screwdriver. • 5 mm nut driver Table 2-3. Recommended Screw Torque Values Screw Thread Size M2.5 (hinges) M2.5 (other) Standoff, hex Removal and Replacement Table 2-2. Required Equipment Torque (cm-kgf) 2,0 –... -
Page 74: Disassembly Flowchart
Disassembly Flowchart The following diagram shows the general “path” you will use when disassembling the notebook to access any particular component. Service Manual Figure 2-1. Disassembly Flow Removal and Replacement... -
Page 75: Removing The Battery
Removing the Battery (User-Replaceable) Required Equipment • None. Removal Procedure • Slide the battery’s release latch, then pull the battery out of its compartment. Removal and Replacement Figure 2-2. Removing the Battery Service Manual... -
Page 76: Removing A Sdram Module
One slot contains an SDRAM module that was factory installed. Note HP Pavilion ze5300, ze5200, ze4300, ze4200, and ze4100, HP nx9010, nx9005 and nx9000, Compaq Evo Notebook N1050v and N1010v, and Presario 2500, 2100, and 1100 notebooks use only DDR266 SDRAM modules. Using the wrong type of module prevents the notebook from booting. -
Page 77: Figure 2-4. Removing An Sdram Module
Note The SDRAM door on HP Pavilion 5300 and 5200, HP nx9010, and Compaq Presario 2500 models is located in the rear left corner of the notebook bottom, as indicated in Figure 2-4. The procedure for removing the SDRAM door and modules is the same for all notebook models. -
Page 78: Removing The Wireless Lan Mini-Pci Card
Carefully pull the mini-PCI card out of the connector. Figure 2-5. Removing the Mini-PCI Card HP Pavilion 4300, 4200, and 4100, HP nx9005 and nx9000, Compaq Evo Notebook N1050 and 1010, and Compaq Presario 2100 and 1100 Models Service Manual... -
Page 79: Figure 2-6. Removing The Mini-Pci Card
Note The Mini-PCI Card door on HP Pavilion 5300 and 5200, HP nx9010, and Compaq Presario 2500 models is located in the front center area of the notebook bottom, as indicated in Figure 2-6. The procedure for removing the Mini-PCI door and card is the same for all notebook models. -
Page 80: Removing The Hard Disk Drive
Removing the Hard Disk Drive (User-Replaceable) Required Equipment • #1 Phillips screwdriver. Removal Procedure Important If you are installing a new hard disk drive, load the factory software and operating system on the drive as described in “Recovering the Factory Software,” as shown on the next page. Unplug the AC adapter, if present, and then remove the battery. -
Page 81: Figure 2-8. Removing The Hard Disk Drive Tray
Turn on or restart the notebook. When the HP logo appears, press Esc to display the Boot menu. Use the arrow keys to select the CD/DVD drive as the first boot device, then press Enter. -
Page 82: Replacing Small Parts
Replacing Small Parts (User-Replaceable) The user can replace the following small parts. Part Replacement Procedure Insert a small flat-blade screwdriver under the rubber screw plug and pry it Rubber screw plugs, loose. To replace, firmly press the adhesive side of the screw plug into the display (on display bezel) recess. -
Page 83: Removing The Keyboard Cover
Removing the Keyboard Cover (User-Replaceable) Required Equipment • #1 Phillips screwdriver. • Small flat-blade screwdriver. Removal Procedure Unplug the AC adapter, if present, and then remove the battery. Remove the two M2.5×4.0 mm hinge cover screws that secure the keyboard cover to the rear of the notebook. -
Page 84: Figure 2-9. Removing The Keyboard Cover
4. If necessary, while holding the center of the cover, carefully insert the flat-blade screwdriver under the right side of the display assembly hinge, gently pry up, and then lift the cover out. This procedure might need to be repeated on the left side of display assembly hinge to completely remove the cover. -
Page 85: Figure 2-10. Disconnecting The Speaker Cable
Note When removing the keyboard cover on HP Pavilion 5300 and 5200, HP nx9010, and Compaq Presario 2500 models, disconnect the speaker cable as indicated in Figure 2-10. Figure 2-10. Disconnecting the Speaker Cable Reassembly Note • Insert the tabs on the left- and right-center of the panel into the mating slots under the keyboard, and then press the panel into place. -
Page 86: Removing The Speaker Assembly
Compaq Presario 2500 Series notebook speakers are integrated into the top case. Refer to the “Removing the Top Case” section later in this chapter for procedures on removing the top case and speakers on the HP Pavilion 5300 and 5200, HP nx9010, and Compaq Presario 2500 Series notebooks. -
Page 87: Removing The Keyboard
Removing the Keyboard (User-Replaceable) Required Equipment • #1 Phillips screwdriver. Removal Procedure Unplug the AC adapter, if present, and remove the battery. Remove the keyboard cover (page 2-12). Remove the four M2.5×4.0 mm screws that secure the keyboard to the top case. Lift up on the keyboard at the switchboard PCA end and then pull it toward the display assembly to release the tabs from the top case. -
Page 88: Figure 2-12. Removing The Keyboard
Figure 2-12. Removing the Keyboard (User-Replaceable) Note This section applies only to HP Pavilion 4300, 4200, and 4100, HP nx9005 and nx9000, Compaq Evo Notebook N1050 and N1010, and Compaq Presario 2100 and 1100 models. Service Manual Removal and Replacement... -
Page 89: Figure 2-13. Removing The Switchboard Pca
Gently lift up on the keyboard, carefully remove the switchboard PCA from the top case, and then disconnect the underside motherboard cable. Figure 2-13. Removing the Switchboard PCA HP Pavilion 4300, 4200, and 4100, HP nx9005 and nx9000, Compaq Evo Notebook N1050 and 1010, and Compaq Presario 2100 and 1100 Models 2-18... -
Page 90: Removing The Switchboard Pca
Removing the Switchboard PCA (User-Replaceable) Note This section applies only to HP Pavilion 5300 and 5200, HP nx9010, and Compaq Presario 2500 models. Required Equipment • #1 Phillips screwdriver. Removal Procedure Unplug the AC adapter, if present, and then remove the battery. -
Page 91: Removing The Cd/Dvd Drive
Removing the CD/DVD Drive (User-Replaceable) Note This section applies only to HP Pavilion 4300, 4200, and 4100, HP nx9005 and nx9000, Compaq Evo Notebook N1050 and N1010, and Compaq Presario 2100 and 1100 models. Required Equipment • #1 Phillips screwdriver. -
Page 92: Figure 2-15. Removing The Cd/Dvd Drive
Figure 2-15. Removing the CD/DVD Drive HP Pavilion 4300, 4200, and 4100, HP nx9005 and nx9000, Compaq Evo Notebook N1050 and 1010, and Compaq Presario 2100 and 1100 Models Service Manual Removal and Replacement 2-21... -
Page 93: Figure 2-16. Removing The Cd/Dvd Drive
Note This section applies only to HP Pavilion 5300 and 5200, HP nx9010, and Compaq Presario 2500 models. Required Equipment • #1 Phillips screwdriver. Removal Procedure Unplug the AC adapter, if present, and remove the battery. Remove these additional assemblies: •... -
Page 94: Removing The Display Assembly
Removing the Display Assembly (Authorized Service Providers Only) Required Equipment • #1 Phillips screwdriver. Removal Procedure Unplug the AC adapter, if present, and remove the battery. Remove the keyboard cover (page 2-12). Remove the two M2.5×6.0 mm retaining screws from the notebook rear panel. Remove the M2.5×4.0 mm screws from the left and right antenna PCAs. -
Page 95: Figure 2-17. Removing The Display Assembly
Figure 2-17. Removing the Display Assembly 2-24 Removal and Replacement Service Manual... - Page 96 USB floppy drive. 4. Turn on the notebook. 5. When you see the HP logo, press ESC to display the boot menu, then boot from the floppy drive. 6. Select the option to update the display/LCD identification stored on the motherboard.
-
Page 97: Removing The Top Case
Removing the Top Case (Authorized Service Providers Only) Note This section applies only to HP Pavilion 4300, 4200, and 4100, HP nx9005 and nx9000, Compaq Evo Notebook N1050 and N1010, and Compaq Presario 2100 and 1100 models. Required Equipment •... -
Page 98: Figure 2-18. Removing The Top Case
Figure 2-18. Removing the Top Case HP Pavilion 4300, 4200, and 4100, HP nx9005 and nx9000, Compaq Evo Notebook N1050 and 1010, and Compaq Presario 2100 and 1100 Models Service Manual Removal and Replacement 2-27... - Page 99 Note This section applies only to HP Pavilion 5300 and 5200, HP nx9010, and Compaq Presario 2500 models. Required Equipment • #1 Phillips screwdriver. Removal Procedure Unplug the AC adapter, if present, and remove the battery. Remove these additional assemblies: •...
-
Page 100: Figure 2-19. Removing The Top Case Screws
Failure to follow this caution can result in damage to the notebook. Figure 2-19. Removing the Top Case Screws HP Pavilion 5300 and 5200, HP nx9010, and Compaq Presario 2500 Models Service Manual Removal and Replacement... -
Page 101: Figure 2-20. Removing The Top Case Screws
Turn the notebook top side up with the rear panel facing forward. Remove the two M2.5×7.0 mm screws from the rear of the bottom case. Figure 2-20. Removing the Top Case Screws HP Pavilion 5300 and 5200, HP nx9010, and Compaq Presario 2500 Models 2-30 Removal and Replacement... -
Page 102: Figure 2-21. Removing The Top Case
11. Lift the top case off of the notebook. Figure 2-21. Removing the Top Case HP Pavilion 5300 and 5200, HP nx9010, and Compaq Presario 2500 Models Service Manual Removal and Replacement... -
Page 103: Removing The Floppy Drive
Removing the Floppy Drive (Authorized Service Providers Only) Note This section applies only to HP Pavilion 4300, 4200, and 4100, HP nx9005 and nx9000, Compaq Evo Notebook N1050 and N1010, and Compaq Presario 2100 and 1100 models. Required Equipment •... -
Page 104: Figure 2-22. Removing The Floppy Drive
Figure 2-22. Removing the Floppy Drive HP Pavilion 4300, 4200, and 4100, HP nx9005 and nx9000, Compaq Evo Notebook N1050 and 1010, and Compaq Presario 2100 and 1100 Models Reassembly Notes Caution Do not excessively bend or fold the floppy drive cable. Excessive flexing can damage the floppy drive cable connections. - Page 105 Note This section applies only to HP Pavilion 5300 and 5200, HP nx9010, and Compaq Presario 2500 models. Required Equipment • #1 Phillips screwdriver. Removal Procedure Unplug the AC adapter, if present, and remove the battery. Remove these additional assemblies: •...
-
Page 106: Figure 2-23. Removing The Floppy Drive
Figure 2-23. Removing the Floppy Drive HP Pavilion 5300 and 5200, HP nx9010, and Compaq Presario 2500 Models Reassembly Notes Caution Do not excessively bend or fold the floppy drive cable. Excessive flexing can damage the floppy drive cable connections. -
Page 107: Removing The Infrared (I/R) Pca
Removing the Infrared (I/R) PCA (Authorized Service Providers Only) Required Equipment • #1 Phillips screwdriver. Removal Procedure Unplug the AC adapter, if present, and remove the battery. Remove these additional assemblies: • Hard disk drive (page 2-9). • Keyboard cover (page 2-12). •... -
Page 108: Figure 2-24. Removing The I/R Pca
Disconnect the I/R PCA cable from the motherboard. Remove the two M2.5×4.0 mm screws that secure the I/R PCA to the bottom case. Remove the I/R PCA. Reassembly Note Caution Use care when handling the I/R PCA cable. Damaging the cable can degrade notebook performance. -
Page 109: Removing The Audio Pca
Removing the Audio PCA (Authorized Service Providers Only) Note The following audio PCA removal instructions apply only to HP Pavilion 5300 and 5200, HP nx9010, and Compaq Presario 2500 models. Required Equipment • #1 Phillips screwdriver. Removal Procedure Unplug the AC adapter, if present, and remove the battery. -
Page 110: Figure 2-25. Removing The Audio Pca
Disconnect the audio PCA cable from the motherboard. Remove the audio PCA cable from the clip on the bottom case. Remove the two M2.0×3.0 mm flathead screws that secure the audio PCA shield to the bottom case. Remove the audio PCA shield. Remove the M2.0×3.0 mm flathead screw that secures the audio PCA to the bottom case. -
Page 111: Removing The Heat Sink (With Fan)
Removing the Heat Sink (with Fan) (Authorized Service Providers Only) Note This section applies only to HP Pavilion 4300, 4200, and 4100, HP nx9005 and nx9000, Compaq Evo Notebook N1050 and N1010, and Compaq Presario 2100 and 1100 models. Required Equipment •... - Page 112 Caution Do not spin the fan blades with your finger or you could damage the fan’s bearings. Reassembly Notes • If the thermal pad is damaged, use a sharp knife or scraper to carefully remove it from the heat sink, then attach a new thermal pad. •...
-
Page 113: Figure 2-27. Removing The Heat Sink (With Fan)
Note This section applies only to HP Pavilion 5300 and 5200, HP nx9010, and Compaq Presario 2500 models. Required Equipment • #0 Phillips screwdriver. Removal Procedure Unplug the AC adapter, if present, and remove the battery. Remove these additional assemblies: •... - Page 114 Caution Do not spin the fan blades with your finger or you could damage the fan’s bearings. Reassembly Notes • If the thermal pad is damaged, use a sharp knife or scraper to carefully remove it from the heat sink, then attach a new thermal pad. •...
-
Page 115: Removing The Cpu Module
• Small flat-blade screwdriver. Note This section applies only to HP Pavilion 4300, 4200, and 4100, HP nx9005 and nx9000, Compaq Evo Notebook N1050 and N1010, and Compaq Presario 2100 and 1100 models. Removal Procedure Unplug the AC adapter, if present, and remove the battery. -
Page 116: Figure 2-28. Removing The Cpu Module
Carefully lift the CPU module off of its socket on the motherboard. Figure 2-28. Removing the CPU Module HP Pavilion 4300, 4200, and 4100, HP nx9005 and nx9000, Compaq Evo Notebook N1050 and 1010, and Compaq Presario 2100 and 1100 Models... - Page 117 Note This section applies only to HP Pavilion 5300 and 5200, HP nx9010, and Compaq Presario 2500 models. Removal Procedure Unplug the AC adapter, if present, and remove the battery. Remove these additional assemblies: • Hard disk drive (page 2-9).
-
Page 118: Figure 2-29. Removing The Cpu Module
Slide the front tip of the locking arm slightly to the right and then swing it up and back. Carefully lift the CPU module off of its socket on the motherboard. Figure 2-29. Removing the CPU Module HP Pavilion 5300 and 5200, HP nx9010, and Compaq Presario 2500 Models Reassembly Notes Caution Each time you install a new CPU module, you must also replace the heat sink’s thermal pad to... -
Page 119: Removing The Rj11/1394 Connector Module
Removing the RJ11/1394 Connector Module (Authorized Service Providers Only) Note The following RJ11/1394 connector module removal instructions apply only to HP Pavilion 5300 and 5200, HP nx9010, and Compaq Presario 2500 models. Required Equipment • Small flat-blade screwdriver. Removal Procedure Unplug the AC adapter, if present, and remove the battery. -
Page 120: Figure 2-30. Removing The Rj11/1394 Connector Module
Remove the M2.5×6.0 mm screw that secures the RJ11/1394 connector module to the bottom case. Remove the RJ11/1394 connector module. Figure 2-30. Removing the RJ11/1394 Connector Module HP Pavilion 5300 and 5200, HP nx9010, and Compaq Presario 2500 Models Service Manual Removal and Replacement... -
Page 121: Removing The Motherboard
3. Insert the Service Utilities floppy disk in the floppy drive. 4. Turn on the notebook. When the HP logo appears (on either the built-in display or the external monitor), press Esc to display the boot menu, then choose Removable Device and boot from the floppy disk. -
Page 122: Figure 2-31. Removing The Motherboard
Carefully lift the motherboard out of the bottom case. If present, remove the modem port cover. Figure 2-31. Removing the Motherboard HP Pavilion 4300, 4200, and 4100, HP nx9005 and nx9000, Compaq Evo Notebook N1050 and 1010, and Compaq Presario 2100 and 1100 Models Service Manual... -
Page 123: Removal Procedure
3. Insert the Service Utilities floppy disk in the floppy drive. 4. Turn on the notebook. When the HP logo appears (on either the built-in display or the external monitor), press Esc to display the boot menu, then choose Removable Device and boot from the floppy disk. -
Page 124: Figure 2-32. Removing The Hard Disk Drive Guide
Caution: Wireless Models Be careful when removing and attaching antenna cables. Damage to cables or connectors can degrade performance. Wireless models only: Remove the mini-PCI door and unplug the two antenna cables from the mini-PCI card. Do not remove the mini-PCI card at this time. Remove the two M2.0×4.0 mm screws that secure the PCMCIA assembly to the bottom case. -
Page 125: Figure 2-33. Disconnecting The Motherboard Cables
Disconnect the modem board cable from the motherboard. Disconnect the 1394 board cable from the motherboard. Disconnect the fan cable from the motherboard and remove the fan. Disconnect the audio board cable from the motherboard. Figure 2-33. Disconnecting the Motherboard Cables 2-54 Removal and Replacement Service Manual... - Page 126 Remove the four M5.0×10.mm standoffs from the notebook rear panel (two on each side of the parallel and external monitor connectors). Remove the three M2.5×6.0 mm screws that secure the CD/DVD drive rear alignment rail to the bottom case. Remove the CD/DVD drive rear alignment rail. Remove the two screws that secure the CD/DVD drive front alignment rail to the bottom case.
-
Page 127: Figure 2-34. Removing The Motherboard
Figure 2-34. Removing the Motherboard 2-56 Removal and Replacement Service Manual... - Page 128 USB floppy drive. 4. Turn on the notebook. 5. When you see the HP logo, press ESC to display the boot menu, then boot from the floppy drive. 6. Select the option to update the display/LCD identification stored on the motherboard.
- Page 129 If you did not store system data, type M for the manual update option. Enter the serial number from the bottom of the notebook—you might have to contact an HP support center to do this. 2-58 Removal and Replacement...
-
Page 130: Replacing Components On A Bottom Case
While holding the paper label in place, attach a serial label overlay into the outer recess. The overlay covers and protects the serial label. Figure 2-35. Example of Serial Number Label Service Manual HP Serial Number (S)TW711A1234 (1P) F2072 W EA MFG# TW711A1234 Made in Taiwan Removal and Replacement... -
Page 131: Figure 2-36. Replacing The Antennas
Replacing the Left and Right Antennas If you need to remove or replace an antenna, see the figure below. Caution Handle the connector ends of the antennas carefully. Failure to do so could degrade notebook performance. Handle the antenna routing metal tabs in the bottom case carefully. These tabs can be easily broken. -
Page 132: Repairing The Bios Ic
Connect the AC adapter to the notebook. Connect any cables or equipment needed to connect to the Internet. Click Start > Programs (or All Programs) > Hewlett-Packard > Notebook > HP e-DiagTools > e-DiagTools for Windows. Click Update, select Download New and click OK. Follow the instructions that appear. Once the update process begins, do not interrupt it. -
Page 133: Figure 2-38. Boot-Block Jumper
Using a BIOS Floppy Disk If you do not have a BIOS floppy disk, download the package from the Partnership Web site (see page vii) under Product Support Information in the Service and Support Library. Follow the instructions for creating the BIOS floppy disk. Caution Make sure to use the correct BIOS floppy disk for the notebook model you are repairing. -
Page 134: Removing Other Components
Removing Other Components (Authorized Service Providers Only) Required Equipment • #0 and #1 Phillips screwdrivers. • Small flat-blade screwdriver. Removal Procedure Unplug the AC adapter, if present, and remove the battery. Remove the assemblies and follow the additional steps listed in the table below. Table 2-5. - Page 135 Component Removal Procedure Guide, HDD Keyboard cover (page 2-12). Speaker (page 2-15). Keyboard (page 2-16). Switchboard PCA (page 2-18). CD/DVD (page 2-20). Display (page 2-23). Top case (page 2-26). Heat sink (with fan) See page 2-40. Keyboard See page 2-16. Keyboard cover Panel, wireless (page 2-12).
-
Page 136: Troubleshooting And Diagnostics
Troubleshooting and Diagnostics This chapter includes troubleshooting and diagnostic information for testing the functionality of the notebook, and for identifying faulty components: • ASP support information • Troubleshooting information Checking for customer abuse (page 3-3). Troubleshooting the problem (page 3-3). Verifying the repair (page 3-4). -
Page 137: Troubleshooting
Troubleshooting The suggestions in this section can help isolate and repair the cause of a problem. To ensure quality repair, follow the basic troubleshooting steps shown below. Figure 3-1. Basic Troubleshooting Steps Troubleshooting and Diagnostics Check the customer’s description of the problem and any supporting information. -
Page 138: Checking For Customer Abuse
Checking for Customer Abuse Some notebooks might appear to have been damaged by customer abuse. Use these guidelines to help determine if this is the case: • If the shipping box is seriously damaged, customer abuse cannot be declared. • If the damage could have a cause other than customer abuse, customer abuse cannot be declared. -
Page 139: Verifying The Repair
Swapping modules that might be defective with others known to be good is generally an ideal way to find the module responsible for the problem. A failure symptom is rarely caused by more than one module, so you will not usually need to replace more than one to correct a particular failure. After you replace a module, the notebook will normally be in a confused state and lock up when you apply power. -
Page 140: Table 3-2. Scope Of Diagnostic Tools
Suggestions for Troubleshooting Function e-Diagtools Bootup Processor Memory Tests Tests Batteries Display Tests Tests Hard disk Tests* Floppy drive Keyboard Tests Audio Tests Tests* Serial Tests Parallel Tests Modem Wireless Infrared PS/2 port Tests † Port replicator Tests PCMCIA IEEE 1394 Tests AC adapter * Test might be available only on certain units. -
Page 141: Table 3-3. Troubleshooting Suggestions
If you cannot isolate the cause of a problem using the above diagnostic tools, use the suggestions in the following table to help find the problem. Table 3-3. Troubleshooting Suggestions Call Center: Symptom Suggestions To help determine likely causes of a problem, determine which replaceable modules are involved in the system function and what roles they play: see the figure on page 1-64 and the table on page 1-65. - Page 142 Call Center: Symptom Suggestions Sluggish startup or Use Tools tab in disk’s shutdown. Properties sheet to check hard disk. Use Disk Defragmenter to optimize hard disk. Delete temporary and unneeded files. Error message such Check for disk in floppy drive. as “Invalid system Check boot order in BIOS disk”...
- Page 143 Power in Control Panel. Check power management settings in BIOS Setup. Try default settings. Battery gauge might need calibration. Run HP Battery Optimizer from Start menu. Certain applications can cause excess CPU and power usage. (User can get Intel Power Monitor from www.intel.com and monitor...
- Page 144 Call Center: Symptom Suggestions AC adapter does not Try another AC adapter, if power notebook. available. Battery indicator is Time Remaining is an inaccurate. estimate based on notebook’s power use at that moment. It, therefore, depends on current task and assumes power will be used at that rate until battery runs out.
- Page 145 Call Center: Symptom Suggestions Display Dark display, no light. Make sure notebook is turned on and warmed up. Check power supply. Make sure SDRAM modules are installed properly. Adjust display brightness. Press Fn+F5 several times. Try external monitor. White display. Adjust display brightness.
- Page 146 Clean with soft cloth or replace as needed. If CD was created on CD-RW drive, try using HP certified media. Read and write quality can vary for other media. Cannot read any CD Restart notebook.
- Page 147 Y-adapter do not work. 3-12 Troubleshooting and Diagnostics Repair Center: Repair Center: Likely Causes Comments HP warranty does not cover expense of correcting this situation. CD/DVD drive. Make sure CD/DVD drive is installed properly. Motherboard. Keyboard. Try reinserting ribbon cable in connector on motherboard.
- Page 148 Special touch pad In Mouse Properties, select features not working. Synaptics PS/2 TouchPad driver. (Driver is installed from \hp\drivers\TouchPad.) Click button does not work. Memory Out of memory error. Make sure C drive has adequate free space. Delete temporary and unneeded files.
- Page 149 Check port settings in Device Manager. Test ports with e-Diagtools diagnostics. For USB: contact device vendor and HP Notebook Web site (see page vii) for latest USB drivers. For USB: if the device is powered by the USB port, try the other port.
- Page 150 Call Center: Symptom Suggestions LAN/network General problems. Check cables and connections. Try connecting notebook to another network station (if applicable). If green light next to LAN port does not light, LAN cable may not be connected to network or network may be down. Use networking troubleshooter in Windows Help.
- Page 151 Call Center: Symptom Suggestions Wireless General problems. Check TCP/IP setup in Control Panel. Check SSID, channel, and encryption settings. One-Touch button problems Buttons not working Make sure correct properly. applications are associated with buttons in One-Touch tab of Keyboard in Control Panel.
- Page 152 Call Center: Symptom Suggestions Notebook pauses or May be normal Windows runs sluggishly. behavior (background processing can affect response time). Certain operations (such as virus scanning or file browsers) can affect performance. Press Ctrl+Alt+Del to see if an application is not responding.
-
Page 153: Diagnostic Tools
Click Start > Turn Off Computer (or Shut Down), Restart. When the HP logo appears, press F10 to start the diagnostic test. The first time you run the program, you are prompted to select the language for the program. - Page 154 Exit. Press F3 and then any key to exit and reboot. Optional: open the Support Ticket. In Windows, click Start > All Programs (or Programs) > Hewlett-Packard > Notebook > HP e-Diagtools > e-Diagtools for Windows. Click View to display the Support Ticket.
-
Page 155: Table 3-4. Post Terminal-Error Beep Codes
First, confirm the failure by performing a “clean” boot, as described below. Note that if the notebook fails to restart with a clean boot, it requires repair. Remove all accessories, including SDRAM modules, port replicator, PC cards, printer, external monitor, pointing device, and keyboard. Provide “clean”... - Page 156 Beep Codes* POST Description 2-1-4-3 Display BIOS copyright notice. 2-1-4-4 Initialize MultiBoot. 2-2-1-1 Display CPU type and speed. 2-2-1-2 Initialize EISA board. 2-2-1-3 Test keyboard. 2-2-2-1 Set key click if enabled. 2-2-2-2 Enable USB devices. 2-2-3-1 Test for unexpected interrupts. 2-2-3-2 Initialize POST display service.
- Page 157 Beep Codes* POST Description 3-4-4-1 Clear parity checkers. 3-4-4-2 Display MultiBoot menu. 3-4-4-3 Clear screen (optional). 3-4-4-4 Check virus and backup reminders. 4-1-1-1 Try to boot with INT 19. 4-1-1-2 Initialize POST Error Manager (PEM). 4-1-1-3 Initialize error logging. 4-1-1-4 Initialize error display function.
-
Page 158: Table 3-5. Post Messages
The following table lists POST messages and explanations for reported problems. If the system fails after you make changes in BIOS Setup, reset the notebook, enter BIOS Setup, and install the defaults or correct the error. Message Description 0200 Failure Fixed Disk Fixed (hard) disk is not working or not configured properly. - Page 159 Message Description 02F5: DMA Test Failed ServerBIOS2 test error: Cannot write to extended Direct Memory Access (DMA) registers. 02F6: Software NMI Failed ServerBIOS2 test error: Cannot generate software Non-Maskable Interrupt (NMI). 02F7: Fail-Safe Timer NMI Failed ServerBIOS2 test error: Fail-safe timer takes too long. device Address Conflict Address conflict for the specified device.
-
Page 160: Table 3-6. Sycard Pcctest Commands
Sycard PCCtest 450/460 PC Card (Optional) The PCCtest 450 and 460 cards (version 1.05) from Sycard Technology are the only recommended diagnostic tools that test the functionality of the PCMCIA slots using a PCMCIA card. Each is a Type II PC card that works with test software to exercise PCMCIA functions. (For details, see the Sycard Technology Web site: http://www.sycard.com/ ). -
Page 161: Bios Setup Utility
To install the WMI preloaded on the hard disk: Start Windows, if it is not already running. Click Start > Programs (or All Programs) > Hewlett-Packard > HP Toptools Agent > Setup. Using WMI For a complete description of how to use WMI, see the following documentation provided with the notebook: •... -
Page 162: Table 3-7. Bios Setup Menus And Parameters
The pointing devices are not active in BIOS Setup, so you will need to use the keyboard to navigate: • Press the LEFT and RIGHT arrow keys to move among menus. • Press the UP and DOWN arrow keys to move among parameters in a menu. •... - Page 163 System Devices Menu Description Video Display Device Sets whether the built-in display automatically switches to an external display, if one is detected. External Pointing Devices Disables the internal pointing devices when an external pointing device is connected. Legacy USB Support Enables BIOS support for USB mouse, keyboard, and floppy drive during startup.
-
Page 164: Replaceable Parts
This chapter contains an exploded view of the notebook and the following lists of parts: • Notebook replaceable parts (page 4-3). • Accessory replacement parts (page 4-12). • Part number reference (page 4-13). Service Manual Replaceable Parts Replaceable Parts... -
Page 165: Figure 4-1. Exploded View
Figure 4-1. Exploded View HP Pavilion 4300, 4200, and 4100, HP nx9005 and nx9000, and Compaq Presario 2100 Replaceable Parts Service Manual... -
Page 166: Figure 4-2. Exploded View
Figure 4-2. Exploded View HP Pavilion 5300 and 5200, HP nx9010, and Compaq Presario 2500 Service Manual Replaceable Parts... -
Page 167: Table 4-1. Replaceable Parts
2 SPS-DSPLY PANEL 14.1-inch 319439-001 XGA CPQ 3 Speaker assy – 1F F4640-60908 319447-001 Replaceable Parts Table 4-1. Replaceable Parts Pavilion Pavilion ze4300, ze5300, ze4200, ze5200, nx9010, N1050v, Presario Presario Exchange 2500 2100 Part Number • • • • • F5761-69011 •... -
Page 168: Table 4-1. Replaceable Parts
5 SPS-KEYBOARD-NO F4640-60923 317443-091 5 SPS-KEYBOARD-PRC F4640-60929 317443-AA1 5 SPS-KEYBOARD-PT F4640-60924 317443-131 Service Manual Pavilion ze4300, Pavilion ze4200, ze5300, nx9005, ze5200, nx9010, N1050v, Presario Presario Exchange 2500 2100 Part Number • • • • • • • • • •... - Page 169 7 SPS-DRV DSKT 1.44-MB 3F 320691-001 SPS-COVER DSKT DRV 319511-001 BLANK Cover, FDD – 1F F5761-60901 319432-001 Replaceable Parts Pavilion ze4300, Pavilion ze4200, ze5300, nx9005, ze5200, nx9010, N1050v, Presario Presario Exchange 2500 2100 Part Number • • • • • • • •...
- Page 170 10 SPS-PROC ATH XP1800+ 319848-001 1.53 GHz 45W 10 SPS-PROC ATH XP1700+ 319850-001 1.46 GHz 45W Service Manual Pavilion ze4300, Pavilion ze4200, ze5300, nx9005, ze5200, nx9010, N1050v, Presario Presario Exchange 2500 2100 Part Number • • • • • •...
- Page 171 12 DVD Assy – 8x 12 CD-RW/DVD Combo Assy 12 SPS-DVD+RW 12 SPS-DRV CD-RW 13 Antennas, Wireless R&L – 1F 14 Antennas, Wireless R&L – 1F Replaceable Parts Pavilion ze5300, ze5200, nx9010, Presario Part Exchange 2500 Number Part Number F5761-60902 F4640-60967 F4640-60944...
- Page 172 16 Cover, mem or mini-PCI – 1F F4640-60901 w/labels 319433-001 16 SPS-COVER MEM/MINI 319489-001 PC 3F Service Manual Pavilion ze4300, Pavilion ze4200, ze5300, nx9005, ze5200, nx9010, N1050v, Presario Presario Exchange 2500 2100 Part Number • • • • • • •...
- Page 173 Kit, cable – 1F Kit, display screw cover Kit, display screw cover – Pavilion 19 Kit, rubber foot and screw plug F4640-60969 4-10 Replaceable Parts Pavilion ze5300, ze5200, nx9010, Presario Part Exchange 2500 Number Part Number F4640-60903 319417-001 319415-001 •...
- Page 174 27 SPS-TRAY, HDD, 3F 335941-001 28 Cover, docking port F4641-60905 HP/Compaq 29 SPS-BD AUDIO 319504-001 CONTROL 3F Service Manual Pavilion ze4300, Pavilion ze4200, ze5300, nx9005, ze5200, nx9010, N1050v, Presario Presario Exchange 2500 2100 Part Number • • • • • • • •...
-
Page 175: Table 4-2. Accessory Replaceable Parts
Cord, Pwr, US #ABA (2w) 8120-6313 317444-001 Port Replicator Assy F4808-60901 317448-001 Simple Port Replicator F4808-60902 HP/Compaq 4-12 Replaceable Parts Table 4-2. Accessory Replaceable Parts Pavilion ze5300, ze5200, nx9010, Exchange Presario Part 2500 Number • • • Pavilion ze4300, ze4200, nx9005, Pavilion ze4200,... -
Page 176: Table 4-3. Part Number Reference
1822-0913 F5535-69205 CPU, P4 2.0 GHz Northwood uFCPGA 1822-0989 F5765-69203 CPU, Cel-M 1.6 GHz Northwood uFCPGA Service Manual Table 4-3. Part Number Reference Pavilion ze5300, ze5200, nx9010 Presario 2500 • • Pavilion ze4300, ze4200, nx9005, Pavilion ze4200, N1050v, nx9000... - Page 177 Keybd, ITALIAN 317443-071 Keybd, SPANISH 317443-081 SPS-KEYBOARD-DEN 317443-091 SPS-KEYBOARD-NO 4-14 Replaceable Parts Pavilion ze4300, Pavilion ze4200, ze5300, nx9005, Pavilion ze5200, ze4200, nx9010 N1050v, nx9000 N1010v Presario Presario Presario Presario 2500 2100 2100 F5771J • • • • • • •...
- Page 178 WIRE-PRC 317444-AB1 SPS-CORD AC PWR 2 WIRE-TAI 317444-AD1 SPS-CORD AC PWR 2 WIRE-KO Service Manual Pavilion ze4300, Pavilion ze4200, ze5300, nx9005, Pavilion ze5200, ze4200, nx9010 N1050v, nx9000 N1010v Presario Presario Presario Presario 2500 2100 2100 1100 F5771J • • •...
- Page 179 Cover, mem or mini-PCI – 1F w/labels 319434-001 Cover, modem port 319435-001 Cover, docking port 4-16 Replaceable Parts Pavilion ze4300, Pavilion ze4200, ze5300, nx9005, Pavilion ze5200, ze4200, nx9010 N1050v, nx9000 N1010v Presario Presario Presario Presario 2500 2100 2100 F5771J • • • • •...
- Page 180 CPU, Cel-M 1.8 GHz Northwood uFCPGA 319466-001 SPS-PROC C/2.0 GHz 319467-001 Antennas, Wireless R&L – 1F Service Manual Pavilion ze4300, Pavilion ze4200, ze5300, nx9005, Pavilion ze5200, ze4200, nx9010 N1050v, nx9000 N1010v Presario Presario Presario Presario 2500 2100 2100 1100 F5771J • • •...
- Page 181 319511-001 SPS-COVER DSKT DRV BLANK 319512-001 SPS-BD RJ45/1394 319513-001 SPS-BD RJ45 4-18 Replaceable Parts Pavilion ze4300, Pavilion ze4200, ze5300, nx9005, Pavilion ze5200, ze4200, nx9010 N1050v, nx9000 N1010v Presario Presario Presario Presario 2500 2100 2100 F5771J • • • • •...
- Page 182 F4640-60920 SPS-KEYBOARD-INTL F4640-60921 Keybd, ITALIAN F4640-60922 Keybd, JAPANESE F4640-60923 SPS-KEYBOARD-NO Service Manual Pavilion ze4300, Pavilion ze4200, ze5300, nx9005, Pavilion ze5200, ze4200, nx9010 N1050v, nx9000 N1010v Presario Presario Presario Presario 2500 2100 2100 1100 F5771J • • • • • •...
- Page 183 F4640-60980 F4640-69080 Case, bottom assy – W2K/XPPro F4640-60981 F4640-69081 Case, bottom assy – XPHome F4640-60984 Thermal pad, set 4-20 Replaceable Parts Pavilion ze4300, Pavilion ze4200, ze5300, nx9005, Pavilion ze5200, ze4200, nx9010 N1050v, nx9000 N1010v Presario Presario Presario Presario 2500 2100 2100 F5771J • • •...
- Page 184 Part Description Number Description F4640-60986 F4640-69086 Case, bottom assy – w/1394 W2K/XPPro F4640-60987 F4640-69087 Case, bottom assy – w/1394 XPHome F4641-60905 Cover, docking port hp/Compaq F4641-60906 Training set, Series 02-B F4694-60901 128MB DDR266B F4695-60901 256MB DDR266B F4696-60901 512MB DDR266B F4808-60901...
-
Page 185: Reference Information
The statement can be a fax copy of the document. The fact that the notebook is in the hands of an HP representative on behalf of the customer is not evidence of ownership. In addition, HP will not remove the password of a notebook for any non-owner, even if it is requested by law enforcement agencies. -
Page 186: Hewlett-Packard Display Quality Statement
TFT displays in their products and is not specific to the notebook display. Notebook TFT displays meet or exceed all HP standards for cosmetic quality of TFT displays. HP does not warrant that the displays will be free of cosmetic imperfections. TFT displays can have a small number of cosmetic imperfections and still conform to HP’s cosmetic quality specifications. -
Page 187: Table 5-1. Lcd Guidelines
Type of Imperfection Imperfections Not Allowed • Electrical Imperfections: Bright dots • Dark dots • • Mechanical Imperfections: • Discoloration Polarizer bubbles, dents Definitions of imperfections: Bright or dark dot: a subpixel (red, green, or blue dot) that is stuck on or off. Polarizer dent or bubble: a light spot with a darker border that appears on a lighted display and does not change size. -
Page 188: Service Notes And Obsolete Parts
Service Notes and Obsolete Parts Service notes containing important repair information for these products will be issued as needed. These notes are available online at the Partnership Web site—see page vii. Reference Information Service Manual...