Sign In
Upload
Manuals
Brands
Eclipse Manuals
Car Receiver
CD7000
Eclipse CD7000 Manuals
Manuals and User Guides for Eclipse CD7000. We have
3
Eclipse CD7000 manuals available for free PDF download: Owner's Manual, Brochure
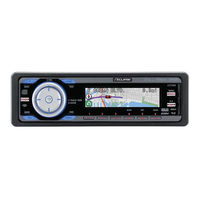
Eclipse CD7000 Owner's Manual (327 pages)
CD/MS Multi-Source Receiver with Fully Motorized Organic EL Display
Brand:
Eclipse
| Category:
Car Receiver
| Size: 8.43 MB
Table of Contents
English
7
For Your Safety in Using the CD7000
2
Table of Contents
7
Operating Precautions
14
Notes on Operation
14
Names of Controls and Parts
15
Turning the Power on and off
17
Switching Audio Modes
17
Adjusting Volume
19
Switching Rotary Modes
19
Creating a Shortcut
19
Switching Screen
20
Operation Assist Function
20
How to Operate the CD/MP3/WMA Player
21
About Compact Discs
21
About Brand New Cds
21
About CD Accessories
22
About Borrowed Cds
22
How to Remove Cds
22
About Irregularly-Shaped Cds
22
About Cleaning a CD
22
About MP3/WMA
23
What Is MP3/WMA
23
Playable MP3/WMA File Standards
23
Playable WMA File Standards
23
ID3/WMA Tag
23
Media
24
Format of Discs
24
File Names
24
Multi-Sessions
25
Playing MP3/WMA
25
MP3/WMA Playing Time Display
25
Display Order of MP3/WMA File/Folder Names
25
Listening to CD
26
Track (File) Up/Down
27
Folder Up/Down
27
Fast Forward/Rewind
27
Scan/Repeat/Random
28
Folder Scan/Repeat/Random
28
Displaying Title
29
Ejecting the Disc
30
How to Operate the Memory Stick Player
31
About Memory Sticks
31
About Cleaning the Memory Sticks
33
Listening to MG Memory Stick
34
Advancing to the Next Track or Returning to the Beginning of the Track Being Played
34
Operations During Rotary Mode
34
Fast Forward/Rewind
35
Playing the Beginning of Tracks (SCAN)
35
Repeating the same Track (REPEAT)
35
Playing Tracks in Random Order (RANDOM)
35
Displaying Title
35
Formatting MG Memory Stick (Quick Format)
36
Ejecting Memory Stick
36
How to Operate the Tuner
37
Listening to the Tuner
37
Tuning to a Station
37
Operations During Rotary Mode
37
Entering Stations into Memory Automatically (the Automatic Preset Mode: ASM)
38
Manually Setting Stations into Memory
38
Preset Station Scan
38
Changing the Reception Sensitivity for Automatic Scanning
39
Changing the Radio Band Location
39
How to Use the Remote Control
40
Precautions in Use of the Remote Control
40
Cleaning the Remote Control
40
Replacing the Battery
41
ESN Security Operating Procedure
43
About ESN
43
How to Switch the Security Type (Key CD Security/Memory Stick Security)
43
How to Operate the ESN (Key CD) Security
43
How to Program the Key CD
43
How to Cancel the Key CD
44
How to Change the Key CD
44
How to Resume Normal Operation (ESN Security Lock Out)
44
What Happens if an Incorrect CD Is Inserted
45
How to Operate the ESN (Memory Stick) Security
46
How to Record a Security Code
46
How to Cancel the Memory Stick Security
46
Canceling the Security Function by Entering the Security Code
46
Canceling the Security Function Using a Memory Stick
47
How to Change the Memory Stick
48
How to Resume Normal Operation (ESN Security Lock Out)
48
Canceling ESN Security Lock out Using Security Code Entry
48
Canceling ESN Security Lock Using Memory Stick
48
What Happens if a Memory Stick or Security Code Is Incorrect
49
How to Operate the ACC Security
49
How to Turn the Security Indicator On/Off
50
How to Read the Electronic Serial Number
50
Detaching the Front Panel
51
Using the Detachable Panel
51
How to Remove the Detachable Panel
51
How to Fit the Detachable Panel
51
How to Operate the Area Shot Function (U.S.A./CANADA Only)
52
About the Area Shot
52
To Use the Area Shot Function
52
Map Data
53
GPS (Global Positioning System)
53
Reading Area Shot Data
54
Changing the Area Shot Mode
55
Area Shot Screen Configuration
56
Switching Map
57
Re-Scrolling through Text Information
57
Changing Area Shot Screen
57
Displaying POI Vicinity
57
Selecting POI Category
57
Displaying POI Information
58
Route Simulation Settings
58
Operations When an Optional GPS Unit Is Connected
58
Automatic Map-Switching
59
Guidance Tone
59
How to Operate the AUDIO CONTROL
61
Switching Audio Control Modes
61
How to Operate the Sound Adjustment Mode
63
About Sound Adjustment Mode
63
About Parametric EQ
64
About Time Alignment
65
About Crossover
65
About E-Iserv Sound Effect Customization
67
Switching the Sound Adjustment Mode
68
Circle Surround II (CSII) Setting
68
Parametric Equalizer Adjustment (PEQ)
68
Selecting an Equalizer Mode from Memory
70
Measuring/Display Frequency Characteristic
70
Displaying Measurement Results
71
To Writing Measurement Results to the Memory Stick
71
Time Alignment Adjustment (Time Alignment)
72
Crossover Adjustment (X-Over)
72
Multi-Harmonizer Settings (Harmonizer)
74
Non-Fader Settings (NF Setting)
74
Non-Fader Phase Settings (Phase)
74
Non-Fader Output Settings (Output)
75
Loudness Settings (Loudness)
75
Speaker Layout Settings (SP Layout)
75
Importing Sound Data (Sound Data)
75
Reading Custom Mode Data (Custom Mode)
77
Making Changes with Display Adjustment Mode
78
Switching the Display Adjustment Mode
78
Switching the Brightness (Bright)
78
Changing Illumination Color (Illumination)
78
Changing Display Type (DISP Type)
79
Changing Background (Background)
79
Changing Spectrum Analyzer (S/A)
80
Changing Slide Show ON/OFF (Slideshow)
80
GPS Information Display
80
Importing Display Data (DISP Data)
81
Changing Scroll Pattern (Scroll Pattern)
83
Making Changes with Function Mode
84
Switching the Function Mode
84
Setting Station Name/Disc Title (Station Name/Title)
84
Deleting Station Name/Disc Title (Station Name/Title)
85
Setting Guide Tone (Guide Tone)
85
Setting Clock Display (Clock ON/OFF)
85
Setting Time (Clock Adjust)
86
Switching Demonstration Screen Display (Demo)
86
Setting Spectrum Analyzer Sensitivity (S/A Sensitivity)
87
Setting the Steering Switch Function (U.S.A. Only)
87
Reading Steering Switch Data (U.S.A. Only)
87
Compatibility with Various Switches
89
Automatic Volume Adjustment
90
How to Operate the Main Unit with an Optional CD Changer Connected
91
Listening to a CD
91
Advancing to the Next Track or Returning to the Beginning of the Track Being Played
91
Operations During Rotary Mode
91
Fast Forward/Rewind
91
Playing the Beginning of Tracks (SCAN)
91
Repeating the same Track (REPEAT)
92
Playing Tracks in Random Order (RANDOM)
92
Skipping to the Next or Previous CD
92
Specifying a CD to Play
92
How to Operate the Tuner with an Optional HD Radio Tuner Connected (U.S.A. Only)
93
About HD Radio
93
Switching between Displays When Receiving HD Radio
93
HD Radio Reception Settings
94
How to Operate the Tuner with an Optional SIRIUS Satellite Radio Tuner Connected (U.S.A. Only)
95
About SIRIUS Satellite Radio
95
Selecting the Radio Mode
95
Selecting a Channel
95
Operations During Rotary Mode
95
Category Selection
95
Direct Channel Selection
96
Manually Setting Channels into Memory
96
Preset Channel Scan
96
Switching Displays When Using the SIRIUS Satellite Radio
96
Displaying SIRIUS ID
97
How to Operate the Main Unit with an Optional Interface Adapter for Ipod ® Connected
98
Listening to Ipod Music Files
98
If an Ipod Is Not Connected
98
If an Ipod Is Connected
98
Advancing to the Next Music File or Returning to the Beginning of the Music File Being Played
98
Fast Forward/Rewind
98
Searching for a Music File
99
Repeating the same Music File (REPEAT)
99
Playing Music Files in Random Order (RANDOM)
99
Displaying Text
100
How to Operate the Main Unit with an Optional Ipod ® Interface Adapter Connected
98
Others
101
Connecting Portable Audio Players to the AUX Jack
101
Switching the Input System
101
Changing Auxiliary Input Sensitivity
101
User Registration Key Display
102
If You Have a Question
103
Displayed Information (for Troubleshooting)
103
Specifications
107
How to Contact Customer Service
108
Security Code
109
Français
115
Pour Votre Sécurité Lors de L'utilisation de L'appareil CD7000
110
Pour Votre Sécurité Lors de L'utilisation de L'appareil CD7000........ 110
122
Précautions D'utilisation ...................................................................
122
Remarques Sur Le Fonctionnement
122
Précautions D'utilisation
122
Noms des Commandes Et des Pièces
123
Noms des Commandes Et des Pièces .............................................. 123
125
Changement de Mode Audio
125
Changement de Mode Rotatif
127
Changement D'écran
128
Mode D'emploi du Lecteur CD/MP3/WMA ......................................... 129
130
Mode D'emploi du Lecteur CD/MP3/WMA
129
Propos des Disques Compacts
129
Propos des CD Neufs
129
Propos des Accessoires de CD
130
Propos des CD Empruntés
130
Retrait des CD
130
Propos des CD de Forme Irrégulière
130
Propos du Nettoyage des CD
130
Propos des Fichiers Mp3/Wma
131
Qu'est-Ce Qu'un Fichier Mp3/Wma
131
Normes des Fichiers Mp3/Wma Lus
131
Standards des Fichiers Wma Lus
131
Tiquette Id3/Wma
131
Format de Disque
132
Noms de Fichier
132
Sessions Multiples
133
Lecture de Fichiers Mp3/Wma
133
Affichage du Temps de Lecture des Fichiers Mp3/Wma
133
Ordre D'affichage des Noms de Fichier/Dossier Mp3/Wma
133
Lecture D'un CD
134
Jection du Disque
138
Mode D'emploi du Lecteur de Cartes Memory Stick......................... 139
142
Mode D'emploi du Lecteur de Cartes Memory Stick
139
Propos des Cartes Memory Stick
139
Propos du Nettoyage des Cartes Memory Stick
141
Fonctionnement en Mode Rotatif
142
Formatage D'une Carte Memory Stick Mg (Formatage Rapide)
144
Mode D'emploi du Tuner
145
Coute Sur Le Tuner
145
Réglage D'une Station
145
Enregistrement Manuel des Stations en Mémoire
146
Mode D'emploi de la Télécommande
148
Précautions D'utilisation de la Télécommande
148
Nettoyage de la Télécommande
148
Mode D'emploi de la Télécommande................................................. 148
149
Changement des Piles
149
Mode D'emploi du Tuner..................................................................... 145
149
Procédure de Fonctionnement de la Sécurité ESN..........................
151
Procédure de Fonctionnement de la Sécurité ESN
151
Propos de la Sécurité Esn
151
Programmation du CD Cl
151
Changement D'un CD Cl
152
Annulation du CD Cl
152
Mode D'emploi de la Sécurité Esn (Carte Memory Stick)
154
Enregistrement du Code de Sécurit
154
Annulation de la Sécurité de Carte Memory Stick
154
Memory Stick
156
Retrait du Panneau Avant ..................................................................
159
Utilisation du Panneau Amovible
159
Mise en Place du Panneau Amovible
159
Retrait de Panneau Amovible
159
Retrait du Panneau Avant
159
Mode D'emploi de la Fonction Area Shot (États-Unis Et Canada
160
Uniquement)........................................................................................
160
Mode D'emploi de la Fonction Area Shot (États-Unis Et Canada Uniquement)
160
Pour Utiliser la Fonction Area Shot
160
Renseignements Cartographiques
161
Changer Le Mode Area Shot
163
Configuration de L'écran Area Shot
164
Changement de Cartes
165
Défilement des Informations Texte
165
Changement de L'écran Area Shot
165
Affichage des Informations de Pdi
166
Réglages de Simulation Routière
166
Changement Automatique de Cartes
167
Signal Sonore de Guidage
167
Mode D'emploi de la Fonction AUDIO CONTROL (Contrôle Audio)
169
Choix des Modes de Contrôle Audio
169
Mode D'emploi de la Fonction AUDIO CONTROL (Contrôle Audio)......169
175
Mode D'emploi du Mode de Réglage du Son .................................... 171
175
Mode D'emploi du Mode de Réglage du Son
171
Propos de L'égaliseur Paramétrique
172
Propos de L'alignement Temporel
173
Propos du Crossover
173
Personnalisation E-Iserv des Effets Sonores
175
Mesure/Affichage des Caractéristiques de Fréquences
178
Affichage des Résultats de la Mesure
179
Stockage des Résultats de Mesure Sur la Carte Memory Stick
179
Réglage de la Disposition des Haut-Parleurs (Sp Layout)
183
Réglages de L'intensité (Loudness)
183
Effectuer des Modifications en Mode de Réglage de L'affichage
186
Modification de la Couleur D'éclairage (Illumination)
186
Effectuer des Modifications en Mode de Réglage de L'affichage
188
Modification de L'analyseur de Spectre (S/A)
188
Activation/Désactivation du Diaporama (Slideshow)
188
Importation des Données D'affichage (Disp Data)
189
Modification du Mode de Défilement (Scroll Pattern)
191
Effectuer des Changements en Mode Fonction ...............................
192
Passage en Mode Fonction
192
Régler Le Nom de Station/Titre de Disque (Station Name/Title)
192
Réglage de L'affichage de L'écran de Démonstration (Demo)
194
Réglage de L'heure (Clock Adjust)
194
Effectuer des Changements en Mode Fonction
192
Comment Utiliser L'unité Principale Lorsqu'un Changeur de CD (Disponible en Option) Est Connecté
199
Sélection D'un CD
200
Comment Utiliser Le Tuner Lorsqu'un Tuner Radio HD Disponible en Option Est Connecté (Uniquement Pour Les États-Unis)
201
Propos de la Radio Hd
201
Réglages de la Réception Radio Hd
202
Disponible en Option (Uniquement Pour Les États-Unis) ................
203
Mode D'emploi du Tuner Avec Une Radio Satellite SIRIUS Disponible en Option (Uniquement Pour Les États-Unis)
203
Utilisation en Mode Rotatif
203
Sélection du Mode Radio
203
Sélection des Catégories
203
Sélection D'un Canal
203
Sélection Directe de Canaux
204
Balayage des Canaux Préréglés
204
Affichage du Numéro D'identification Sirius
205
Mode D'emploi du Tuner Avec Une Radio Satellite SIRIUS
203
Comment Utiliser L'unité Principale Lorsqu'un Adaptateur
206
D'interface Pour Ipod (Disponible en Option) Est Connecté..........
206
Comment Utiliser L'unité Principale Lorsqu'un Adaptateur D'interface Pour Ipod ® (Disponible en Option) Est Connecté
206
Coute de Fichiers Audio Ipod
206
Si Aucun Ipod N'est Connect
206
Recherche D'un Fichier Audio
207
Lecture des Fichiers Audio en Ordre Aléatoire (Random)
207
Affichage de Texte
208
Divers
209
Sélection du Système D'entrée
209
Si Vous Avez Une Question
211
Informations Affichées (Pour Le Dépannage)
211
Caractéristiques Techniques
215
Comment Contacter Le Service Clientèle
216
Español
223
Medidas de Seguridad para el Uso del CD7000
218
Tabla de Contenido
224
Precauciones de Funcionamiento
230
Notas sobre la Operación
230
Nombres de Los Controles y las Piezas
231
Cambio de Los Modos de Audio
233
Encendido y Apagado
233
Ajuste del Volumen
235
Cambio de Pantalla
236
Acerca de Los Discos Compactos
237
Acerca de Los CD Nuevos
237
Acerca de Los Accesorios de Los CD
238
Acerca de Los CD Prestados
238
Cómo Extraer Los CD
238
Acerca de Los CD con Formas Irregulares
238
Cómo Utilizar el Reproductor de CD/MP3/WMA
237
Acerca de la Limpieza de un CD
238
Acerca de Mp3/Wma
239
Qué es un Archivo Mp3/Wma
239
Estándares de Archivos Mp3/Wma Reproducibles
239
Estándares de Archivos Wma Reproducibles
239
Etiqueta Id3/Wma
239
Formato de Los Discos
240
Nombres de Los Archivos
240
Reproducción de Mp3/Wma
241
Visualización del Tiempo de Reproducción de Mp3/Wma
241
Carpeta Siguiente/Anterior
243
Avance/Retroceso Rápido
243
Pista (Archivo) Siguiente/Anterior
243
Explorar/Repetir/Orden Aleatorio
244
Explorar/Repetir/Orden Aleatorio de Carpetas
244
Visualización del Título
245
Expulsión del Disco
246
Acerca de las Tarjetas de Memoria Memory Stick
247
Cómo Utilizar el Reproductor de Memory Stick
247
Acerca de la Limpieza de las Tarjetas Memory Stick
249
Expulsión de la Memory Stick
252
Cómo Utilizar el Sintonizador de Radio
253
Sintonizar una Emisora
253
Precauciones de Uso del Control Remoto
256
Utilización del Control Remoto
256
Sustitución de la Pila
257
Acerca de Esn
259
Cómo Programar el CD Clave
259
Cómo Cancelar el CD Clave
260
Cómo Cambiar el CD Clave
260
Cómo Utilizar la Seguridad de Esn (Memory Stick)
262
Cómo Cancelar la Seguridad con Memory Stick
262
Cancelar la Función de Seguridad Usando la Memory Stick
263
Cómo Cambiar la Memory Stick
264
Cómo Conectar/Desconectar el Indicador de Seguridad
266
Procedimiento de Operación de Seguridad de ESN
259
Desmontaje del Panel Frontal
267
Cómo Colocar el Panel Desmontable
267
Cómo Extraer el Panel Desmontable
267
Acerca de Area Shot
268
Cómo Utilizar la Función Area Shot (sólo EE.UU. y Canadá)
268
Datos de Mapas
269
Cambio del Modo Area Shot
271
Configuración de la Pantalla Area Shot
272
Cambio de la Pantalla Area Shot
273
Visualización de Información de Poi
274
Ajuste de la Simulación de Rutas
274
Cambio de Mapa
273
Selección de una Categoría Poi
273
Cambio a Los Modos de Control de Audio
277
Cómo Utilizar el Control de Audio
277
Acerca del Modo de Ajuste de Sonido
279
Acerca del Ecualizador Paramétrico
280
Acerca del Cruce
281
Acerca de la Alineación de Tiempo
281
Acerca de la Personalización de Los Efectos Sonoros de E-Iserv
283
Selección de un Modo de Ecualización de la Memoria
286
Medición/Visualización de las Características de Frecuencia
286
Ajuste de la Alineación de Tiempo (Time Alignment)
288
Cómo Utilizar el Modo de Ajuste de Sonido
279
Ajuste de Cruce (X-Over)
288
Ajuste no Atenuante (Nf Setting)
290
Ajuste de la Distribución de Los Altavoces (Sp Layout)
291
Ajuste de Sonoridad (Loudness)
291
Unidad Principal
292
Lectura de Los Datos del Modo Personalizado (Custom Mode)
293
Realizar Cambios con el Modo de Ajuste de Visualización
294
Cambio del Fondo (Background)
295
Visualización de la Información de Gps
296
Activación/Desactivación del Pase de Diapositivas (Slideshow)
296
Cambio del Patrón de Desplazamiento (Scroll Pattern)
299
Realizar Cambios con el Modo de Función
300
Ajuste del Tono de Guía (Guide Tone)
301
Ajuste de la Visualización del Reloj (Clock On/Off)
301
Ajuste de la Hora (Clock Adjust)
302
Ajuste Automático de Volumen
306
Cómo Utilizar la Unidad Principal con un Cambiador de CD Opcional
307
Pasar al CD Siguiente O Anterior
308
Cómo Utilizar el Sintonizador con un Sintonizador de Radio de Alta Definición Opcional (sólo EE.UU.)
309
Cómo Utilizar el Sintonizador con un Sintonizador de Radio por Satélite SIRIUS Opcional (sólo EE.UU.)
311
Selección del Modo de Radio
311
Selección de Categorías
311
Selección de un Canal
311
Selección Directa de Canales
312
Exploración de Canales Predefinidos
312
Cambio de la Visualización con la Radio por Satélite Sirius
312
Visualización del ID de Sirius
313
Cómo Utilizar la Unidad Principal con un Adaptador de Interfaz para Ipod® Opcional
314
Búsqueda de un Archivo Musical
315
Visualización de Texto
316
Cambiar el Sistema de Entrada
317
Otros
317
Si Tiene Alguna Pregunta
319
Información Mostrada (para Solucionar Problemas)
319
Especificaciones
323
Cómo Ponerse en Contacto con el Servicio al Cliente
324
Advertisement
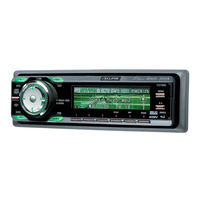
Eclipse CD7000 Owner's Manual (128 pages)
CD/MS Multi-Source Receiver with Fully Motorized Organic EL Display
Brand:
Eclipse
| Category:
Car Receiver
| Size: 9.12 MB
Table of Contents
Introduction
2
Safety
2
Table of Contents
7
Operating Precautions
14
Notes on Operation
14
Names of Controls and Parts
15
Front View
15
Turning the Power on and off
17
Switching Audio Modes
17
Adjusting Volume
19
Creating a Shortcut
19
Switching Rotary Modes
19
Switching Screen
20
Operation Assist Function
20
How to Operate the CD/MP3/WMA Player
21
About Compact Discs
21
About Brand New Cds
21
About CD Accessories
22
About Borrowed Cds
22
How to Remove Cds
22
About Cleaning a CD
22
About MP3/WMA
23
What Is MP3/WMA?
23
Playable MP3/WMA File Standards
23
ID3/WMA Tag
23
Media
24
Format of Discs
24
File Names
24
Multi-Sessions
25
Playing MP3/WMA
25
MP3/WMA Playing Time Display
25
Display Order of MP3/WMA File/Folder Names
25
Listening to CD
26
Track Up/Down
27
Folder Up/Down
27
Fast Forward/Rewind
27
Scan/Repeat/Random
28
Folder Scan/Repeat/Random
28
Displaying Title
29
Ejecting the Disc
30
How to Operate the Memory Stick Player
31
About Memory Sticks
31
About Cleaning the Memory Sticks
33
Listening to MG Memory Stick
34
Operations During Rotary Mode
34
Playing the Beginning of Tracks
35
Playing Tracks in Random Order
35
Repeating the same Track
35
Formatting MG Memory Stick
36
Ejecting Memory Stick
36
How to Operate the Tuner
37
Listening to the Tuner
37
Tuning to a Station
37
Manually Setting Stations into Memory
38
Preset Station Scan
38
Changing the Radio Band Location
39
How to Use the Remote Control
40
Precautions in Use of the Remote Control
40
Cleaning the Remote Control
40
Replacing the Battery
41
ESN Security Operating Procedure
43
About ESN
43
How to Operate the ESN
43
How to Cancel the Key CD
44
How to Change the Key CD
44
How to Resume Normal Operation
44
What Happens if an Incorrect CD Is Inserted?
45
How to Operate the ESN Security
46
How to Cancel the Memory Stick Security
46
Canceling the Security Function by Entering the Security Code
46
How to Change the Memory Stick
48
How
48
How to Operate the ACC Security
49
How to Turn the Security Indicator On/Off
50
How to Read the Electronic Serial Number
50
Detaching the Front Panel
51
Using the Detachable Panel
51
How to Fit the Detachable Panel
51
How to Remove the Detachable Panel
51
How to Operate the Area Shot Function
52
About the Area Shot
52
To Use the Area Shot Function
52
Map Data
53
Gps
53
Reading Area Shot Data
54
Area Shot Screen Configuration
56
Switching Map
57
Displaying POI Vicinity
57
Selecting POI Category
57
Changing Area Shot Screen
57
Displaying POI Information
58
Route Simulation Settings
58
Operations When an Optional GPS Unit Is Connected
58
Automatic Map Switching
59
Guidance Tone
59
How to Operate the AUDIO CONTROL
61
Switching Audio Control Modes
61
SVC Setting Examples
62
How to Operate the Sound Adjustment Mode
63
About Sound Adjustment Mode
63
About Parametric EQ
64
About Time Alignment
65
About Crossover
65
About E-Iserv Sound Effect Customization
67
Switching the Sound Adjustment Mode
68
Circle Surround II Setting
68
Parametric Equalizer Adjustment
68
Selecting an Equalizer Mode from Memory
70
Measuring/Display Frequency Characteristic
70
Displaying Measurement Results
71
To Writing Measurement Results to the Memory Stick
71
Time Alignment Adjustment
72
Crossover Adjustment
72
Multi-Harmonizer Settings
74
Non-Fader Settings
74
NF Setting
74
Non-Fader Phase Settings
74
Non-Fader Output Settings
75
Loudness Settings
75
Speaker Layout Settings
75
Importing Sound Data
75
Reading Custom Mode Data
77
Making Changes with Display Adjustment Mode
78
Switching the Display Adjustment Mode
78
Switching the Brightness
78
Changing Illumination Color
78
Changing Display Type
79
Changing Background
79
Changing Spectrum Analyzer
80
GPS Information Display
80
Changing Slide Show On/Off
80
Importing Display Data
81
Changing Scroll Pattern
83
Making Changes with Function Mode
84
Switching the Function Mode
84
Setting Station Name/Disc Title
84
Deleting Station Name/Disc Title
85
Setting Guide Tone
85
Setting Clock Display
85
Setting Time
86
Clock Adjust
86
Setting Spectrum Analyzer Sensitivity
87
Setting the Steering Switch Function
87
Reading Steering Switch Data
87
Compatibility with Various Switches
89
Automatic Volume Adjustment
90
How to Operate the Main Unit with an Optional CD Changer Connected
91
Listening to a CD
91
Skipping to the Next or Previous
92
Specifying a CD to Play
92
About HD Radio
93
Switching between Displays When Receiving HD Radio
93
HD Radio Reception Settings
94
About SIRIUS Satellite Radio
95
Selecting the Radio Mode
95
Selecting a Channel
95
Category Selection
95
Direct Channel Selection
96
Preset Channel Scan
96
Manually Setting Channels into Memory
96
Switching Displays When Using the SIRIUS Satellite Radio
96
Displaying SIRIUS ID
97
Listening to Ipod Music Files
98
Searching for a Music File
99
Repeating the same Music File
99
Playing Music Files in Random Order
99
Displaying Text
100
Other
101
Connecting Portable Audio Players to the aux Jack
101
Switching the Input System
101
Changing Auxiliary Input Sensitivity
101
User Registration Key Display
102
If You Have a Question
103
Displayed Information
103
Specifications
107
Components
114
For Your Safety
115
Name and Functions of Terminals
117
Wire Colors and Connection Points
118
Main Unit Connections
119
Vehicle Connections
119
Example of Using Vehicle Adapter Wires
119
System Connection Example
120
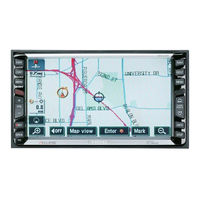
Eclipse CD7000 Brochure (36 pages)
HDD Series DVD Series
Brand:
Eclipse
| Category:
Car Video System
| Size: 7.58 MB
Table of Contents
System Setups
8
Features List
10
Specifications
10
Digital Radio Options
23
Advertisement
Advertisement
Related Products
Eclipse CD2030
ECLIPSE CD 8445E
ECLIPSE CD 5425E
Eclipse ECLIPSE CD3100
Eclipse ECLIPSE CD5433
Eclipse CD5030
Eclipse CD8061
Eclipse CD8051
Eclipse CD3421
Eclipse CD3000
Eclipse Categories
Car Receiver
Car Navigation system
Car Stereo System
Burner
Speakers
More Eclipse Manuals
Login
Sign In
OR
Sign in with Facebook
Sign in with Google
Upload manual
Upload from disk
Upload from URL