Sign In
Upload
Manuals
Brands
Daikin Manuals
Heater
RDXYQ8T7V1B
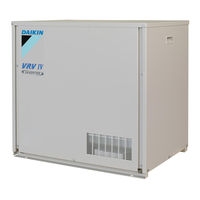
Daikin RDXYQ8T7V1B Manuals
Manuals and User Guides for Daikin RDXYQ8T7V1B. We have
4
Daikin RDXYQ8T7V1B manuals available for free PDF download: Installer And User Reference Manual, Installer And User Manual, Installation And Operation Manual, Installation Manual
Daikin RDXYQ8T7V1B Installer And User Reference Manual (156 pages)
Heat pump for indoor installation
Brand:
Daikin
| Category:
Heat Pump
| Size: 8.48 MB
Table of Contents
Table of Contents
2
1 About the Documentation
6
About this Document
6
Meaning of Warnings and Symbols
7
2 General Safety Precautions
9
For the Installer
9
General
9
Installation Site
10
Refrigerant - in Case of R410A or R32
10
Electrical
12
3 Specific Installer Safety Instructions
15
For the User
18
4 User Safety Instructions
19
General
19
Instructions for Safe Operation
20
5 About the System
23
System Layout
23
6 User Interface
24
7 Before Operation
25
8 Operation
26
Operation Range
26
Operating the System
26
About Operating the System
26
About Cooling, Heating, Fan Only, and Automatic Operation
27
About the Heating Operation
27
To Operate the System (WITHOUT Cool/Heat Changeover Remote Control Switch)
28
To Operate the System (with Cool/Heat Changeover Remote Control Switch)
28
Using the Dry Program
29
About the Dry Program
29
To Use the Dry Program (WITHOUT Cool/Heat Changeover Remote Control Switch)
29
To Use the Dry Program (with Cool/Heat Changeover Remote Control Switch)
30
Adjusting the Air Flow Direction
30
About the Air Flow Flap
30
Setting the Master User Interface
31
About Setting the Master User Interface
31
To Designate the Master User Interface (VRV DX)
32
About Control Systems
32
9 Energy Saving and Optimum Operation
33
Available Main Operation Methods
33
Available Comfort Settings
34
10 Maintenance and Service
35
Maintenance after a Long Stop Period
35
Maintenance before a Long Stop Period
36
About the Refrigerant
36
After-Sales Service and Warranty
36
Warranty Period
36
Recommended Maintenance and Inspection
37
Recommended Maintenance and Inspection Cycles
37
Shortened Maintenance and Replacement Cycles
38
11 Troubleshooting
39
Error Codes: Overview
40
Symptoms that Are NOT System Malfunctions
42
Symptom: the System Does Not Operate
43
Symptom: Cool/Heat Cannot be Changed over
43
Symptom: Fan Operation Is Possible, but Cooling and Heating Do Not Work
43
Symptom: the Fan Speed Does Not Correspond to the Setting
43
Symptom: the Fan Direction Does Not Correspond to the Setting
43
Symptom: White Mist Comes out of a Unit (Indoor Unit)
43
Symptom: White Mist Comes out of a Unit (Indoor Unit, Heat Exchanger Unit)
44
Symptom: the User Interface Reads "U4" or "U5" and Stops, but then Restarts after a few Minutes
44
Symptom: Noise of Air Conditioners (Indoor Unit, Heat Exchanger Unit)
44
Symptom: Noise of Air Conditioners (Indoor Unit, Compressor Unit, Heat Exchanger Unit)
44
Symptom: Noise of Air Conditioners (Compressor Unit, Heat Exchanger Unit)
44
Symptom: Dust Comes out of the Heat Exchanger Unit
44
Symptom: the Units Can Give off Odours
44
Symptom: the Heat Exchanger Unit Fan Does Not Spin
45
Symptom: the Display Shows "88
45
Symptom: the Compressor in the Compressor Unit Does Not Stop after a Short Heating Operation
45
Symptom: the Inside of an Compressor Unit Is Warm Even When the Unit Has Stopped
45
Symptom: Hot Air Can be Felt When the Indoor Unit Is Stopped
45
12 Relocation
46
13 Disposal
47
For the Installer
48
14 About the Box
49
About LOOP by DAIKIN
49
Overview: about the Box
49
Compressor Unit
50
To Unpack the Compressor Unit
50
To Handle the Compressor Unit
50
To Remove the Accessories from the Compressor Unit
50
To Remove the Transportation Stay
51
To Remove the Transportation EPS
51
Heat Exchanger Unit
52
To Unpack the Heat Exchanger Unit
52
To Handle the Heat Exchanger Unit
52
To Remove the Accessories from the Heat Exchanger Unit
53
To Remove the Transportation Sheet
53
15 About the Units and Options
54
Overview: about the Units and Options
54
Identification
54
Identification Label: Compressor Unit
54
Identification Label: Heat Exchanger Unit
55
About the Compressor Unit and Heat Exchanger Unit
55
System Layout
56
Combining Units and Options
56
About Combining Units and Options
57
Possible Combinations of Indoor Units
57
Possible Options for the Compressor Unit and Heat Exchanger Unit
57
16 Unit Installation
61
Preparing the Installation Site
61
Installation Site Requirements of the Compressor Unit
61
Installation Site Requirements of the Heat Exchanger Unit
63
Securing Safety against Refrigerant Leaks
64
Opening the Unit
66
About Opening the Units
66
To Open the Compressor Unit
66
To Open the Switch Box Cover of the Heat Exchanger Unit
67
Mounting the Compressor Unit
67
Precautions When Mounting the Compressor Unit
67
Guidelines When Installing the Compressor Unit
67
Mounting the Heat Exchanger Unit
68
Precautions When Mounting the Heat Exchanger Unit
68
Guidelines When Installing the Heat Exchanger Unit
68
Guidelines When Installing the Ducting
69
Guidelines When Installing the Drain Piping
70
17 Piping Installation
72
Preparing Refrigerant Piping
72
Refrigerant Piping Requirements
72
Refrigerant Piping Material
73
To Select the Piping Size
73
To Select Refrigerant Branch Kits
75
Refrigerant Piping Length and Height Difference
75
Connecting the Refrigerant Piping
77
About Connecting the Refrigerant Piping
77
Precautions When Connecting the Refrigerant Piping
77
Pipe Bending Guidelines
78
To Braze the Pipe End
78
Using the Stop Valve and Service Port
78
To Remove the Pinched Pipes
81
To Connect the Refrigerant Piping to the Compressor Unit
82
To Connect the Refrigerant Piping to the Heat Exchanger Unit
84
To Connect the Refrigerant Branching Kit
85
Checking the Refrigerant Piping
85
About Checking the Refrigerant Piping
85
Checking Refrigerant Piping: General Guidelines
86
Checking Refrigerant Piping: Setup
86
To Perform a Leak Test
87
To Perform Vacuum Drying
88
To Insulate the Refrigerant Piping
89
Charging Refrigerant
89
About Charging Refrigerant
89
Precautions When Charging Refrigerant
90
To Determine the Additional Refrigerant Amount
91
To Charge Refrigerant
91
Error Codes When Charging Refrigerant
94
To Fix the Fluorinated Greenhouse Gases Label
94
18 Electrical Installation
95
About Connecting the Electrical Wiring
95
Precautions When Connecting the Electrical Wiring
95
Field Wiring: Overview
97
About the Electrical Wiring
99
Guidelines When Knocking out Knockout Holes
99
About Electrical Compliance
99
Safety Device Requirements
100
To Connect the Electrical Wiring on the Compressor Unit
101
To Connect the Electrical Wiring on the Heat Exchanger Unit
103
To Finish the Transmission Wiring
104
To Close the Compressor Unit
105
To Close the Heat Exchanger Unit
105
To Check the Insulation Resistance of the Compressor
105
19 Configuration
107
Overview: Configuration
107
Making Field Settings
107
About Making Field Settings
107
To Access the Field Setting Components
108
Field Setting Components
108
To Access Mode 1 or 2
110
To Use Mode 1 (and Default Situation)
111
To Use Mode 2
113
Mode 1 (and Default Situation): Monitoring Settings
114
Mode 2: Field Settings
118
To Connect the PC Configurator to the Compressor Unit
122
Energy Saving and Optimum Operation
122
Available Main Operation Methods
123
Available Comfort Settings
124
Example: Automatic Mode During Cooling
126
Example: Automatic Mode During Heating
127
20 Commissioning
129
Overview: Commissioning
129
Precautions When Commissioning
129
Checklist before Commissioning
130
Checklist During Commissioning
131
About the Test Run
131
To Perform a Test Run (7-Leds Display)
132
To Perform a Test Run (7-Segment Display)
133
Correcting after Abnormal Completion of the Test Run
134
Operating the Unit
134
21 Hand-Over to the User
135
22 Maintenance and Service
136
Overview: Maintenance and Service
136
Maintenance Safety Precautions
136
To Prevent Electrical Hazards
136
Checklist for Yearly Maintenance of the Heat Exchanger Unit
137
About Service Mode Operation
137
To Use Vacuum Mode
137
To Recover Refrigerant
138
23 Troubleshooting
139
Overview: Troubleshooting
139
Precautions When Troubleshooting
139
Solving Problems Based on Error Codes
139
Error Codes: Overview
140
24 Disposal
146
25 Technical Data
147
Piping Diagram: Compressor Unit and Heat Exchanger Unit
147
Wiring Diagram: Compressor Unit
149
Wiring Diagram: Heat Exchanger Unit
152
26 Glossary
154
Advertisement
Daikin RDXYQ8T7V1B Installer And User Manual (140 pages)
Heat pump for indoor installation
Brand:
Daikin
| Category:
Heat Pump
| Size: 7.86 MB
Table of Contents
Table of Contents
2
About the Documentation
6
About this Document
6
Meaning of Warnings and Symbols
7
General Safety Precautions
9
For the Installer
9
General
9
Installation Site
10
Refrigerant - in Case of R410A or R32
10
Electrical
12
Specific Installer Safety Instructions
15
For the User
18
User Safety Instructions
19
General
19
Instructions for Safe Operation
20
About the System
23
System Layout
23
User Interface
24
Operation
25
Before Operation
25
Operation Range
26
Operating the System
26
About Operating the System
26
About Cooling, Heating, Fan Only, and Automatic Operation
27
About the Heating Operation
27
To Operate the System (WITHOUT Cool/Heat Changeover Remote Control Switch)
28
To Operate the System (with Cool/Heat Changeover Remote Control Switch)
28
Using the Dry Program
29
About the Dry Program
29
To Use the Dry Program (WITHOUT Cool/Heat Changeover Remote Control Switch)
29
To Use the Dry Program (with Cool/Heat Changeover Remote Control Switch)
29
Adjusting the Air Flow Direction
30
About the Air Flow Flap
30
Setting the Master User Interface
31
About Setting the Master User Interface
31
To Designate the Master User Interface (VRV DX)
31
Energy Saving and Optimum Operation
32
Available Main Operation Methods
32
Available Comfort Settings
33
Maintenance and Service
34
Maintenance after a Long Stop Period
34
Maintenance before a Long Stop Period
35
About the Refrigerant
35
After-Sales Service and Warranty
35
Warranty Period
35
Recommended Maintenance and Inspection
36
Recommended Maintenance and Inspection Cycles
36
Shortened Maintenance and Replacement Cycles
37
Troubleshooting
38
Error Codes: Overview
39
Symptoms that Are NOT System Malfunctions
41
Symptom: the System Does Not Operate
42
Symptom: Cool/Heat Cannot be Changed over
42
Symptom: Fan Operation Is Possible, but Cooling and Heating Do Not Work
42
Symptom: the Fan Speed Does Not Correspond to the Setting
42
Symptom: the Fan Direction Does Not Correspond to the Setting
42
Symptom: White Mist Comes out of a Unit (Indoor Unit)
42
Symptom: White Mist Comes out of a Unit (Indoor Unit, Heat Exchanger Unit)
43
Symptom: the User Interface Reads "U4" or "U5" and Stops, but then Restarts after a few Minutes
43
Symptom: Noise of Air Conditioners (Indoor Unit, Heat Exchanger Unit)
43
Symptom: Noise of Air Conditioners (Indoor Unit, Compressor Unit, Heat Exchanger Unit)
43
Symptom: Noise of Air Conditioners (Compressor Unit, Heat Exchanger Unit)
43
Symptom: Dust Comes out of the Heat Exchanger Unit
43
Symptom: the Units Can Give off Odours
43
Symptom: the Heat Exchanger Unit Fan Does Not Spin
44
Symptom: the Display Shows "88
44
Symptom: the Compressor in the Compressor Unit Does Not Stop after a Short Heating Operation
44
Symptom: the Inside of an Compressor Unit Is Warm Even When the Unit Has Stopped
44
Symptom: Hot Air Can be Felt When the Indoor Unit Is Stopped
44
Relocation
45
Disposal
46
For the Installer
47
About the Box
48
Overview: about the Box
48
Compressor Unit
48
To Unpack the Compressor Unit
48
To Handle the Compressor Unit
49
To Remove the Accessories from the Compressor Unit
49
To Remove the Transportation Stay
50
To Remove the Transportation EPS
50
Heat Exchanger Unit
51
To Unpack the Heat Exchanger Unit
51
To Handle the Heat Exchanger Unit
51
To Remove the Accessories from the Heat Exchanger Unit
52
To Remove the Transportation Sheet
52
About the Units and Options
53
Overview: about the Units and Options
53
Identification
53
Identification Label: Compressor Unit
53
Identification Label: Heat Exchanger Unit
54
About the Compressor Unit and Heat Exchanger Unit
54
System Layout
55
Combining Units and Options
55
About Combining Units and Options
56
Possible Combinations of Indoor Units
56
Possible Options for the Compressor Unit and Heat Exchanger Unit
56
Unit Installation
60
Preparing the Installation Site
60
Installation Site Requirements of the Compressor Unit
60
Installation Site Requirements of the Heat Exchanger Unit
62
Opening the Unit
63
About Opening the Units
63
To Open the Compressor Unit
63
To Open the Switch Box Cover of the Heat Exchanger Unit
64
Mounting the Compressor Unit
64
Precautions When Mounting the Compressor Unit
64
Guidelines When Installing the Compressor Unit
64
Mounting the Heat Exchanger Unit
65
Precautions When Mounting the Heat Exchanger Unit
65
Guidelines When Installing the Heat Exchanger Unit
65
Piping Installation
66
Preparing Refrigerant Piping
66
Refrigerant Piping Requirements
66
Refrigerant Piping Material
67
To Select the Piping Size
67
To Select Refrigerant Branch Kits
69
Refrigerant Piping Length and Height Difference
69
Connecting the Refrigerant Piping
71
About Connecting the Refrigerant Piping
71
Precautions When Connecting the Refrigerant Piping
71
Pipe Bending Guidelines
72
To Braze the Pipe End
72
Using the Stop Valve and Service Port
72
To Remove the Pinched Pipes
73
To Connect the Refrigerant Piping to the Compressor Unit
75
To Connect the Refrigerant Piping to the Heat Exchanger Unit
76
To Connect the Refrigerant Branching Kit
78
Checking the Refrigerant Piping
78
About Checking the Refrigerant Piping
78
Checking Refrigerant Piping: General Guidelines
79
Checking Refrigerant Piping: Setup
79
To Perform a Leak Test
80
To Perform Vacuum Drying
81
To Insulate the Refrigerant Piping
81
Charging Refrigerant
82
About Charging Refrigerant
82
Precautions When Charging Refrigerant
83
To Determine the Additional Refrigerant Amount
83
To Charge Refrigerant
84
Error Codes When Charging Refrigerant
87
To Fix the Fluorinated Greenhouse Gases Label
87
Electrical Installation
88
About Connecting the Electrical Wiring
88
Precautions When Connecting the Electrical Wiring
88
Field Wiring: Overview
90
Guidelines When Knocking out Knockout Holes
92
About Electrical Compliance
92
Safety Device Requirements
92
To Connect the Electrical Wiring on the Compressor Unit
93
To Connect the Electrical Wiring on the Heat Exchanger Unit
96
To Close the Compressor Unit
97
To Close the Heat Exchanger Unit
97
To Check the Insulation Resistance of the Compressor
98
Configuration
99
Overview: Configuration
99
Making Field Settings
99
About Making Field Settings
99
To Access the Field Setting Components
100
Field Setting Components
100
To Access Mode 1 or 2
102
To Use Mode 1 (and Default Situation)
103
To Use Mode 2
104
Mode 1 (and Default Situation): Monitoring Settings
105
Mode 2: Field Settings
109
To Connect the PC Configurator to the Compressor Unit
113
Energy Saving and Optimum Operation
113
Commissioning
114
Precautions When Commissioning
114
Checklist before Commissioning
114
Checklist During Commissioning
116
About the Test Run
116
To Perform a Test Run (7-Leds Display)
116
To Perform a Test Run (7-Segment Display)
117
Correcting after Abnormal Completion of the Test Run
118
Hand-Over to the User
120
Maintenance and Service
121
Overview: Maintenance and Service
121
Maintenance Safety Precautions
121
To Prevent Electrical Hazards
121
Checklist for Yearly Maintenance of the Heat Exchanger Unit
122
About Service Mode Operation
122
To Use Vacuum Mode
122
To Recover Refrigerant
123
Troubleshooting
124
Overview: Troubleshooting
124
Precautions When Troubleshooting
124
Solving Problems Based on Error Codes
124
Error Codes: Overview
125
Disposal
131
Technical Data
132
Piping Diagram: Compressor Unit and Heat Exchanger Unit
132
Wiring Diagram: Compressor Unit
134
Wiring Diagram: Heat Exchanger Unit
137
Glossary
139
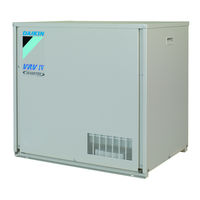
Daikin RDXYQ8T7V1B Installation And Operation Manual (48 pages)
Compressor unit for indoor installation
Brand:
Daikin
| Category:
Air Compressor
| Size: 5.7 MB
Table of Contents
Table of Contents
6
About Making Field Settings
29
To Access the Field Setting Components
29
Field Setting Components
29
To Access Mode 1 or 2
30
To Use Mode 1 (and Default Situation)
31
To Use Mode 2
31
Mode 1 (and Default Situation): Monitoring Settings
32
Mode 2: Field Settings
33
To Connect the PC Configurator to the Compressor Unit
36
Commissioning
36
Precautions When Commissioning
36
Checklist before Commissioning
36
Checklist During Commissioning
37
About the Test Run
37
To Perform a Test Run (7-Leds Display)
37
To Perform a Test Run (7-Segment Display)
37
Correcting after Abnormal Completion of the Test Run
38
Operating the Unit
38
Hand-Over to the User
38
Troubleshooting
38
Error Codes: Overview
39
Technical Data
42
Piping Diagram: Compressor Unit and Heat Exchanger Unit
42
Wiring Diagram: Compressor Unit
43
Disposal
44
Advertisement
Daikin RDXYQ8T7V1B Installation Manual (12 pages)
VRV IV heat exchanger unit for indoor installation
Brand:
Daikin
| Category:
Heater
| Size: 3.08 MB
Table of Contents
Installation Manual
1
1 About the Documentation
4
Table of Contents
4
About this Document
4
2 About the Box
5
Heat Exchanger Unit
5
3 About the Units and Options
5
About the Compressor Unit and Heat Exchanger Unit
5
System Layout
5
Combining Units and Options
5
Possible Options for the Compressor Unit and Heat Exchanger Unit
5
4 Preparation
5
Preparing Installation Site
5
Installation Site Requirements of the Heat Exchanger Unit
5
Preparing Electrical Wiring
6
Safety Device Requirements
6
5 Installation
6
Opening the Units
6
To Open the Switch Box Cover of the Heat Exchanger Unit
6
Mounting the Heat Exchanger Unit
6
Guidelines When Installing the Heat Exchanger Unit
6
Guidelines When Installing the Ducting
6
Guidelines When Installing the Drain Piping
7
Connecting the Refrigerant Piping
8
To Connect the Refrigerant Piping to the Heat Exchanger Unit
8
Connecting the Electrical Wiring
8
Field Wiring: Overview
8
Guidelines When Connecting the Electrical Wiring
9
To Connect the Electrical Wiring on the Heat Exchanger Unit
9
6 Technical Data
9
Wiring Diagram: Heat Exchanger Unit
10
Unit
10
Advertisement
Related Products
Daikin RDXYQ5T7V1B
Daikin REYQ8-48PY1B
Daikin VRV IV RDXYQ5T8V1B Series
Daikin RDXYQ-T8
Daikin RD40JEVLK
Daikin RDT-030c
Daikin RDT-018c
Daikin RDT-125c
Daikin RDT-115c
Daikin RD30JEVLK
Daikin Categories
Air Conditioner
Heat Pump
Remote Control
Chiller
Fan
More Daikin Manuals
Login
Sign In
OR
Sign in with Facebook
Sign in with Google
Upload manual
Upload from disk
Upload from URL