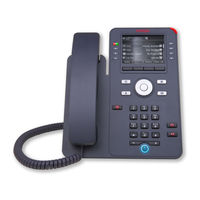
Sign In
Upload
Manuals
Brands
Avaya Manuals
IP Phone
J189
Avaya J189 Manuals
Manuals and User Guides for Avaya J189. We have
7
Avaya J189 manuals available for free PDF download: Manual, Instructions Manual, Using Manual, Quick Reference
Avaya J189 Manual (170 pages)
SIP IP Phones in Open SIP
Brand:
Avaya
| Category:
IP Phone
| Size: 2.32 MB
Table of Contents
Table of Contents
6
Chapter 1: Introduction
13
Purpose
13
Chapter 2: Avaya J169/J179 Phone Overview
14
Phone Overview
14
Physical Layout of a J169/179 IP Phone
16
Connection Jacks for J169/179 IP Phone
18
Optional Components
20
Chapter 3: Getting Started
21
Entering the Provisioning Details
21
Identifying the Device Type During Phone Boot-Up
22
Logging out of Your Phone
23
Logging in to Your Phone
23
Locking Your Phone
23
Unlocking Your Phone
24
Setting the Network Mode
24
Connecting to a Wi-Fi Network
25
Setting the Network Configuration
26
Chapter 4: Navigation
28
Cursor Navigation
28
Navigation Cluster
28
Text Input
29
Line Keys
30
Main Menu
30
General Phone Icons
31
Bluetooth Icons
32
Wi-Fi Icons
33
Chapter 5: Handling Incoming Calls
34
Answering a Call
34
Answering a Call When on Another Call
34
Ignoring a Call
35
Declining a Call
35
Chapter 6: Handling Outgoing Calls
37
Making a Call by Using the Manual Dial Mode
37
Making a Call by Using the Auto-Dial Mode
37
Redialing a Number
38
Making a Call by Using Speed Dial
38
Making a Call from the Local Сontacts List
39
Making a Call from the Corporate Database Сontacts List
39
Emergency Call
39
Making an Emergency Call
40
Making an International Call
40
Chapter 7: Broadsoft Call Recording Indicator
41
Chapter 8: Call Related Features
42
Muting and Unmuting a Call
42
Placing a Call on Hold and Resuming the Call
42
Chapter 9: Contacts
43
Directory
43
Broadworks Directory
43
Adding a New Contact
43
Adding a Contact from the Recents List
44
Editing a Contact
45
Doing a Quick Search for a Contact
45
Viewing Local Contact Details
46
Searching for a Contact
46
Combining Contacts
47
Deleting a Contact
47
Creating a Local Сontacts Group
48
Adding a Contact to the Local Group
48
Removing a Contact from the Local Group
48
Assigning a Ringtone to a Contact
49
LDAP Directory
50
Setting LDAP Directory as the Contact Search Source
50
Searching LDAP Contacts
51
Chapter 10: Do Not Disturb and Call Forward
52
Do Not Disturb
52
Activating and Deactivating Do Not Disturb
52
Activating the Ring Reminder
53
Call Forwarding
53
Call Forward Icons
54
Forwarding a Call to Another Extension
54
Forwarding Call When Busy
55
Forwarding Unanswered Calls
56
Chapter 11: Recents
57
Call Log
57
Making a Call from Recents
57
Viewing the Recents Details
58
Deleting a Call Record from Recents
58
Clearing the Recents List
59
Chapter 12: Conference Calls
60
Adding a Person to an Active Call
60
Adding a Person on Hold to a Conference Call
60
Putting a Conference Call on Hold and Resuming a Call
61
Viewing the Details of a Conference
61
Chapter 13: Advanced Features
63
Accessing the Features Screen
63
Active Call Shortcut Keys
63
Making a Call Transfer with a Shortcut Key
64
Making a Conference Call with a Shortcut Key
65
Parking a Call with a Shortcut Key
65
Activating the Screen Saver
66
Broadworks Advance Call Control
66
Anonymous Call Block
66
Autodialing a Pre-Assigned Number
67
Broadworks Anywhere
67
Enabling and Disabling Broadworks Anywhere
68
Configuring Broadworks Anywhere Locations
68
Changing Location Details
69
Deleting Locations
70
Configuring Broadworks Anywhere Alerting
70
Broadworks Mobility
71
Enabling and Disabling Broadworks Mobility Alerting
71
Configuring Broadworks Mobility
71
Editing Mobile Identity Alerting
73
Broadworks Anywhere and Mobility Icons
75
Calendar
75
Accessing Calendar
76
Configuring the Microsoft Exchange Server Calendar
76
Reviewing Your Calendar Event
77
Call Park
77
Call Park Icons
78
Call Park Notifications
78
Customizing Parked Call Notification
78
Parking a Call
80
Parking a Call to a Call Park Group
81
Unparking a Call
82
Call Retrieve
82
Using Call Retrieve
83
Call Transfer
83
Making a Consultative Transfer
84
Making a Blind Transfer
84
Call Waiting
85
Enabling and Disabling the Call Waiting Feature
85
Distinctive Ringing
85
Setting a Distinctive Ring Tone
85
Dynamic Park and Page
86
Parking and Paging an Active Call
87
Retrieving a Parked Call
87
Receiving a Page Call
88
Enabling Auto Answer
88
Flexible Seating
89
Flexible Seating Icons
89
Logging in to Your Primary Phone Extension from the Host Phone
89
Logging out of Your Primary Phone Extension Using a Host Phone
90
Group Paging
90
Long-Term Acoustic Exposure Protection
91
Configuring Long Term Acoustic Protection
91
Multicast Paging
92
Sending a Multicast Page
92
Pre-Configuration of Keys
93
Push-To-Talk
93
Retrieving a Voice Message
93
Shared Call Appearance
94
SCA Icons and Visual LED Indication
95
Joining a Call in a Shared Line
96
Putting a Call on Private Hold and Resuming a Call
96
Customizing Ringtones for the SCA Extension
97
Customizing SCA Lines
98
Customizing Incoming Call Alerts for Shared Lines
98
Viewing SCA Configuration
99
Shared Parking
100
Shared Parking Icons and Indication
100
Parking a Call to a Shared Room
101
Unparking a Call from a Shared Room
101
SLA Mon
101
WML Browser
102
Accessing the WML Browser
102
Using a Guest Login
103
Chapter 14: Busy Lamp Field
104
BLF Icons and Visual LED Indication
104
Adding a Broadsoft BLF User
105
Customizing BLF Incoming Call Indication
106
Customizing Presence Parked Call Indication
107
Customizing the Ring Tone
107
BLF Call Operations
108
Making a Call to a Monitored User
108
Picking up an Incoming Call
108
Barging in on an Active Call
109
Unparking a Call
109
Prioritizing Incoming Calls over a BLF Call
110
Chapter 15: Shared Call Appearance
111
SCA Icons and Visual LED Indication
112
Joining a Call in a Shared Line
113
Putting a Call on Private Hold and Resuming a Call
113
Customizing Ringtones for the SCA Extension
114
Customizing SCA Lines
115
Customizing Incoming Call Alerts for Shared Lines
115
Viewing SCA Configuration
116
Chapter 16: Simultaneous Ring Personal
118
Accessing Simultaneous Ring Personal from the Phone Menu
118
Disabling Simultaneous Ring Personal During an Active Call
119
Adding a Simultaneous Ring Number
119
Editing Simultaneous Ring Numbers
120
Deleting a Simultaneous Ring Number
120
Chapter 17: Broadworks Call Center
121
Logging in to the Phone
122
Logging out of Your Phone
122
Call Center Status
123
Viewing the Call Center Status
123
Broadworks Call Center Icons
123
ACD Call Information
124
Viewing the ACD Call Information from the Call Details
124
Setting the Agent State
125
Agent State
126
Customer Originated Trace
126
Initiating the Customer Originated Trace
126
Escalation Calls to Supervisor
127
Escalating a Call to the Supervisor
127
Emergency Escalation
128
Escalating a Call to the Supervisor During an Emergency
128
Call Disposition Codes
129
Entering Disposition Code
129
Hold Reminder
130
Advertisement
Avaya J189 Instructions Manual (163 pages)
Using Avaya J189 SIP IP Phone in Avaya Aura
Brand:
Avaya
| Category:
IP Phone
| Size: 3.04 MB
Table of Contents
Table of Contents
6
Chapter 1: Introduction
13
Purpose
13
Chapter 2: Avaya J189 Phone Overview
14
Phone Overview
14
Physical Layout
16
Connection Jacks for J189 IP Phone
18
Secondary Display
20
Optional Components
20
Avaya J100 Expansion Modules and USB Power Supply
20
Chapter 3: Getting Started
22
Entering the Provisioning Details
22
Identifying the Device Type During Phone Boot-Up
23
Logging in to Your Phone
23
Logging out of Your Phone
24
Locking Your Phone
24
Unlocking Your Phone
25
Setting the Network Mode
25
Setting the Network Configuration
26
Connecting to a Wi-Fi Network
27
Chapter 4: Navigation
29
Cursor Navigation
29
Navigation Cluster
29
Text Input
30
Line Keys
30
Main Menu
31
General Phone Icons
31
Presence Icons
34
Multiple Level Precedence and Preemption Icons
34
Bluetooth Icons
35
Wi-Fi Icons
35
Chapter 5: Incoming Calls
36
Answering a Call
36
Answering a Call When on Another Call
36
Call Pickup
37
Answering a Call for a Call Pickup Group Member
37
Answering a Call in the same Call Pickup Group
37
Answering a Call Using the Extension Number
38
Viewing a Missed Call
38
Ignoring a Call
39
Declining a Call
39
Chapter 6: Outgoing Calls
41
Making a Call by Using the Manual Dial Mode
41
Making a Call by Using the Auto-Dial Mode
41
Redialing a Number
42
Making a Call by Using Speed Dial
42
Making a Call from the Local Сontacts List
42
Making a Call from the Corporate Database Сontacts List
43
Making an International Call
43
Making a Priority Call
43
Precedence Call
44
Making a Precedence Call by Using the Main Menu
45
Making a Precedence Call by Using Dial Plan Configuration
45
Autodialing a Pre-Assigned Number
45
Using URI Dialing to Make a Call
46
Calling in Your Intercom Group Using Dial Intercom
46
Calling in Your Intercom Group Using Auto Icom
47
Emergency Call
47
Making an Emergency Call
48
Chapter 7: Call-Related Features
49
Muting and Unmuting a Call
49
Placing a Call on Hold and Resuming the Call
49
Off-Hook Alert
50
Chapter 8: Contacts
51
Adding a New Contact
51
Adding a Contact from the Recents List
52
Searching for a Contact
52
Doing a Quick Search for a Contact
53
LDAP Directory
53
Setting LDAP Directory as the Contact Search Source
54
Searching LDAP Contacts
54
Viewing the Contact Details
55
Editing a Contact
56
Combining Contacts
56
Deleting a Contact
57
Creating a Local Сontacts Group
57
Adding a Contact to the Local Group
58
Removing a Contact from the Local Group
58
Assigning a Ringtone to a Contact
59
Chapter 9: Presence
60
Viewing the Presence Status of Your Contacts
60
Changing Your Presence Status
60
Redirecting Calls When Do Not Disturb Is Active
61
Chapter 10: Do Not Disturb and Call Forwarding
63
Do Not Disturb
63
Activating and Deactivating Do Not Disturb
63
Call Forwarding
64
Forwarding a Call to Another Extension
64
Setting Enhanced Call Forwarding
65
Call Forwarding to Your Cell Phone Using EC500
67
Extending a Call to Your Cell Phone
67
Chapter 11: Call History
69
Call Log
69
Making a Call from Recents
69
Viewing the Recents Details
69
Deleting a Call Record from Recents
70
Clearing the Recents List
71
Chapter 12: Conference Calls
72
Adding a Person to an Active Call
72
Adding a Person on Hold to a Conference Call
72
Putting a Conference Call on Hold and Resuming a Call
73
Dropping or Disconnecting the Last Participant from a Conference Call
73
Viewing the Details of a Conference
74
No Hold Conference
74
Adding a Participant to no Hold Conference
74
Chapter 13: Team Button
76
Answering an Active Call on a Monitored Extension
77
Viewing the Status of Monitored Stations
77
Speed Dialing to a Monitored Extension
77
Transferring a Call to a Monitored Phone
78
Monitoring Other Extensions at a Glance
79
Chapter 14: Calendar and Avaya Spaces
80
Calendar
80
Accessing Calendar
80
Configuring the Microsoft Exchange Server Calendar
80
Reviewing Your Calendar Event
81
Avaya Spaces Calendar Integration
82
Joining an Avaya Spaces Meeting through a Direct Dial-In Phone Number
82
Preventing Duplicate Audio Streams on Avaya Spaces Application
83
Chapter 15: Advanced Features
85
Accessing the Features Screen
85
Active Call Shortcut Keys
85
Making a Call Transfer with a Shortcut Key
86
Making a Conference Call with a Shortcut Key
86
Automatic Callback
87
Setting up Automatic Callback
87
Blocking Your Extension from Displaying During Calls
88
Displaying Your Extension on Outgoing Calls
88
Bridged Call Appearance
89
Making a Call on a Bridged Line
89
Answering a Bridged Line Call
89
Joining a Call on a Bridged Line
90
Preventing Others from Bridging on to Your Call
90
Selecting a Destination Number Using Feature Target
91
Busy Indicator
92
Busy Indicator Icons and LED Indication
92
Busy Indicator Call Operations
92
Call Transfer to a Monitored User
93
Call Parking
94
Parking a Call
94
Unparking a Call
95
Call Recording
95
Recording a Call
95
Call Transfer
96
Making a Consultative Transfer
96
Making a Blind Transfer
96
Crisis Alert Station
97
Acknowledging the Crisis Alert
97
Emergency Caller Information
98
Stopping the Crisis Alert
98
Acknowledging the Crisis Alert after an Error in the First Acknowledgment
99
Hunt Group Busy
99
Using Hunt Group Busy
100
Interrupting a Call with a Whisper Page
100
Intercom
101
Auto-Answer an Auto Intercom Call
101
Auto Intercom Feature with Multiple Device Access
102
Auto-Answer an Auto Intercom Call with Multiple Device Access
102
Service Observe
102
Activating Service Observe
103
Deactivating Service Observe
103
Assisting an Agent on an Observed Call
104
Limit Incoming Calls
104
Activating Limit Incoming Calls
104
Deactivating Limit Incoming Calls
105
Multiple Device Access
105
Handling Calls and Conferences Using Multiple Device Access
106
Multicast Paging
106
Sending a Multicast Page
107
Pre-Configuration of Keys
107
SLA Mon
107
Shared Control
108
Tracing a Malicious Call
109
Using a Guest Login
109
Voicemail
110
Listening to Your Voicemail
110
WML Browser
111
Accessing the WML Browser
111
Chapter 16: USB Devices
112
Viewing USB Menu
112
Connecting USB Keyboard
113
Entering Text Using USB Keyboard
113
Navigating Using USB Keyboard
114
Avaya J189 Using Manual (150 pages)
Using in Avaya Aura
Brand:
Avaya
| Category:
IP Phone
| Size: 1.85 MB
Table of Contents
Table of Contents
6
Chapter 1: Introduction
12
Purpose
12
Chapter 2: Avaya J189 Phone Overview
13
Phone Overview
13
Physical Layout
15
Connections Jacks for J189 IP Phone
17
Secondary Display
19
Optional Components
19
Avaya J100 Expansion Modules and USB Power Supply
20
Chapter 3: Getting Started
21
Entering the Provisioning Details
21
Identifying the Device Type During Phone Boot-Up
22
Logging in to Your Phone
22
Logging out of Your Phone
23
Locking Your Phone
23
Unlocking Your Phone
24
Setting the Network Mode
24
Setting the Network Configuration
25
Connecting to a Wi-Fi Network
26
Chapter 4: Navigation
28
Cursor Navigation
28
Navigation Cluster
28
Text Input
29
Line Keys
29
Main Menu
30
General Phone Icons
30
Presence Icons
32
Multiple Level Precedence and Preemption Icons
33
Bluetooth Icons
34
Wi-Fi Icons
34
Chapter 5: Handling Incoming Calls
35
Answering a Call
35
Answering a Call When on Another Call
35
Ignoring a Call
36
Declining a Call
36
Chapter 6: Handling Outgoing Calls
38
Making a Call by Using the Manual Dial Mode
38
Making a Call by Using the Auto-Dial Mode
38
Redialing a Number
39
Making a Call by Using Speed Dial
39
Making a Call from the Local Сontacts List
40
Making a Call from the Corporate Database Сontacts List
40
Making an International Call
40
Emergency Call
41
Making an Emergency Call
41
Chapter 7: Call-Related Features
42
Muting and Unmuting a Call
42
Placing a Call on Hold and Resuming the Call
42
Chapter 8: Managing Contacts
43
Adding a New Contact
43
Adding a Contact from the Recents List
44
Editing a Contact
44
Doing a Quick Search for a Contact
44
Viewing the Contact Details
45
Searching for a Contact
46
Combining Contacts
46
Deleting a Contact
47
Creating a Local Сontacts Group
47
Adding a Contact to the Local Group
48
Removing a Contact from the Local Group
48
Assigning a Ringtone to a Contact
49
LDAP Directory
49
Setting LDAP Directory as the Contact Search Source
50
Searching LDAP Contacts
50
Chapter 9: Presence
52
Viewing the Presence Status of Your Contacts
52
Changing Your Presence Status
52
Redirecting Calls When Do Not Disturb Is Active
53
Chapter 10: Do Not Disturb and Call Forwarding
55
Do Not Disturb
55
Activating and Deactivating Do Not Disturb
55
Call Forwarding
56
Forwarding a Call to Another Extension
56
Setting Enhanced Call Forwarding
57
Call Forwarding to Your Cell Phone Using EC500
59
Extending a Call to Your Cell Phone
59
Chapter 11: Managing Recents
60
Call Log
60
Making a Call from Recents
60
Viewing the Recents Details
60
Deleting a Call Record from Recents
61
Clearing the Recents List
62
Chapter 12: Managing Conference Calls
63
Adding a Person to an Active Call
63
Adding a Person on Hold to a Conference Call
63
Putting a Conference Call on Hold and Resuming a Call
64
Dropping or Disconnecting the Last Participant from a Conference Call
64
Viewing the Details of a Conference
65
Chapter 13: Team Button
66
Answering an Active Call on a Monitored Extension
67
Viewing the Status of Monitored Stations
67
Speed Dialing to a Monitored Extension
67
Transferring a Call to a Monitored Phone
68
Monitoring Other Extensions at a Glance
69
Chapter 14: Advanced Features
70
Accessing the Features Screen
70
Active Call Shortcut Keys
70
Making a Call Transfer with a Shortcut Key
71
Making a Conference Call with a Shortcut Key
71
Activating the Screen Saver
72
Automatic Callback
72
Setting up Automatic Callback
72
Autodialing a Pre-Assigned Number
73
Blocking Your Extension from Displaying During Calls
73
Bridged Call Appearance
74
Making a Call on a Bridged Line
74
Answering a Bridged Line Call
74
Joining a Call on a Bridged Line
75
Busy Indicator
75
Busy Indicator Icons and LED Indication
75
Busy Indicator Call Operations
76
Call Transfer to a Monitored User
77
Calendar
78
Accessing Calendar
78
Configuring the Microsoft Exchange Server Calendar
78
Reviewing Your Calendar Event
79
Calling in Your Intercom Group
80
Call Parking
80
Parking a Call
81
Unparking a Call
81
Call Pickup
81
Answering a Call for a Call Pickup Group Member
82
Answering a Call in the same Call Pickup Group
82
Answering a Call Using the Extension Number
83
Call Recording
83
Recording a Call
83
Call Transfer
84
Making a Consultative Transfer
84
Making a Blind Transfer
84
Crisis Alert Station
85
Acknowledging the Crisis Alert
86
Emergency Caller Information
86
Stopping the Crisis Alert
87
Acknowledging the Crisis Alert after an Error in the First Acknowledgment
87
Displaying Your Extension on Outgoing Calls
88
Excluding Others from Bridging on to Your Call
88
Hunt Group Busy
88
Using Hunt Group Busy
89
Interrupting a Call with a Whisper Page
89
Limit Incoming Calls
90
Activating Limit Incoming Calls
90
Deactivating Limit Incoming Calls
90
Long-Term Acoustic Exposure Protection
91
Configuring Long Term Acoustic Protection
91
Multiple Device Access
92
Handling Calls and Conferences Using Multiple Device Access
92
Using URI Dialing to Make a Call
93
Making a Priority Call
93
Multicast Paging
94
Sending a Multicast Page
94
No Hold Conference
95
Adding a Participant to no Hold Conference
95
Precedence Call
96
Making a Precedence Call by Using the Main Menu
96
Making a Precedence Call by Using Dial Plan Configuration
96
Pre-Configuration of Keys
97
Service Observe
97
Activating Service Observe
98
Deactivating Service Observe
98
Assisting an Agent on an Observed Call
99
SLA Mon
99
Shared Control
100
Tracing a Malicious Call
100
Using a Guest Login
101
WML Browser
102
Accessing the WML Browser
102
Chapter 15: Using USB Devices
103
Viewing USB Menu
103
Connecting USB Keyboard
104
Entering Text Using USB Keyboard
104
Navigating Using USB Keyboard
105
Advertisement
Avaya J189 Manual (139 pages)
Brand:
Avaya
| Category:
IP Phone
| Size: 1.78 MB
Table of Contents
Table of Contents
6
Chapter 1: Introduction
12
Purpose
12
Chapter 2: Avaya J189 Phone Overview
13
Phone Overview
13
Physical Layout
15
Connections Jacks for J189 IP Phone
17
Secondary Display
19
Optional Components
19
Chapter 3: Getting Started
20
Entering the File Server Address
20
Identifying the Device Type During Phone Boot-Up
21
Logging in to Your Phone
21
Logging out of Your Phone
22
Locking Your Phone
22
Unlocking Your Phone
22
Connecting to a Wifi Network
23
Chapter 4: Navigation
24
Cursor Navigation
24
Navigation Cluster
24
Text Input
25
Line Keys
25
Main Menu
26
General Phone Icons
26
Presence Icons
28
Multiple Level Precedence and Preemption Icons
29
Bluetooth Icons
30
Wi-Fi Icons
30
Chapter 5: Handling Incoming Calls
31
Answering a Call
31
Answering a Call When on Another Call
31
Handling Calls and Conferences Using Multiple Device Access
32
Ignoring a Call
32
Declining a Call
33
Chapter 6: Handling Outgoing Calls
34
Making a Call by Using the Manual Dial Mode
34
Making a Call by Using the Auto-Dial Mode
34
Redialing a Number
35
Making a Call by Using Speed Dial
36
Making a Call from the Local Сontacts List
36
Making a Call from the Corporate Database Сontacts List
36
Making an International Call
37
Emergency Call
37
Making an Emergency Call
37
Chapter 7: Call-Related Features
39
Muting and Unmuting a Call
39
Placing a Call on Hold and Resuming the Call
39
Chapter 8: Managing Contacts
40
Adding a New Contact
40
Adding a Contact from the Recents List
41
Editing a Contact
41
Doing a Quick Search for a Contact
41
Viewing the Contact Details
42
Searching for a Contact
43
Combining Contacts
43
Deleting a Contact
44
Creating a Local Сontacts Group
44
Adding a Contact to the Local Group
45
Removing a Contact from the Local Group
45
Assigning a Ringtone to a Contact
46
LDAP Directory
46
Setting LDAP Directory as the Contact Search Source
47
Searching LDAP Contacts
47
Chapter 9: Managing Recents
49
Call Log
49
Making a Call from Recents
49
Viewing the Recents Details
49
Deleting a Call Record from Recents
50
Clearing the Recents List
51
Chapter 10: Managing Conference Calls
52
Adding a Person to an Active Call
52
Adding a Person on Hold to a Conference Call
52
Putting a Conference Call on Hold and Resuming a Call
53
Dropping or Disconnecting the Last Participant from a Conference Call
53
Viewing the Details of a Conference
54
Chapter 11: Advanced Features
55
Accessing the Features Screen
55
Active Call Shortcut Keys
55
Making a Call Transfer with a Shortcut Key
56
Making a Conference Call with a Shortcut Key
56
Activating the Screen Saver
57
Activating Send All Calls
57
Automatic Callback
58
Setting up Automatic Callback
58
Autodialing a Pre-Assigned Number
58
Blocking Your Extension from Displaying During Calls
59
Bridged Call Appearance
59
Making a Call on a Bridged Line
59
Answering a Bridged Line Call
60
Joining a Call on a Bridged Line
60
Busy Indicator
60
Busy Indicator Icons and LED Indication
61
Busy Indicator Call Operations
61
Call Transfer to a Monitored User
62
Calendar
63
Accessing Calendar
63
Configuring the Microsoft Exchange Server Calendar
64
Reviewing Your Calendar Event
64
Call Forwarding
65
Forwarding a Call to Another Extension
66
Setting Enhanced Call Forwarding
66
Call Forwarding to Your Cell Phone Using EC500
68
Calling in Your Intercom Group
69
Call Parking
69
Parking a Call
69
Unparking a Call
70
Dynamic Park and Page
70
Parking and Paging an Active Call
70
Retrieving a Parked Call
71
Call Pickup
71
Answering a Call for a Call Pickup Group Member
72
Answering a Call in the same Call Pickup Group
72
Answering a Call Using the Extension Number
73
Call Recording
73
Recording a Call
74
Call Transfer
74
Making a Consultative Transfer
74
Making a Blind Transfer
75
Crisis Alert Station
75
Acknowledging the Crisis Alert
76
Emergency Caller Information
76
Stopping the Crisis Alert
77
Acknowledging the Crisis Alert after an Error in the First Acknowledgment
77
Displaying Your Extension on Outgoing Calls
78
Excluding Others from Bridging on to Your Call
78
Extending a Call to Your Cell Phone
79
Retrieving a Voice Message
79
Hunt Group Busy
80
Using Hunt Group Busy
80
Interrupting a Call with a Whisper Page
80
Limit Incoming Calls
81
Activating Limit Incoming Calls
81
Deactivating Limit Incoming Calls
81
Long-Term Acoustic Exposure Protection
82
Configuring Long Term Acoustic Protection
82
Multiple Device Access
83
Using URI Dialing to Make a Call
84
Making a Priority Call
84
Multicast Paging
84
Sending a Multicast Page
85
No Hold Conference
85
Adding a Participant to no Hold Conference
86
Precedence Call
86
Making a Precedence Call by Using the Main Menu
87
Making a Precedence Call by Using Dial Plan Configuration
87
Pre-Configuration of Keys
88
Presence
88
Viewing the Presence Status of Your Contacts
88
Changing Your Presence Status
89
SLA Mon
89
Shared Control
90
Team Button
91
Answering an Active Call on a Monitored Extension
92
Viewing the Status of Monitored Stations
92
Speed Dialing to a Monitored Extension
92
Transferring a Call to a Monitored Phone
93
Monitoring Other Extensions at a Glance
93
Tracing a Malicious Call
94
Using a Guest Login
94
WML Browser
95
Accessing the WML Browser
95
Avaya J189 Using Manual (70 pages)
Brand:
Avaya
| Category:
IP Phone
| Size: 1.51 MB
Table of Contents
Table of Contents
6
Chapter 1: Introduction
9
Purpose
9
Chapter 2: Phone Overview
10
Physical Layout
12
Connections Jacks for J189 IP Phone
14
Secondary Display
16
Optional Components
16
Avaya J100 Phone Display Modes
17
Chapter 3: Getting Started
18
Identifying the Device Type During Phone Boot-Up
18
Logging in to Your Phone
18
Logging out of Your Phone
18
Unlocking Your Phone
19
Logging in as a Guest User
19
Chapter 4: Navigation
21
Cursor Navigation
21
Navigation Cluster
21
Enhanced Navigation in Half-Width Mode
22
Line Keys
23
Main Menu
23
General Icons
23
Chapter 5: Call Operations
25
Answering a Call
25
Ignoring a Call
26
Making Calls
26
Making a Call
26
Making an Emergency Call
26
Calling a Person from the Contacts List
27
Calling a Person from the Call History
27
Making a Call Using Edit Dialing
28
Calling a Person from the Directory
28
Redialing a Number
28
Clearing a Number
29
Transferring a Call
29
Muting a Call
29
Placing a Call on Hold and Resuming the Call
30
Contacts
30
Using the Contacts Feature
30
Adding a New Contact
31
Deleting a Contact
32
Editing a Contact
32
Viewing the Contact Details
32
Searching for a Contact
33
Call History
33
Viewing the Call History
33
Viewing Call History Details
34
Adding an Entry from the Call History to Your Contacts List
34
Removing an Entry from Call History
34
Clearing All Call History Entries
35
Turning off Call History
35
Conferences
35
Using the Conference Feature
35
Adding a Person to an Active Call
36
Adding a Person on Hold to a Conference Call
36
Dropping a Person from a Conference Call
36
Dropping or Disconnecting the Last Participant from a Conference Call
37
Putting a Conference Call on Hold and Resuming a Call
37
Muting a Person on a Conference Call
38
Using Voicemail
38
Receiving Your Messages
38
Chapter 6: Advance Features
40
Call Forwarding
40
Activating Call Forwarding
40
Activating Send All Calls
40
Activating EC500 for Simultaneous Ringing on Multiple Phones
41
Bridged Call Appearances
42
Using Bridged Call Appearances
42
WML Browser
43
Accessing the WML Browser
44
Call Recording
44
Using USB Flash Drives with Your Phone
44
Adding Contacts from an External File to Your Contacts List
45
Overwriting Contacts List with an External File
46
Copying Your Contacts List to a USB Flash Drive
46
Temporarily Using a USB Contacts List
47
Using Pictures from Your USB Device as a Screensaver
47
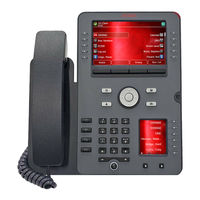
Avaya J189 Manual (29 pages)
Expansion Module for SIP
Brand:
Avaya
| Category:
Control Unit
| Size: 0.61 MB
Table of Contents
Table of Contents
5
Chapter 1: Introduction
7
Purpose
7
Change History
7
Chapter 2: Overview
8
Avaya J100 Expansion Module Overview
8
Physical Layout
10
Avaya J100 Expansion Module Icons
11
Avaya J100 Expansion Module Upgrade Indication
11
The Expansion Module Lines and Icons in CCMS Mode
12
Chapter 3: Call Operations
13
Making a Call
13
Answering a Call
13
Answering a Call When on Another Call
14
Accessing Features
14
Applications
14
Applications Overview
14
Accessing Applications
15
Chapter 4: Settings
16
Customizing the Display
16
Display Mode
16
Setting a Background Image Unique to JEM24 Display
17
Setting the Custom Screen Saver Image
18
Adjusting the Expansion Module Brightness
19
Setting the Text Size
19
Customizing Keys
20
Adding a Labeled Key
20
Relabeling a Key
20
Moving a Key
21
Deleting a Key
21
Restoring Customized Keys to Default
22
Chapter 5: Troubleshooting
23
Viewing the Expansion Module Details
23
Viewing the Expansion Module Details from Administration Menu
23
Viewing the Expansion Module Details from Main Menu
23
Common Troubleshooting Scenario
24
Chapter 6: Resources
25
Finding Documents on the Avaya Support Website
25
Avaya Documentation Center Navigation
25
Viewing Avaya Mentor Videos
26
Avaya J189 Quick Reference (3 pages)
Brand:
Avaya
| Category:
IP Phone
| Size: 0.13 MB
Advertisement
Related Products
Avaya J129
Avaya J169
Avaya J179
Avaya J139
Avaya J100 Series
Avaya JBM24
Avaya JEM24
Avaya J159
Avaya Meru JMC1000
Avaya Jabra Motion Office
Avaya Categories
IP Phone
Telephone
Server
Switch
Gateway
More Avaya Manuals
Login
Sign In
OR
Sign in with Facebook
Sign in with Google
Upload manual
Upload from disk
Upload from URL