Table of Contents
Advertisement
Advertisement
Table of Contents

Related Manuals for NEFF C67M70N3GB


Summary of Contents for NEFF C67M70N3GB
- Page 1 COMPACT OVEN WITH MICROWAVE [en] INSTRUCTION MANUAL C67M70N3GB...
-
Page 3: Table Of Contents
Cooking time Test dishes End of operation Baking Preset operation Grilling Setting the clock Acrylamide in foodstuffs Produktinfo Additional information on products, accessories, replacement parts and services can be found at www.neff- international.com and in the online shop www.neff- eshop.com... -
Page 4: Important Safety Information
: Important safety information Read these instructions carefully. Only then ment and catch fire. Do not place grease- will you be able to operate your appliance proof paper loosely over accessories safely and correctly. Retain the instruction during preheating. Always weight down manual and installation instructions for the greaseproof paper with a dish or a future use or for subsequent owners. - Page 5 door and door stop clean; see also sec- Risk of burns! tion Care and cleaning. The appliance becomes very hot. Never ■ touch the interior surfaces of the cooking Microwave energy may escape if the coo- Risk of serious damage to health! ■...
-
Page 6: Causes Of Damage
over and spatter. When heating, always Using the appliance door for standing on or placing objects ■ on: Do not stand or place anything on the open appliance place a spoon in the container. This will door. Do not place ovenware or accessories on the appliance prevent delayed boiling. -
Page 7: Your New Appliance
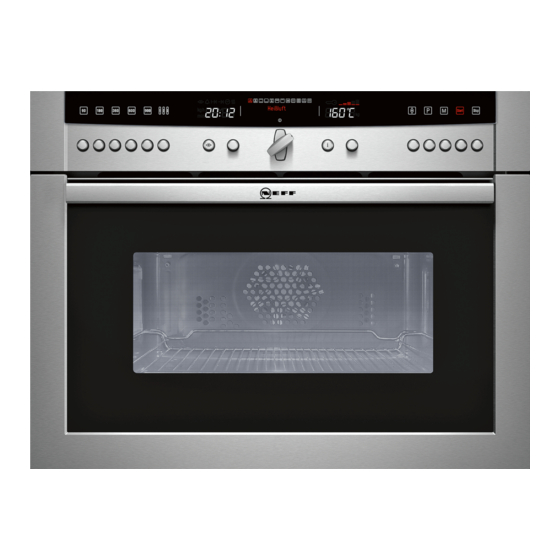
Your new appliance In this section, you will find information on the shelf heights ■ the control panel the accessories ■ ■ the operating modes ■ Control panel Operating Operating controls controls Stops oven operation or cancels a setting „ Selects 90 watt microwave power Selects 180 watt microwave power Microwave power settings and operating controls... -
Page 8: Cooking Compartment
Cooking compartment Operating modes and Application temperature range Your appliance has a cooling fan. Centre-area grill For small amounts of flat, small Cooling fan low (1) items for grilling (e.g. steaks, The cooling fan switches on and off as required. The hot air medium (2) bread). -
Page 9: After-Sales Service Products
After-sales service products You can obtain further accessories from specialist retailers: You can obtain suitable care and cleaning agents and other Accessories Order number accessories for your domestic appliances from the after-sales Baking tray, enamelled Z6360X0 service, specialist retailers or (in some countries) online via the eShop. -
Page 10: Switching The Appliance On And Off
Switching the appliance on and off Use the operating mode selector to switch the compact °±² button = series of operations ■ microwave oven on and off. Setting an operating mode and temperature ■ button = automatic programmes Switching on ■... -
Page 11: Heating Indicator
You can use the button to check the current heating à ± MicroCombi, gentle temperature while the oven is heating up. Due to thermal MicroCombi, gentle is suitable for cakes in tins, such as inertia, the temperature displayed may differ slightly from the Sponge cake, e.g. -
Page 12: The Microwave
You can use the button to check the current cooking Once a cooking time has been set, it will start counting down ± ■ ■ compartment temperature during rapid heating. immediately after the oven is started, regardless of the rapid heat up function. -
Page 13: Combination
Combination This involves the simultaneous operation of another operating Press the button for the microwave power setting you require. mode with the microwave. Using the microwave makes your The clock display shows mins and the symbol. ‚† ‹‹ meals ready more quickly, and still browns them nicely. Set the cooking time using the rotary selector. -
Page 14: Memory
Memory Starting the memory Memory gives you the option to store your own settings and call them up again at the press of a button. There are six You can start cooking at any time using the settings saved for memory locations available. -
Page 15: Minute Minder
Switching the clock display on and off Turn the operating mode selector back to the position and Û push it in. Press and hold the clock function button for a few à seconds. The clock display is switched off. If a clock function is active, the associated symbol remains illuminated. -
Page 16: Childproof Lock
Childproof lock The oven has a childproof lock to prevent children from Turn the temperature selector until ™ƒ‚ appears on the switching it on by accident or changing an operation that is temperature display. already in progress. Press and hold the Info button ±... -
Page 17: Basic Settings
Basic settings Your appliance has various basic settings, which you can Note: In the table, you will find all the basic settings and options adjust to suit your needs at any time. for changing them. Only the basic settings that correspond to the features of your specific appliance are displayed. -
Page 18: Cleaning The Glass Cover
Pull the clip on the oven ceiling forwards. (Fig. A) Area Cleaning agents Press the front of the glass cover down using the thumb of your other hand. Let go of the clip. Control panel Hot soapy water: Clean with a dish cloth and dry with a Slide the cover forwards using both hands and rest it on the soft cloth. -
Page 19: Cleaning The Glass Panels
Risk of serious damage to health.! Never operate the appliance without the microwave glass cover. Microwave energy may escape. Cleaning the glass panels The glass panels can be removed from the oven door for cleaning. Risk of burns! The appliance becomes very hot. Never touch the interior sur- faces of the cooking compartment or the heating elements. -
Page 20: Replacing The Oven Light Bulb
Problem Possible cause Remedy/information The appliance does not work. The plug is not plugged into the mains. Plug in the plug. Power cut Check whether the kitchen light works. Defective fuse Look in the fuse box to make sure that the fuse for the appliance is OK. -
Page 21: Replacing The Door Seal
Refit the glass cover. (Fig. C). Risk of serious damage to health.! Never use the appliance if the door seal is damaged. Micro- wave energy may escape. Do not use the appliance again until it has been repaired. Open the oven door. Remove the old door seal. -
Page 22: Automatic Programmes
Automatic programmes The automatic programmes enable you to prepare food very Turn the operating mode selector until the matching easily. You select the programme and enter the weight of your programme appears. food. The automatic programme makes the optimum setting. Ovenware The automatic programmes are only intended for roasting in ovenware with a lid. - Page 23 It is not possible to set a weight outside the weight range. Liquid will be produced when defrosting meat, poultry or fish. ■ ■ Drain off this liquid when you turn the food. Under no circum- With many dishes, a signal sounds after a certain time. Turn ■...
- Page 24 Potatoes For potato gratin, layer the potatoes in shallow ovenware 3 to Notes ■ 4 cm deep. Boiled potatoes: cut into pieces of equal size. Add 2 ■ tablespoons of water per 100 g of potatoes, and salt to taste. After the programme has ended, leave the bake to stand in ■...
- Page 25 Programme group Weight range in kg Ovenware/accessories, shelf height Programme Macaroni bake, frozen 0.40 - 1.00 Ovenware without lid, wire rack, level 1 Bake, savoury, cooked ingredients 0.40 - 3.00 Shallow ovenware without lid, wire rack, level 2 Bake, sweet 0.50 - 1.80 Shallow ovenware without lid, wire rack, level 1 Potato gratin, fresh...
- Page 26 Programme group Suitable food Weight range Ovenware/accessories, shelf height Programme in kg Beef Pot roast, fresh** 0.80 - 2.00 Deep ovenware with lid, wire rack,level 1 Sirloin, medium* Thick piece of sirloin, 5 - 6 cm 0.80 - 2.00 Ovenware without lid, wire rack, level 1 Sirloin, rare* Thick piece of sirloin, 5 - 6 cm 0.80 - 2.00...
-
Page 27: Tested For You In Our Cooking Studio
Programme group Suitable food Weight range in kg Ovenware/accessories, shelf height Programme Made from fresh, mixed meat approx. 8 cm deep 0.80 - 1.50 Ovenware with lid, wire rack, level 1 Made from fresh lamb approx. 8 cm deep 0.80 - 1.50 Ovenware with lid, wire rack, level 1 Stew* Goulash... - Page 28 Defrost Weight Microwave power setting in watts, Notes cooking time in minutes Whole fish 300 g 180 W, 3 mins + 90 W, 10-15 mins Turn during cooking. 600 g 180 W, 8 mins + 90 W, 10-15 mins Vegetables, e.g. peas 300 g 180 W, 5-15 mins Stir carefully during defrosting.
- Page 29 Stir or turn the food several times during the heating time. Notes ■ Check the temperature. Take ready meals out of the packaging. They will heat up ■ more quickly and evenly in microwaveable ovenware. The After heating, allow the food to stand for a further 2 to ■...
-
Page 30: Microwave Tips
Never set the microwave to full power. ■ Risk of scalding! Open the popcorn bag carefully as hot steam may be ■ released. Weight Accessories Level Microwave power in watts, Cooking time in minutes Popcorn for the microwave 1 bag, 100 g Ovenware, wire rack 600 W, 4 mins Microwave tips... - Page 31 Top/bottom heating Hot air ■ ■ Hot air plus ■ Cakes on trays Accessories Level Type of Temperature Microwave power Cooking time heating °C in watts in minutes Sponge with dry topping Universal pan 160-180 25-35 Sponge with dry topping Universal pan + 150-170 40-50...
-
Page 32: Baking Tips
Top/bottom heating Preheat the cooking compartment. ■ Hot air ■ Bread and rolls Accessories Level Type of Temperature in °C Cooking time in heating minutes Yeast bread with 1 kg of flour Universal pan + 170 15-25 Sourdough bread with 1.2 kg flour Universal pan + 170 40-50... - Page 33 As far as possible, the pieces of food you are grilling should Tips for braising ■ be of equal thickness. Steaks should be at least 2 to 3 cm Use ovenware with a lid for braising fish. thick. This will allow them to brown evenly and remain Add two to three tablespoons of liquid and a little lemon juice succulent and juicy.
- Page 34 Pork Accessories Level Type of Temperature in Microwave power Cooking time in heating °C, grill setting in watts minutes Joint of pork, lean, Ovenware with lid, 210-230 90 W 50-60 approx. 1 kg wire rack Joint of pork, lean, Ovenware with lid, 200-220 90 W 70-80...
-
Page 35: Tips For Roasting And Grilling
Poultry Accessories Level Type of Temperature in Microwave power Cooking time in heating °C, grill setting in watts minutes Chicken, whole, Ovenware with lid, wire 230-250 360 W 25-35 approx. 1.2 kg rack Poulard, whole Ovenware with lid, wire 200-220 360 W rack 180 W... -
Page 36: Bakes, Gratins, Toast With Toppings
How to tell when the roast is ready. Use a meat thermometer (available from specialist shops) or carry out a “spoon test”. Press down on the roast with a spoon. If it feels firm, it is ready. If the spoon can be pressed in, it needs to be cooked for a little longer. -
Page 37: Slow Cooking
Convenience products Accessories Level Type of Temperature Microwave power Cooking time in heating °C in watts minutes Pretzels, dough Universal pan* 190-210 20-25 Part-cooked rolls or baguette Wire rack 140-150 12-15 Fish fingers Universal pan 190-210 180 W 10-15 Chicken goujons, nuggets Universal pan 190-210 360 W... -
Page 38: Tips For Slow Cooking
Tips for slow cooking Slow cooking Level Type of Temperat Cooking time heating ure °C in minutes Slow-cooked meat is not So that the roasted meat does not Fillet of veal 80-100 as hot as conventionally cool too fast, warm the plates and roasted meat. -
Page 39: Grilling
Ovenware Level Type of Temperature °C Baking time in heating minutes Yeast cakes on a baking tray Universal pan 170-190 45-55 Universal pan* + 160-180 50-60 Enamel baking tray** Apple pie 2 x 20 cm springform 170-190 70-90 & cake tins on the wire rack * When baking on two levels, always slide in the enamel baking tray above the universal pan. - Page 40 Constructa Neff Vertriebs-GmbH Carl-Wery-Straße 34 D-81739 München *9000731955* Register your product online 9000731955 (03) 940328 www.neff-international.com...